
Backgrounds for your fabric collage quilt, as I’ve said before, can be surprisingly challenging. The choices of background are nearly infinite. How do you narrow it down? The answer I return to again and again is: What is the story of my quilt?
I ask questions: Where is my subject? What is my subject doing? What emotion do I associate with the subject? And so forth.
These questions, and others, help me focus on what sort of backgrounds will make sense for my subject and eliminate those that don’t help further the story. This usually gets me over the decision-making hump to a background I am happy with.
Today’s post gives you some more examples of how the story of a quilt can narrow down the background choices.
Here are the links to the Fabric Collage Summer Special posts in this series so far.
Susan Carlson Fabric Collage Throwback Thursday Summer Special—1 of 14: Choosing a Photo
Susan Carlson Fabric Collage Throwback Thursday Summer Special—5 of 14: Creating a Fabric Palette
Susan Carlson Fabric Collage Throwback Thursday Summer Special—6 of 14: Sequence
Susan Carlson Fabric Collage Throwback Thursday Summer Special—7 of 14: Sequence in Portraits
Susan Carlson Fabric Collage Throwback Thursday Summer Special—8 of 14: Using Sheers in Sequence
Susan Carlson Fabric Collage Throwback Thursday Summer Special—9 of 14: Background Stories
Susan Carlson Fabric Collage Throwback Thursday Summer Special—10 of 14: Sheer Curiosity?
To dive a bit deeper, the information in this series has been gathered, reorganized and expanded upon in our online learning resource the Fabric Collage Master Class. For more information about the Master Class, click the button below.
Telling the Story: Fabric Collage Backgrounds
(Originally Posted December 10, 2016)
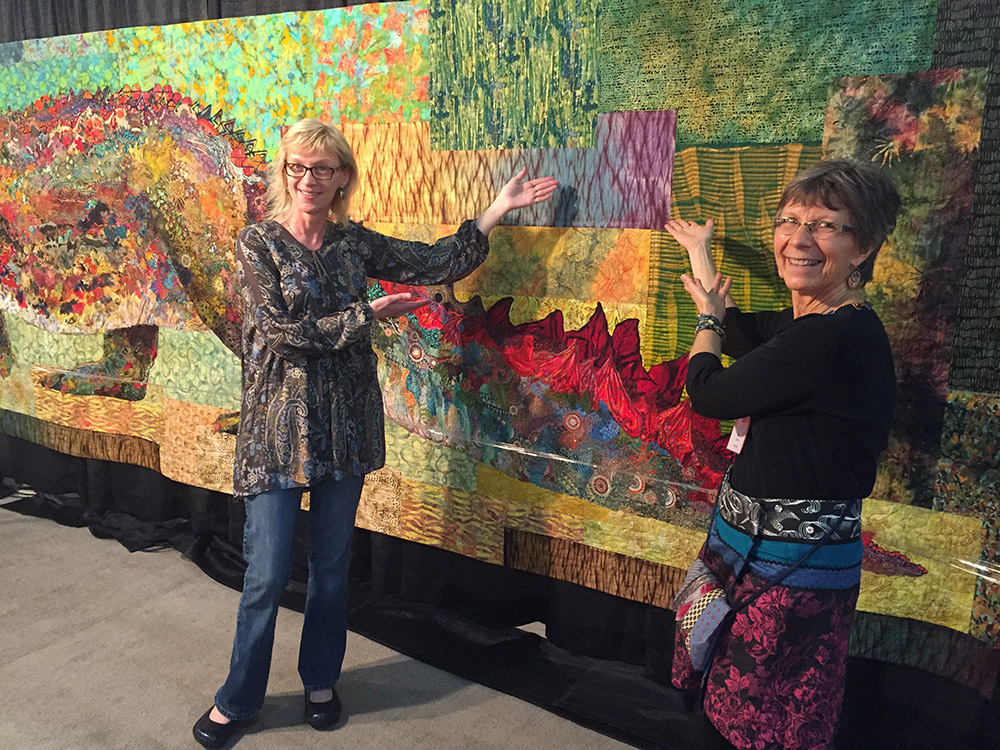
At the end of a four or five day class, my students will be exhausted (and so will I!). Most of them will have spent the entire time working on the main part of their image: the person, the animal, the object, whatever it is they have chosen as their subject. Regardless of how far they got on their main image, or whether they will finish it in class, I have to give a talk sometime during the week about backgrounds.
I usually wait until day three—after they’ve had a chance to digest some of what I’ve introduced them to. I don’t wait until too close to the end—say, day four—because sometimes backgrounds are integral to the main image—a tractor in a farmyard, a flower on a bush, a fish in a coral reef. Even if the main image—their grandchild, their cape buffalo, their sea turtle—is independent from the background, it’s going to have to be addressed eventually.
Questions about backgrounds come in two main categories:
How do I do it?
How do I choose?
The first is a technical question easily answered. The second is sometimes more challenging and requires the student to access their creativity.
Backgrounds: How do I do it?
There are at least two ways for constructing a background.
The first way is to simply cut away the the foundation fabric from around the main image so that it can be placed on whatever fabric you are auditioning. (See Quilt Stories: Surprise Me for an example.) The advantage of this of course, is that you’ll be able to see immediately how it looks. Working this way, one could choose to use a single piece of fabric (whole cloth) as a background (such as I did with “Gombessa“) or one could also decide to construct a background from large, rectangular pieces of fabric—think of boxes or frames. See the examples based on my Serendipitous Sea Turtle pattern below.


This turtle is still in progress, but it’s pretty close to done, close enough so I can start looking at backgrounds. I’ve created it on a foundation fabric, then as you can see in the second picture, I’ve cut it away from the foundation so it can be auditioned with various backgrounds. See below.
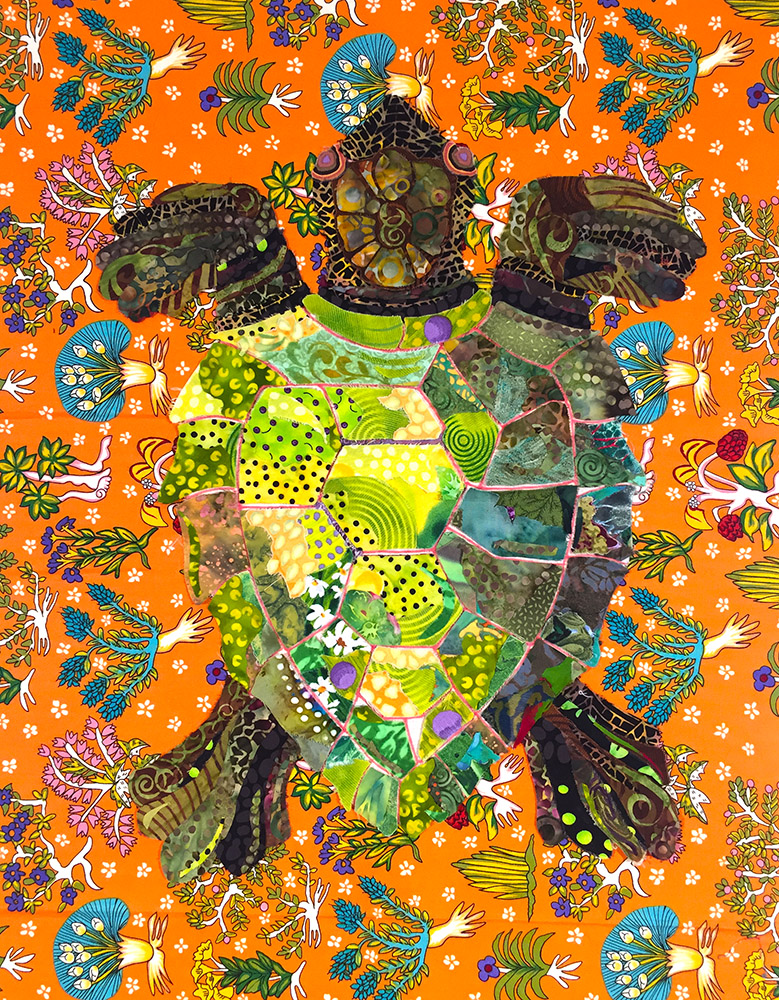
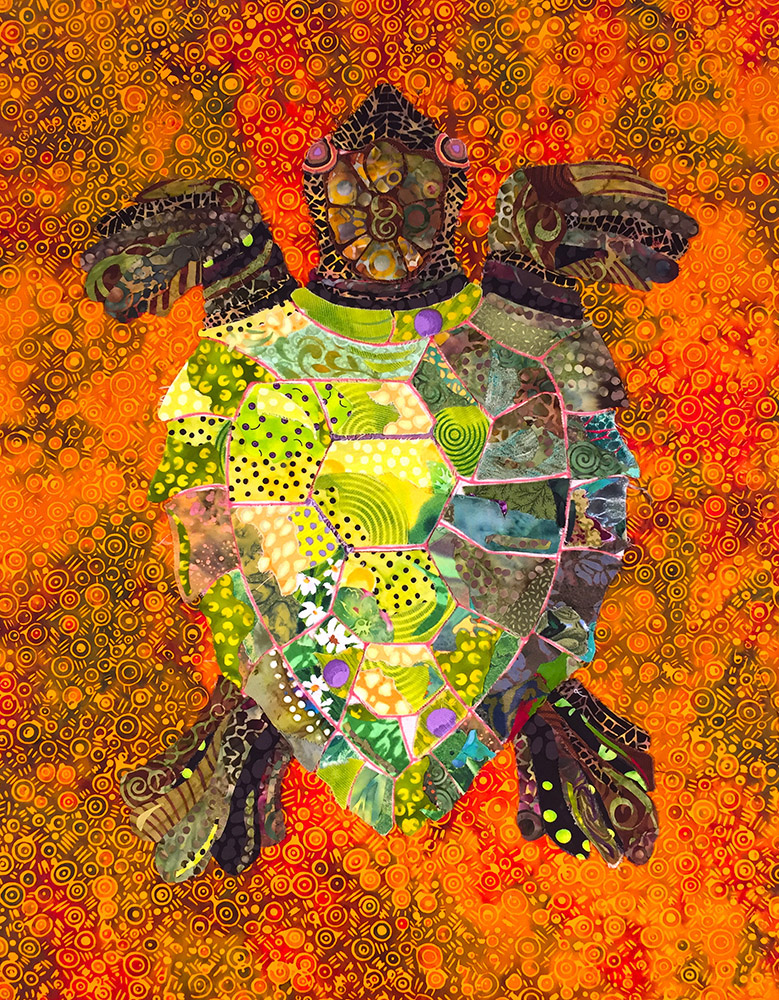
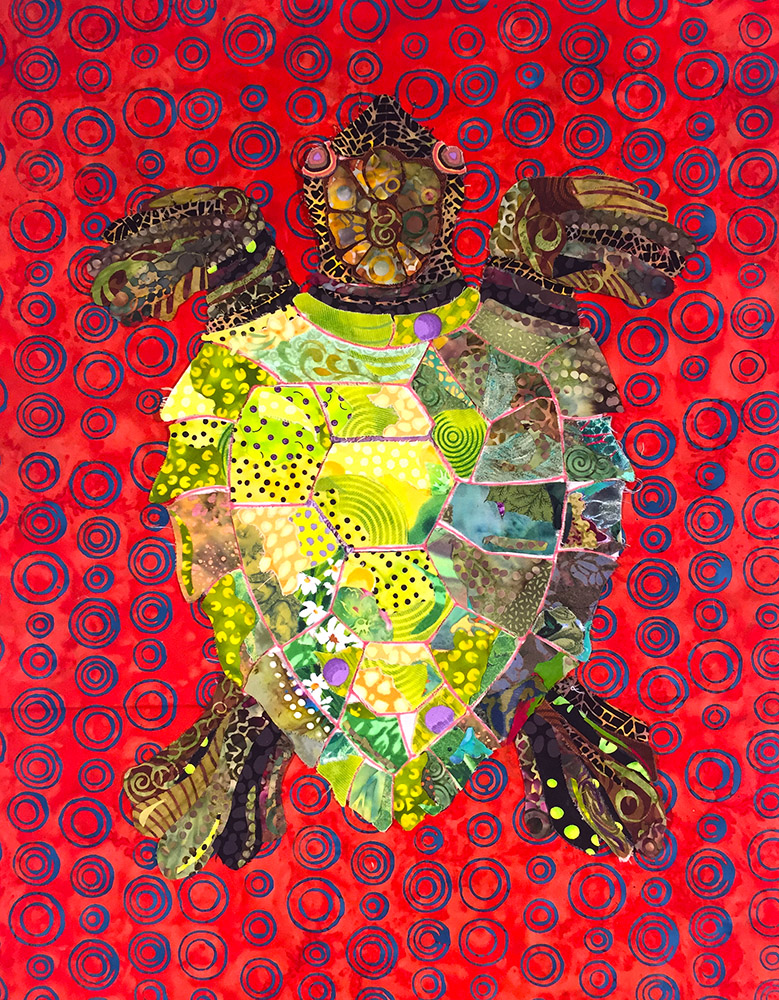
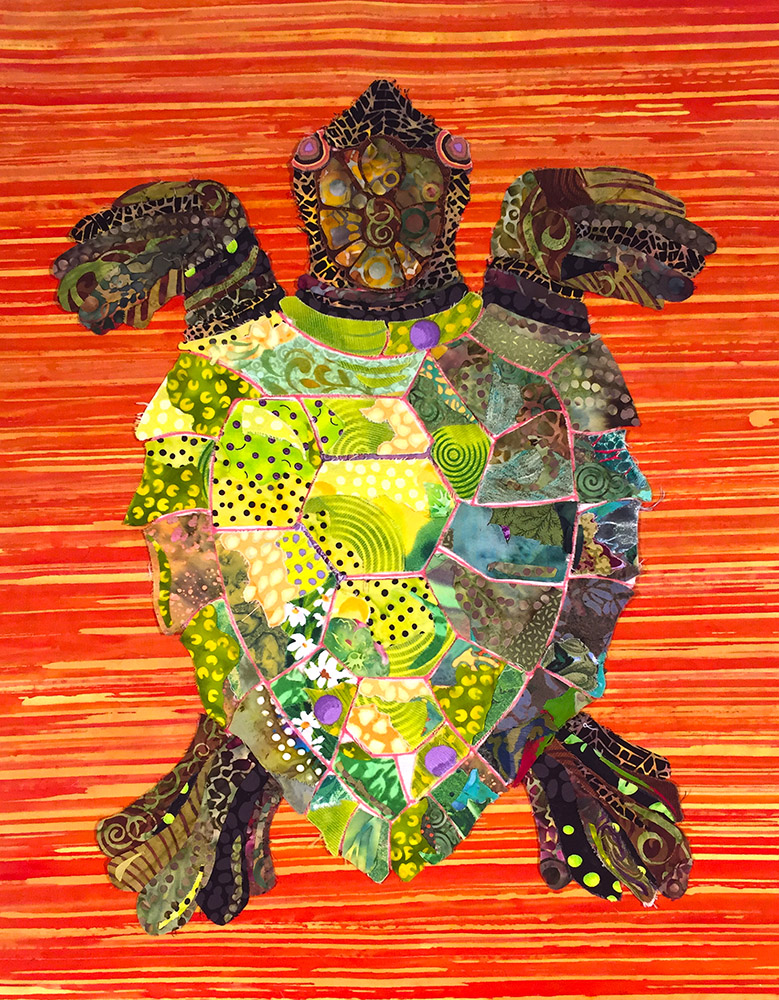
The upper left version had way too busy of a print, even though as I was working on the turtle, I had it in mind as a potential background. However, I did like how the orange looked, so it gave me a color direction to explore. The upper right version had similar problems. The darker values of the greens were a bit close to the values in the turtle. If I wanted the turtle to blend in and out of its environment, it wouldn’t be a bad option. The lower left, while red-orange could provide a good contrast, it did seem to be too dark overall. Finally I was happiest with the last option. This orange version provided good contrast with the turtle. It’s horizontal stripes also contrast and therefore help to highlight the verticalness of the turtle. However, for my taste it was still a little too plain. So…
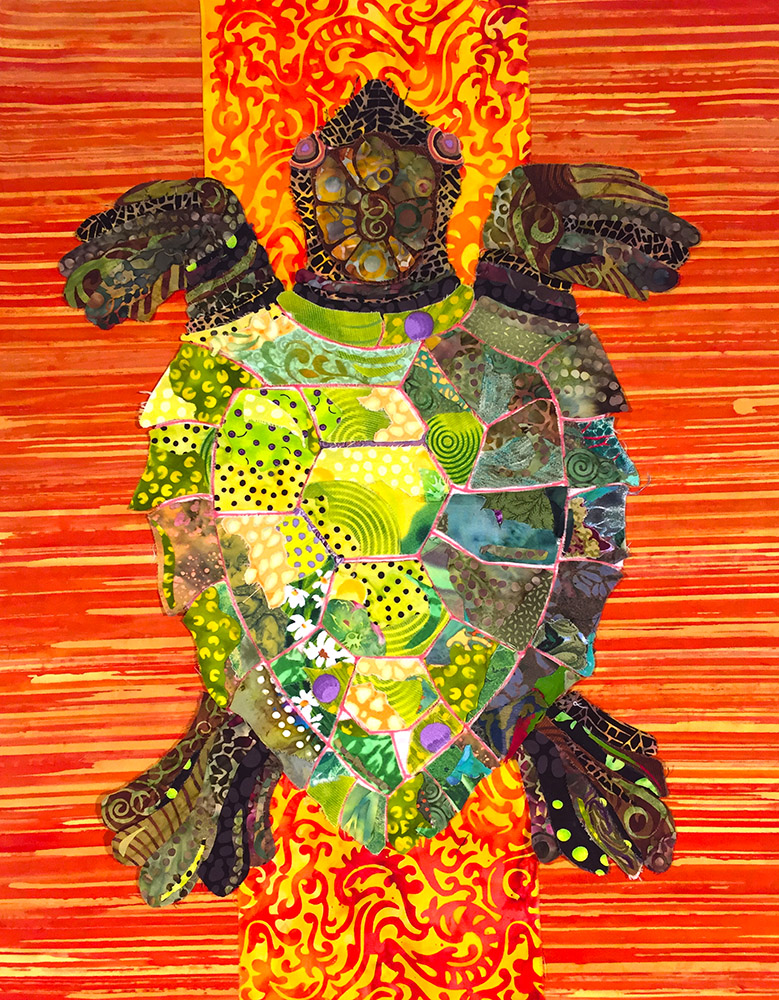
… adding a central band of a similar color but a contrasting print helps to jazz it up a bit. I think this will be my final choice for background. For now.
Here’s another example of a way to keep the background simple, but to add more interest to it.
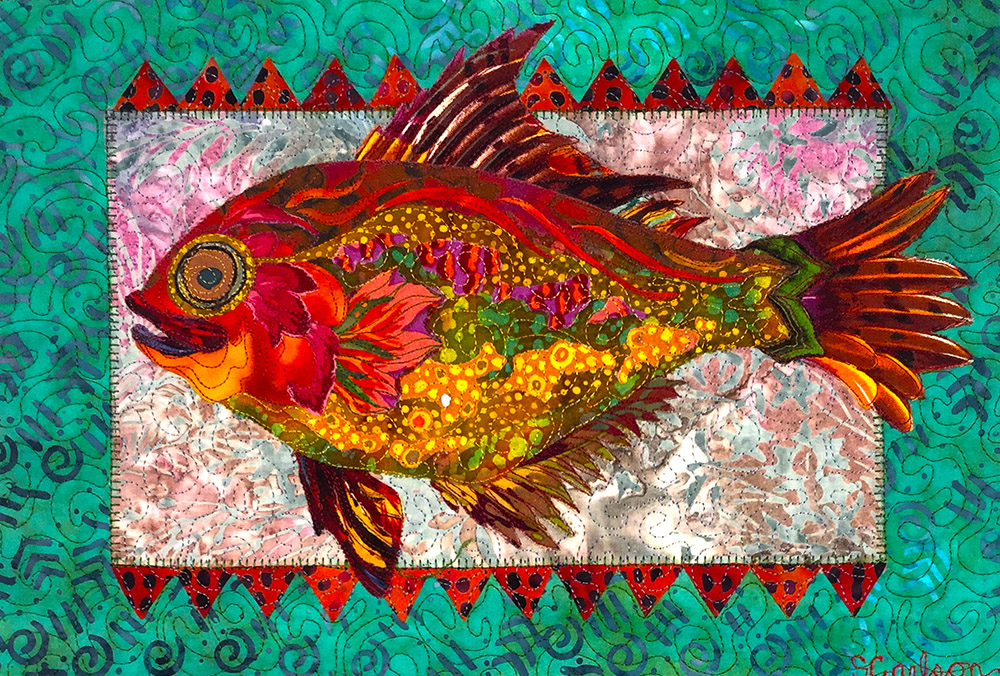
This little fish (about 12 inches long) was created separately on the foundation fabric, then cut out and placed on a background created for it—still in the same cut and glue collage process. The aqua fabric creates a border around a lighter inner fabric. It’s this inner box that provides the contrast for the fish, otherwise the aqua would be too close in value and the fish would blend with the background. The triangles are added as ornamentation and to bring color and extra interest into the otherwise empty corners.
The same fish (my “Winged Butterfish” design available here), but in different colors and with a completely different background solution. This introduces the second way of constructing a background—to keep collaging onto the foundation. This lends itself to be more organic and freeform, and as you see in this case, still showing off the fish nicely.
It’s not necessary and sometimes not advantageous to cut the image away from the foundation fabric—it may be too complex or too big—then you simply continue collaging into the background. (Remember to leave the edges of the main image loose—not glued—so you can slide background fabric underneath.) Most of my quilts are done this way and I find this way of working to be more customizable.
Say you have a turtle or fish made up of greens and reds in a large variety of fabrics of many different values. You want the background to be made up of different shades of blue. By collaging the background around the image you can be very particular about which value of blue gets placed where. Most of the time it will be a case of highlighting the main image rather than having it blend in with the background. You would likely place the darkest blues against the lightest areas of the image and vice versa.
The two turtles below both have collaged backgrounds. The first might not look collaged, but there are darker and lighter areas of different fabrics. I avoided placing the lightest value fabrics close to the turtle, which might have caused it to blend in. (Plus, I wanted to work in my baby turtle fabric without being so obvious about it!) For the second, I knew I wanted some nighttime “sky” fabric to set off my bright “rainbow” turtle. The moon, star, and “spiral galaxy” (in my mind anyway) batiks I found in my stash fit the bill perfectly. The big ol’ flowers were a bit of a why not? afterthought. They were originally leftovers from the leaves I cut to go around the shell, but if I just pretend they’re “planets,” they now fit the theme as well.


Collaged backgrounds from multiple fabrics are now my favorite way of working. It encourages more creativity and serendipity. Rather than simply building a box or frame to put the image in, the opportunity arises to do something truly unique.
Which brings up another issue: How do you decide what the background should look like?
Backgrounds: How do I choose?
Okay, so when some students finish their main image they’re just ready to be done. The simplest background is just fine with them, being little more than a frame. And that’s okay. A piece of whole cloth or a simple box construction and they’re finished.
Other students, however, strive for something more ambitious and that’s when it can become overwhelming.
If you aren’t using a whole cloth or boxy background, the choices become infinite. And the infinite is scary. The way to defeat the infinite is with the particular. What is the particular story of this image?
When a student in class is struggling with her background, I ask questions in order to draw out the story behind the piece: What’s the subject? Where is the subject? What is it doing? Why did you choose this subject? What’s important about the subject?
The answers to these questions almost always lead us to our backgrounds. For example, let’s look at a few of my quilts.
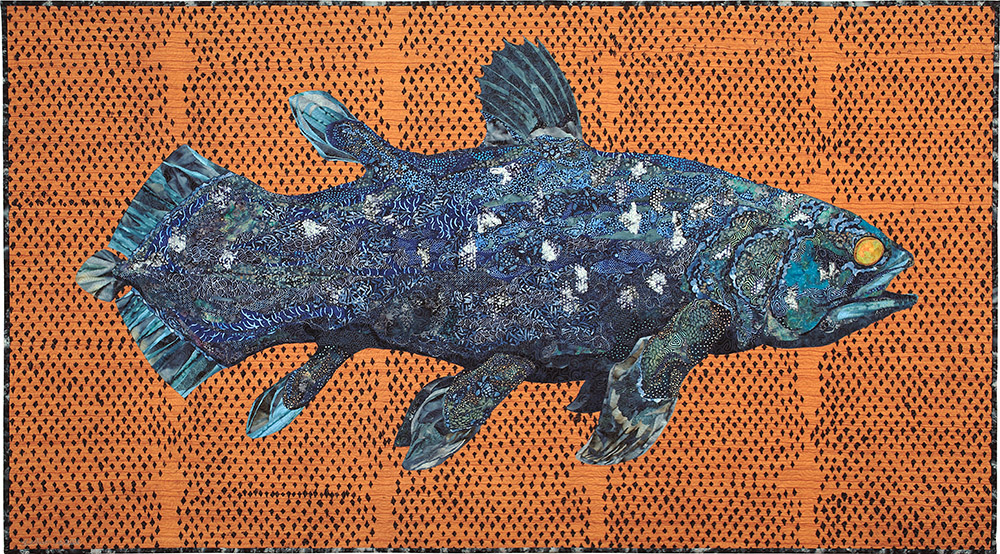
Gombessa
Let’s start with an easy one. “Gombessa” features a life-size coelacanth on a whole-cloth background. This is a big quilt. The fish is life-size, about six feet long. Doing a whole-cloth background is unusual for me—I usually prefer something more visually rich and complex. But when you examine the story of the quilt, by asking the questions above, you’ll understand why it’s so appropriate.
- What’s the subject? A coelacanth, also known as the dino fish as it was thought to have gone extinct 65 million years ago, around the same time as the dinosaurs.
- Where is the subject? It lives in two places in the Indian Ocean: off the coast of Madagascar and in the waters off Indonesia.
- What is it doing? Don’t know. Hanging out?
- Why did you choose this subject? Because of its unique story: it was rediscovered in a South African fish market in 1938.
- What’s important about the subject? I’m fascinated by its story.
The most pertinent answer in this case turned out to be where the fish was from. Since it has been found in only two populations—off the eastern coast of Africa and the coast of Indonesia—I tried to find a way to represent that in fabric. When I read that the fish was many shades of blue with white spots I immediately thought of Indonesian batiks, so I made the fish with lots of those fabrics.
At the time I was considering what I would do for the background, I happened to visit our yearly Maine quilt show. I was thinking of something in golds, since that color would complement the blues. At a particular booth were lots of international fabrics, and the universe stepped in. The booth owner had one piece that was big enough and in the colors I was looking for. The clincher, however, is that the fabric was a hand-painted piece from Africa.
So, between the fish itself and the background, the fabrics I used place the fish in its two habitats. Perfect.

Redfish
Here’s another fish. This one is purely from my imagination (there is a species of fish by that name, though it doesn’t look like this). As I’ve said before: a head, some fins, and a tail and you’ve got yourself a fish. I could have used whole-cloth for the background as I did with Gombessa, but once I asked myself the questions, I came up with a different solution.
- What’s the subject? A made-up fish.
- Where is the subject? In the ocean.
- What is it doing? Swimming.
- Why did you choose this subject? Because I wanted to play with color.
- What’s important about the subject? Nothing in particular.
So, here the answer to question number 4 is the important one. If I wanted to play with color, then the background needed to be a variety of fabrics as well. But since the fish was only one color, red, I decided the background should be one color, aqua. In searching through my cut scraps for aquas, many were strips of fabric, or had straight edges. So I placed many as horizontal stripes to give a sense of water current flowing past the fish, satisfying question numbers two and three in the process—swimming in the ocean.
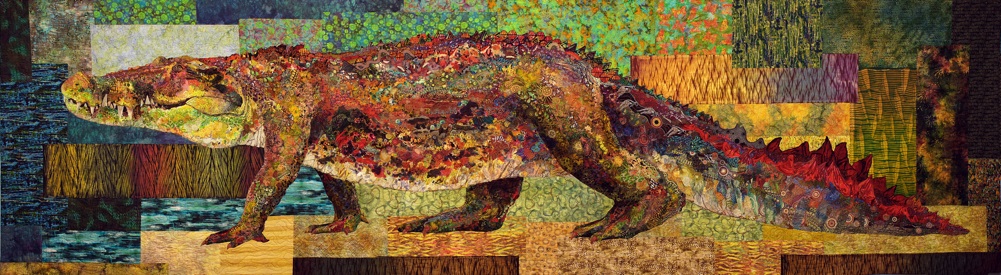
Crocodylus Smylus
When it was time to think about it, I saw Stevie the saltwater crocodile on a background of rectangular pieces of fabric. But once I had finished the main image and started playing around, auditioning fabrics here and there around her, it became confusing with no focus. This was a case of being overwhelmed by the infinite. I just had too many choices and needed to find a way to narrow them down.
So let’s look at the questions again.
- What’s the subject? A saltwater crocodile.
- Where is the subject? Australia.
- What is it doing? Walking on the beach.
- Why did you choose this subject? Because of their awesome size (20 feet average in real life!).
- What’s important about the subject? Their awesome size!
When I read about salties surfing—that’s right, surfing—on waves in the ocean, I knew I wanted to place her on a beach. In this case, the second and third questions were the ones that really helped me define the background—walking from underbrush and across the beach to the ocean. It became a more straight-forward task of suggesting trees and grasses behind her, sand under her, and water ahead of her. I still kept my rectangular shapes, but the answer to where she was and what she was doing defined the placement and color of those fabric rectangles.
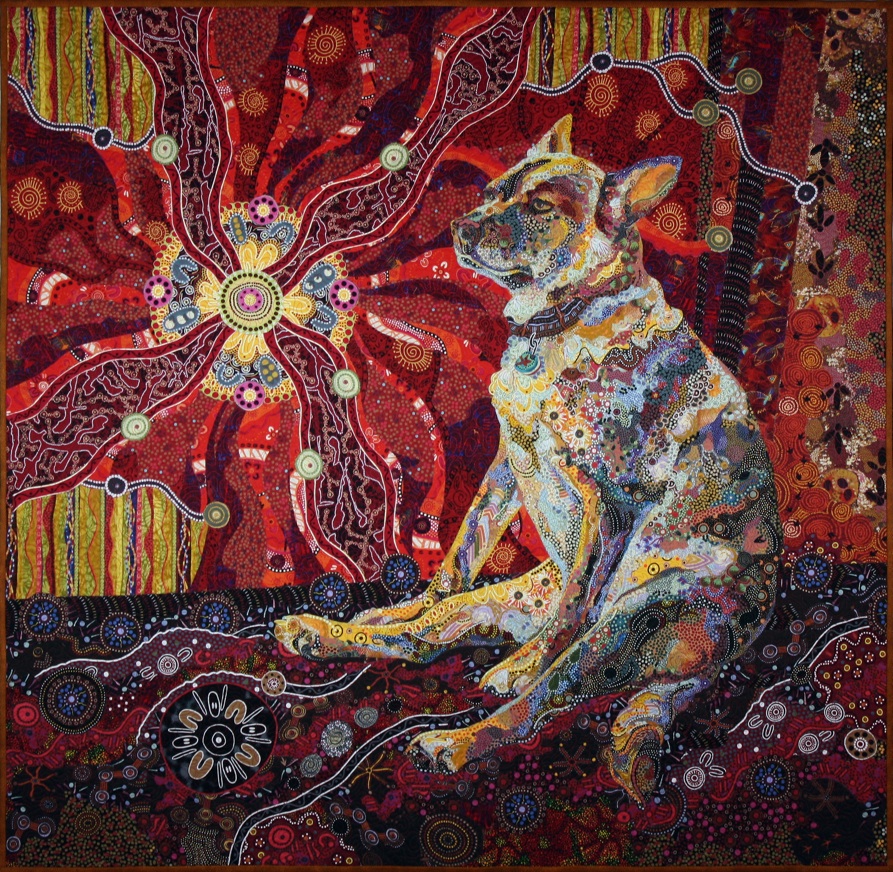
Dixie Dingo Dreaming
I’ve talked about the background of this quilt pretty extensively in a previous Quilts Story, so I won’t repeat it word for word here, but let’s apply the questions above to this quilt.
- What’s the subject? My dog Pippin.
- Where is the subject? She’s sitting in the sun by a sliding glass door.
- What is it doing? She’s snoozing, sitting in a posture that was particular to her.
- Why did you choose this subject? Because she’s special to me.
- What’s important about the subject? She’s part of our family.
The answers to these questions led to me a very particular solution to the background. On one level it’s quite obvious: I created the impression of a doorway with two straight edges, a vertical and a horizontal. Then I created a stylized sun that is shining through the doorway. In essence, I placed her where she was when I took the picture—just a little more fanciful than in real life.
But it’s the answers to the last question that makes this background particular: Could I somehow show how she was a member of our family? The solution was to do it symbolically. As I go into in some depth in my Quilt Story post, I borrowed from and adapted Australian Aboriginal symbolism to accomplish my goal. The center of the sun represents a campfire (or our home). The gray U-shaped symbols around the fire represent the four of us in our home: the three people and one fur-person. The red wavy lines represent our paths through life. And so forth. (Read Quilt Stories: “Dixie Dingo Dreaming” for a complete explanation.) In the end, this quilt of Pippin includes our whole family—three humans, two fur-people, and one feather-person—at that moment in time.
Last Thoughts on Backgrounds
Use the background to accent your main image. Be sure that the background adds to and doesn’t distract from or overwhelm your subject.
One way a background can distract is by making too much of it. It’s not uncommon for my students to center their image on a large whole-cloth piece of fabric where it can look a little lost.
I tend to crop pretty close to the subject. Sometimes, as in the little fish with the box and border above, the image actually breaks into the border. It’s more desirable to be a big fish in small pond than vice versa. Unless there’s a good reason for more negative space in the background, I would crop pretty close.
Backgrounds can be simple, just colorful squares or beautiful fabric to frame the work, or they can be as complex as you’d like. I encourage you to have your background tell a story. Think about the questions I ask my students. Those answers may hold the key to unlocking the story your quilt is trying to tell.
Susan’s Fabric Collage Class Schedule
September 2026: Susan Carlson Fabric Collage in Bar Harbor, Maine 2026
A week-long class on the doorstep of the breathtaking Acadia National Park, Bar Harbor, Maine
September 14, 2026 – September 18, 2026
FOR MORE INFORMATION
April 2027: Strada Toscana—Serendipitous Fabric Collage with Susan Carlson
A week of fabric collage and cultural field trips in the Tuscany Region of Italy
April 18-23, 2027
FOR MORE INFORMATION
September 2027: Woodland Ridge Retreat—Fabric Images
Five days of fabric collage in this cozy retreat in Downsville, WI
September 21-25, 2027
FOR MORE INFORMATION
Susan Carlson Ongoing Open Studio Hours
Weekly Fabric Collage Coaching
1/2 hour time slots, $65 each
One afternoon a week, I’ll be available to help, encourage, and coach anyone who needs it—between the hours of 1pm-4pm Eastern Time (for instance, this would be between 10am-1pm Pacific Time).
Coaching could be to continue working on an in-progress collage, or to begin a new project—whatever is desired.
Sign-up can be for one day or multiple days—every week, every two weeks, once a month or once only. These sessions will be recorded and emailed to you, just as coaching sessions are, so they can be referred to as needed.
Sign up for time slots here
Please note that times are listed in Eastern Time!
Simply click on a slot and type in your name, Tom will bill you before your session.
Please contact Tom ([email protected]) so he can contact you with more instructions.
July/August 2026 Dates
Tuesday, July 21
Tuesday, July 28
Tuesday, August 4
Tuesday, August 11
If you are interested in this sort of coaching but Tuesday is not a day that would work for you, just drop us an email and we can figure something out ([email protected]).
From an Open Studio Hours participant who also recently took a class with me:
I can’t recommend enough this new format. I’ve met with Susan three times since our class (once a week) and each session has been inspiring, motivating, and very helpful in terms of defining my path forward (and also creating some accountability relative to that path…). Before each session, I think about what areas I would like to focus on and send off a photo with my questions. In this way, I get from Susan exactly the support I need, plus a video recording to remember it. Meanwhile, preparing for my session helps me make my project a priority so I see ongoing progress, which is gratifying.
Honestly, this was the format I was hoping for. I told Susan I wanted to write a testimonial about it because I was so happy she was offering it. So, if you’re like me and a periodic check-in keeps you learning, growing, and doing your best work, sign up for coaching. Maybe I’ll see you there (you get to listen in on other sessions during the open studio you attend). —LeahGrace Kayler
Fabric Collage Online Master Class—Updated
The Susan Carlson Fabric Collage Online Master Class Manual is a multi-media resource guide to the process of fabric collage. Using video, photos, text, and links to my blog posts for further relevant reading and information, I take you from beginning to end in creating your own fabric collage masterpiece, following my guidelines in a step-by-step format. Lifetime Access. Suitable for all levels, including beginners.
Read all about the process of creating the Master Class—explanation of its genesis—the whys and hows Tom and I made some of the decisions we did in this post: Online Master Class Now Available: Some Reflections.
Click here for more information about the Fabric Collage Master Class.
Price: $199
Lifetime Access
Suitable for all levels, including beginners
Further Susan Carlson Learning Resources include: Facial Features eWorkshop, website, Serendipity Quilts, patterns, blog (in general), YouTube videos, Sea Turtle eWorkshop, Fabric Collage Online Master Class, Patreon. , and our February Fantastical Fish and Summertime’s Fascinating Bugs and Butterfly Work-Alongs
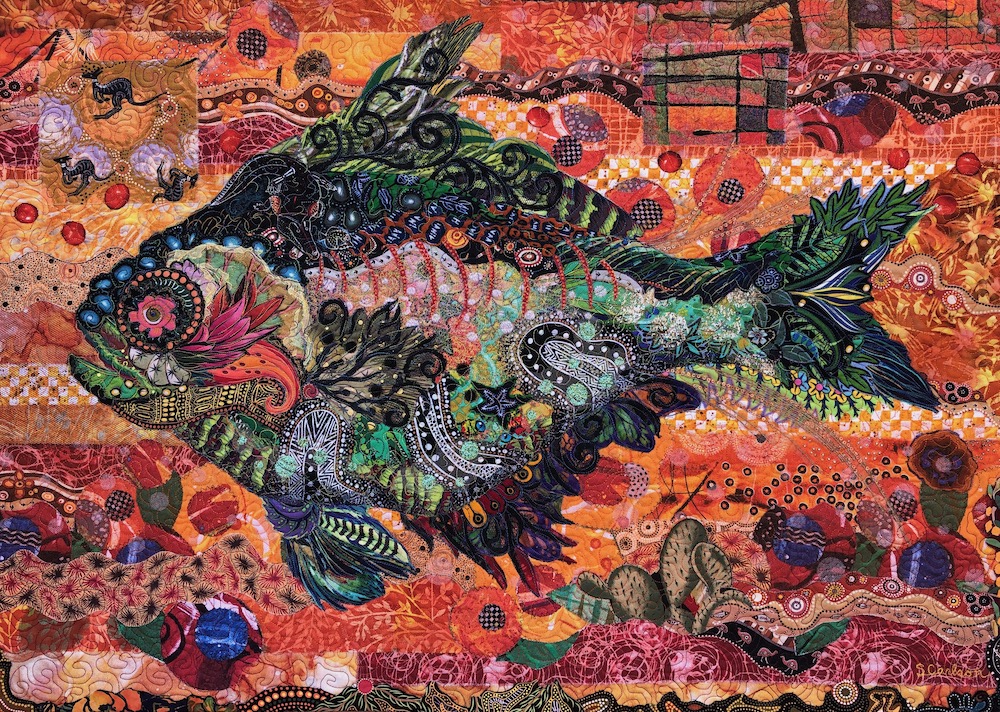
Susan Carlson Fabric Collage: Fantastical Fish eWorkshop I
INCLUDES:
• All four recordings from the four-week class.
• Extended 10-minute edition of piecing time lapse (see below).
• Over six hours of video instruction.
• Annotated videos with “jump points” to help find the information you need.
• Materials list
• Links to helpful blog posts.
• Free fish pattern of your choice.
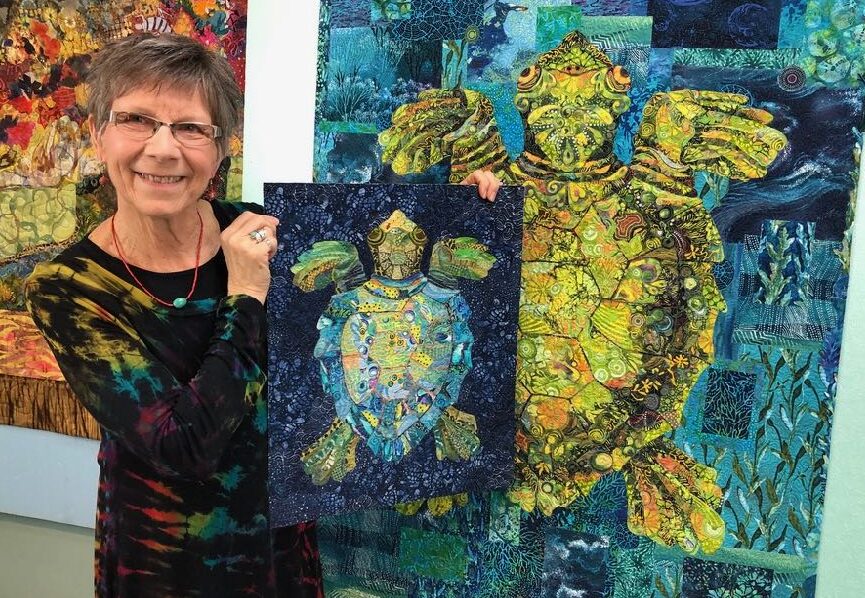
Susan Carlson Fabric Collage: Sea Turtle eWorkshop
Learn fabric collage through a start-to-finish project—from pattern and fabric selection through quilting and binding. Each step is clearly written, illustrated with photos, and further demonstrated with videos. Learn the technique with a Sea Turtle then launch into any fabric collage project you wish. Lifetime access and suitable for all levels, including beginners. Sea Turtle Pattern included
Read all about the Sea Turtle eWorkshop in this blog post: Fabric Collage Sea Turtle eWorkshop Launch.


Facial Features eWorkshop
Designed as a supplement to the Fabric Collage Online Master Class, or for those who have a good understanding of the basics of Fabric Collage. Lifetime Access. Intermediate or advanced levels suggested.
The Facial Features eWorkshop contains 8 videos and over 8 hours of in-depth instruction for creating each feature of a portrait in fabric. The videos are annotated with “Jump Points” allowing you to scan forward and backward to the information you need. Facial features PDF templates are included as reference and basic designs to work along with. Like the Fabric Collage Online Master Class, membership in this eWorkshop is for life.
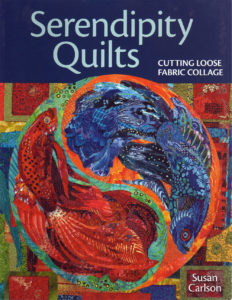
Book: Serendipity Quilts—Cutting Loose Fabric Collage
Full color throughout. Five projects of increasing complexity, four patterns to enlarge are included.
These books will be signed by Susan and can be inscribed to a particular person.
One Comment