
After a long winter, it seems that all-of-a-sudden, summer is here—and time for our annual Fabric Collage Summer Special. From now through August, our Throwback Thursdays will feature a series of fabric collage “how-to” posts. Summer can be quite busy but these posts will lead you step-by-summertime-step through the process of creating a fabric collage—from choosing your subject to hanging it on the wall.
Today we start with the very beginning thoughts of creating a collage, with hints on what to consider in a photo of your subject. When working from a photo, as most of us do, what should you look for? How much detail should you be able to see? How about the contrast?
This post will have you looking at your favorite photos in “a new light.” For example, the photo of my dog Pippin, above, caught her in her special pose and her lazy dozing-in-the sunshine expression. However, the exposure blows out many of the details in the brightest areas. Read how I compensated for that in the following post—#1 in the series.
I hope you can give yourself some time this summer—or winter for my Southern Hemisphere readers—to use this series as a guide on a fabric collage project or just as dream time for a future idea.
Here are the links to the Fabric Collage Summer Special posts in this series so far.
Susan Carlson Fabric Collage Throwback Thursday Summer Special—1 of 14: Choosing a Photo
Susan Carlson Fabric Collage Throwback Thursday Summer Special—5 of 14: Creating a Fabric Palette
Susan Carlson Fabric Collage Throwback Thursday Summer Special—6 of 14: Sequence
Susan Carlson Fabric Collage Throwback Thursday Summer Special—7 of 14: Sequence in Portraits
Susan Carlson Fabric Collage Throwback Thursday Summer Special—8 of 14: Using Sheers in Sequence
Susan Carlson Fabric Collage Throwback Thursday Summer Special—9 of 14: Background Stories
Susan Carlson Fabric Collage Throwback Thursday Summer Special—10 of 14: Sheer Curiosity?
To dive a bit deeper, the information in this series has been gathered, reorganized and expanded upon in our online learning resource the Fabric Collage Master Class. For more information about the Master Class, click the button below.
From Photo to Fabric: Choose the Best Shot
(Originally posted January 9, 2016)
Listen up. Time for some tough love. That picture of your laughing grandchild, that snapshot of your beloved bulldog, the antique photo of your great-grandmother: what wonderful memories they elicit!
But they may not be the perfect subject for a fabric collage quilt.
It’s hard for me to say no. When students bring me these photos as potential subjects for a four- or five-day fabric images class, I try to guide them toward the best choice. I list the criteria that I think will give them the highest chance of success:
High contrast: Dark and light in equal measures. Shadows should be close to black and highlights close to white. But not ALL high contrast.
A variety of values: Are there some good in-between values as well? Does it have shades of color, or value, that gives form to the subject? (For more on value, see my blog entry, “Why Color is Irrelevant.”)
Sharp focus: Is the focus clear enough to blow up to the size needed to work with?
Close cropping: For a recognizable portrait, get in close. You don’t want a picture of someone standing fifty feet distant.
Three-quarters or profile pose: A subject staring straight ahead is the most difficult. It’s easier to define a nose if it’s not foreshortened.
Do my students’ (or even my own) subject photos always meet all of these guidelines? No. We muddle through despite, but the effort we put in when we start with a photo that lacks these criteria is much greater than it might have been had we chosen a different picture to work from.
Let’s take a look at the photos I used for some of my people and pet portraits. Along the way, I’ll point out the photos’ strengths and weaknesses.
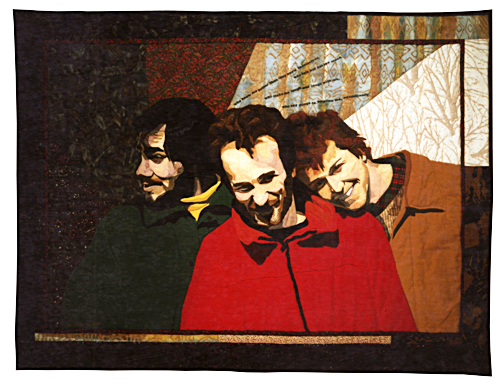
Surprise Me

“Surprise Me” is a quilt I made of my husband Tom and his two college roommates based on the above photo. I really like this shot. The affection and intimacy of the guys is clearly evident. But just because I like it, does that make it a good subject for a portrait?
Here’s why it works for me:
- Nice contrast. Look at the highlights and shadows on their faces.
- Focus is sharp (at least in the original photo).
- There’s a variety of poses. It’s not just three mug shots. Joe is in profile, Tom mostly straight on, and Mike is three-quarter profile with a head tilt to boot.
- Tight composition. There’s no wasted space between the subjects.
While the bright sunlight makes for great contrast, it leaves Tom and Mike a little washed out in the mid-values. I had to really work to find enough variation in tone to define Tom’s forehead and the right side of Mike’s face. Overall, though, the good aspects of the photo far outweigh the challenging ones.
[Note that this is an early collage portrait of mine from 31 years ago! In case you’re wondering where’s all the printed fabrics and why they aren’t multi colored!]

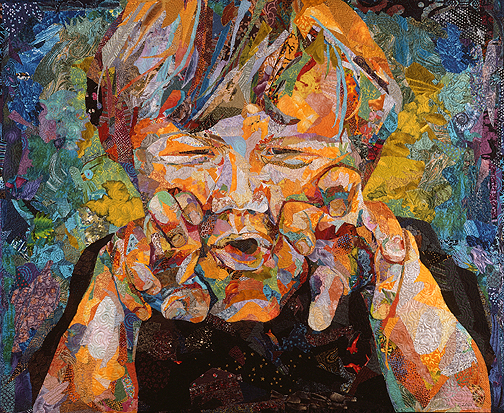
Samuelsaurus Rex
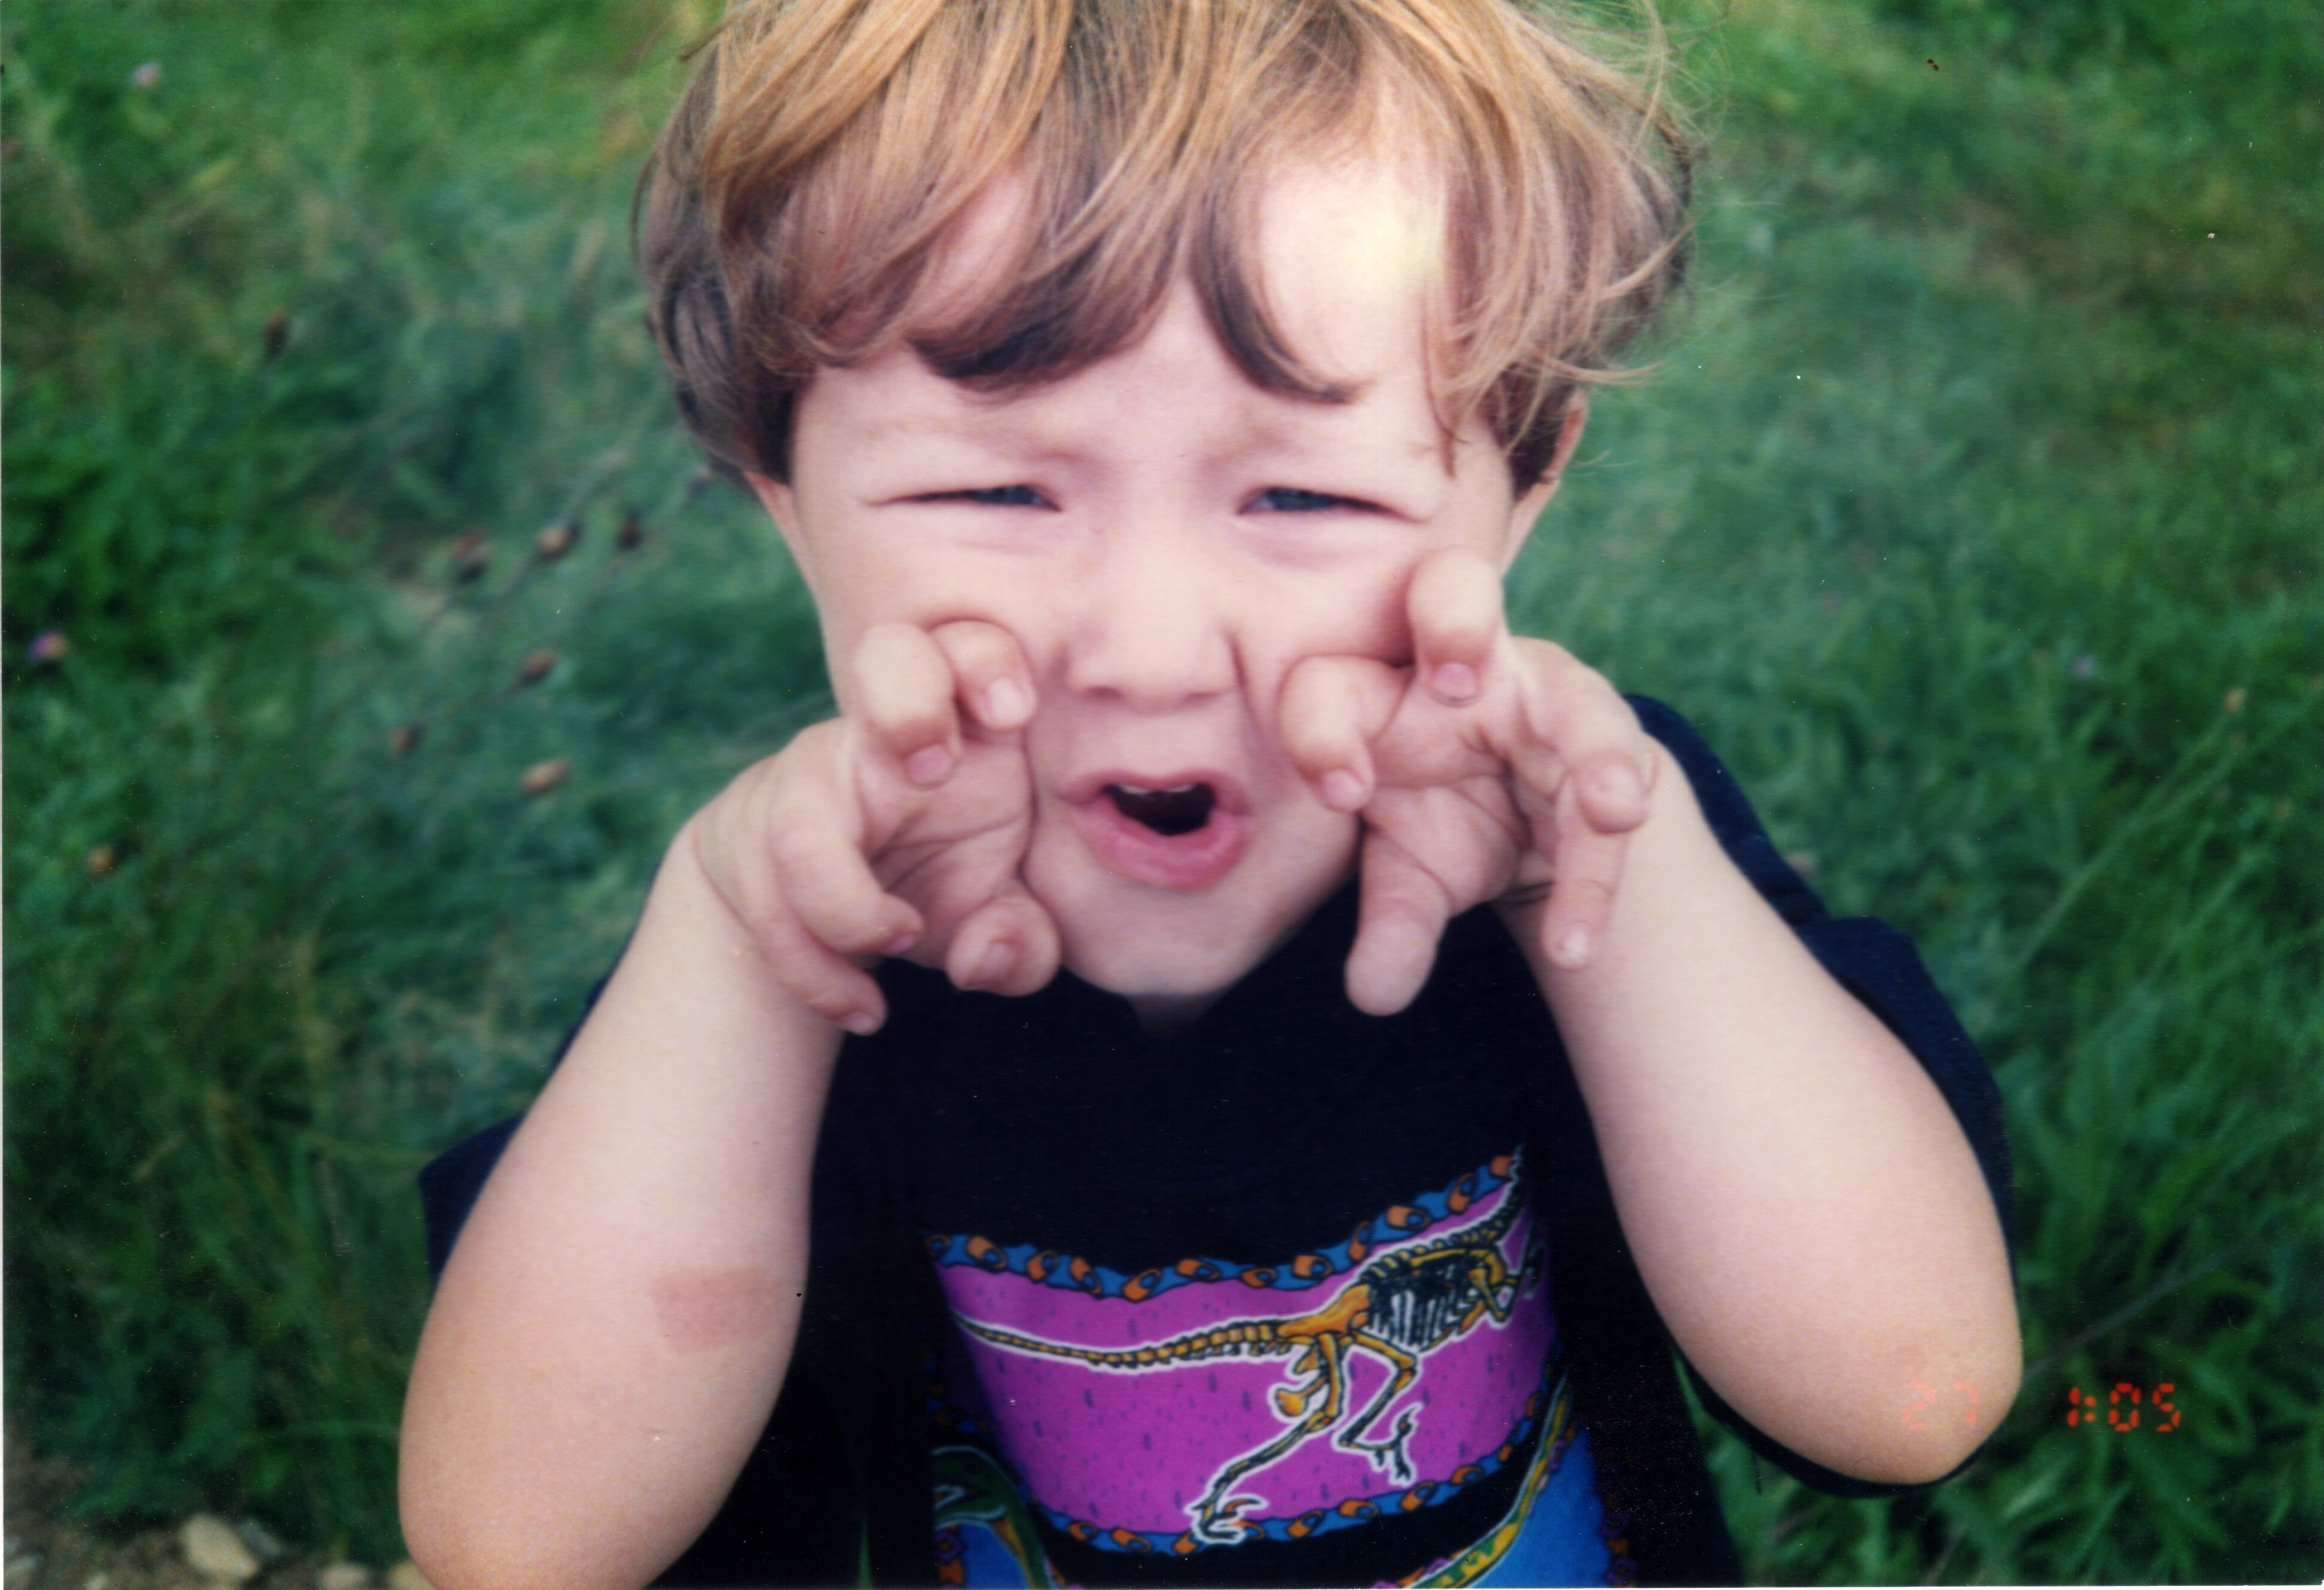
I used this photo to create the portrait of my son Sam, “Samuelsaurus Rex.” Besides being the cutest, sweetest, most charming little boy in the world, what makes this photo good or bad as the source of a portrait?
- The pose is of course the best part of this photo. The hands curled in Tyrannosaur claws, the squinted eyes, the open mouth, the tousled hair. It’s immediately engaging.
- However: the contrast isn’t good at all. His pale skin shows barely any change in value.
- The straight on framing introduces a bunch of foreshortening. His stubby little nose is one thing, but his cute little curled fingers present a foreshortening quagmire.
Verdict: This is not a picture I would encourage a beginner to use. I would gently suggest that the student choose a different subject for their first piece. Once they had some experience, this would be a good photo to return to later.
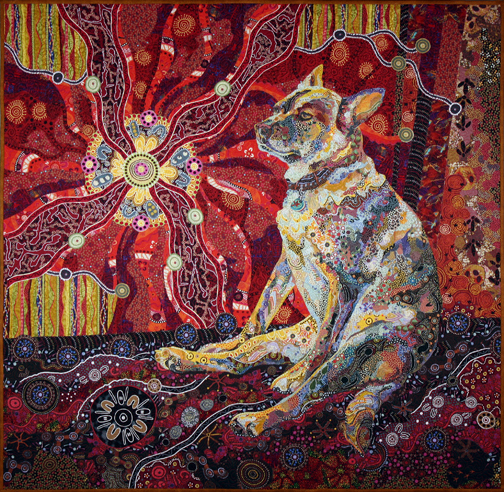
Dixie Dingo Dreaming
Aside from family members, another favorite subject for portraits among my students is pets. My own are no exception.
When I decided to make a quilt of my dog Pippin, I especially wanted to catch her in her unique “cattle dog” slouch. Here are some photos I considered using:


Let’s look at each one separately.

- One nice thing about animals as subject matter is that most of them come with built in value variation. Fur and feathers come in a variety of colors and shades. So the the fact that the flash has eliminated most shadows on Pippin here doesn’t really bother me. I can use her natural coloration to give her form shape.
- Focus and cropping are both fine.
- But it’s the pose that comes up short for me. Specifically, her snout will be foreshortened, which is always a challenge. And her expression is a bit “dubious”, uncharacteristic of her self-assured nature.
Verdict: Close but no cigar. But I did end up using this version of her tail. It has a nice curve to it.
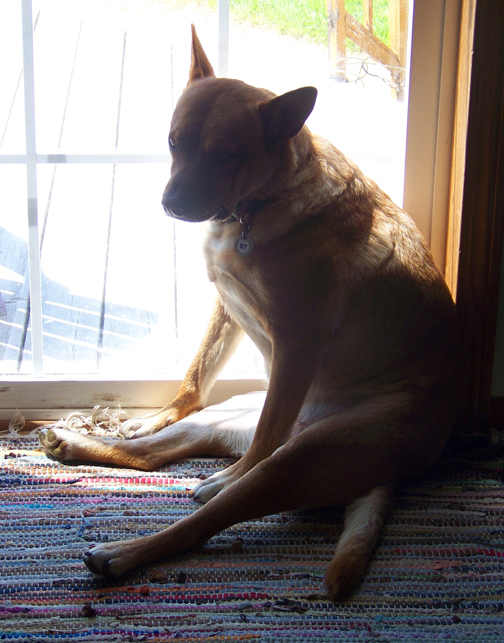
- The problem here is obvious. The backlighting has left her totally in shadow.
- The pose isn’t quite right either.
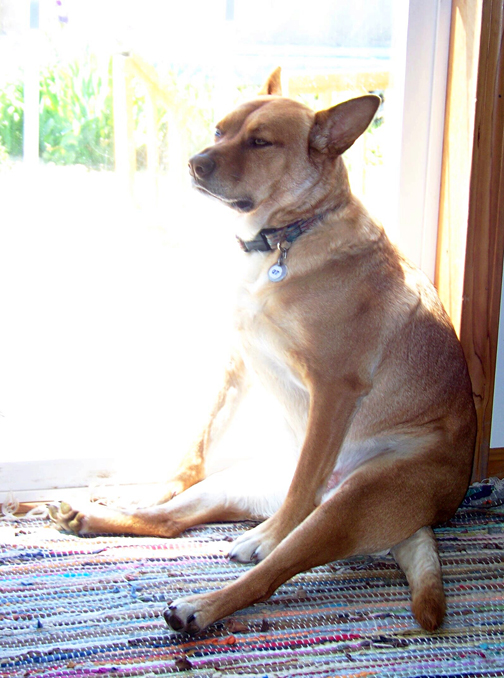
- Bingo. The pose here is perfect. Pippin is drowsing in the sun, her ears are relaxed, her eyes are just starting to droop. Her front left paw is visible, which is a bonus. Most important, her muzzle is in ¾ profile, giving her head and face a nice shape.
- The overexposure of this photo is a problem, but how big a problem is it really? Sure I lose a lot of detail on her right side, but there’s a fix for that: I can use the underexposed photo above for that part of her.
- So, by referring to all three photos I come up with a good composite to work with.
What also makes the third photo so attractive to me is the context. It shows Pippin in a pose typical for her, in her favorite spot, in the sunshine. Even if you didn’t know Pippin you get a sense of her.
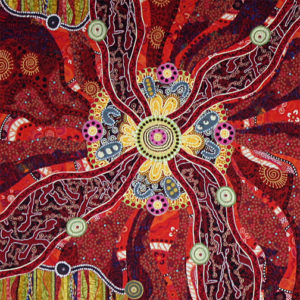
Golden Temple of the Good Girls
Let’s say you have multiple pets that you want to include in a single quilt. Are you going to take on the Sisyphean task of trying to get one photo of all of them? Let’s say you have a dog, a cat, and a bird. Still want to try it? It would be like that brain teaser involving ferrying a fox, a goose, and a bag of grain across a river.
The obvious solution is to use three (or more!) different photos and combine them. That’s what I did with “Golden Temple of the Good Girls.”
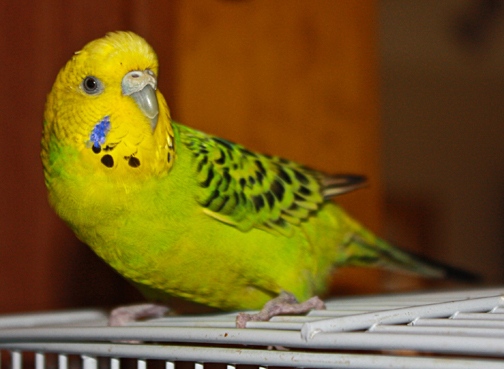
Here’s Kiiora the budgie.
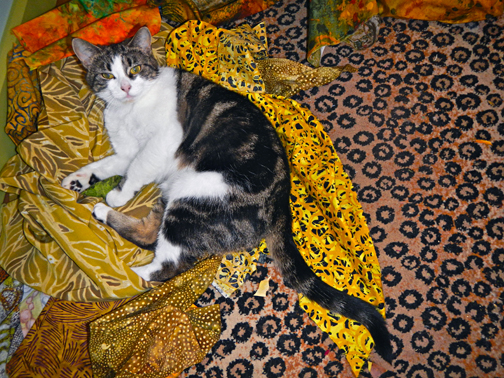
And Djinni the cat on a pile of “Crocodylus Smylus” fabric.
And Kali the mini-Schnauzer.
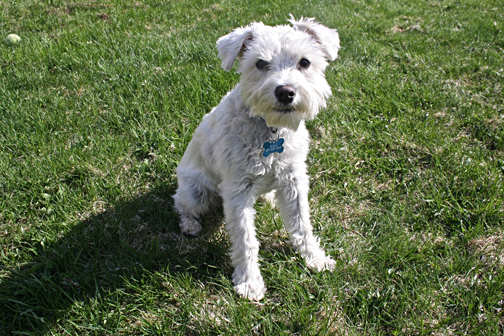
- Exposure and contrast are fine on all three.
- Cropping is fairly tight.
- Notice that each animal is looking at you. That’s important.
In fact, I only made one substantial change. Like using the underexposed photo for part of Pippin in “Dixie Dingo Dreaming,” here I used to two photos of Kali to get the perfect composition. I liked the pose of Kali’s body in the photo above, but I preferred the cock of her head in this one:

Here’s my solution for how to combine the three pets into one quilt:

Kiiora obviously had to go at the top, in the peak of the temple, with her clutch of eggs (which, yes, she’s laid eggs, and no they don’t hatch, she’s single). Kali and Djinni each occupy a niche in the shrines down below. Notice how each animal breaks the “frame”: Kiiora and Djinni’s tails and Kali’s paw help bring them forward in the composition. (For more on “Golden Temple of the Good Girls” go to my previous blog post.)
Learning to See
Teaching students to see clearly is one of my most important tasks during class. Usually that involves asking them to learn to see values in their photos or to see the true shape of facial features such as eyes or mouths.
Sometimes when students bring in photos, they’re not seeing their subject clearly. Their vision is clouded by affection and maybe nostalgia. They’re so attached to a particular subject that the quality of the photo doesn’t really matter to them. All they see is their loved one—a departed parent, a devoted pet, or darling grandchild. They’re seeing with their hearts, not their eyes.
And there’s nothing wrong with that.
There’s a lot of value in being emotionally connected to the subject of a portrait. It may provide important details such as a typical expression or way of dressing that the photo lacks. At the very least, that connection provides motivation to stick with the project.
Do any students arrive with the perfect photo? Yes. And it makes for an easier start on the project. However, a lot of shortcomings that other photos might have can still be overcome—with extra effort—by a willing heart.
Susan’s Fabric Collage Class Schedule
July 2026: 5-Day Live Online Fabric Collage Class via Zoom!
REGISTER HERE and attend from your own home
July 13-17, 2026
More about my 5-Day Online Fabric Collage Classes
From past online student, Sylvie Aguilar:
When the on-line classes started, I hesitated before signing up. Not being a very tech savvy person, it scared me. I also thought it would be a very long zoom day. After procrastinating for a couple weeks, thinking I didn’t know enough about collage, with my daughter’s encouragement I signed up. That was the best decision I made! What a fantastic class. I learned so much more than anticipated. Susan and her husband Tom, are a great team, and so generous with their time and knowledge. From day one, they made us feel at home. It was like we were all part of a collage artist family. It was so comforting to feel part of a community of fabric artists that understood you and got excited about the same things you did.
September 2026: Susan Carlson Fabric Collage in Bar Harbor, Maine 2026
A week-long class on the doorstep of the breathtaking Acadia National Park, Bar Harbor, Maine
September 14, 2026 – September 18, 2026
FOR MORE INFORMATION
April 2027: Strada Toscana—Serendipitous Fabric Collage with Susan Carlson
A week of fabric collage and cultural field trips in the Tuscany Region of Italy
April 18-23, 2027
FOR MORE INFORMATION
September 2027: Woodland Ridge Retreat—Fabric Images
Five days of fabric collage in this cozy retreat in Downsville, WI
September 21-25, 2027
FOR MORE INFORMATION
Susan Carlson Ongoing Open Studio Hours
Weekly Fabric Collage Coaching
1/2 hour time slots, $65 each
One afternoon a week, I’ll be available to help, encourage, and coach anyone who needs it—between the hours of 1pm-4pm Eastern Time (for instance, this would be between 10am-1pm Pacific Time).
Coaching could be to continue working on an in-progress collage, or to begin a new project—whatever is desired.
Sign-up can be for one day or multiple days—every week, every two weeks, once a month or once only. These sessions will be recorded and emailed to you, just as coaching sessions are, so they can be referred to as needed.
Sign up for time slots here
Please note that times are listed in Eastern Time!
Simply click on a slot and type in your name, Tom will bill you before your session.
Please contact Tom ([email protected]) so he can contact you with more instructions.
June 2026 Dates
Tuesday, June 2
Tuesday, June 9
Tuesday, June 23
Tuesday, June 30
If you are interested in this sort of coaching but Tuesday is not a day that would work for you, just drop us an email and we can figure something out ([email protected]).
From an Open Studio Hours participant who also recently took a class with me:
I can’t recommend enough this new format. I’ve met with Susan three times since our class (once a week) and each session has been inspiring, motivating, and very helpful in terms of defining my path forward (and also creating some accountability relative to that path…). Before each session, I think about what areas I would like to focus on and send off a photo with my questions. In this way, I get from Susan exactly the support I need, plus a video recording to remember it. Meanwhile, preparing for my session helps me make my project a priority so I see ongoing progress, which is gratifying.
Honestly, this was the format I was hoping for. I told Susan I wanted to write a testimonial about it because I was so happy she was offering it. So, if you’re like me and a periodic check-in keeps you learning, growing, and doing your best work, sign up for coaching. Maybe I’ll see you there (you get to listen in on other sessions during the open studio you attend). —LeahGrace Kayler
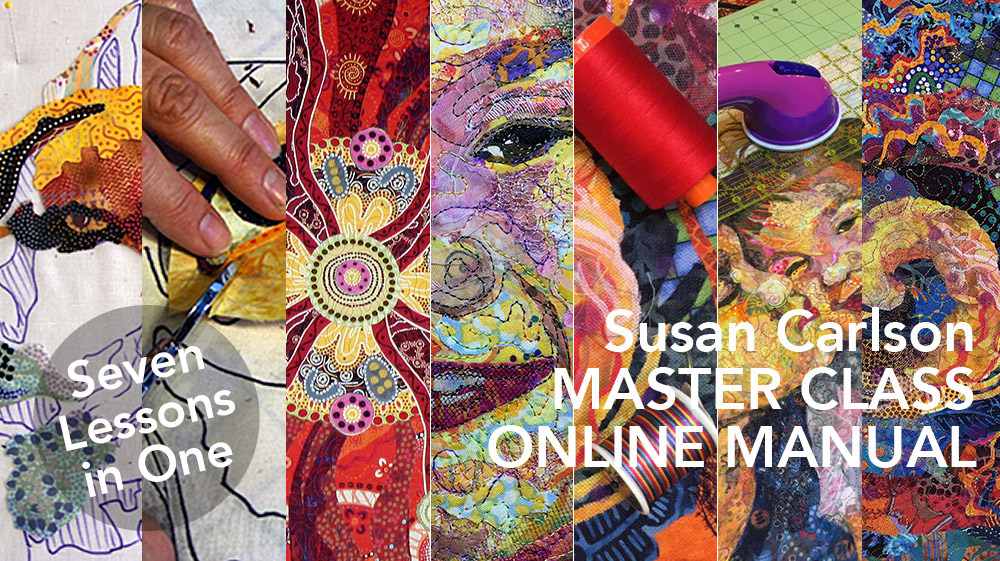
Fabric Collage Online Master Class—Updated
The Susan Carlson Fabric Collage Online Master Class Manual is a multi-media resource guide to the process of fabric collage. Using video, photos, text, and links to my blog posts for further relevant reading and information, I take you from beginning to end in creating your own fabric collage masterpiece, following my guidelines in a step-by-step format. Lifetime Access. Suitable for all levels, including beginners.
Read all about the process of creating the Master Class—explanation of its genesis—the whys and hows Tom and I made some of the decisions we did in this post: Online Master Class Now Available: Some Reflections.
Click here for more information about the Fabric Collage Master Class.
Price: $199
Lifetime Access
Suitable for all levels, including beginners
Further Susan Carlson Learning Resources include: Facial Features eWorkshop, website, Serendipity Quilts, patterns, blog (in general), YouTube videos, Sea Turtle eWorkshop, Fabric Collage Online Master Class, Patreon. , and our February Fantastical Fish and Summertime’s Fascinating Bugs and Butterfly Work-Alongs
Susan Carlson Fabric Collage: Fantastical Fish eWorkshop I
INCLUDES:
• All four recordings from the four-week class.
• Extended 10-minute edition of piecing time lapse (see below).
• Over six hours of video instruction.
• Annotated videos with “jump points” to help find the information you need.
• Materials list
• Links to helpful blog posts.
• Free fish pattern of your choice.
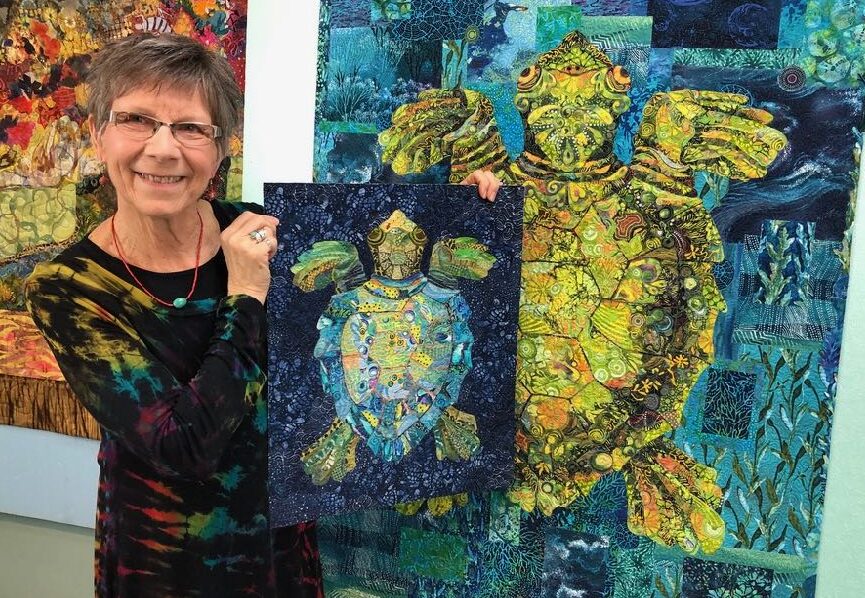
Susan Carlson Fabric Collage: Sea Turtle eWorkshop
Learn fabric collage through a start-to-finish project—from pattern and fabric selection through quilting and binding. Each step is clearly written, illustrated with photos, and further demonstrated with videos. Learn the technique with a Sea Turtle then launch into any fabric collage project you wish. Lifetime access and suitable for all levels, including beginners. Sea Turtle Pattern included
Read all about the Sea Turtle eWorkshop in this blog post: Fabric Collage Sea Turtle eWorkshop Launch.


Facial Features eWorkshop
Designed as a supplement to the Fabric Collage Online Master Class, or for those who have a good understanding of the basics of Fabric Collage. Lifetime Access. Intermediate or advanced levels suggested.
The Facial Features eWorkshop contains 8 videos and over 8 hours of in-depth instruction for creating each feature of a portrait in fabric. The videos are annotated with “Jump Points” allowing you to scan forward and backward to the information you need. Facial features PDF templates are included as reference and basic designs to work along with. Like the Fabric Collage Online Master Class, membership in this eWorkshop is for life.
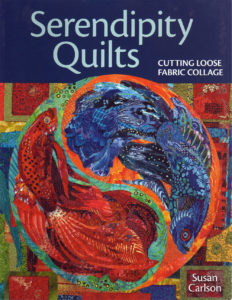
Book: Serendipity Quilts—Cutting Loose Fabric Collage
Full color throughout. Five projects of increasing complexity, four patterns to enlarge are included.
These books will be signed by Susan and can be inscribed to a particular person.
8 Comments