
This fabric collage portrait of my son Sam, is one that I began the week of his 23rd birthday, April 2020. Now more than a year later, it has become my summer resolution to complete it. So far, so good. If I were to be asked what stage this is in, I’d say basically third draft, the fine tuning. Though the background shenanigans you’ll see and read about below are more of a second draft “fix it up” stage. If you’re new to the reference of drafts for fabric collage, you can read this early post of mine. It’s a good way to look at your work, structure your progress, and give yourself a pat on the back (and maybe a glass of wine) when you can check another draft off your list.


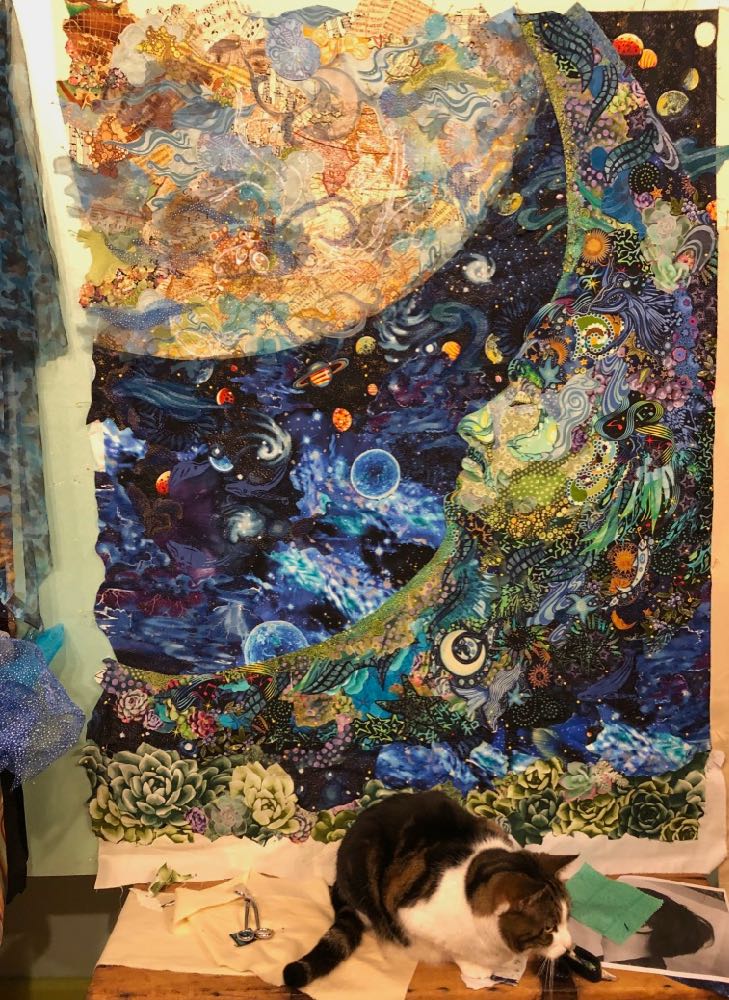
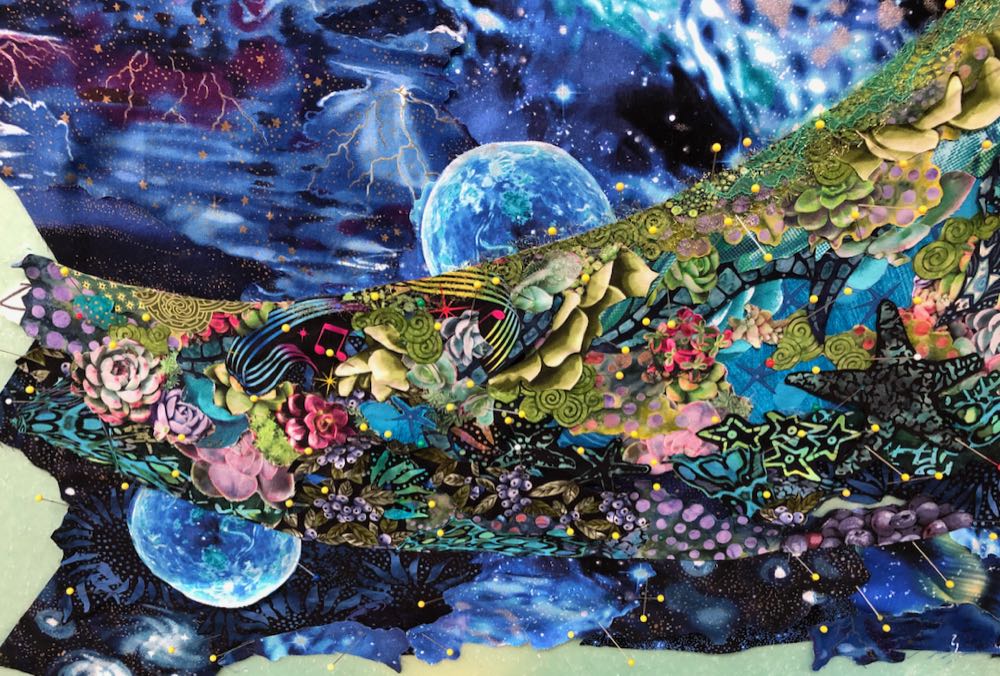
The photo you see above left, is where the Part 2 blog post of Sam’s portrait left off—me well on the way to completing the lower succulent border of the collage. If you want or need to go back to the beginning of my thoughts and trials about the background of this portrait, check out Part 2. If you want the answer to, “why succulents?”, go back to Part 1. The short answer is, it’s a category of plants that Sam likes, and this portrait is about him. The (mostly) finished second draft, including that completed lower edge, is seen in the photo above right. That was my goal for Sam’s birthday week this year. Second draft done, pat on the back.
A note that to see any of the images larger, just double click on the photos.


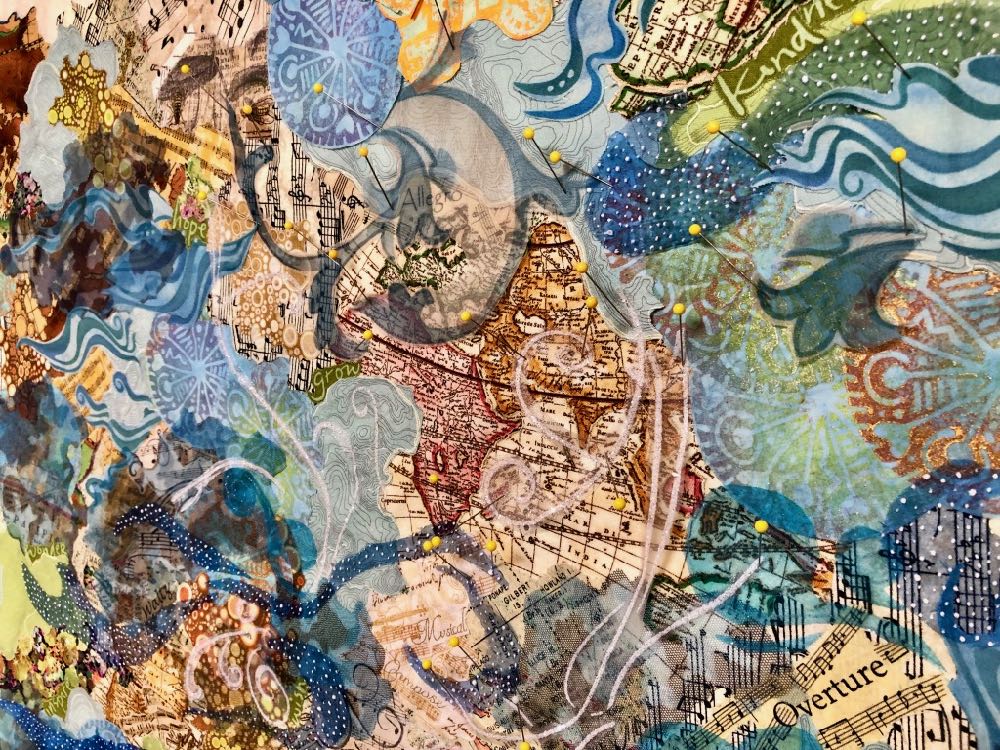
I was then ready to begin draft #3. I had already planned that a lot of the details of this collage would be added with translucent sheers and other sorts of netting and tulle (I talk about using those sorts of fabrics in this post, and this post). Sam graduated (now 2 years ago) with a major in Musical Theater, so a “theatrical” use of layers of showy fabrics accenting the many musical-themed base fabrics, seemed appropriate for this portrait of this time of his life. In the two photos above, you see on the left a layer of blue and black camouflage printed tulle overlaid on most of the Earth, demonstrating how this sort of fabric can alter and enhance the collaged image beneath. You can even see how it would alter the universe part of the background. I treat these sheer fabrics like any other fabric I would use (above right)—cutting it down into hand-sized shapes to move around and arrange, trim down and fussy-cut as needed, pin, add more, and eventually glue in place.
In the photo below, I’ve started the gluing process left to right (note where there are still pins). Gluing takes hours to complete, and should definitely be another cause for celebration.


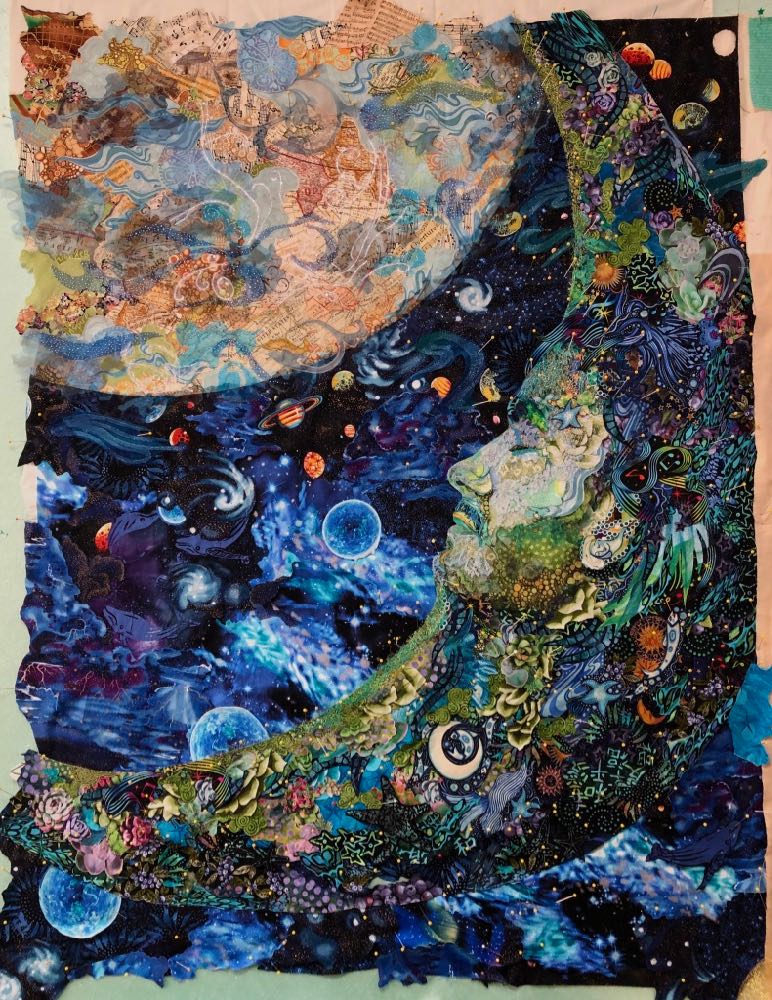
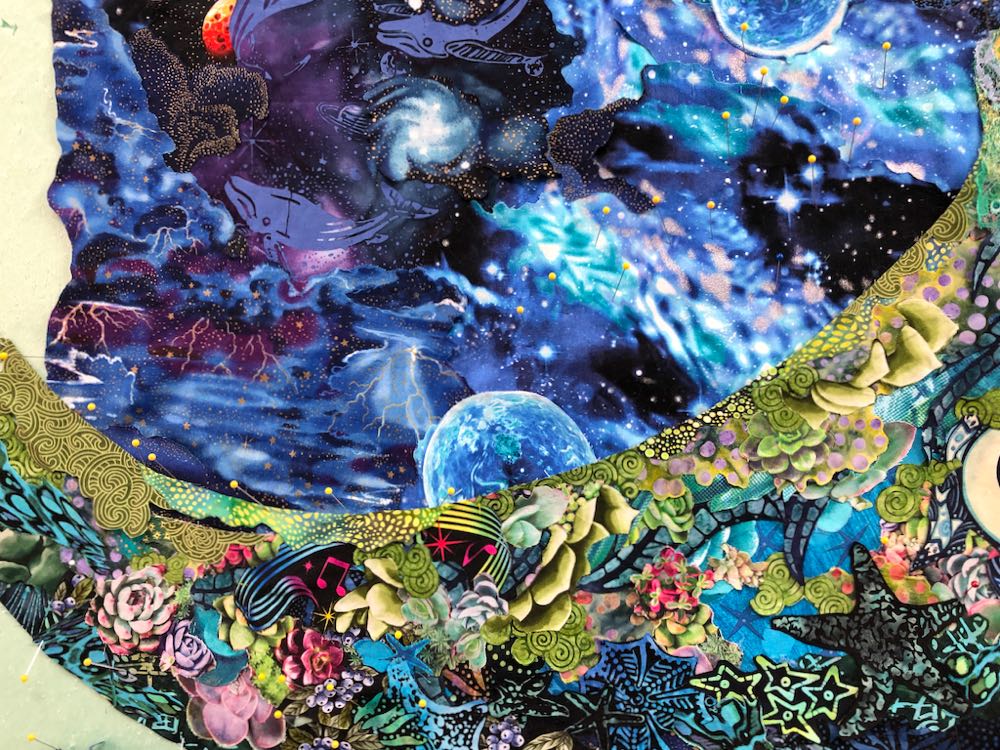
The background. I warn students that the background can throw them into fits of self-doubt and angst, causing avoidance rather than completion. Yup, I was there. I had begun to doubt the idea of the succulents as a lower border. So, I finally bit the bullet and jumped back into the background. In the sequence of photos above (remember you can click on the photos to see them larger), I removed the entire succulent border by cutting off the foundation fabric from under the moon’s edge. With a fresh slate, I re-pinned a continuation of the universe fabrics. My thought was that the moon looked too skinny now. In the third photo, I exposed the ragged edge of the moon and added a little more “weight” to him. Then in the fourth photo, I merged moon fabric into universe fabric to make a “nebulous” edge. Hmmm.
In a moment of, “I just don’t know what to do,” I pinned the strip of collaged succulents back on (below), this time with a gap of universe showing between moon and succulents. I had to let it sit while I turned my attention to other parts of the collage.
I had already added some sheer fabrics to the inner edge of the crescent moon, so the next step should have been fine-tuning Sam’s features. I had been studiously delaying working on Sam’s face, mostly because both Sam and I liked it already, and I didn’t want to mess it up. So really, his features were still in their first draft stage.
But now I had my Summer Resolution and the time to hesitate was over. I reached for the lacey and sheer fabrics I had been squirreling away for a year already, cut a palette of sheer fabrics, and started to play.


The photo above left, shows only the fabric base of the first draft. The right hand photo shows adding the first pieces of blue and green lace. Already his nose stands out better from the universe behind, his cheek has a better “blend”, and his forehead is lighter. I also added second/third draft adjustments to the lightness in his temple and highlights on his ear—mostly with succulent fabric scraps!
More sheers and more small touches ensued. Re-working Sam’s lips and mouth area (below) gave me a final sigh of relief as I saw Sam’s image improve with each day’s work. A sweet siren face from a mermaid print added a final highlight to Sam’s “musical” ear. 😉
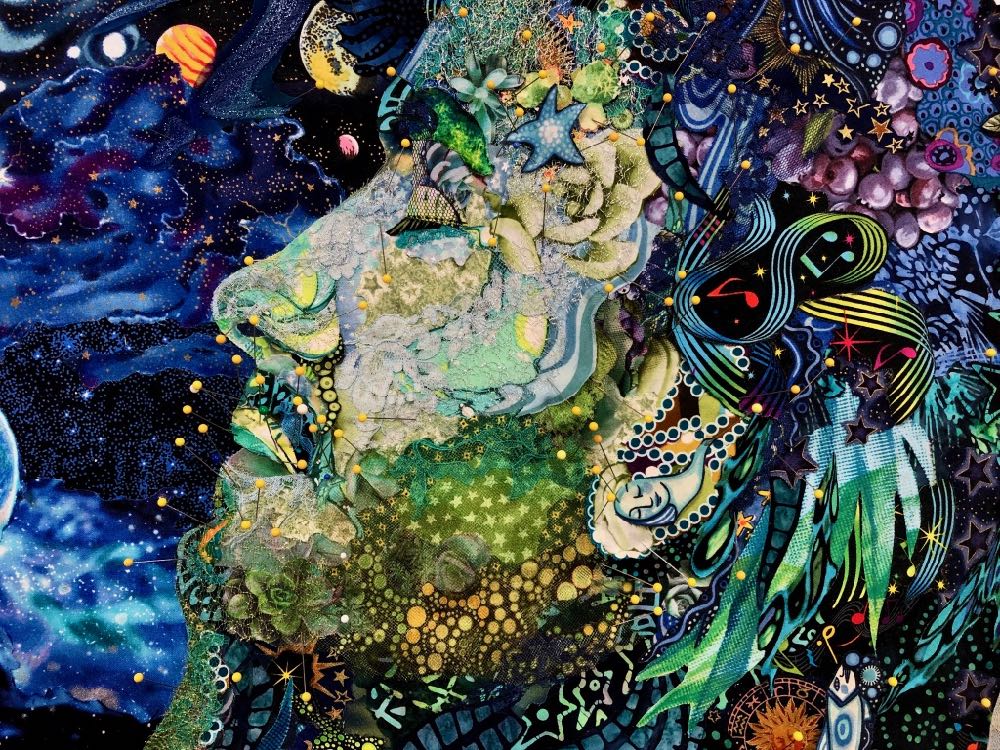
At this point it’s cut-pin-glue, reassess, then cut-pin-glue some more. The details get so small that within a short-ish amount of time the pins get in my way. I can’t add or manipulate any more pieces of fabric without gluing a batch first to get rid of the pins. But more is better, I say. And more is what I added in the photos below.


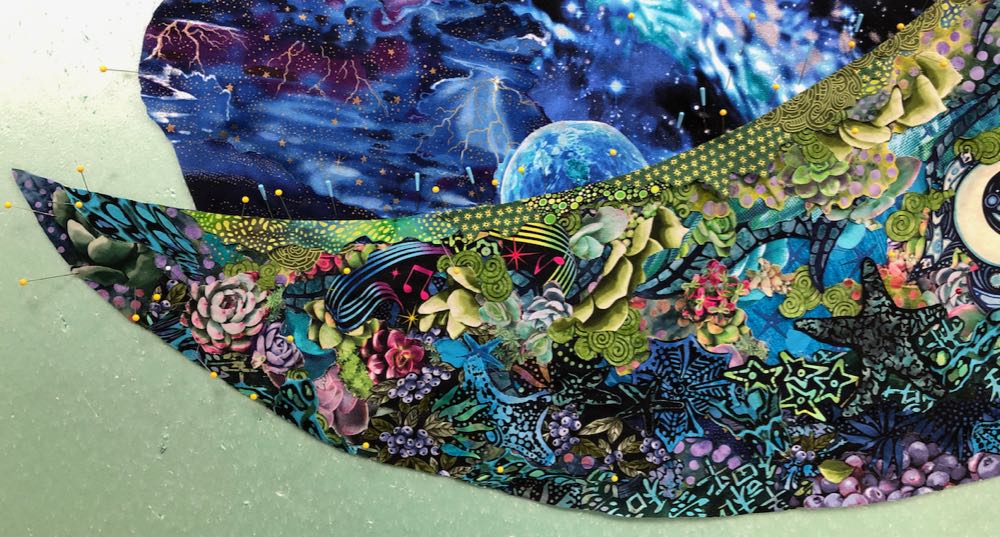
So then I was quite happy with Sam’s face, and moved back to the crescent of the moon to add highlights and more visual interest. Along the way, I had removed the succulent border, again. I applied a principle of writing to my collage that I learned from Stephen King’s (non-fiction) book, On Writing. He says that sometimes you have to kill your darling in order to move the plot forward. So I killed my “darling” idea of the succulent border. Then in true Stephen King fashion, I dismembered and rearranged the succulents to be reabsorbed as the trail of highlights in the moon’s body.
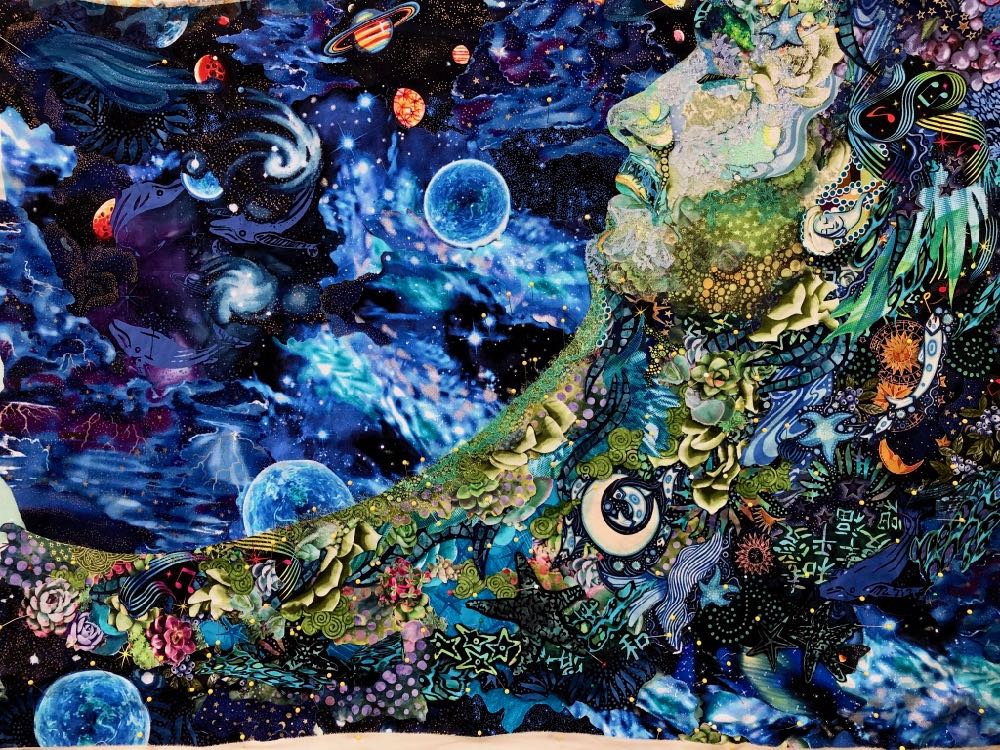
But still I wasn’t satisfied with the lower edge of the collage—where moon meets universe. The merging of the fabrics wasn’t working, it needed a clearer, definitive edge. So I added slightly lighter fabrics to increase the contrast, smoothed out the edge, and widened the tail and lower edge of the moon in the process. If you compare and match the fabric pieces from the photo above with the photo below, you can pick out the changes. Look at the blue planet in the lower left of each photo—the planet didn’t move, the lower edge of the moon’s tail expanded over it.
And still it didn’t look right. The background? Something in relation to the 3 parts of the composition? Something was off.
When in doubt, glue. It productively occupies your hands while your brain can work on a problem—and there were plenty of pins holding down fabrics, pointing to plenty of areas that needed to be glued.
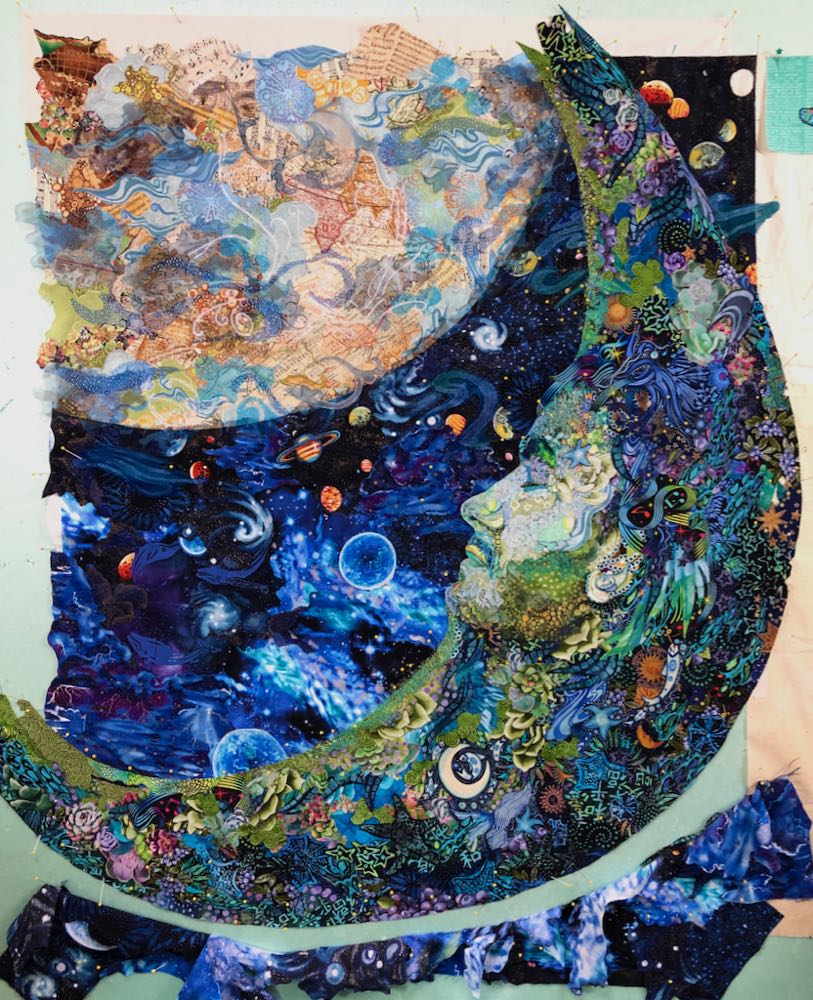
As I was gluing the lower edge of the moon, I started to flip down the universe fabrics tucked under the moon edge. That way I could easier smooth out and glue the moon fabrics in place, see photo below left. When I made my way to the right side of the collage, I removed the strip of muslin I had pinned in place months ago to visually crop that side of the composition. When it was gone it exposed a few raggedy patches of fabrics extending from that side of the moon, see photo below right.


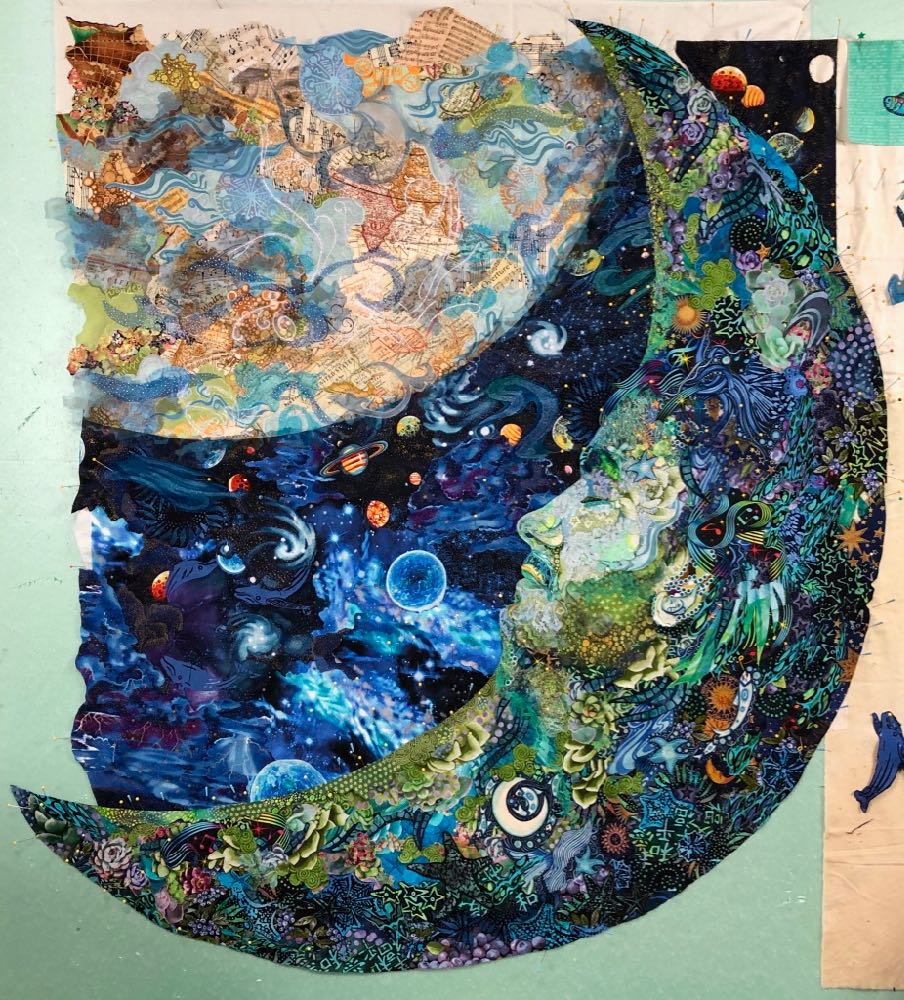
And all of a sudden—yes, like a light bulb turning on—I knew what to do. Forget cropping the moon, it needed to extend off the quilt “edge,” to break the rectangular boundary on the right side and bottom, and the points of the crescent needed to extend off the quilt background as well. I was quite excited. See photo below for the result of my vision. Sure it was a bit wobbly looking on the edges, but a bit of trimming and tucking would remedy that.
The next morning I was coming off the high—the outer curve of moon just wasn’t cooperating with my snips here and there, and I began to suspect that the trajectories of the points of the moon weren’t correct—not that I was following any sort of design line, I was just winging it.
Step in technology and Tom. I took the photo above and asked if Tom would convert it to a printout that I could slip under a piece of tracing paper to test various sized circles to determine where my guesstimated curves had gone awry. Tom did me one better, he generated circles in a drawing program and digitally overlaid them on the moon and earth, below, and gave me that printout. Much easier that me searching for correctly sized dessert plates to trace around on my tracing paper. Funny enough, this is the sort of annotation I’ve been using for online students. Did I even begin to think of using it for myself? No.
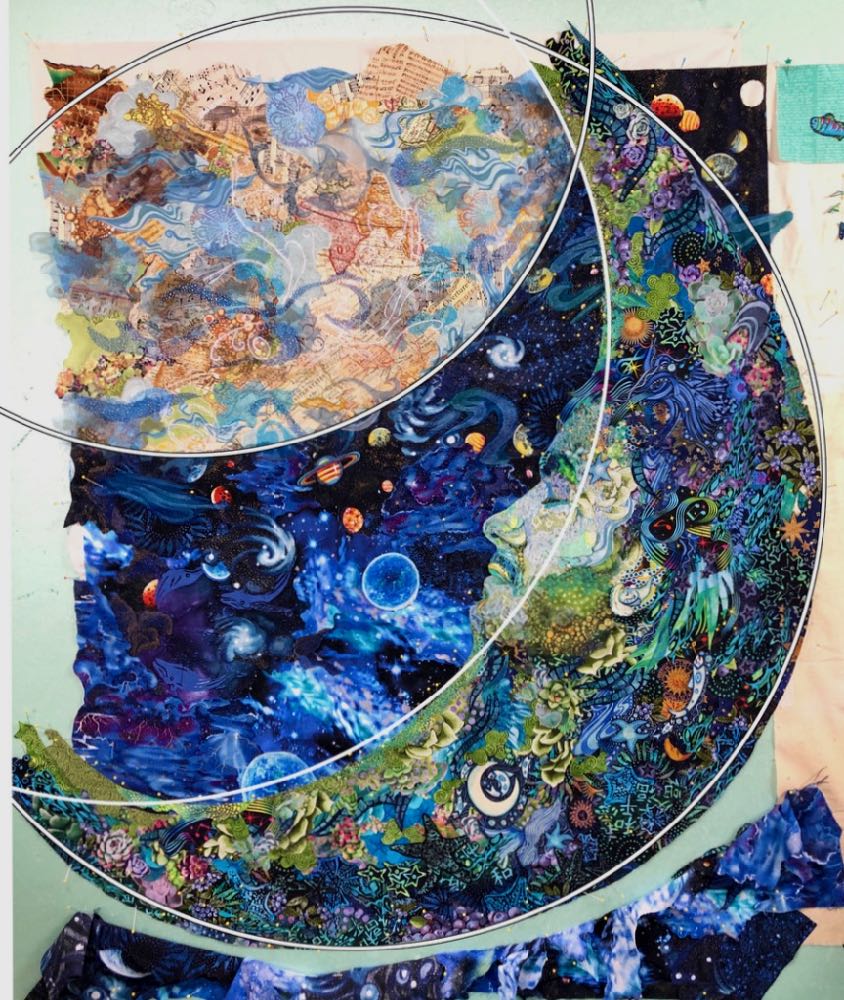
It was now so wonderfully straight forward where I needed to trim and where I needed to add for a nicely balanced curve to the moon. I could see from the overlay that I needed to adjust the inside curve as well. In the photos below, are the before and after versions of the tail of the moon.
I’m very pleased, finally, how the background has been resolved—and so is Sam. Killing the darling succulents was a good move, as was killing the lower universe. The best way for the moon to separate from the background? Remove the background.
I’m not done with the collage yet. There are more sheer fabrics on the sidelines waiting to go into Sam’s face, the rest of the moon, and the universe. I may extend the left sides of the Earth and universe another inch or two. At least that’s what I was thinking a couple days ago. Now I’m not so sure. Gonna live with it over the weekend, pat myself on the back, and have that glass of wine.
Susan, I am always in awe how you progress from one draft to the next and resolve issues you don’t think look right. The time you take to write your blog and explain each step in your collage transformation is amazing. Thank you for taking the time to allow your blog audience to come along on your creative journey . You are more than generous with your time and in sharing your work.
I am always so impressed with the magical and insightful ideas you share with your readers.
Thank you for continuing to be such an inspirational teacher and mentor.
My goodness, your explanation of progress was so interesting and also a peek into your way of thinking! This is going to be another amazing piece of art that I’m sure you and your family will cherish! Thanks for sharing….I love watching you from the sidelines!
You are amazing. Thanks for letting us come along for the ride. I’m still getting up the nerve to share my spirals!
Thanks so much for this and many other in depth bog posts about your process. I am reminded to relax on how long the process takes and the need for breaks between work times. I’m finishing up (making the label, binding, and sleeve) this week on a Beta Duo I started in February. I made a solid background so it could have taken longer. I have another one in first draft and another in my head. The journey is unending.
It is amazing to see how you transformed the first draft – where moon, earth, Sam’s face, and the background universe seem like slightly separate entities – into one a third draft where all of the elements are so cohesive, and the focus is firmly on Sam’s face and personality. This blog is really inspiring for me.
Thanks for sharing your thought process as worked through these latest edits. Brilliant solution on the curves. I really like having the outer curve of the moon as the quilt edge, with the points extending beyond the background as well. But I’m looking forward to seeing what you decide in the end.
I was in the Thursday night classes and watched Sam’s progress there, but seeing the later progress and hearing the thought processes that guided the project along is so exciting. I even re-read Part 1 and Part 2 to further immerse myself in this awesome piece. (Succulents sucked me in, as I’ve recently fallen in love with them. But I agree with removing them.) And for you to take the time and effort to photograph and explain these step by step changes–well, I can’t tell you how valuable this is! I feel so loved that you would do this for us! What a gift to your groupies! Thank you!
Amazing to see how seemingly small changes make such a difference. Sam is now the main focus. Wonderful composition. Thank you so much for sharing your process. Helps me to realize that my own process, which often feels like I am not getting anywhere, is actually heading in the right direction. Thank you.