
This is the second week of going back to the basics of fabric collage. My intent is to explain the process as a Summertime Challenge to consume in small bites and in a straight-forward, step-by-step manner. If you missed it, last week I started with the first four steps (out of 12 in all). This week, I’m serving up the second course of four steps: gluing, the messy-scary stage, sequence 1 and 2, and backgrounds. Click here, or below on the numbered blue headlines for each step, to access each of the four individual posts.
This challenge series was first introduced last winter, running from January through March. At the end of each month, I held a Thursday Night in My Studio Live! webinar, in which I did short demos and answered questions based on the topics covered that particular month.
Below are links to the first and second recordings, wrapping up the first eight blog post topics. There’s a short trailer you can watch before purchasing each. A reminder that if you attended those meetings, you should have received a coupon code to access the videos for free. In fact, the recordings may already be available in your account for you to review!
Thursday Night in My Studio Live!: Fabric Collage Basics 2 PURCHASE $10
Thursday Night in My Studio Live!: Fabric Collage Basics 1 PURCHASE $10
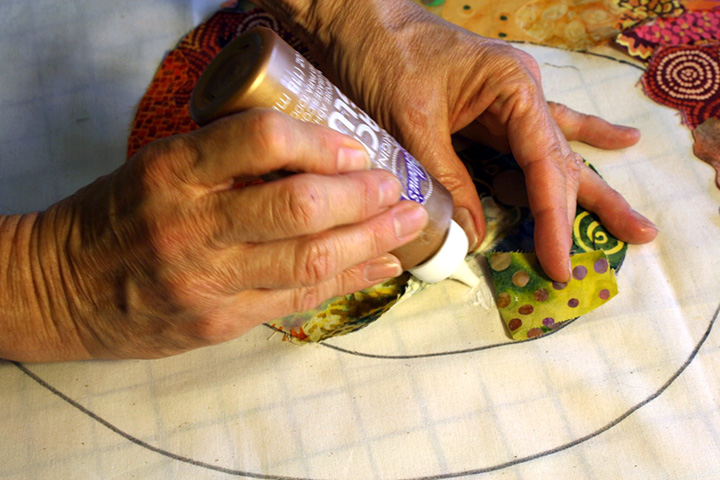
5. Why Glue? Updated with Video
Glue is integral to this method. I know that these days I don’t get as many quizzical looks when I say that as I used to. This post explains the whys and wherefores of gluing. There’s a method to this madness, I assure you. After three decades of using glue to adhere fabric, I can attest to its longevity and flexibility.
Primarily, glue allows me to use fabric the way other artists use paint—in “dabs” of color or value—with the added benefit of a printed design or pattern included. I place a cut fabric shape onto my drawn design, turn it, trim it, pin it, then when I’m happy, a smear of glue holds it in place. But if I later decide to change my mind, I can pull up that fabric piece or even glue another right over it. Glue makes this fabric collage process quite forgiving.

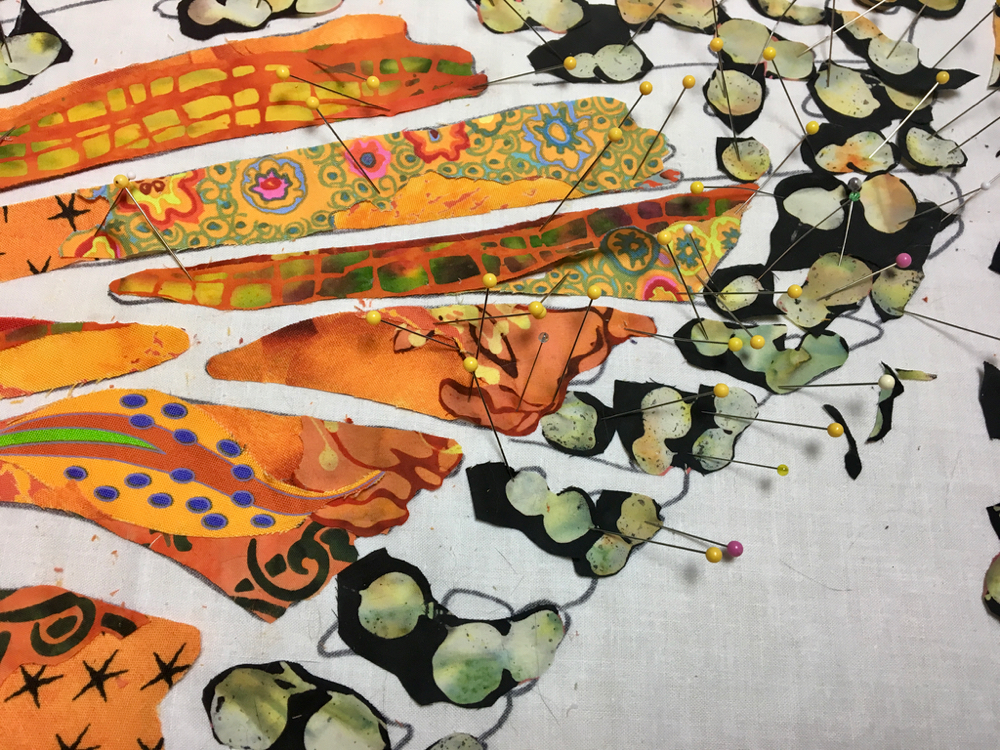
6. Fabric Collage and the Messy-Scary Stage
I warn my students every class: you will hit the mess-scary stage. This refers to that point in your collage when you’ve started to cover up your drawn design but the fabric image hasn’t really started to coalesce yet. There’s fabric here, there, and everywhere and it’s hard to believe that it will amount to anything in the end.
Perseverance pays off at this moment. You just have to keep at it. Trust me and trust yourself—if you keep placing fabric shapes, trimming, pinning, and gluing, you’ll get through the Messy-Scary Stage and see the fruits of your effort.
Did you read the posts I talked about and linked to last week? If not, go back and read them, then act on them first, before you get too deep into the Messy-Scary. Before you glue you need a good design to follow, fabric that’s a good choice for fabric collage, and to cut down that fabric into a palette! We’re doing this step-by-step and jumping ahead can add to any frustration, doubt, and fabric collage angst. Sure, you can dive in head-first, but if you find yourself in the deep end, take a deep breath and make your way back to those beginning steps that gently lead you into the fabric collage pool.

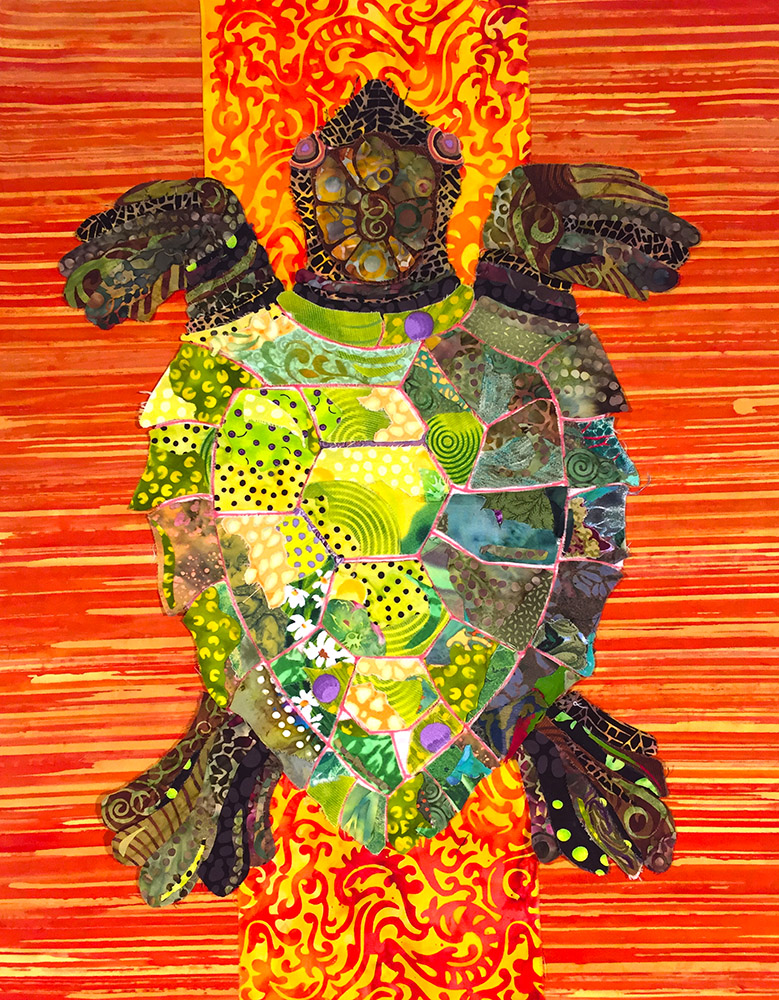
7. Sequence in Fabric Collage Part 1
The order in which you begin, and continue on, your fabric collage is important—and can greatly help to tone down the Messy-Scary. Some people ask why does sequence matter? Because it’s a good way to structure the construction of an image.
Work from the top down.
This idea can be more than a little unintuitive. Top down? Huh?
You start with what’s on top. Be it a turtle shell or a butterfly wing, start with the individual plates or panes of color, then the lines between. You look at those areas as shapes that are on top of the lines surrounding them, and to be filled in first. It’ll make sense when you read the post.
This method of working helps keep your drawn design uncluttered and provides a nice “leading edge” for the next grouping of fabric shapes (in this case lines), to be tucked under those on top.
Sequence in Fabric Collage Part 2: Faces
Since I posed this step-by-step Fabric Collage challenge at the beginning of this year, I’ve written two more “sequence” posts; Sequence in Fabric Collage Part 2: Faces, hint—you start with the nose, working into cheeks and forehead, it’s what’s on top; and Part 3 which deals with using sheer fabric—but that step-by-step will be in next week’s post, so I’ll link to it then.

8. Telling the Story: Fabric Collage Backgrounds
No matter how many times I say this, it can still be surprising by how difficult choosing a background can be.
Just narrowing down the infinite choices of potential backgrounds is a daunting task, let alone following through and completing it.
My “go to” advice is to think about what sort of background would add to the story of your subject. Why is this subject important to you? What is it doing? Where is your subject, location-wise? Asking yourself these questions places your subject in context, in its environment, it helps to picture in your mind what would work to visually support your particular subject. It’s not foolproof, but it’s proved to be a good way to give a jump-start to those creative juices.
If you’re working along on this Summertime Challenge, you may not be at the point of choosing a background yet, but you’re probably far enough along to start thinking about it. In addition to a story, your subject may be developing a “personality” if doesn’t already have one. For instance if you chose a simpler low-stress subject like a fish or a butterfly, there may not be much of a story, but it may be developing a personality, and that can sometimes help with the hunt for a background as well.
We originally linked these posts together as a 3-part 2021 New Year’s Challenge. This summer, I’m challenging myself to finish one particular collage quilt and to begin another. Want to join me? Either to start a project or to get back to work on an unfinished collage? I definitely suggest to make a palette before you start either.
This post is Part Two of the 3-week challenge. Last week there were a couple comments that I might have some company out there, working along with me. Let me know in the comments below how your projects are going, or if there are any more takers! As far as my progress goes, there’s been a lot of gluing….
See you next week with Part Three of the Summertime Challenge: Steps 9-12. Let’s see how we all do by then. 😉
Love rereading what I learned last year. It reinforces the process when I want to stray. Currently I am finishing a my life in cars collage then I am going to start a portrait of my brother maybe a sun. I may be able to work along. Endless joy.
Thank you very much.
Hi Sandy! A life in cars collage? Sounds interesting, gonna share it next month on Patreon Zoom? If there’s time, I’ll gonna share my progress too! Good to have deadlines.
Hi Susan,
I’m right there with you, at the gluing stage, trying to finish the elephant I started during your May online class. It’s a long process but So far so good.
Looking forward to finalizing the background.
Hi Sylvie! Yup, so far so good on my end too! Finalizing one area at at time….
I’m working on my second spiral! I’m loving this process. Not sure what to do next…maybe a fish? Thank you so much for your generosity with help. Hope to meet you in a class one day, in person or on zoom.
Hi Carol! Aren’t those spirals fun? And yes, I’d highly recommend a fish next—you can’t go wrong with them. A head, a tail, a body in between to connect them. Thanks for following along and hope to meet you someday as well!
Hello Susan,
I have followed your work for several years and have two pieces in progress from your Serendipity book. I loved your presentation last week for the Rivah Quilters in Virginia. And have been re-inspired to finish them. I have been surfing your website and found Student work Volume 2. Fabulous work but how are the buttons, beads etc attached? I doubt glue would work even temporarily. Thanks so much for all your sharing.
Susan B. in Virginia
Hi Susan! Thanks for your comments! That lecture went on a bit long so glad you liked it so much! You know, I’m not quite sure how those beads and buttons were attached, very striking though. [Work by Beth Sims found in this Finish Line post.] Beth liked to do handwork, so my first guess is that they were hand sewed, though I know there’s a good glue out there that will adhere buttons to fabric quite well, Fabri-tac?? I can’t remember for sure now, maybe another reader knows?
I’m working along with your summer challenge – and can’t get over how helpful and thorough your posts are. I took a class in fabric collage a few months ago but might as well have saved my money. I didn’t understand anything about how to choose fabrics or how to cut them into useable pieces until I started reading your blog/watching your tutorials. I’m looking forward to testing out each of your patterns in turn.
Thank you for all your work!