
Some of you may remember Part 1 of this series on sequence in fabric collage, which covered those thin “between” spaces: for example, the veins in a butterfly wing or the gaps between the plates on a turtle’s shell. That post appeared almost exactly one year ago and COVID crashed down shortly thereafter. In the rush to adjust to the new reality of how to teach fabric collage, the ideas for new parts in this series on sequence got set aside. There were more important things to do.
So, finally, here is Part 2.
One of the many topics I could address as far as sequence in fabric collage goes, is faces. Where do you start? What comes next? What do you leave until the end?
First, it’s important to be able to look at a face and understand how it’s shaped. In a recent blog post, “The Topography of the Fabric Collage Face”, I talked about how you can view the face as a landscape with ridges, valleys, and plains. If you keep that in mind, what I say next may make more sense.
In general, with any subject, I want you to start with what’s in front. Asking yourself, “What’s on top?” is one way of addressing the subject. In the case of a person’s face, what’s in front, or on top, is the nose. So, start with the nose.
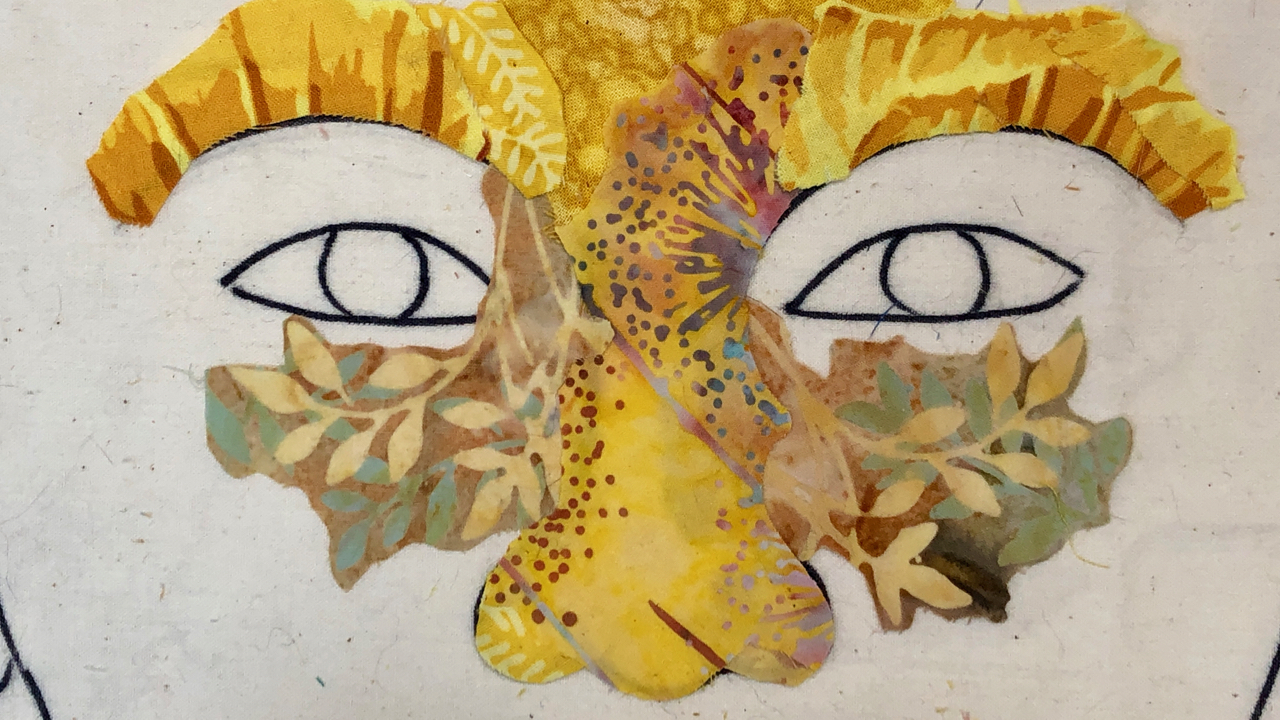
1. Nose
But why? Why start with the nose?
There’s a couple reasons. The first has to do with your pattern and with the nature of fabric collage: one piece of fabric overlaps another. One shape of fabric gets trimmed to the line you’ve drawn on your pattern (such as the nostrils and point of the nose). The next fabric shapes get tucked under those trimmed-to-shape pieces (such as the future shadows under the nose).
So when you start with the nose, you’re using the pattern lines to their best advantage by knowing exactly where and what you need to trim away. One way of thinking of it is, you want to keep as much of your pattern visible for as long as possible. I mean, you spent effort making the pattern—don’t cover it up right away by starting with the shadows under the nose, or worse, “blocking in” the entire face with larger pieces of fabric. You can’t use your pattern as a guide if you cover it up right away.
The other reason I say to start with the nose is that it’s simpler than the eyes or mouth—a good warm-up as you progress through the face. It also leads you to spread your fabric shapes directly down from the ridge of the nose and into the cheeks, and upward into the forehead. In the process, you’re going to be working with color values—the lights and darks of your fabrics—and patterns they contain that could work for facial contours. It’s all about acclimating your eyes and mind to what you’re looking for in order to create the face.
2. Eyes
As your fabric shapes start to spread out from the nose, try not to cover up the lines for the eyes in the process, ’cause the eyes come next.
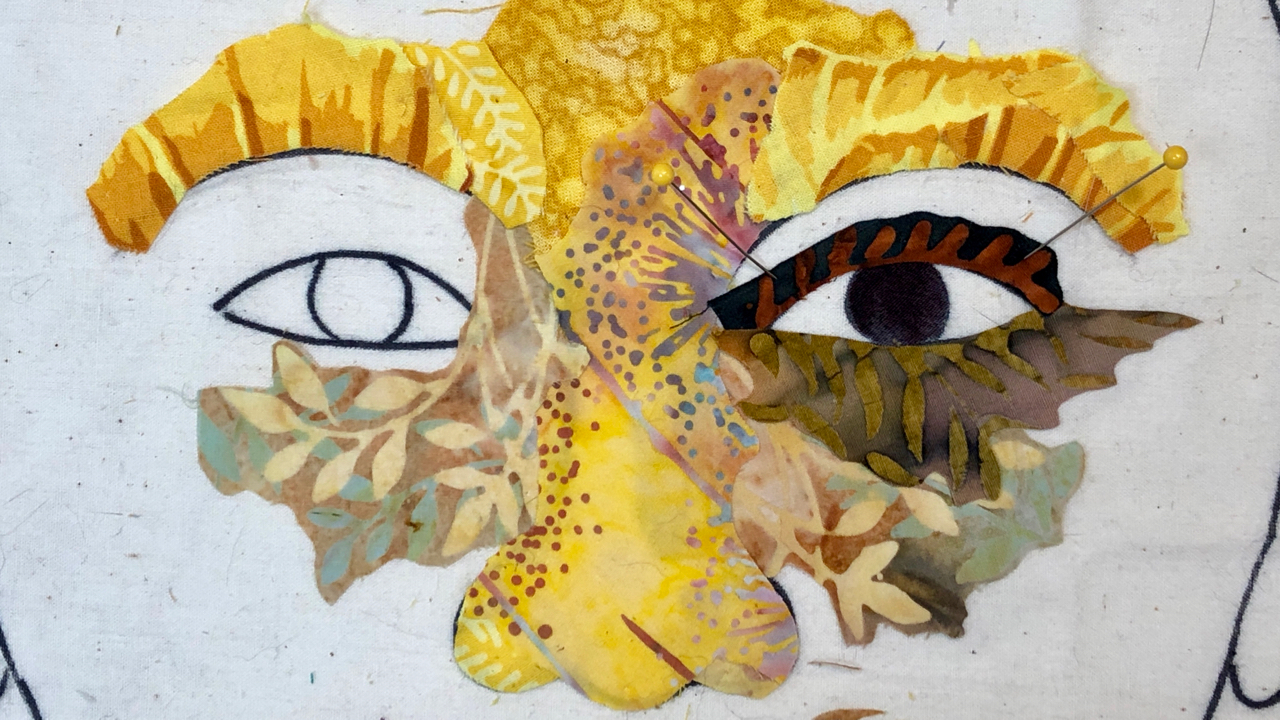
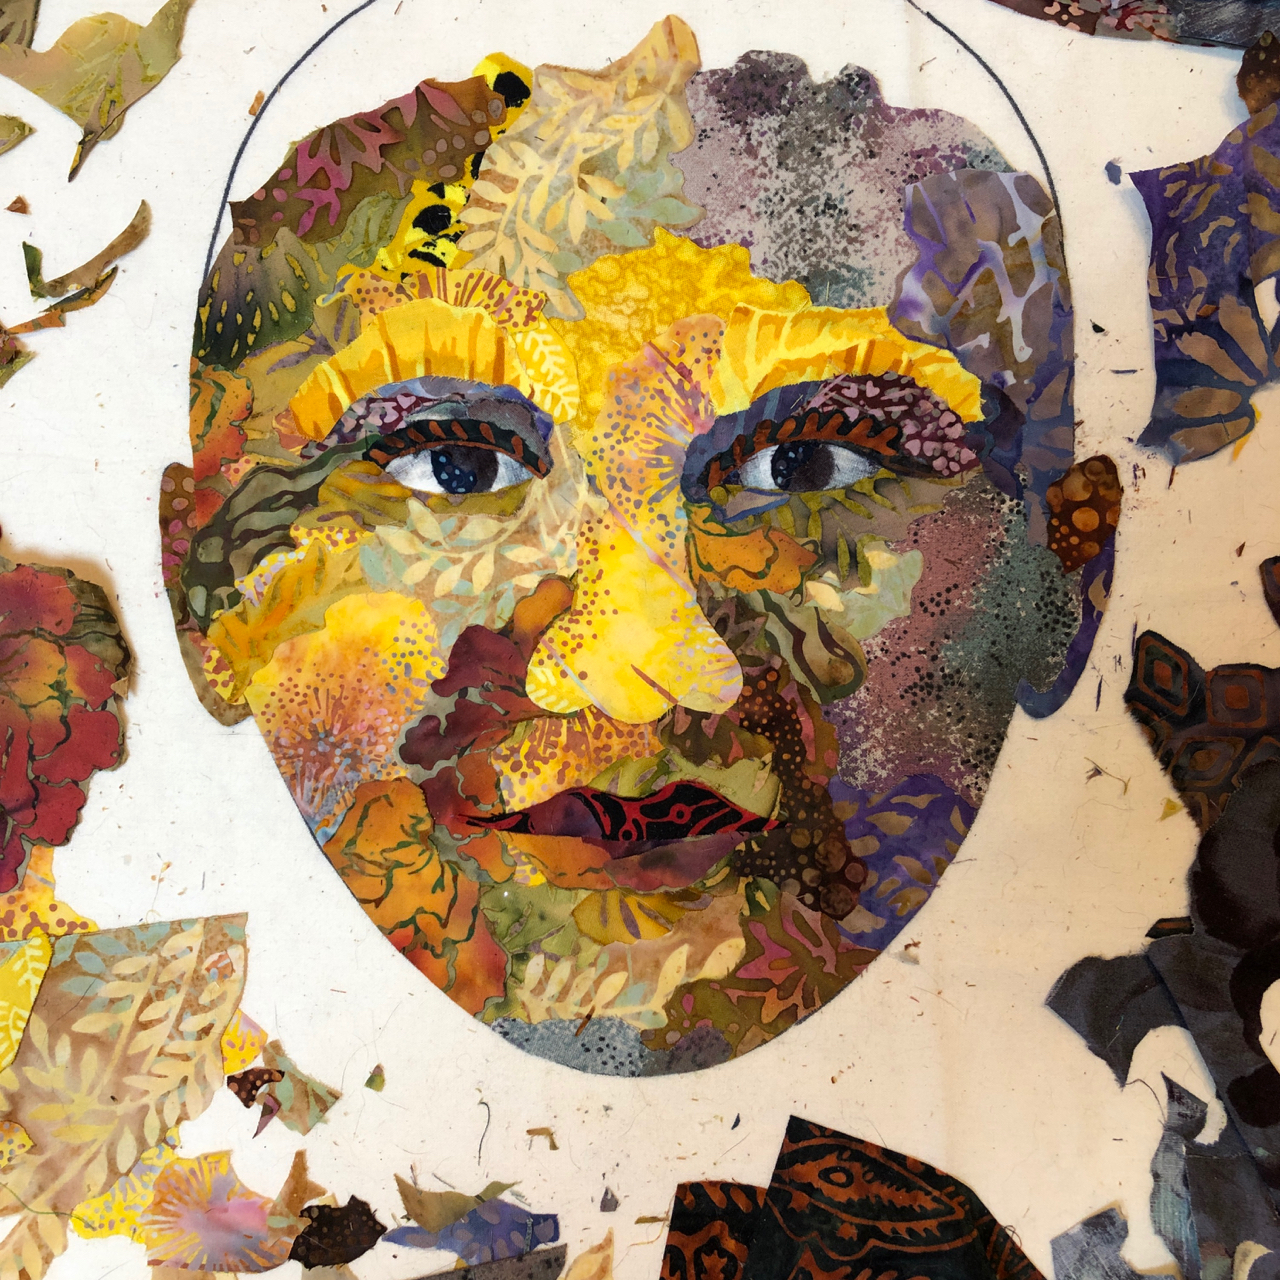
But now, where do you start with the eyes? Do you block in the entire eye and work inward toward the pupil? No. Start with the iris, the colored part of the eye, maybe even cut that circle to include a darker center for a ready-made the pupil. In the photo above, I found designs in my fabrics that had curves and pattern that fit the eyelid curves, and gave the eyes lashes at the same time.
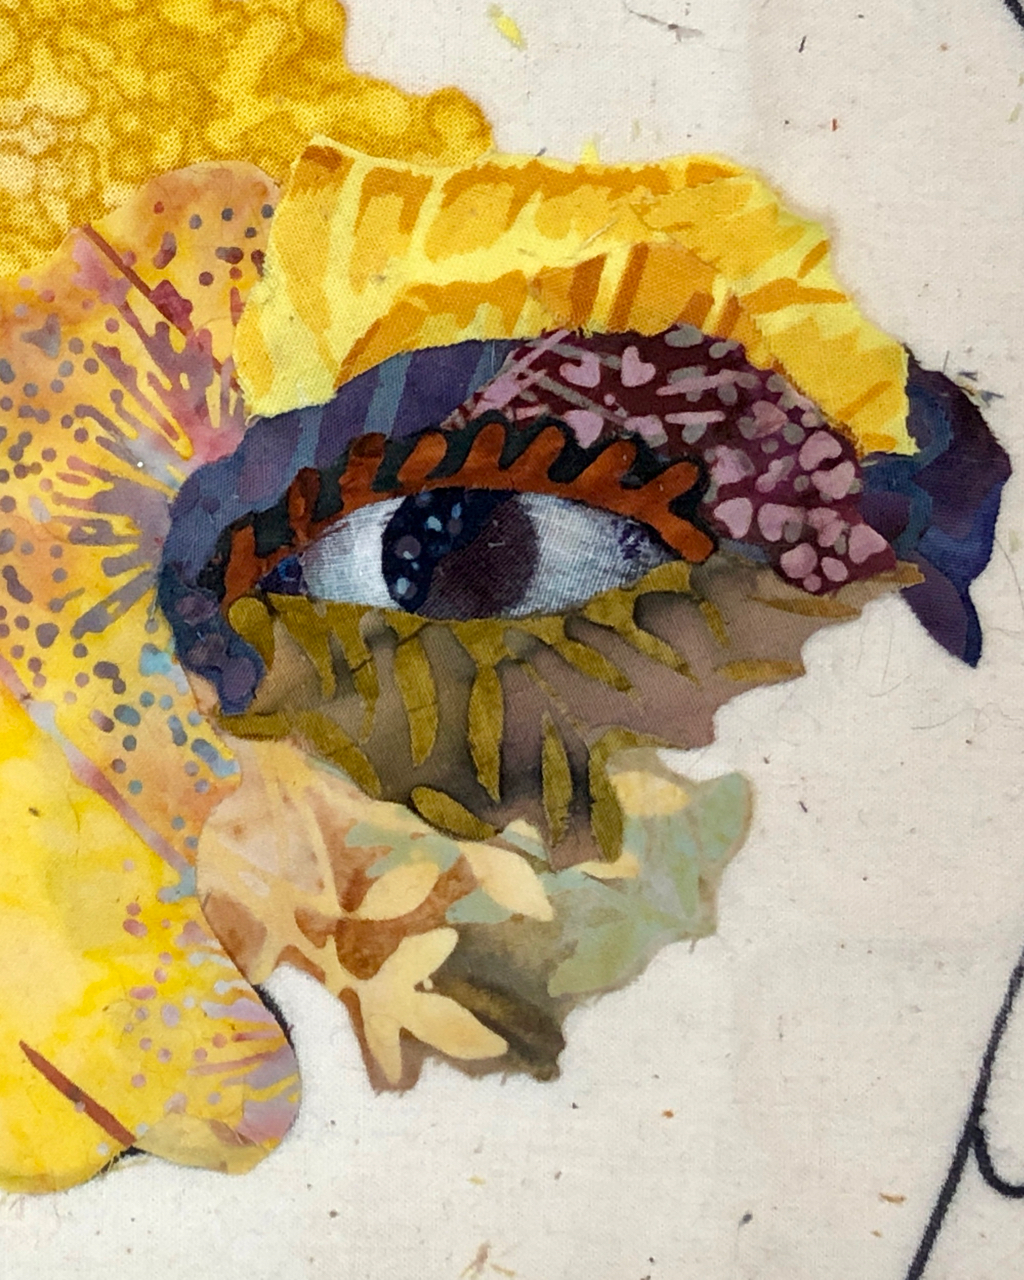
Note: depending on how accurate I need to be with a face, as in, is this someone I know or not, I create eyes in different ways, even different sequences. For a more advanced layering sequence demonstration, check out this “Eye for an Eye” post.
For this generalized face, which is honestly, much more freeing and fun to make, I expanded outward from the iris into the whites of the eye. The triangular shadowed whites get tucked under the iris and lids, having already used the drawn lines for the size of the iris and the curves of the lids. See how that “what’s in front,” “what’s on top,” sequence works for eye construction as well?
3. Mouth
After the eyes, I move on to the mouth.
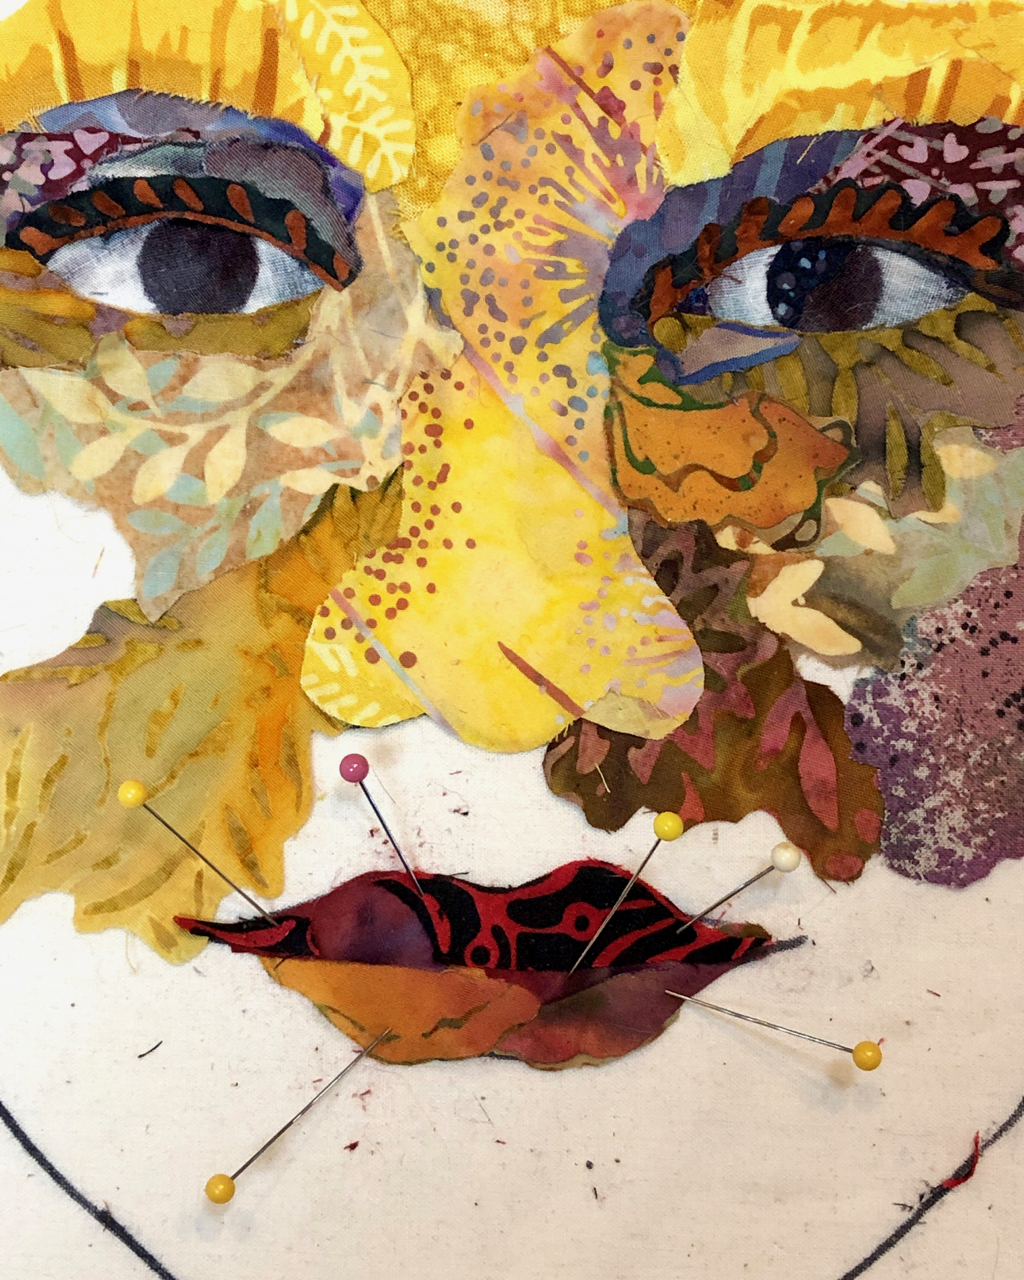
Typically, I’ll start with the upper lip, it is “on top of” the lower lip, after all. I almost always use more than one piece of fabric to give the lips more interest and form, moving from the brighter side of the face to the darker side. Trim the upper lip line straight where it meets the lower lip. Then slip the lower lip fabrics underneath. Once those pieces are tacked together and in place with a little glue, the surrounding face fabrics can be slipped under the mouth unit. Sequence.
And so forth
Once I’ve completed the first draft (add more details later) of the major features, I fill in the rest of the face: finish the cheeks, chin, forehead, ears, and so on. Everything spreads out from the the central features, so the order really doesn’t matter.


Trimming to the defining lines of facial features and then the outside of the face, is very satisfying and calms down the chaos of all those bits of fabrics. To create a definitive jaw line, trim to the line like I did above. The neck fabrics will slip underneath, as in photo below.
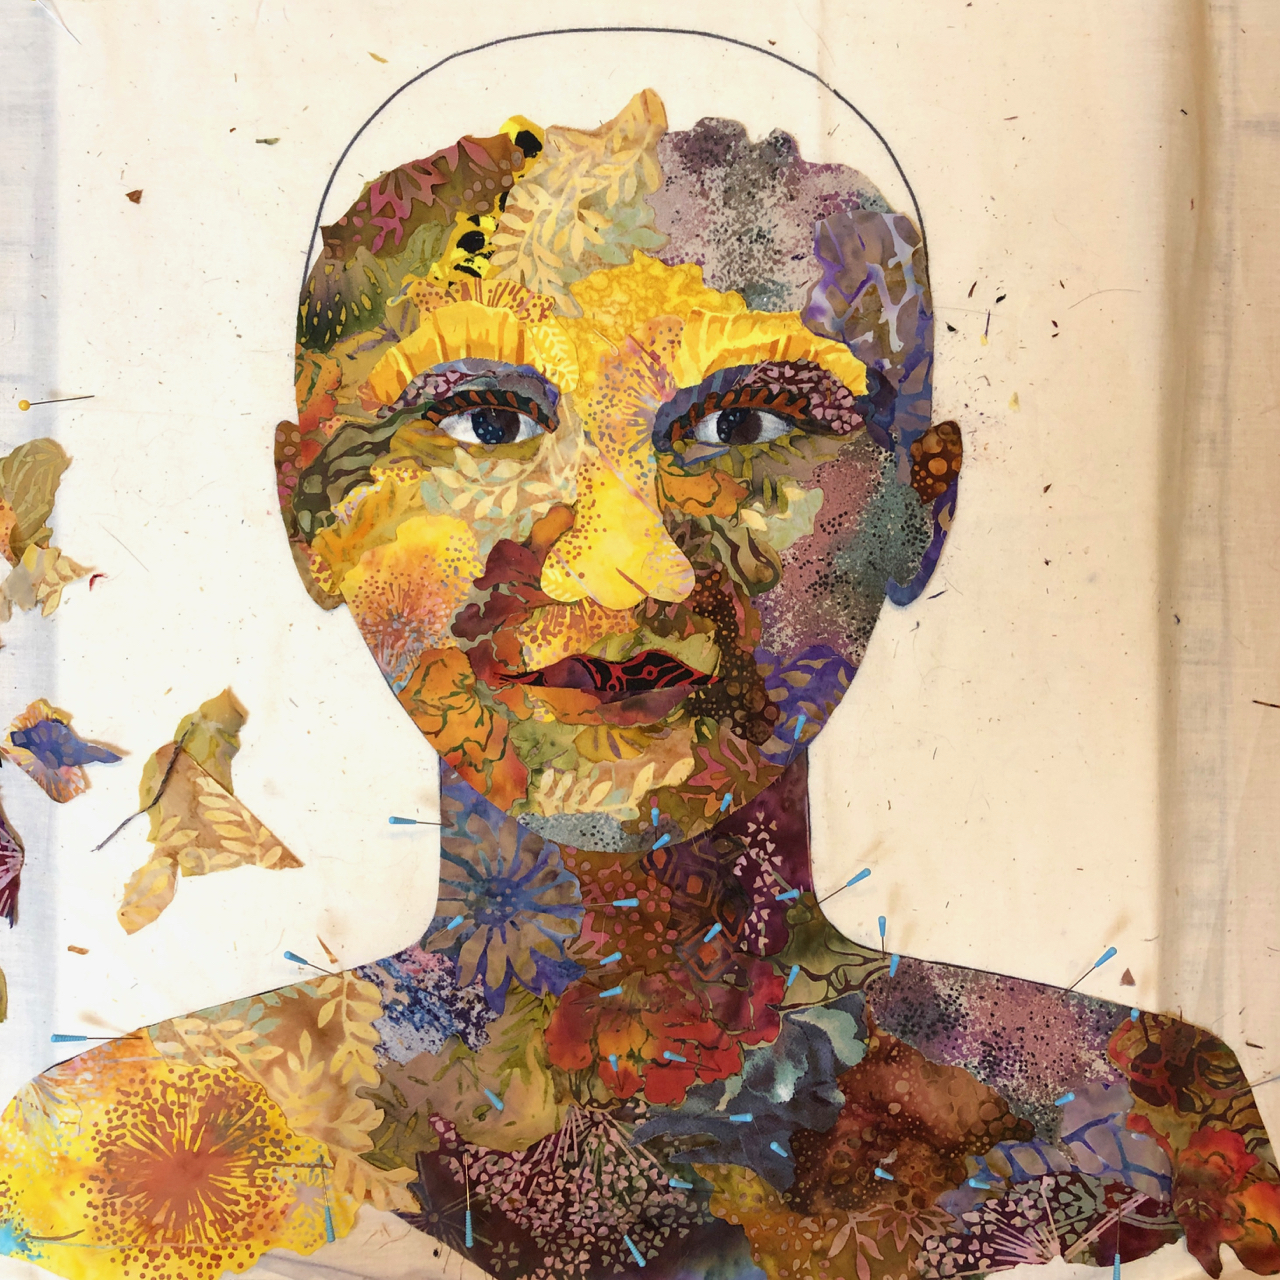
Where hair falls in a portrait sequence will vary case by case. If there’s bangs that need to be just so, I’ll do them before completing the forehead and then the forehead fabrics will go under the bangs. But with this portrait, I left my options open. I’m going to see what I find in my fabric stash—what inspires me—for the last part in this particular example of sequence in fabric collage.
There will be more subjects and more posts about sequence to come, but no promises as to when.
The photos above are lifted from my 2020 series of Thursday Night in My Studio Live! presentations on the face. These presentations are one of the new ways of teaching fabric collage we developed last year. They’re now available as recordings.
So for further and more detailed instruction in creating features and faces in fabric collage, you can purchase these Thursday Night in My Studio Live! recordings for $7 each.
Facial Features Nose: Thursday Night in My Studio Live!
Facial Features Eyes: Thursday Night in My Studio Live!
Facial Features Mouth: Thursday Night in My Studio Live!
Facial Features—Neck and Hair: Thursday Night in My Studio Live!
Facial Features—Child vs. Adult Faces: Thursday Night in My Studio Live!
tres bien expliqué
Je voudrais savoir le nom de votre colle.
Merci. Luce
Thank you, Thank you, Thank you, Susan. I have been enjoying your blog and books for many years. They are very informative and inspirational. I love your relaxed but educational teaching style. I made a sun face from your book that I really enjoyed. I look forward to taking the 5 day workshop and meeting you in Sept./21 in Kalispell, if all goes well with Covid vaccines.
This is a subject that I need to be constantly reminded of. Thank you for a great post, Susan.
Susan, this is the best tech sheet yet. I don’t remember part one last year. Will you be send it out again or is it already available.
Thanks so much!
Barb
Susan, thanks for all your postings on faces. Will you be offering a class just on face collage anytime? I was wondering about personalizing the face in the moon.
Thanks again!
Glenda,
There’s a whole Thursday Night episode on personalizing a face into the moon. It’s available here:
oonportraitpattern/478929889
There’s one on the sun, too:
unportraitpattern/481700654
No plans to do a “just faces” class soon.