
This week and for the following two weeks we’re going back to basics. If you are interested in learning fabric collage but thought it was too difficult, let these posts prove to you it isn’t, taking you step-by-step through the process. With a little guidance from these posts, your education will progress steadily toward creating memorable images, or maybe you want to take a break and just play a little, like I did with the spiral, above. Either way, you’re working piece-by-fabric-piece, and over these three weeks, I hope to help you along the fabric collage path.
This week, we cover the first four of 12 steps: choosing a photo for your subject, making a pattern, choosing fabric, and creating a palette with that fabric. Click here or on the numbered blue headlines to access the four mentioned posts.
This series was first introduced last winter, running from January through March. At the end of each month, I held a Thursday Night in My Studio Live! webinar, in which I did short demos and answered questions based on the topics covered.
Below, is a link to the first recording, wrapping up the first four blog post topics. There’s a short trailer you can watch before purchasing. A reminder that if you attended those meetings, you should have received a coupon code to access the video for free. In fact, the recordings may already be available in your account for you to review!
Thursday Night in My Studio Live!: Fabric Collage Basics 1 PURCHASE $10
By-the-way, a brand new crop of bright and colorful Oma’s Pumpkins has been harvested and Sam will have them ready to display in the Etsy shop he manages for his Oma, tomorrow, Sunday—noon Eastern Time. So if you’re interested in my mom’s stuffed creations (and I know many of you are), keep an eye out for that post!
1.) From Photo to Fabric: Choose the Best Shot
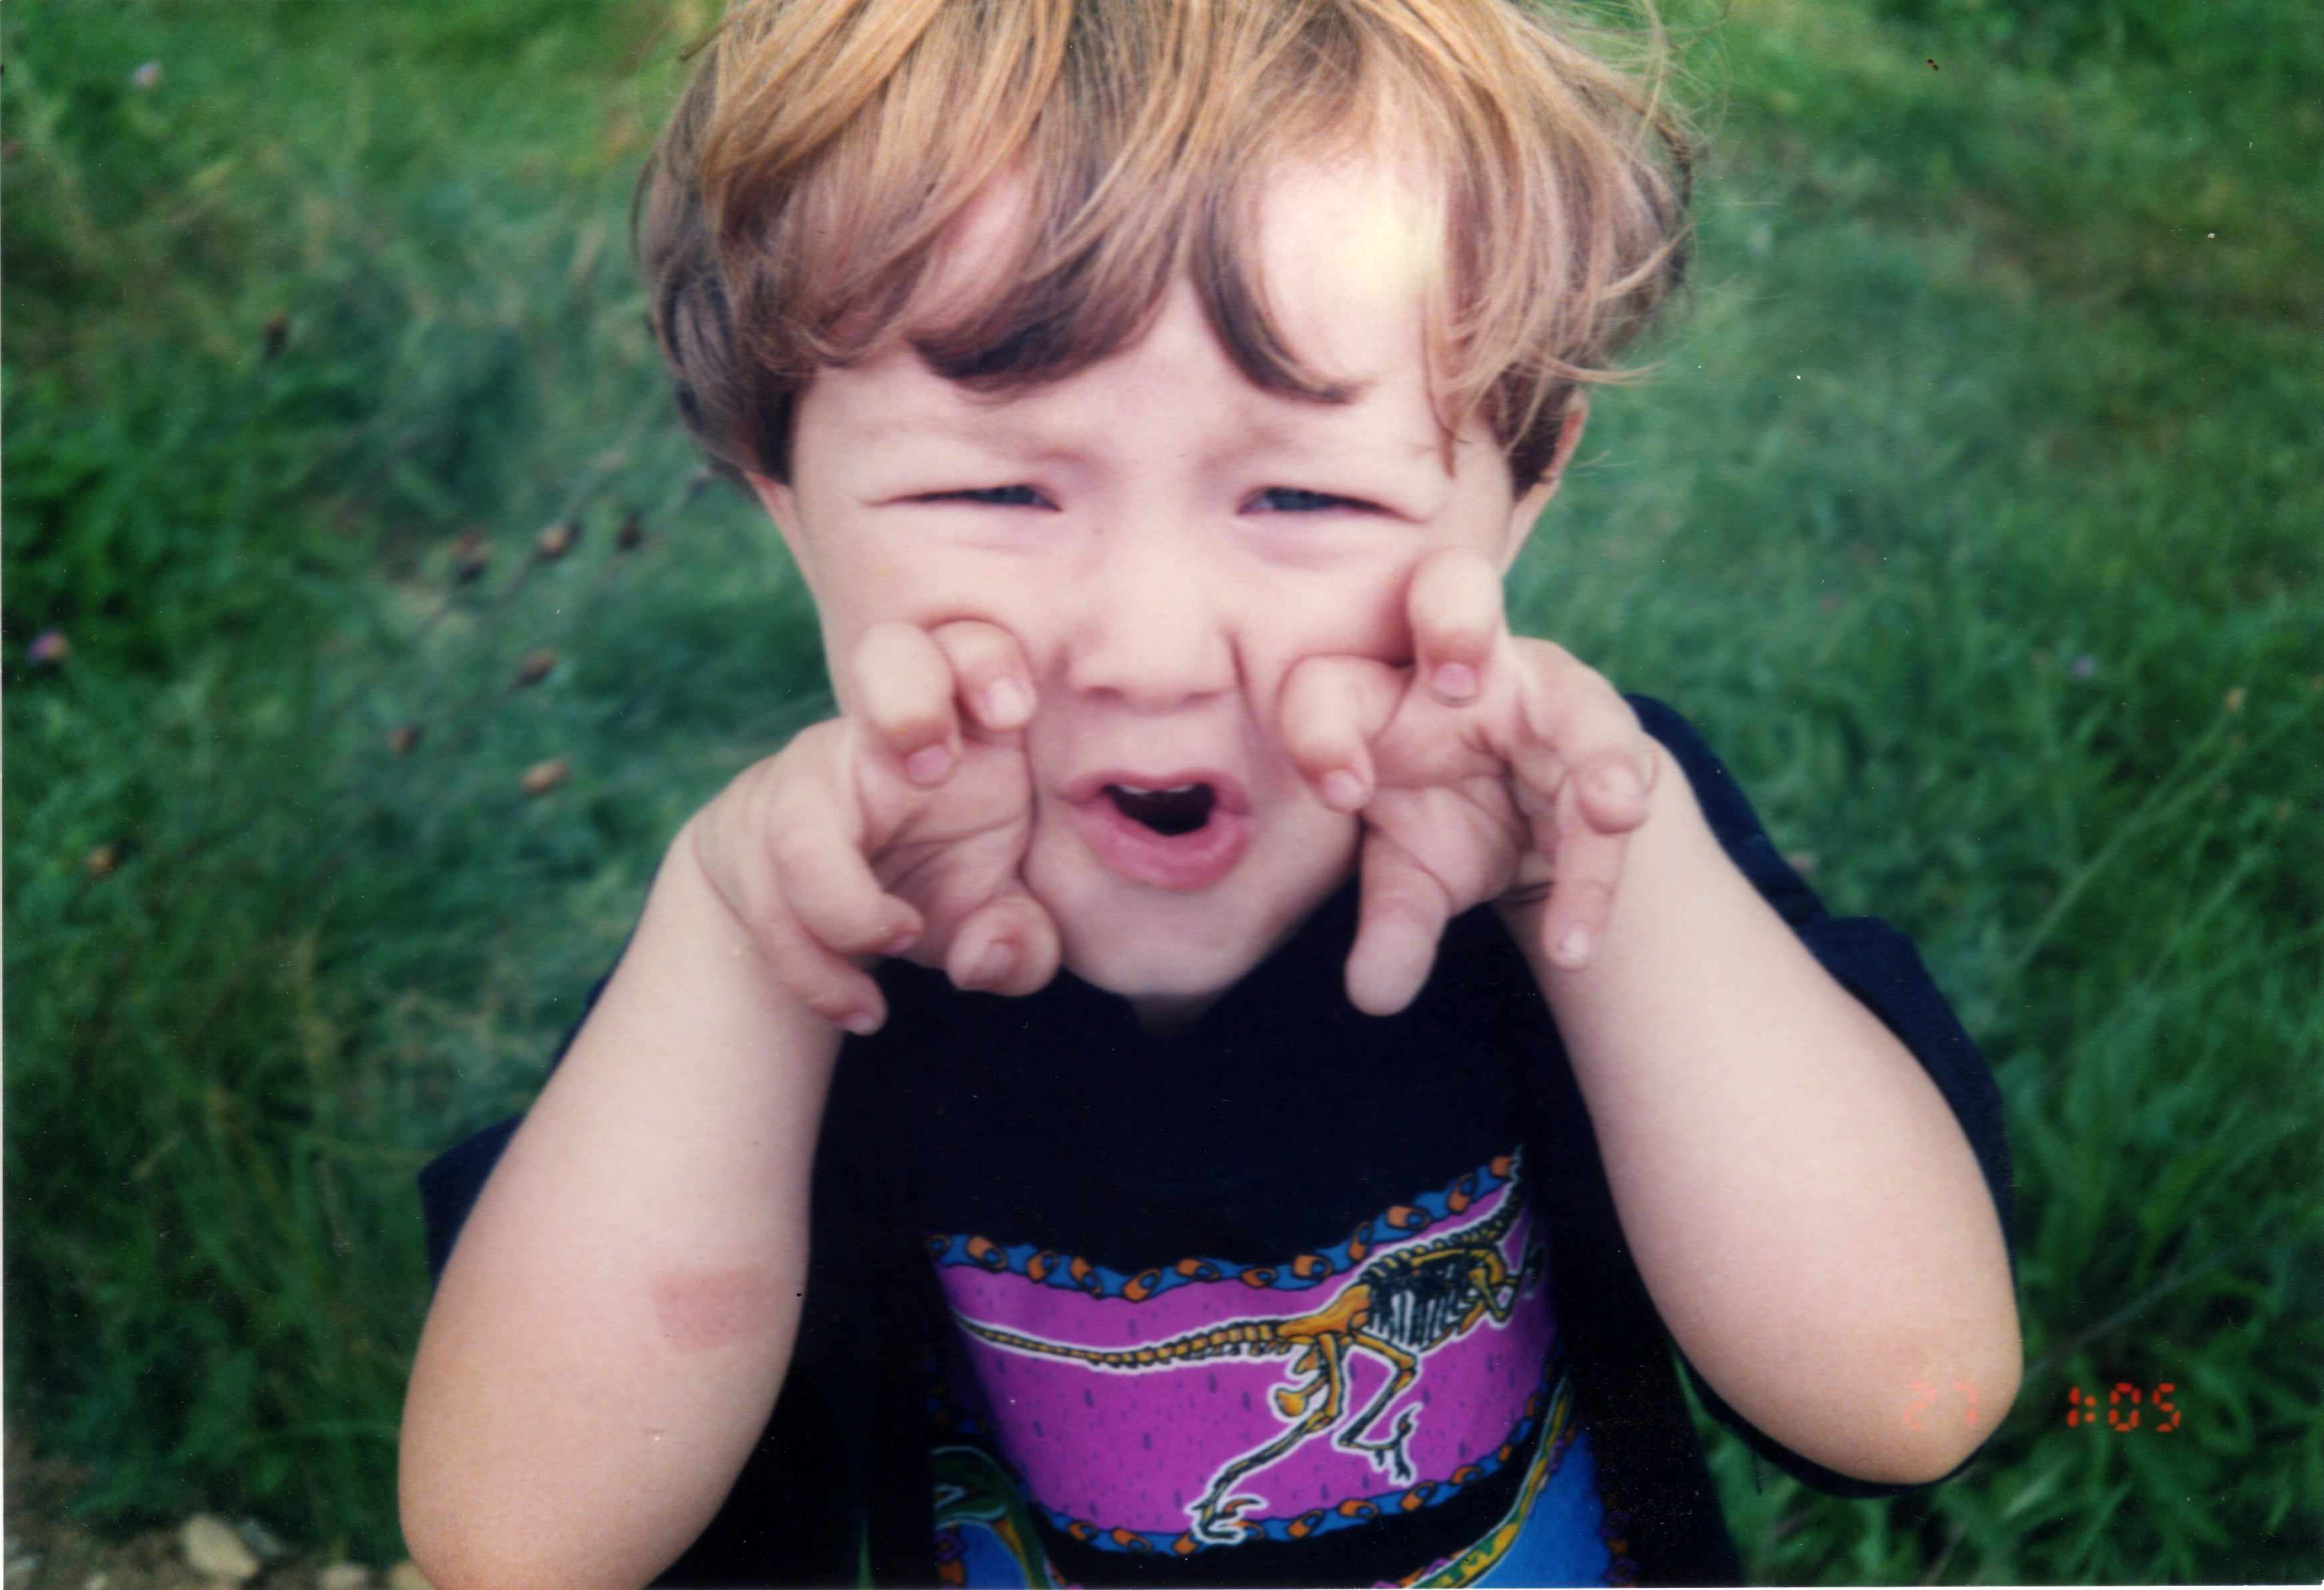
When someone asks me what sort of design they should begin with, I would not recommend a portrait. However, we get things in our heads of what we want to do, and many times it’s that plump-cheeked little angel that we can’t get enough of. I get it. And that’s why I used the photo above as an example in this post about choosing a photo. The point is, it may be cute (in my mind adorable), but not necessarily ideal for fabric collage. But if that’s all you’ve got, you make the best of it.
But if you do have choices, well, I talk about that too. Not all photographs are created equal. Choosing an image that is best suited for fabric collage sure helps to ensure as smooth a start as possible on a collage. In the post linked above, I use my own work as examples, along with the inspiration photos I chose to work with.
And back to that first question? What sort of design would I recommend? Basically, something you’re not emotionally tied to. Early on in my own fabric collage journey, I spent many happy years creating fish of all sizes, colors, and backgrounds—working with the designs and patterns I found in my growing stash of fabrics. I had the freedom to put them together however I wanted to, no pressure to make them “right.” What does a “right” fish look like anyway? And then there was my run of bugs and butterflies collages—those were even more fun than I thought they’d be. Again, anything goes. That’s the kind of designs I recommend, start with something you can play with and get comfortable with the technique first.
Whatever you choose as your subject, let having fun be your guide. I think you learn better that way.

2.) Making a Pattern for Fabric Collage Update
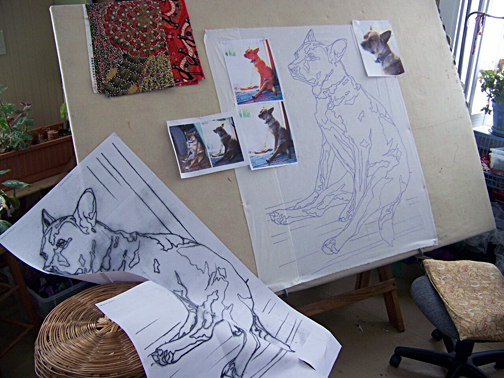
Once you’ve chosen your image, the next step is to make a pattern based on it. I think it goes without saying, the simpler your subject, the simpler and easier it is to generate a pattern. You’ll be collaging to the lines in your pattern, so a good pattern will set you in the right direction for your fabric image.
Time spent in creating a good pattern is time saved later when you are in the middle of collaging your image. If your drawn lines aren’t really true to the shape or details of the subject, your collage will understandably vary from the original image as well. Sometimes this is okay—when the image is something like a fanciful fish or beetle—even a sun or moon face can be stress free when approached with the idea of letting go and seeing where the fabric takes you. If it makes your life easier, here are a bunch of $5 patterns of mine you can check out.
And if you’re aiming for that recognizable animal or person, make sure the drawing you’ll be working with is faithful to the photo. Don’t skimp on this step! If you don’t understand what’s going on in a line drawing, how are you going to interpret it in fabric? I draw and re-draw my designs all the time. The more I understand my subject before I begin the collage, the better. I help you understand how to generate a line drawing from a photo in this post.
3.) Choosing Fabric for Fabric Collage (Updated with Video)
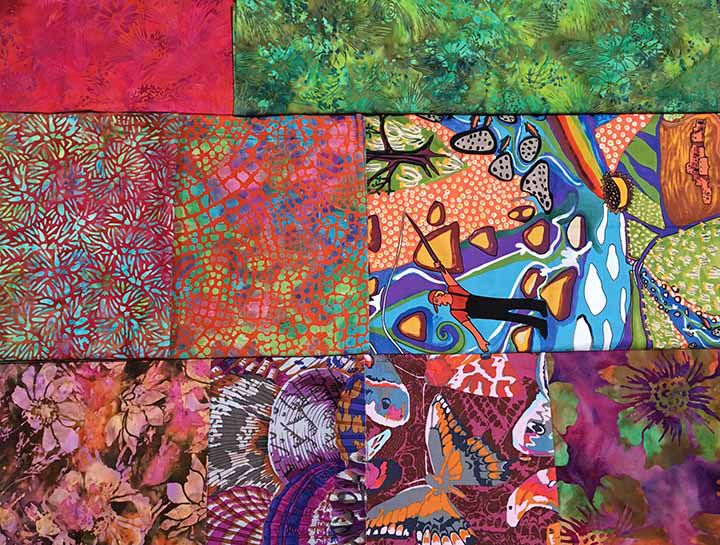
This post answers one of the most frequent questions I am asked: what kind of fabrics do you use?
I often get these sorts of questions from upcoming students who are packing for a class, looking at their (often overwhelming) fabric stash. How can they possibly include all the fabrics they’ll need? The reassuring answer is that they can cut back on the bulk by bringing smaller pieces of fabric—a fat quarter, even less, is often more than enough of any one fabric. The best use of packing space is a variety of fabrics—and the best fabrics for fabric collage incorporate various designs and prints, colors and values within each piece. A good variety means you’ll find the right piece of fabric when you need it. Probably. There’s always exceptions to every rule, but this post can help you make some educated (fabric collage) choices.
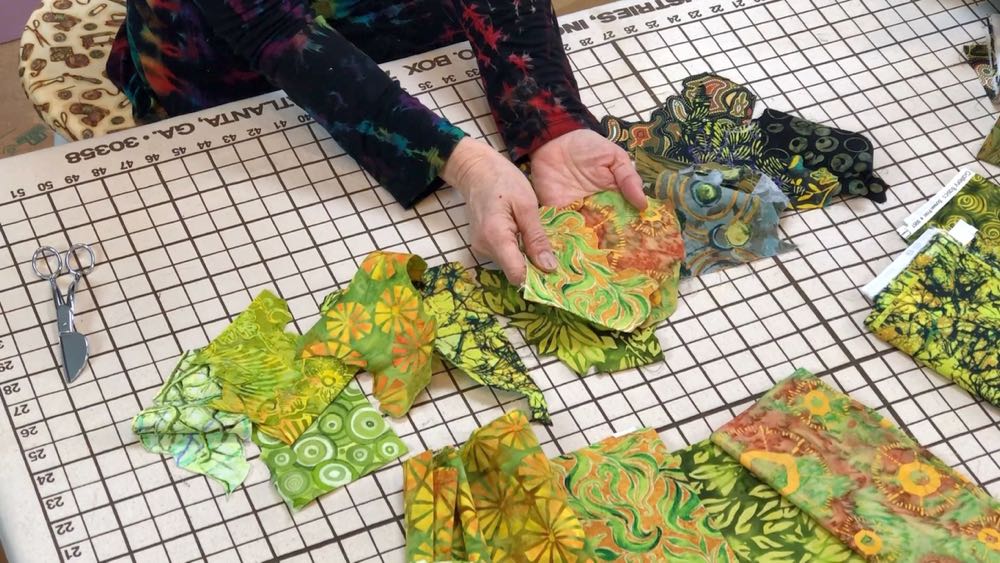
4.) Create a Palette for Fabric Collage
Now that you’ve made some fabric choices, you’re ready to start piecing, right? Hold your horses! There’s one intermediate step that I now ask all my students to do: create a fabric palette by cutting down your fabrics into hand-sized pieces. Don’t put the rest back in your stash yet, you may need them later to replenish your palette. But before you place any fabric on the drawing, make a palette.
What’s the purpose of this exercise? First of all, you are further familiarizing yourself with your fabric. But most importantly, you are making your fabric accessible. Small pieces can be held up to your pattern to try out. Large folded rectangles of fabric are bulky and awkward to use. I’ve seen students time-after-time unfold one piece of fabric, turn it around and around trying to find the “right spot,'” grab scissors and cut something out. Then they place it somewhere on their drawing, squint a little, take it off, unfold another piece of fabric and start the sequence all over again. It doesn’t take long to get frustrated and wonder why you ever wanted to try this technique in the first place.
I don’t know why it took me so long to make this step homework before arriving to class. Maybe because it’s hard to understand the time-saving beauty of having a palette in place before beginning the collage. It’s not that you’ll know what’s going to work, that’s not the point. You’ll never know what’s going to work until you start putting piece next to piece next to piece. How one fabric looks will be influenced by the one placed next to it, and so on, and you’ll never get very far in the process until you can see how a whole bunch of pieces are looking next to each other. If you think too hard about every… single… piece, it takes longer than it needs to. A pre-cut palette invites you to pick and place and rearrange to your heart’s content.
Read this post about creating a fabric palette and hopefully you’ll start to understand what I’m saying. In addition to a quick-start on the collage itself, a palette is a good test to see if you have a nice range of values from light to dark to work with. Maybe you notice there’s a value or color gap in in your fabrics as you set up your palette, so it’s another way to help figure out what fabrics to choose!
Make the palette, then be ready to collage.
We originally put these posts together as a 3-part New Year’s Challenge. This summer, I’m challenging myself to finish one collage quilt and begin another. Want to join me either way? Well, this has been Part One of a 3-week challenge to start a project—or to get back to work on an unfinished collage (I suggest to make a palette before you go any farther). Let me know in the comments below if there are any takers!
See you next week with Part Two: Steps 5-8. You should have enough ideas to work on until then. 😉
Hi Susan, thanks for sharing this information. I’m still a bit puzzled as to what to put in my pre cut palette.
Should I put some colour related fabrics of varying tones, or contrasting? Or Both?
Also are there hints for how to turn a photo or picture into a pattern, or do you just trace over to simplify into the workable shapes?
Many thanks, Kaylee ????
Hi Kaylee, this week’s post summarizes the full information you’ll access by referring to the four linked posts. We put the links into the blue “headlines,” but I wasn’t sure if that would be clear to readers. I think I’ll go back now and add additional links, just in case. I think your questions will be answered in those four individual posts, but let me know if you still have questions after reading them!
Have wanted to do this for years.
I’m thinking seriously of taking you up on this. I have to find a photo…..choose a photo.
Hey Theresa! Did you find a photo? Gonna give it a shot? 🙂
Thinking yes. I have always wanted to paint the white pelicans that are here briefly in the early summer. Have not done that yet,as life gets in the way of even the best laid plans. I found a photo…I think it has enough distinguishable shapes, and would make a wonderful lesson in working with white, my all time favorite color. Should I post picture here?
Hi Theresa! I guess I need to clarify that this is an “unofficial” summer challenge! I have my own work to get back to and am taking time off from teaching. However, sometimes it’s just nice to know others are out there getting back to their own projects too, like we’re working together, but on our own. So there’s no feedback involved, but it’s good you found a photo, and in the “pattern link” of last week’s post, you’ll find the info for translating your photo into a drawing, and then choosing fabric, etc….
That’s perfect! I have several things that are coming to a close, so the unofficial part of this gives me flexibility to complete other items! ????
Been reading your blog and eyeing your quilts for a couple weeks now, so this challenge is good incentive to dive in and try the process myself. Looking forward to it!
Hi Bertie! Did you dive in? 😉
Hi Susan,
My name is Sue, and I have now bought both of your books, the two books by Anne Lamont, and Natalie Goldberg, bought tons of all kinds of fabric, the pelican scissors, etc. literally, you named it in your videos, I have it!!! This question might sound really foolish, but I don’t have scraps from other projects, I’m starting with just the whole pieces of fabric. My question is, do you just start cutting pieces to fit your space, do you cut squares of different sizes, rectangles, etc.? I’ve never seen you start with just a 1/4 yd of something. Just scraps from your stash. I would love to know, I’m dying to get started.
Thank you so much
My best,
Sue Palmer
Palm Desert, California
To learn the process I suggest you consider becoming a member of the Fabric Collage Master Class: https://susancarlson.com/about-the-fabric-collage-online-master-class/
To read about cutting down fabrics from your whole-cloth fabrics such as fat quarters, read this post about making a fabric collage palette: https://susancarlson.com/2020/10/31/create-a-palette-for-fabric-collage/
Hi again Sue,
I’d like to add to my previous comment… there’s another option that may be that beginning step you’re looking for, my Spiral eWorkshop. It’s set up as a start-to-finish project to familiarize you with your fabric, how to cut it, how to glue it, etc., all the way to the end binding, and it’s only $25. If you then wish to delve further into fabric collage (which it sounds like you might!), you could step into the Fabric Collage Master Class. The Spiral is included as a beginning exercise in the Master Class, so if you’ve already purchased the Spiral eWorkshop, you get your $25 back as credit towards the Master Class.
But definitely follow the blog post link for creating a fabric collage palette, it should answer your how-to-cut questions. Thanks for your support and enthusiasm!