
Joanne Schwartz has been a huge supporter of mine for years now. She’s traveled from California to attend a couple of my Maine quilt retreats, and she’s been a joy to have in class each time. She’s such an open and willing student and is so cheerful with a wry sense of humor.
This year it seemed that I wouldn’t have the pleasure of seeing her (or any students). To my surprise, since summer, I’ve been meeting Joanne weekly—Via Zoom, of course—as I give her guidance on the fabric collage quilts she’s creating.
Fabric Collage Coaching is something I’d been considering for a while, but when the pandemic hit I knew it was finally time to develop online tools for teaching fabric collage. Coaching via Zoom is one of the simplest and most effective methods I’ve found so far.
The quilt of Joanne’s friend’s dog “Catch” is a great case study. With a couple other fabric collage quilts on the sidelines, “Catch” is the third one she’s completed, taking her about six weeks from start to finish.
Sometimes you just have to find the right subject to inspire you to work through to completion. With this very good girl, Catch, I think Joanne found her muse. Maybe she was also motivated by creating the portrait as a gift to her friend, Mimi, who raises dogs for canine companion training (Canine Companions for Independence). Catch, by the way, is also the local AAA San Jose Giants baseball team’s mascot (this fact becomes important later on!).
In any case, Joanne and I had six meetings, weekly on Tuesdays at 3:00 p.m. during the time she was working on Catch. Each session was recorded for her to review later, so she didn’t have to take copious notes or try to remember what I’d said. Zoom’s annotation tools are incredibly useful for giving feedback, allowing me to draw (and color!) right on the screen to highlight areas of concern, point out fabrics or pieces of fabric I think would be useful, or to emphasize the line of the snout or shape of an eye.
Follow along with us as we take it session by session with photos and excerpts of the video recordings. And Joanne, a big thank you for allowing us to share your artistic journey through this beautiful and soulful quilt you’ve created.
Session One: Design and Fabric Choice
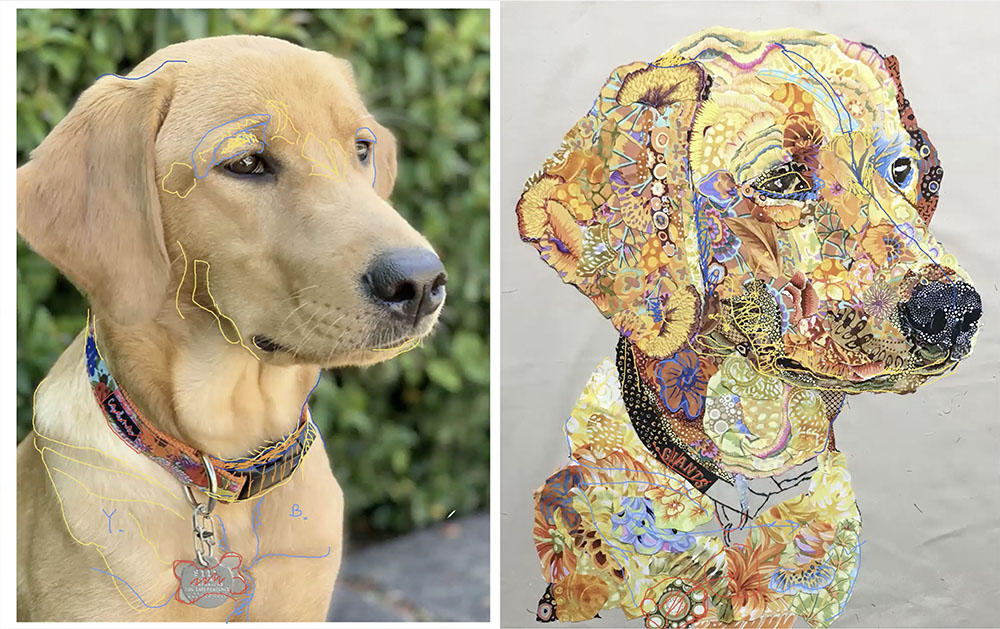
It all starts with an image. In this case Joanne had a great photo to work from—nice light and sharp focus. There’s plenty of variation in value with highlights and shadows. And the pose being three quarter profile prevents the difficulties of foreshortening dealing with a straight-on photo.


Joanne made a design by tracing the photo onto tracing paper. That’s where my advice starts. The drawing tells me whether or not a student understands the form of their subject. Joanne did a great job. I was especially impressed with her drawing of Catch’s nose (who ever really looks at the form of a dog’s nose?). There were just a couple of details I thought she was missing in her drawing. Listen in on and watch our session in the following video as I outline some areas I thought needed more attention.
For best viewing experience, please watch videos at full screen. Since beginning these sessions with Joanne, I have discovered how to make the annotation line wider and what colors show up clearer—I’m learning as well!
I then had a look at her fabrics (below).
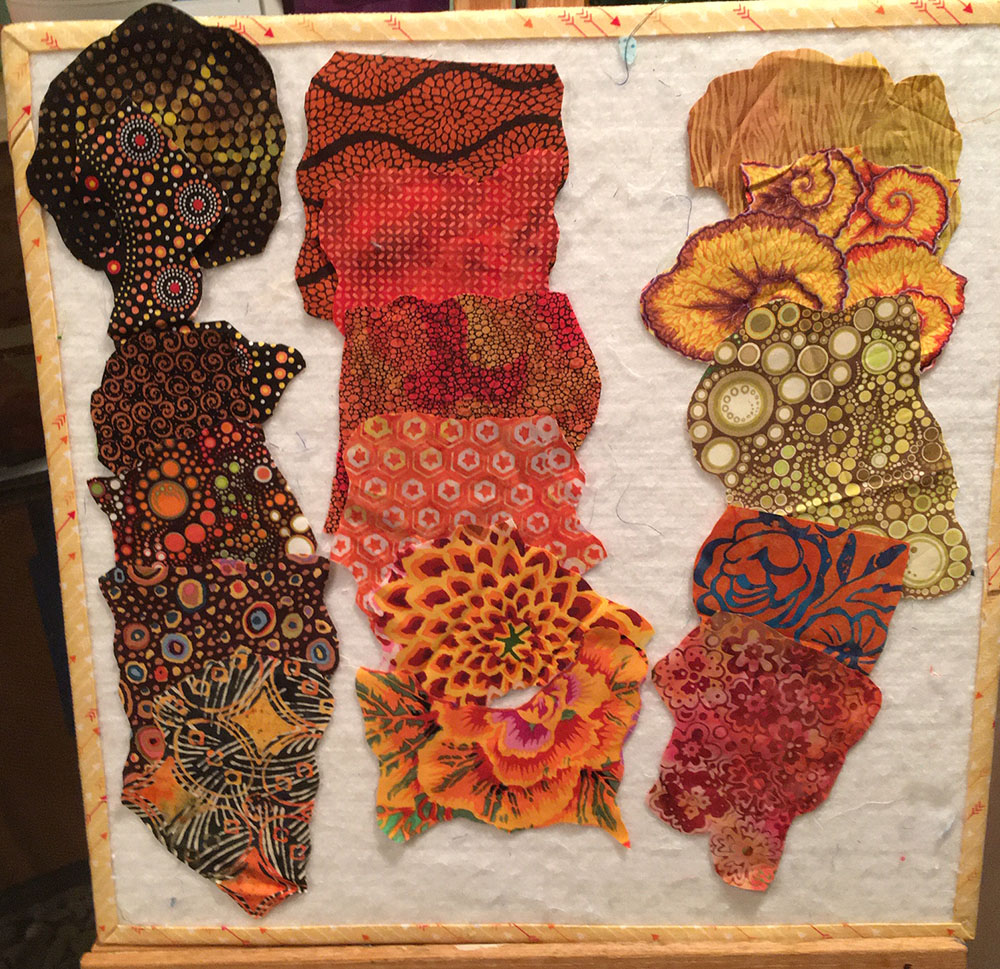
I thought her selections were quite good, though she could use more variety on the light end of the value spectrum. She really didn’t have the fabrics to hit the very lightest highlights. However, in our session I reminded her of the trick that can double the number of fabrics in your arsenal and might help her find those highlight fabrics. (Joanne gets a gold star for creating a palette of fabrics by cutting them out in hand-sized pieces before she began the actual collage.)
In our first session, then, Joanne and I adjusted the fine details in her drawing and refined her ideas about the fabrics she intended to use. This initial discussion, before she’d placed one piece of fabric, set her up to make a good start to the collage itself.
Session Two: Focus on Features
Part of my job as coach is to provide motivation by cheering my students on. When I saw the work Joanne had done after only one week, I had no problem sharing my enthusiasm with her. She had come a long way in a short time.


When I asked her where she wanted to start with feedback, she expressed concern that she had lost the definition between the ear and the rest of Catch’s body.
We then talked about the nose and how to create the split in Catch’s nose (which all dogs have if you look close). While we were in that area I gave her some ideas for creating more definition in the very cramped area under the nose: upper lip, highlight on upper lip, lower lip, and then chin, all in a very small amount of space.
We finished up talking about the shape of the forehead and the shadows under the jaw. You’ll see how Joanne incorporated these suggestions in the next session.
Session Three: Capturing Catch
In our third session Joanne expressed her concern that she needed to make her quilt look more like Catch specifically—that it was looking like a generic dog, not a specific dog. We identified the problem as having to do with her jaw. Compared to an earlier version, the snout looked shorter and less like the snout of a Golden Retriever.
So that was where we started with Joanne’s third session, with work on Catch’s snout and jaw line. Using an intermediate picture of the dog, we identified where she’d gone off track. Below is a side by side comparison of the first three versions—clockwise, starting at left.


In this video we discuss how to correct the errant jawline.
We decided on ways to simplify and clarify the shape of the eye. Then we moved on to the forehead, which is so expressive in golden retrievers. Catch looks like she’s really concentrating and we wanted to capture that.
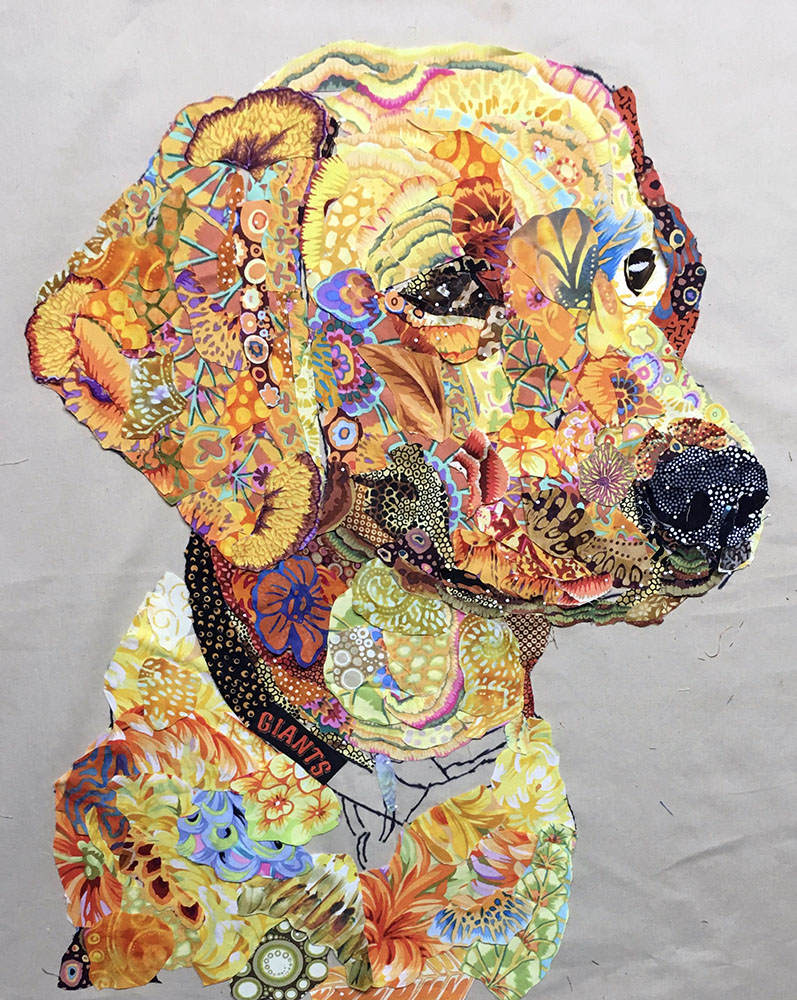
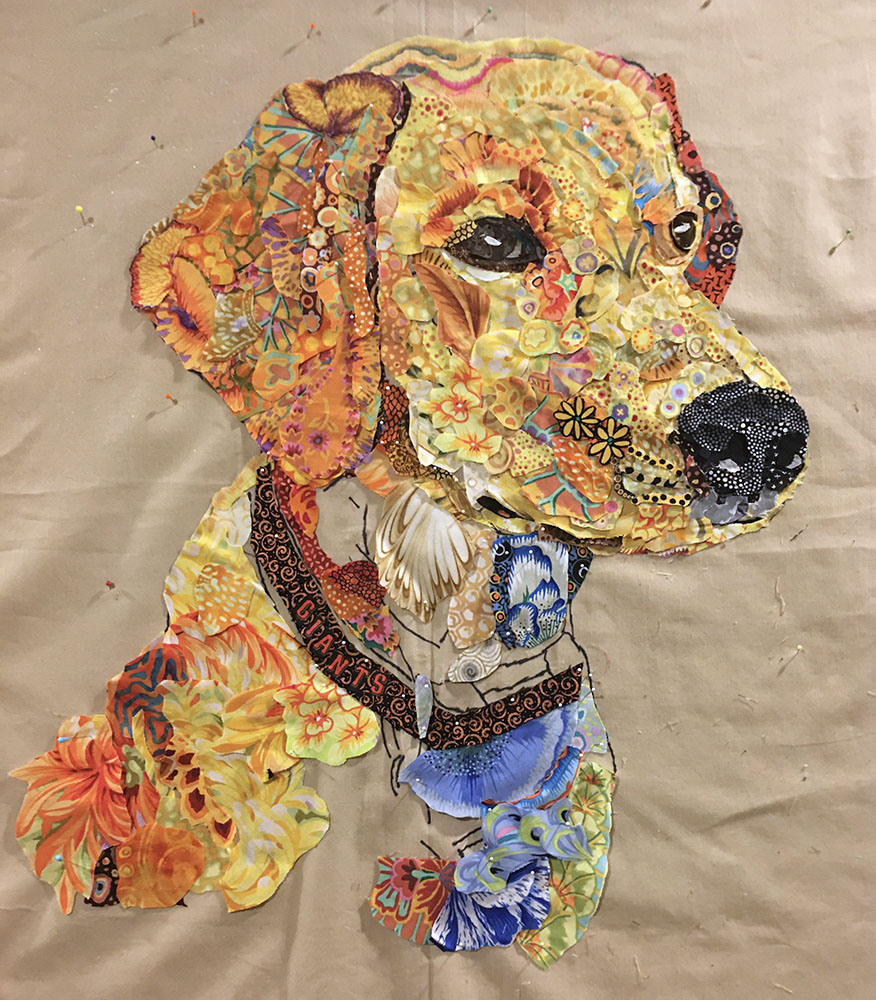
We moved onto the collar. Joanne made the wise decision to remove the buckle altogether and just create a smooth ring. Then we finished up by defining the values in Catch’s body. When we were done with session three (below), this is what my annotations looked like! Without my taped description to review, all those lines could be overwhelming.
Session Four: Great Strides
After a certain point, changes become more and more subtle. A little cut here, and bit of added fabric there individually are small changes, but add them up and they combine to have a big overall effect. In Joanne’s fourth coaching session I broke out the fine tooth comb for Catch’s face. She was so close. From here on out you won’t notice major additions or alterations to the face. Of course there was still the body to do, so after some minor work around the eyes, we spent most of our Zoom time on the body.
Dogs have interesting anatomy. Like the split in their noses, you might not notice the little things that make up a dog’s body until you take a very close as you’re making a collage quilt. In Joanne’s case, she was looking at other photos of Catch and noticed that the two patches of fluff on either side of the dog’s throat were more prominent and lighter in value than appeared in the original photo. Many dogs have this neck fluff but it wasn’t clear to Joanne what she was looking at until she saw it from a different angle. Here’s how we discussed creating those clumps of fur.
Joanne had made some big improvements with her use of value. She really concentrated on seeing where the shadows and highlights were. As with the changes to Catch’s eyes, the changes I suggested were minor. Just a couple places where I thought she could go lighter, like on the far side of the muzzle.
Then we looked at the collar. I gave her some guidance on how to create the collar since she was leaving out the buckle. I also gave her a hint I learned when doing my own dog quilt “Dixie Dingo Dreaming” which involved using a recurring motif I found in Aboriginal Australian fabrics.
In the end, the collar changed completely, but talking about it ahead of time helped guide Joanne’s final solution, which you’ll see in Session Five. The really important thing about the collar was that it help tell Catch’s story of being the Giants’ mascot.
Session Five: Picking Nits
In our next-to-last session for Catch, Joanne and I really got down to picking nits. Catch’s head was so close we just talked a bit about working some more blue into the muzzle trying to define the difference between her upper and lower lip. We spent much of our time talking about the body which was still at an early stage.
It’s common for different parts of a collage to progress at different rates. For example, I almost always start with facial features and move outward from there. So now that the head was so close to being set, it was time for Joanne to concentrate on the body. Since the dog’s fur varies in value, but some areas are similar to other areas, I suggested pulling some of the highlight fabric from the neck to use in the lighter areas below the collar such as her shoulders.
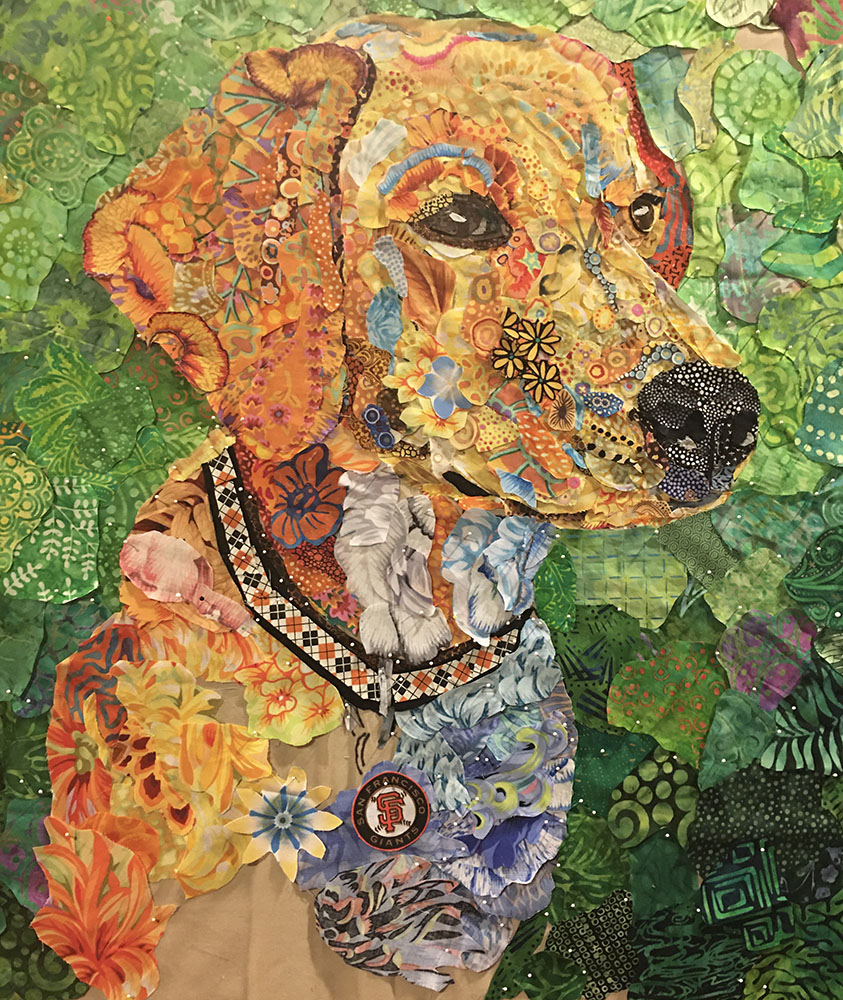
Of course the big change between this version and the previous is the background. The values of the background greens run from dark to light, bottom to top. So we talked about making sure that Catch pops out from the background. If a value of a green fabric is too close to the value of a fabric in the dog, the edge between the two will blend together, losing the nice clear definition of the dog.
Session Six: “I’m kinda done.”
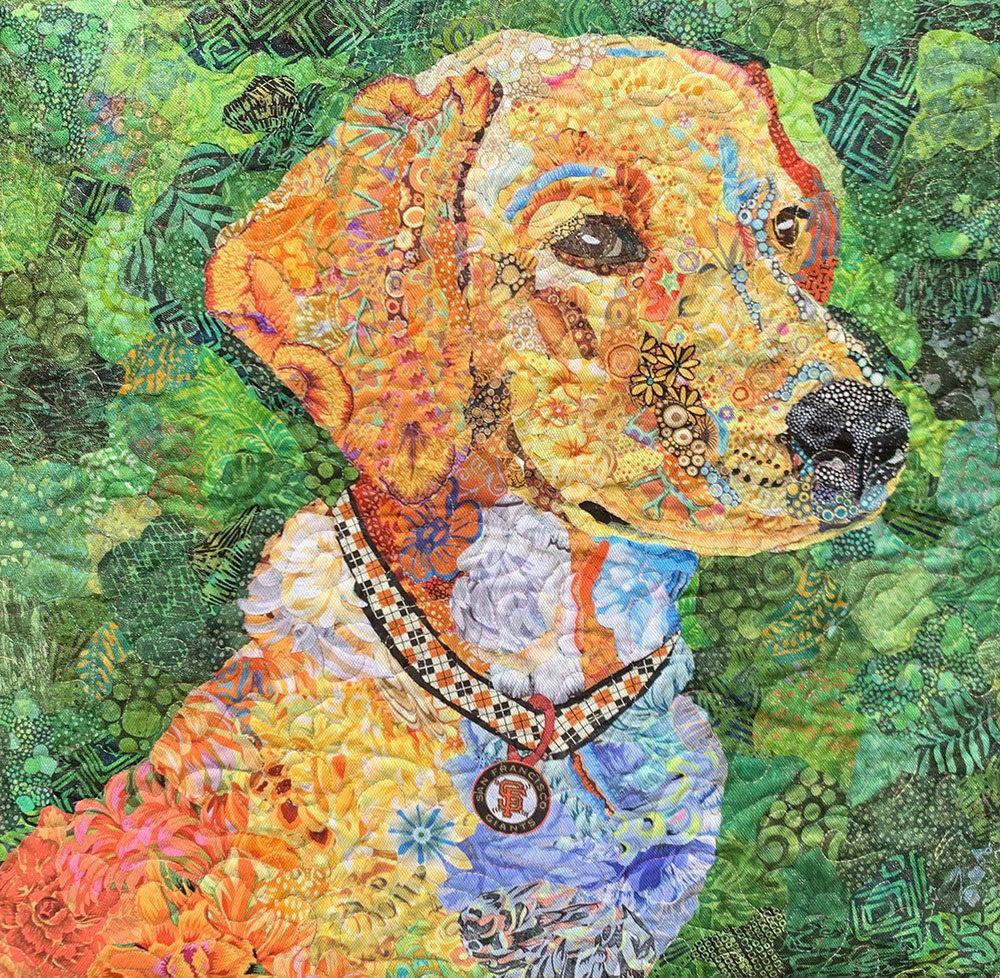
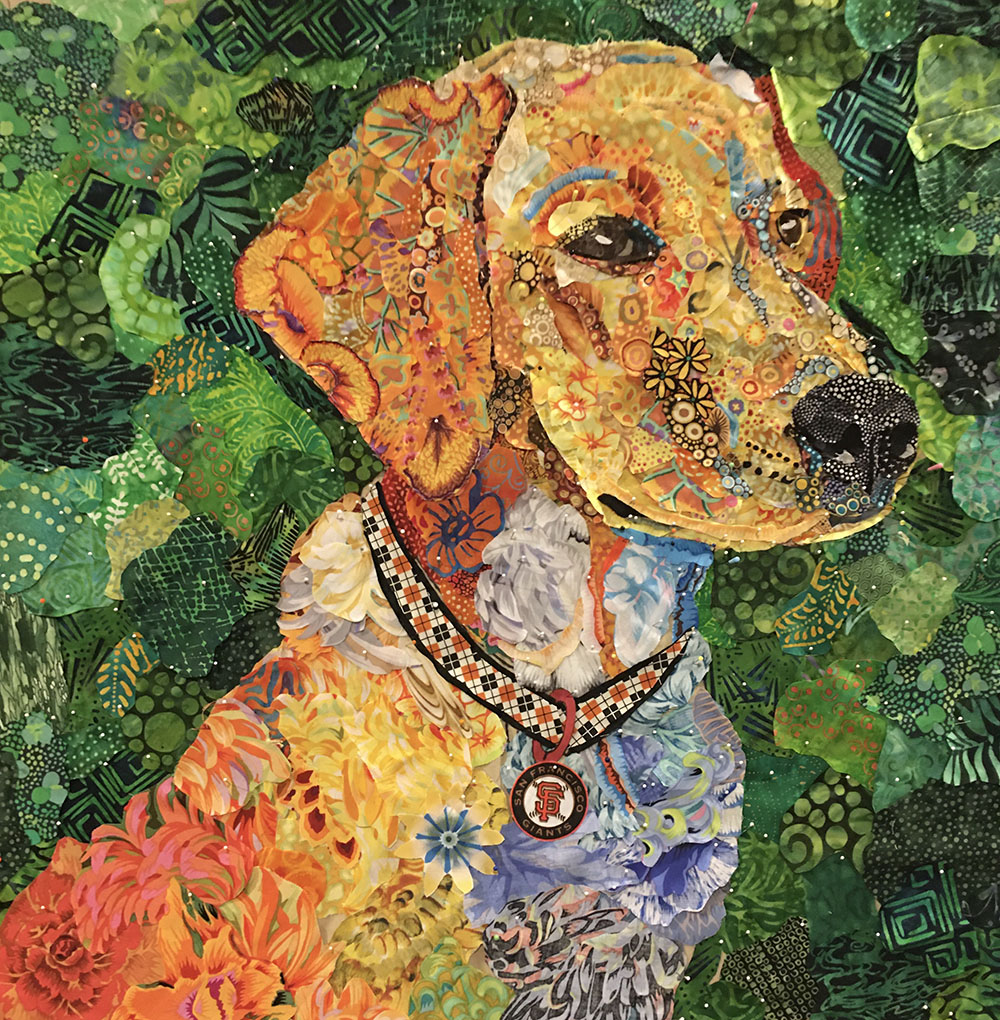
That’s what Joanne said when we met for the final session on Catch. I had to agree. We looked at a smaller version of the image (I took a photo of the screen with my cell phone) and converted the color image to a black and white version—a helpful way see how color values of a collage are working together. We both signed off on Catch’s portrait.
The final verdict came from Joanne’s massage therapist, who said, “It looks just like the dog!” Always a good sign.
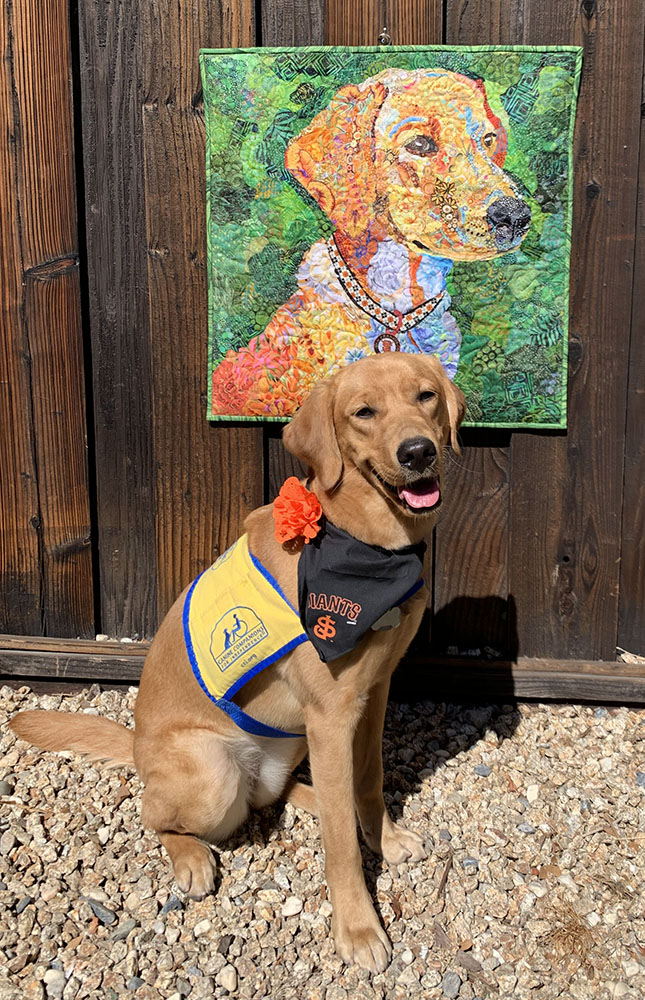
Of course, as you can see above, there’s still pins scattered throughout the collage, so there’s still a bit of gluing for Joanne to complete. And then quilting and binding. But it wasn’t long after this session that Joanne sent me the following image of Catch, the proud mascot, and her portrait. The quilt was already given to her friend, Mimi, who couldn’t possibly be happier than Catch seems.
Good girl, Catch! And great work, Joanne!
Great email! Loved following along. Some good “ reminders”
Great job Joanne!
Absolutely brilliant way of coaching, what a clever idea in these difficult times. Bravo Susan and bravo also to your student who has an excellent understanding of your collage method.
What a fantastic way of teaching! I wonder if this type of individual communication (other than attending regular classes/workshops) would have evolved had we not been pushed into a different way of connecting with others because of the pandemic. Susan, you are amazing; Tom, you are a great partner/collaborator; and Joanne, you nailed the beautiful Catch in the flesh!
Joanne and Susan, thank you, this is so good! The videos are very comprehensive and helpful. Joanne, you did a terrific job.
Thanks Kaye. I appreciate a compliment from you, a master of fabric collage. 🙂
This was a great post to document the stages and how you work. You do a very good job!
What a wonderful way to present this way of teaching on line. J. Great job! Susan, your coaching is so exciting to hear and see which makes me want to get something started to participate in the collage process. As I watch though, I feel so inferior to the students who have been participating. Please don’t quit showing us your methods as I build confidence each time I watch and work on some of my collages. Hopefully I will join your coaching at some point in time. Thank you Susan!