
In my most recent Thursday Night in My Studio Live! presentations, I’ve been creating a spiral-shaped fabric collage quilt as a demonstration of how to think in “drafts” as a way to break down the collage process. I was asked the question by an attendee of why I chose a spiral to use as an example and as a project I thought others might be interested in trying. And that got Tom and I thinking about writing this post—so thanks for the inspiration.
First of all, I love the shape of a spiral. But also, and more importantly for students, creating a spiral is an ideal first subject for those wishing to learn fabric collage.
- They teach the techniques of fabric collage, including choosing fabric, cutting, and gluing in a stress-free way (I don’t think it’s possible to “go wrong” with a spiral).
- They teach the theory of fabric collage including using value to create form, using warm and cool colors, and using the printed pattern of a piece of fabric to blend the edge of one fabric into another.
- They’re an inspirational symbol of new beginnings and rebirth.
- They’re pretty.
Getting Your Exercise
Despite these very good reasons for using this subject as a first fabric collage quilt, I’ve noticed resistance from my students to starting with a spiral exercise before beginning bigger, “more interesting” quilts.
I get it.
I understand because when I was in art school I too resisted my exercises. As a student at the Maryland Institute College of Art I was expected to keep an ongoing sketchbook for certain classes. Invariably, I would be up all night before the sketchbook was due for review, doing all the exercises I’d put off. I’d draw one image. Turn the page, switch media, draw another. Turn the page, switch styles, draw another. Switch hands and redraw one of the previous. And so on—trying to make it look like I had been drawing in my sketchbook all along. Right.
Exercises just don’t seem fun. They seem like make-work or drudgery, but they really are helpful in expanding one’s skills and confidence—age has taught me that. And once you do start an exercise, it’s usually more fun than you think it’d be.
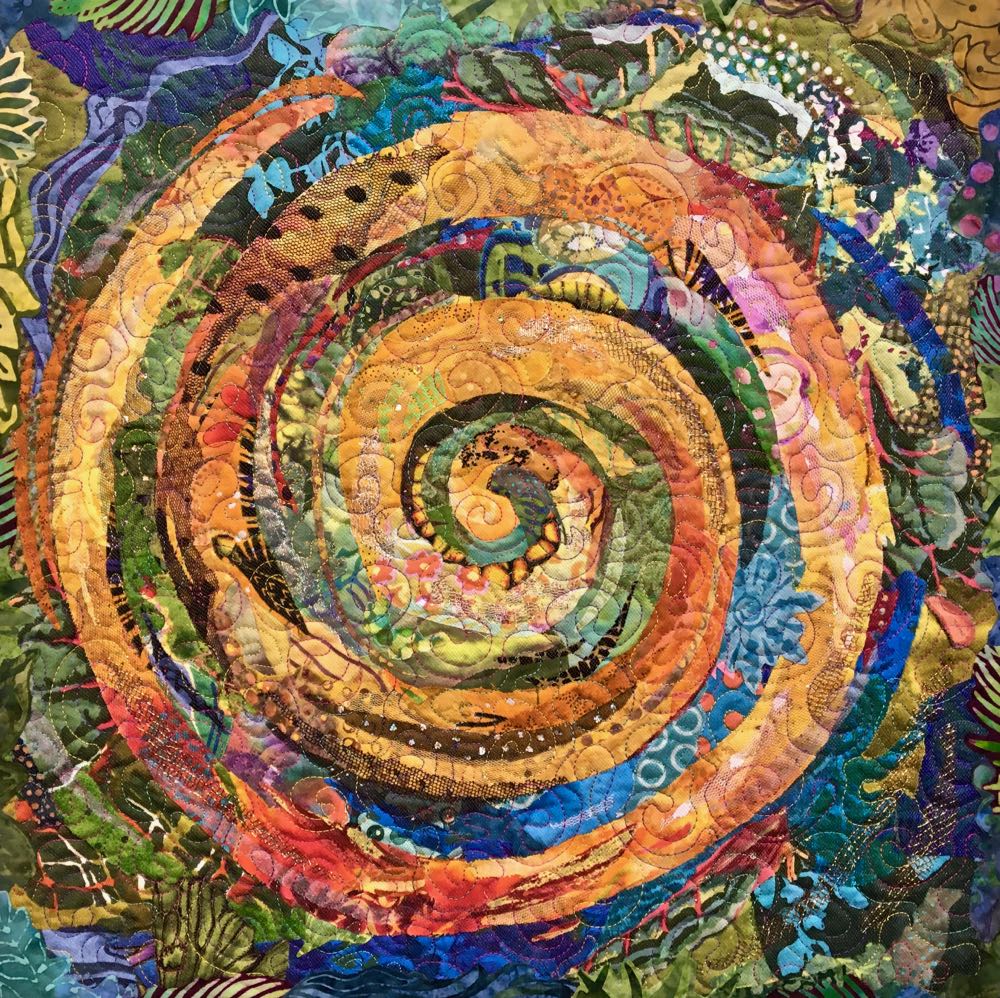
The quilt above and the quilt at the beginning of this blog post were both created during classes while I was demonstrating various techniques. Each of them took more than a year to complete, class by class. They traveled with me on various trips moving a little closer to completion as I demonstrated choosing fabric, cutting, gluing, and even adding extras like bits of glittery sheers. Eventually they got close enough to done that I quilted and bound them. They’re now used as finished quilt samples.
In my Fabric Collage Master Class I’ve included a spiral exercise. Of those who take my advice and try it, none have ever reported that they were sorry they’d done it. Instead they say how much they learned and how glad they are they started there—or they’re happy that they went back to it when they hit a wall with their more complicated subject. It can be a quick and easy project, which is why I made the Spiral eWorkshop available as an inexpensive way to try fabric collage during the pandemic.
My students often have higher expectations for themselves than a “simple” spiral: they want to produce something with more “wow” power, or something more personal to them.
What sometimes happens, however, is that they grow frustrated and overwhelmed trying to both learn the techniques and theory of fabric collage while attempting a more challenging subject.
What the spiral does is it removes the second part of that equation. By keeping the subject simple, students can concentrate on learning the technique. Once they have experience, they can turn around and apply that experience to something more challenging.
It’s human nature to want to skip the exercise part and just jump to the end. And, frankly, many students do manage it. Especially in class where I can coach them, they can go from zero to creating a portrait of their pet or whatever they choose.
However, they might find the process friendlier by starting small and by doing their homework.
The Techniques a Spiral Teaches
Fabric collage can be distilled down to three basic fabric skills: choose fabric, cut, glue.
Choosing Fabric: It all starts here of course. Choosing the right fabrics takes practice. First is the question, “What color, or colors?” Then it’s important to choose fabrics in a wide range of values—lights and darks—because the use of contrasting values is how you create form. Whether it is the shape of your spiral or the shape of a nose, choosing the best fabrics for the process is an important step. For a few posts on choosing fabric for fabric collage, check out the “How-To” category of my blog.
Cutting Fabric: More and more, I’m coming to realize the importance of cutting a palette of chosen fabrics before you even get started with the collage. These are hand-sized shapes that are cut using the print in the fabrics as a guide—not knowing where or even if they’ll work, but at least they are now in a manageable size to maneuver on your pattern.
The cutting exercise I’m thinking about, is how you cut the edge of your fabric shape to best blend with the piece of fabric that will be next to it. Getting this sort of practice while working on a spiral is sooo much easier than when trying to make color gradations on your beloved kitty cat’s head.
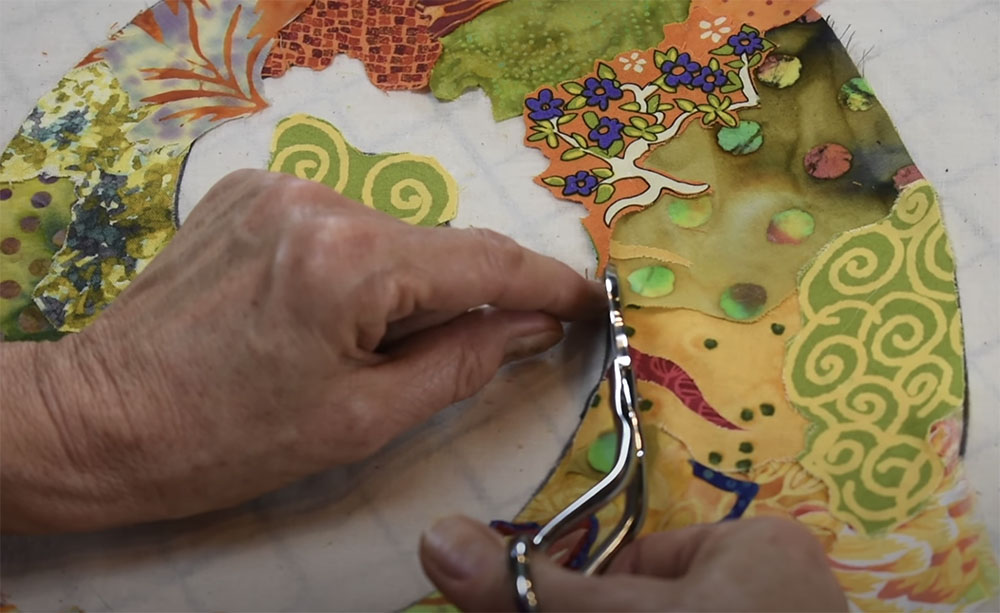
And then there’s those funny looking scissors I like so much to use—they take a little practice too. In addition to cutting out your initial fabric shapes, they’re quite handy in cutting to the outline of the shape you’ve drawn onto your foundation fabric—which may be harder than it sounds. In class, when a student is struggling with something like a giraffe’s head for instance, I’ll often peel up the fabric pieces they placed and show them that the line they thought they were cutting to really exists a half inch further in. Why not get the practice of following the design line on a spiral when it isn’t quite as critical? An eighth of an inch either way won’t make a difference on your spiral. But if you’re off an eighth of an inch on the nose of your grandchild, you may notice that something is not quite right, but you just can’t figure out what it is.

Gluing Fabric: Control of the amount and placement of glue is a good skill to have with this technique. Too much glue could add extra bulk to the collage. It’s a possible explanation why someone occasionally gets in trouble with machine needles breaking when quilting their collage. More common is that too much glue could bleed through your fabric and leave a mark. All you need is a dab, or a smear. If it comes out in a blob, I’ll reduce the glue to a smear with my finger, a thin dab of glue will hold the fabric in place just fine. Placement of the glue toward the center of the fabric shape is just as important for ease of learning the technique. Since this is a layering process (not a butting-edges-together process), keeping the edges of your fabric pieces free of glue until you’re ready to quilt is quite helpful. Very often you will want to slip another fabric piece under the edge of the one you just glued down. A dab in the center of each is enough for now. When you’re ready to quilt, you can go back and glue loose edges, if needed.
The Theory a Spiral Teaches
Dark and Light: Since light values tend to come visually forward and dark values recede, you can use this theory to give the spiral form. This use of dark and light values is the same idea to create the form of facial features on a portrait, or the form of an old rusty truck, and so on.
Warm and Cool: I often encourage students making a spiral to choose fabrics based on an arbitrary limitation, like using warm (yellow-based) colors for the spiral itself and cool (blue-based) colors for the background—which also forms a spiral. Like light and dark values, warm colors tend to come forward visually while cool colors tend to recede.
Print Patterns in Fabric: The instinct for many beginners is to avoid large and strong prints, thinking they’ll be distracting and difficult to incorporate into a fabric collage. Actually, usually the opposite is true. Solids and “semi-solids” like calicos are the most difficult to blend one into another—think of filling the shapes of a Paint-by-Number kit with the “flatness” of specific paint colors (though I do love the nostalgia of those paintings). Whereas fabrics with larger organic or irregular prints can merge and blend together very nicely. A spiral gives you practice—and thus the confidence—to handle these print patterns and use them to help create movement and contour in future fabric collage subjects.
The Symbolism of Spirals
I first started to take note of spiral designs during a teaching (and family) trip to New Zealand in 2007. The Maori of New Zealand work this symbol, which they call a koru, into much of their art, tattoos, and ornamentation. Our son Sam, has and still wears a spiral greenstone (jade) pendant from NZ. Later, Sam and I worked on a spiral quilt together, which we entitled “Koru.”
Ten-year-old Sam drew the spiral and placed all the fabric bits of this scrap-pieced spiral (he had a very definite plan in his head). After he pinned the pieces where he wanted them, I glued them down. We shared the quilting with me using an overall spiral stipple design, and Sam adding the final touch of a decorative stitch around the purple spiral.
The Maori koru is a design based on the fern. To them it symbolizes rebirth, growth, and renewal. A Maori proverb says: “As one fern frond dies, one is born to take it’s place.” The return of ferns here in Maine each spring, some of the first plants to break through the earth, the curls of their fronds unfurling slowly—is an event we look forward to. We can certainly relate to that symbolism. (We also eat a certain variety of fern fronds, called fiddleheads for their resemblance to the head of a violin. In case you’re wondering, fiddleheads taste much like asparagus.)
I’m sure most of us would start this year over again if we could. Tom, though not a golfer, says we all ought to “take a mulligan” on 2020. Since we can’t start over, creating a spiral might be a soothing way to encourage us to endure and persevere through our challenges.
The Beauty of Spirals
Abstract images are not always the easiest forms of art to connect to. A face, an animal, a landscape—these are images we can make an emotional and intellectual connection to.
But I find the shape of a spiral, despite its abstract nature, to be interesting on several levels.
The shape of the spiral draws us in. If we stare at it long enough it almost begins to spin. (In fact take a look at this interesting optical illusion involving Van Gogh’s “Starry Night,” which has its share of spirals in the sky.)
In art, composition and balance are often used to guide the viewer’s eye through the image. A spiral leads inward, into the heart of the image. And then sometimes it spirals back out. We notice the colors and how they are used to indicate the inward motion. Then maybe we see the patterns in the fabrics and how they enhance or inhibit this motion.
Eventually we may cease to see a spiral. We may see a galaxy, a flower, the aforementioned fern frond, a hurricane, or as Thursday night viewers pointed out a couple days ago, a seahorse(!). And these are all concrete objects we can relate to on an emotional level. We can call on our experience with that object to form a connection.
So that’s why I think spirals are under-appreciated as a subject for fabric collage. You can take them to whatever level you’d like, and they’ll always be a great way to get a little exercise, with your fabrics.
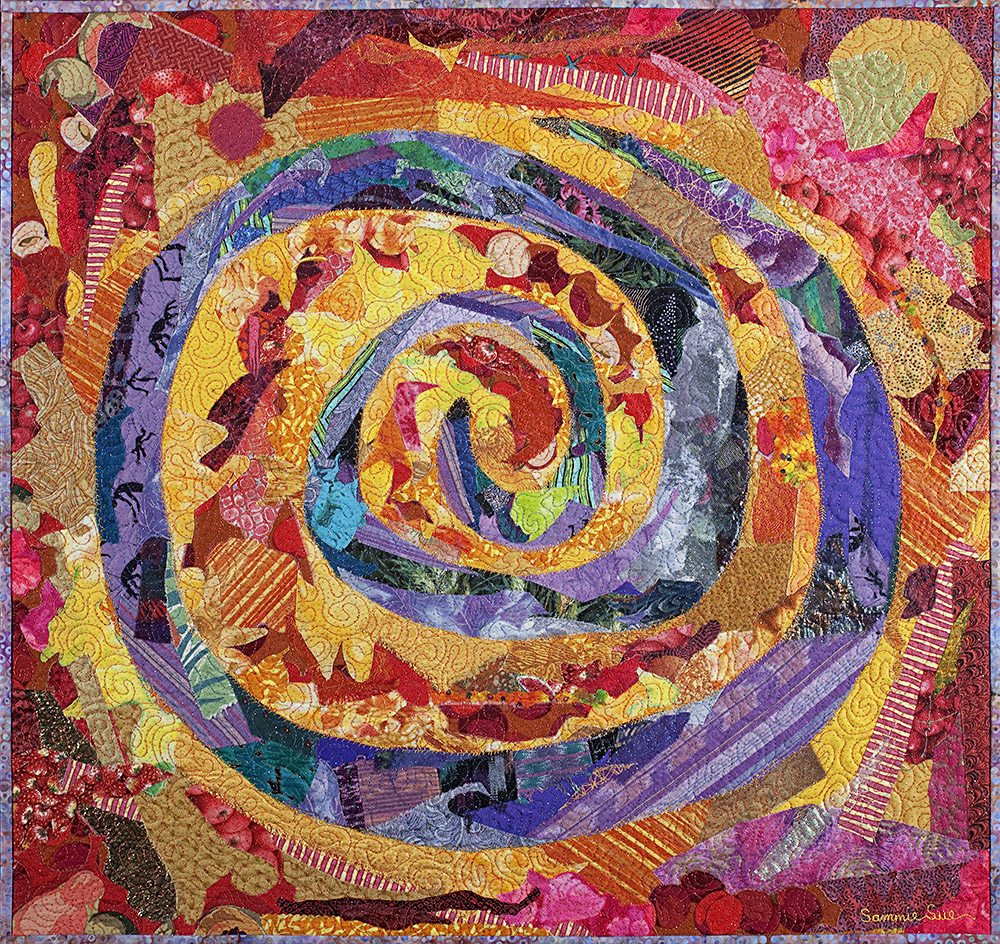
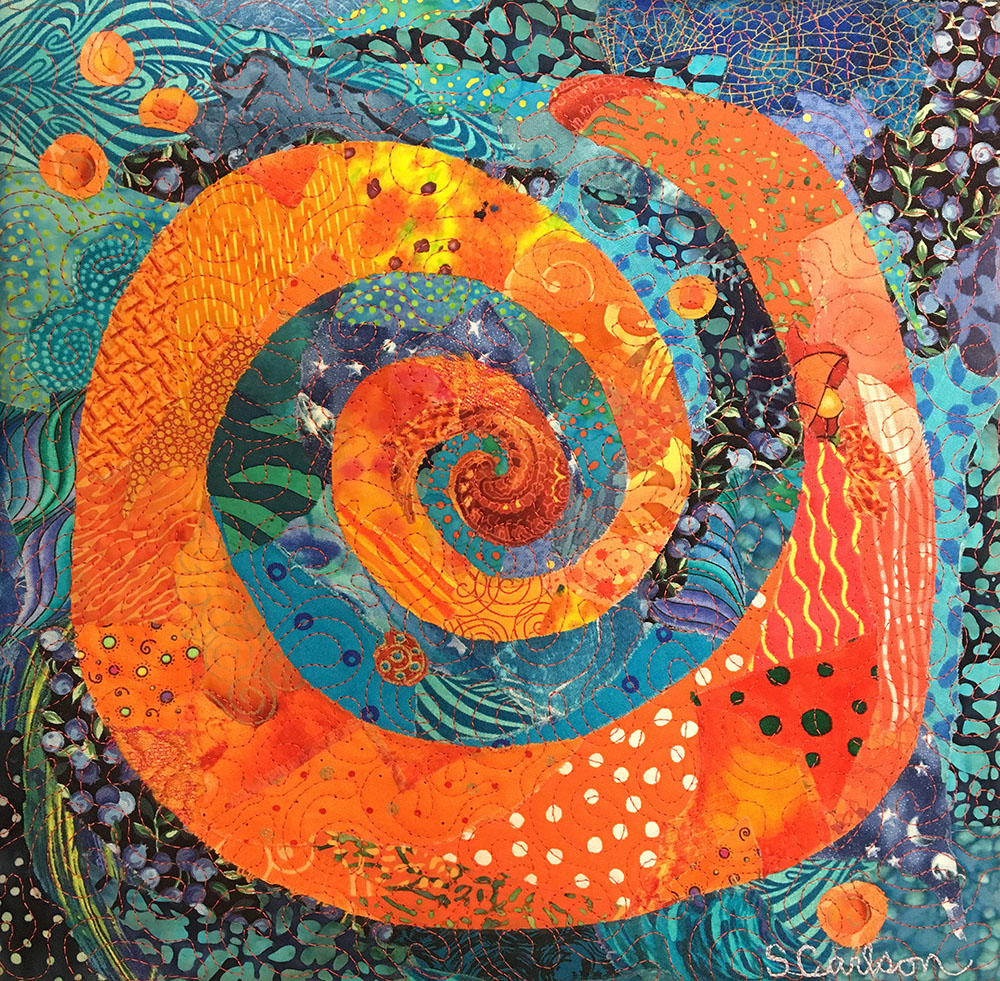
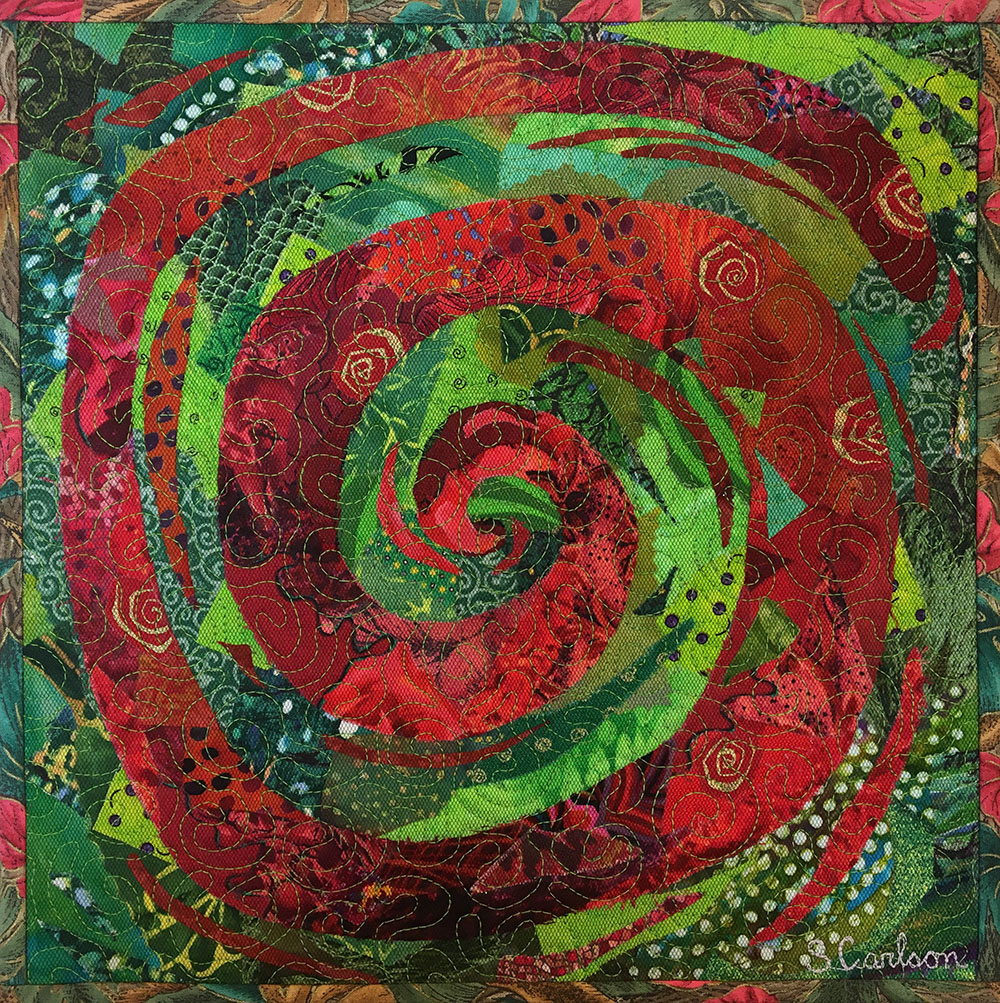
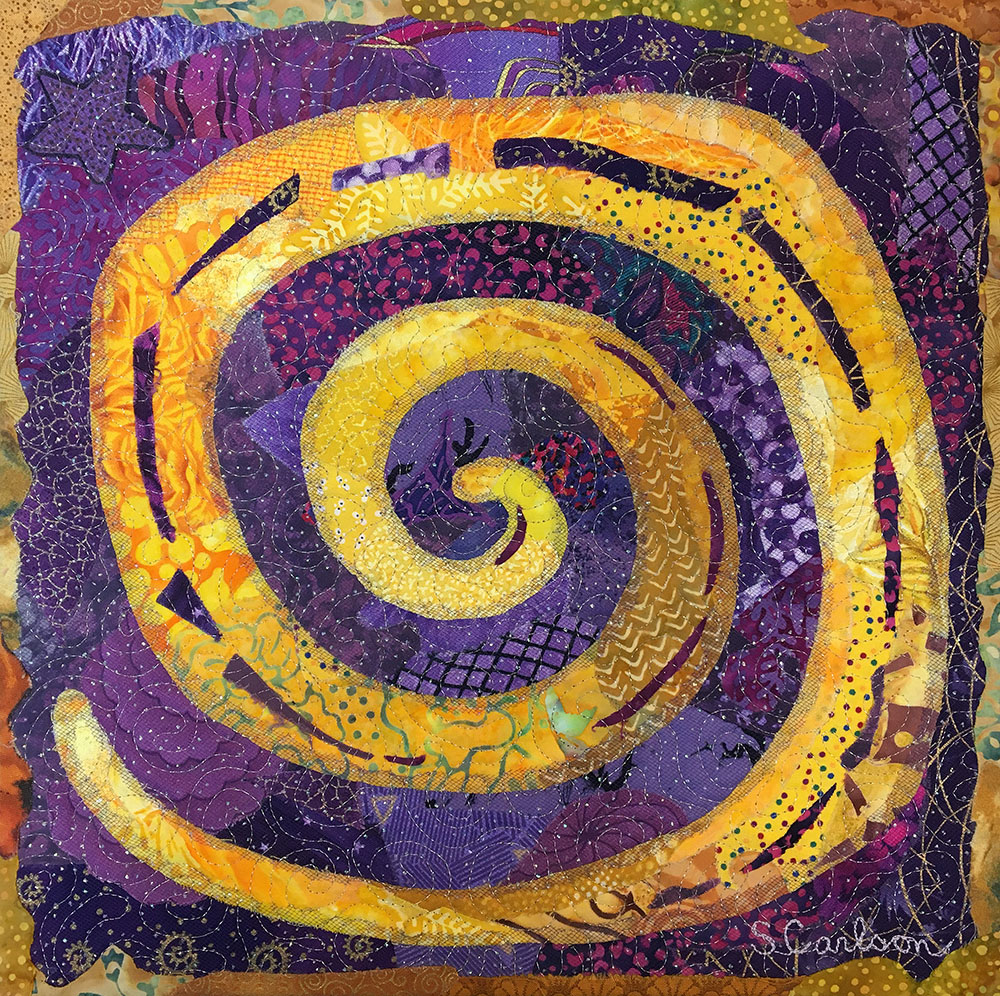
The spirals below are example quilts of using contrasting colors that I created for my book, “Serendipity Quilts.”
I started out with a very difficult piece Four years ago and it took me over a year to complete. I had to walk away so many times, usually out of frustration. I have since made 5 more collage quilts, however, I decided to take your Thursday classes in order to learn some of the finer points, the zoom classes give me a lot more time observing your techniques and really close up demos. The spiral has been so helpful in teaching me some of the small little details that make all the difference in the end. I have grown very fond of the Zoom classes and the fact that I can go back and review all the little tid bits that I might have missed. I so appreciate how generous you and Tom are with your time and professional classes.
It is also just a fun thing to do when you are keeping safe in isolation.
Thank you both for all that you have created for a groupie of the Sue Carlson method of collage.
I know nothing about spiral fabric collage. stocked just to traditional quilting, After seeing your works,I need to step out of my box and experience more. Thank you.
Gorgeous fabric collage spiral designs. I really like mix of patterns and colors. I am not a quilter but love the idea of creating a fabric collage with my own artwork of hand painted fabrics.
Hi Elisabella! (I love your name) Yes,a spiral is a special symbol in every way and medium. If you do create any with your fabrics, please share through my contact info? Sounds intriguing!