: Thursday Night Spirals")
Last month, I presented a series of Thursday Night in My Studio Live! webinars called “Is It Drafty in Here? Fabric Collage Drafts.” I used a spiral design to demonstrate the idea of working in drafts for fabric collage, and encouraged others to follow along by making their own spiral quilt.
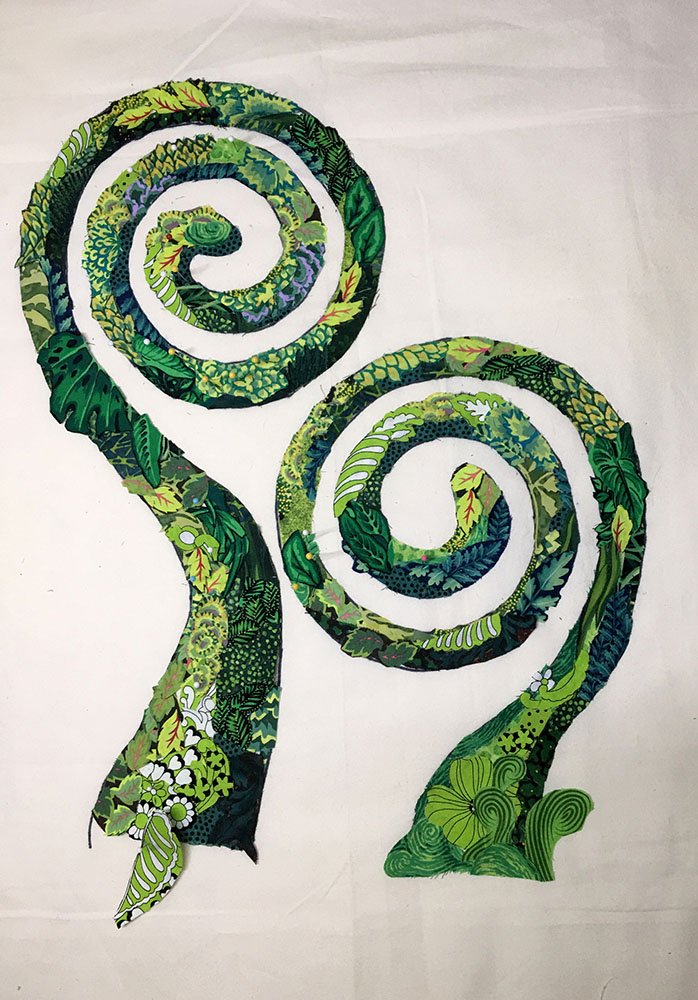
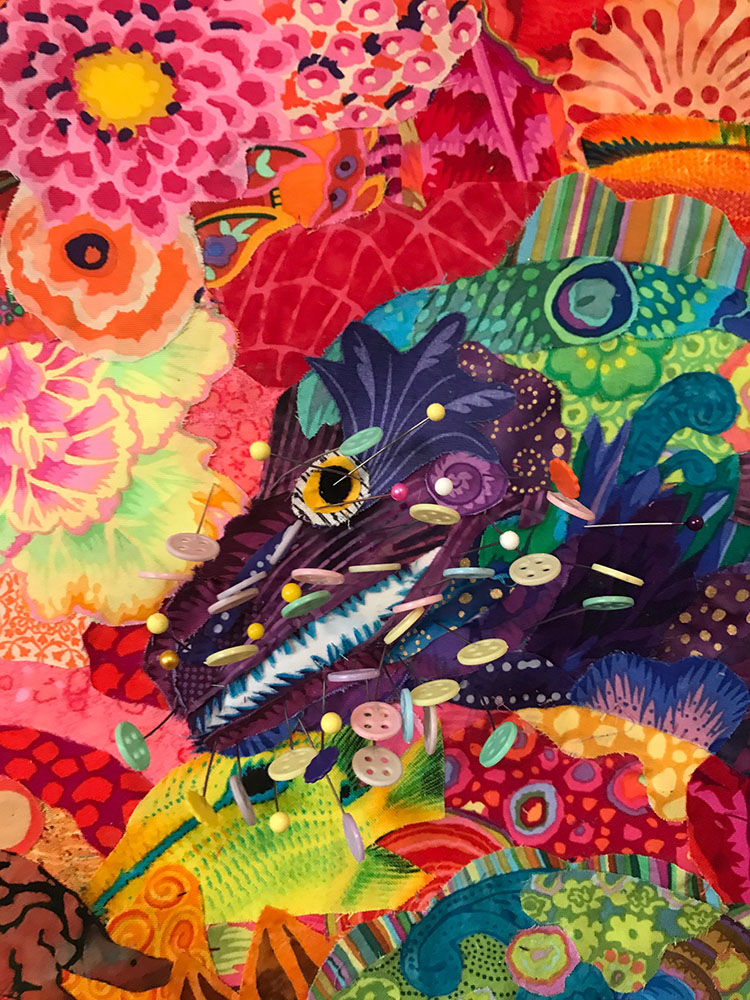
“Spiraling Fiddleheads” (detail above), by Donna LaFleur, is just one of the fantastical submissions from the very attentive attendees of that webinar series—many more spirals follow below—some completed, others at various stages (or drafts) of completion.
As Sandy Schlossberg points out below, I encourage my online students to start with a spiral. It teaches the various steps of the fabric collage process, while keeping the subject simple enough to ensure success in learning the basics.
In other words, low risk, high reward.
I think you’ll agree that the combinations of colors and patterns in these student works make you appreciate how beautiful the simple spiral can be.
Since this class was about working in drafts, I invited my students to send in their spirals at whatever draft they were on. So you’ll see that some are still in the first draft while others are fully complete. I think you’ll find it interesting to see how these quilts progressed.
If you feel inspired to try your own spiral here are a few resources for you:
• The Susan Carlson Fabric Collage: Spiral eWorkshop is available here for $25.
• Recordings of the “Is It Drafty in Here? Fabric Collage Drafts” for $7 each at my website www.susancarlson.com. Just scroll down to the Thursday Night section.
• My October 10th blog post: The Under-Appreciated Fabric Collage Spiral
* * *
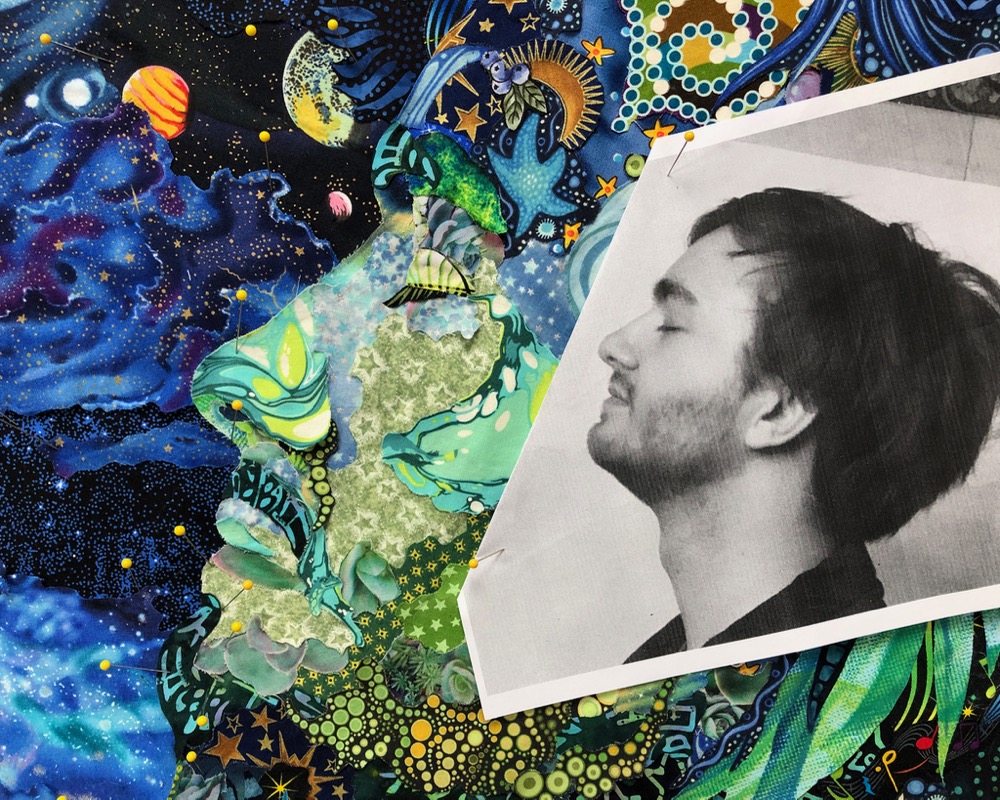
Thursday Night in My Studio Live! presentations resume next week. I’ll be demonstrating how to adapt my Moon Portrait and Sun Portrait patterns with drawings of individualized features of someone you know, an example of which is the portrait of my son, “Blue Moon Sam” (detail below).
Register here:
Celestial Portrait Patterns: Moon, November 12, 7:00 p.m. Eastern Time
Celestial Portrait Patterns: Sun, November 19, 7:00 p.m. Eastern Time
These Celestial Portrait Patterns: Moon and Sun presentations, are an offshoot of the next big project I’m working on, a Module for the Fabric Collage Online Master Class Manual titled, appropriately enough, “Celestial Portraits”—planned release is the beginning of 2021 (which is much closer than we think!). This add-on to the Fabric Collage Master Class will walk users through the steps of creating unique Sun and Moon collage quilt projects.
First Draft: Getting It Down
Donna LaFleur
Status: First Draft
From Donna:
With the spiral being the focus of this “working in drafts” webinar, it was natural for me to want to represent a spiral in the form of fern fiddleheads emerging from the ground. This is my first time using Susan’s fabric collage techniques in an art quilt. The choice of subject made a rather narrow spiral for me to work with, and I had decided to use a light source from the upper left to cast the shadows. After looking at many pictures of fiddleheads, I drew these spirals by hand and enlarged them.
I have a large stash of green patterned fabrics, so was able to choose from yellow-greens to blue-greens. I used very small pieces of fabric due to the limited size of the spiral (one inch wide in some areas). I’m pleased with my progress so far, but have a lot left to do to reach completion. I have decided to enter it in a multi-media art exhibition scheduled for mid Jan. 2021, to help me stay on task through the end of the year.
Julie Andersen
Julie is a fellow Mainer and has taken several in-person classes with me over the years. Now during these online Thursday Night presentations, it’s a pleasure to see her familiar name pop up in the Q&A session. I can “hear” her voice and “see” her smile as I talk to her.
Her spiral reminds me of the fiddlehead ferns that Donna LaFleur used as her inspiration—a touch of warmth spiraling out of the ground after a long and cold Maine winter.
From Julie:
After admiring Susan’s work in her books for years, I was very excited to take the turtle class at Quilt Essentials. I have been fortunate enough to take several other classes with her here in Maine.
At the beginning of the pandemic isolation, I was artistically stuck, spiraled inward. Unfinished projects over the years had created a quilting log jam which I would now have time to work on, but I just didn’t “feel” it. Although you can see this spiral is unfinished, I have a plan and have (for the first time) ordered fabric online. When the dark blue fabric arrives, there is a clear plan to finish the spiral. I’m no longer feel creatively stuck because the online classes with Susan have inspired me.
Second and Third Drafts: Fixing It Up—Adding Details
Karen Johnston
Status: In Progress
From Karen:
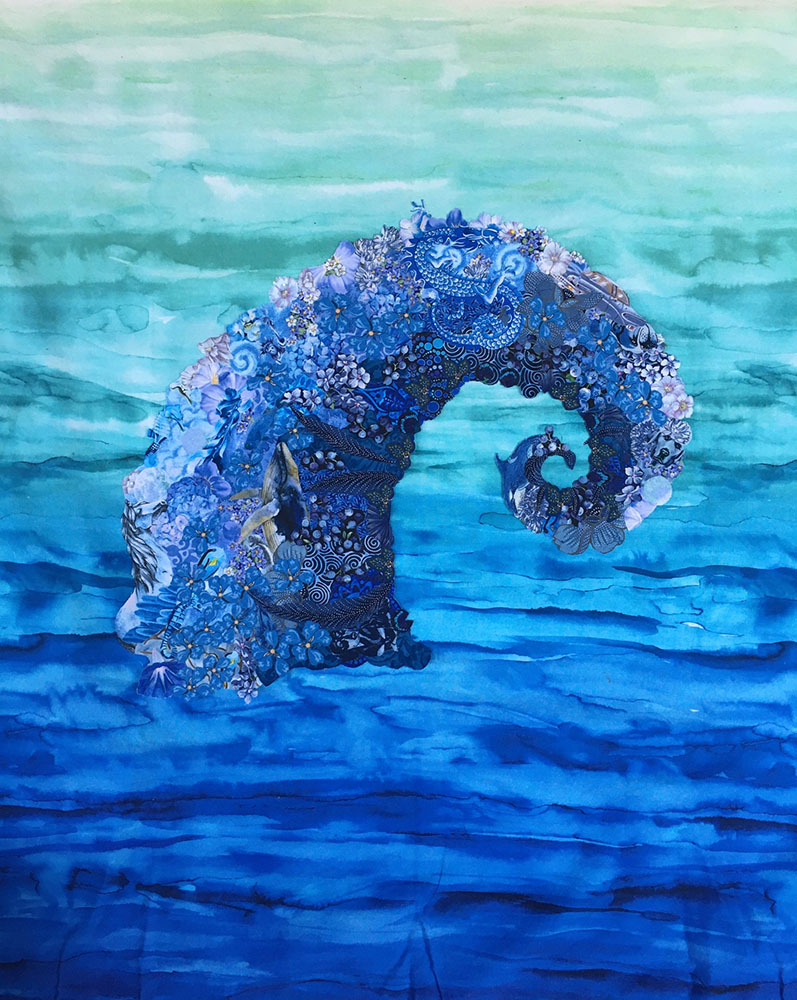
I started with a Fibonacci spiral line. Had a lot of blue fabric, so the color selection seemed obvious. I started to collage from Susan’s books, but really got into it after taking her class at Art Quit Tahoe in 2019.
My kids think this is a wave or an elephant.


Photos: (above left to right)
1. I started with a Fibonacci spiral line and filled it in.
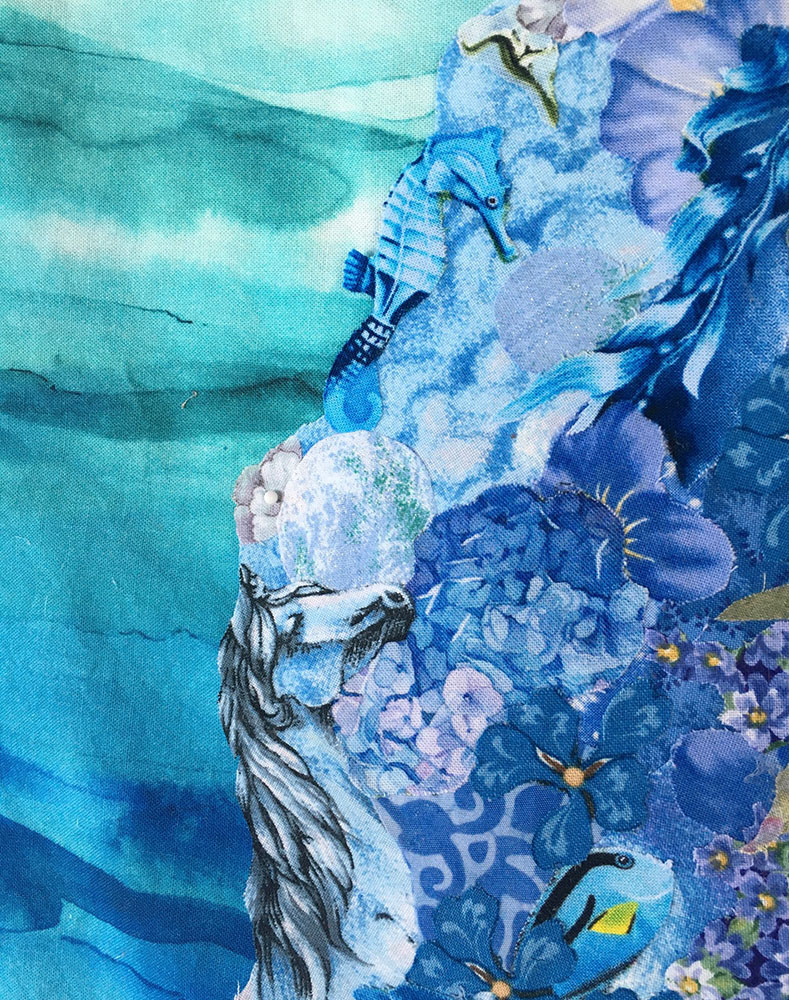
2. Some of my palette and the really messy, scary stage. I’m kind of addicted to novelty fabric and enjoy hiding dogs, dragons and sea life in my collages.


3. Mostly collaged base with some favorite novelty fabric added. (above left to right)
4. Checking for blending problems with values by converting photo to black and white.
5. (below) Auditioning the background- this is my favorite option so far.
Adele Scritchfield
Status: In Progress
From Adele:
I signed up for your Spiral Workshop and started working on this project. Even from the start I was concerned about how I was going to finish it since I’ve only free motion quilted one small piece before. So I signed up to attend the “finishing” session of “Is It Drafty In Here.” Boy am I glad I did, I now know I have different options to consider.
Looking forward to attending future series like the Moon and Sun portraits. Thanks for sharing your talent to a wider audience using Zoom and making learning affordable!
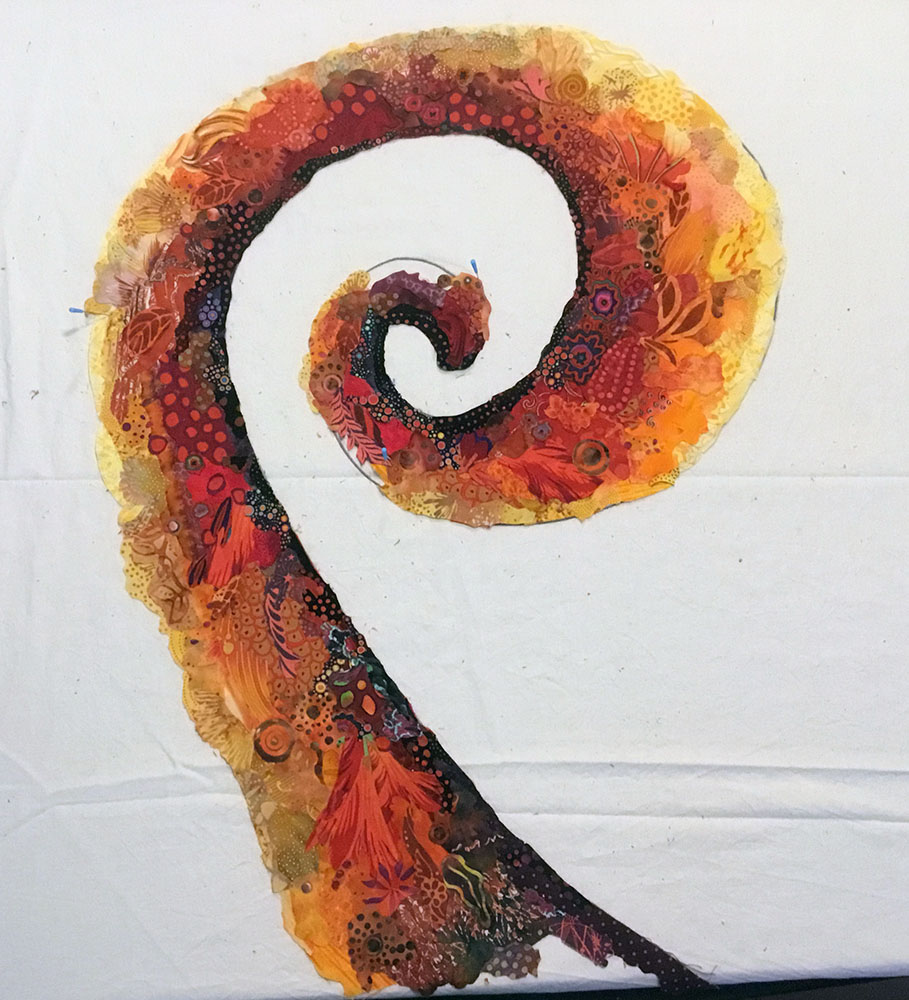
This project is just going into the finishing stage. I still have a lot of areas to work on and add detail to. I started out using a lot of maroon but after taking your drafty session realized it was too tonal. I had to dig in my stash for oranges and purples to make a more analogous scheme and brighten things up. It’s still very tonal but I’m always drawn to that. I’m also partial to flowers and leaves as you can see!


Linda Roberts
Status: In Progress
From Linda:
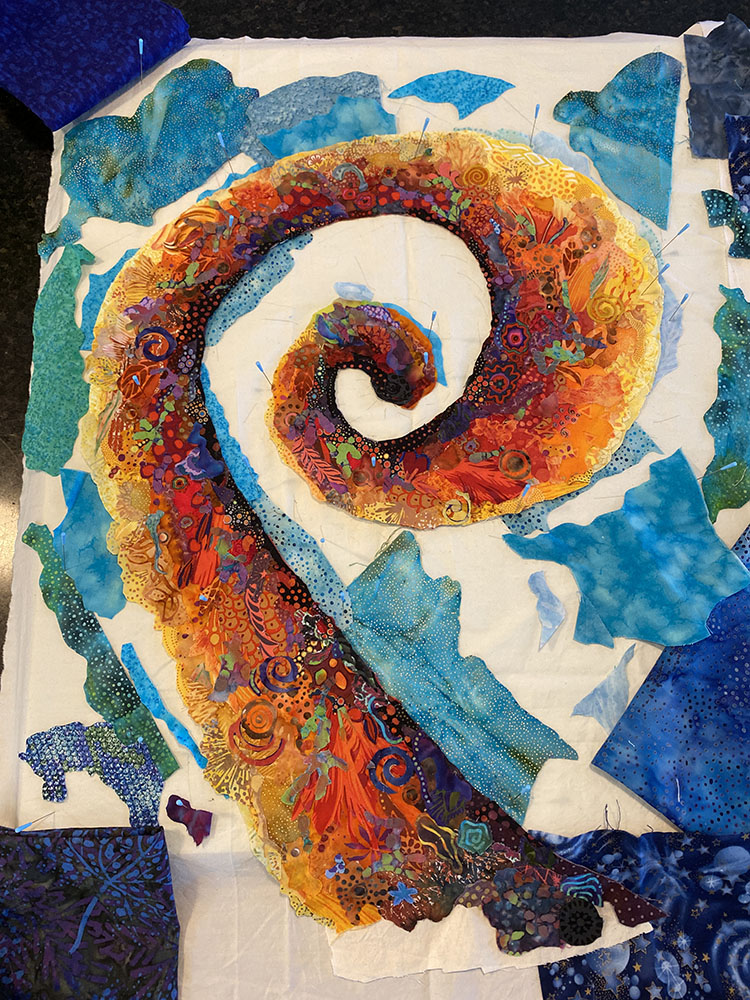
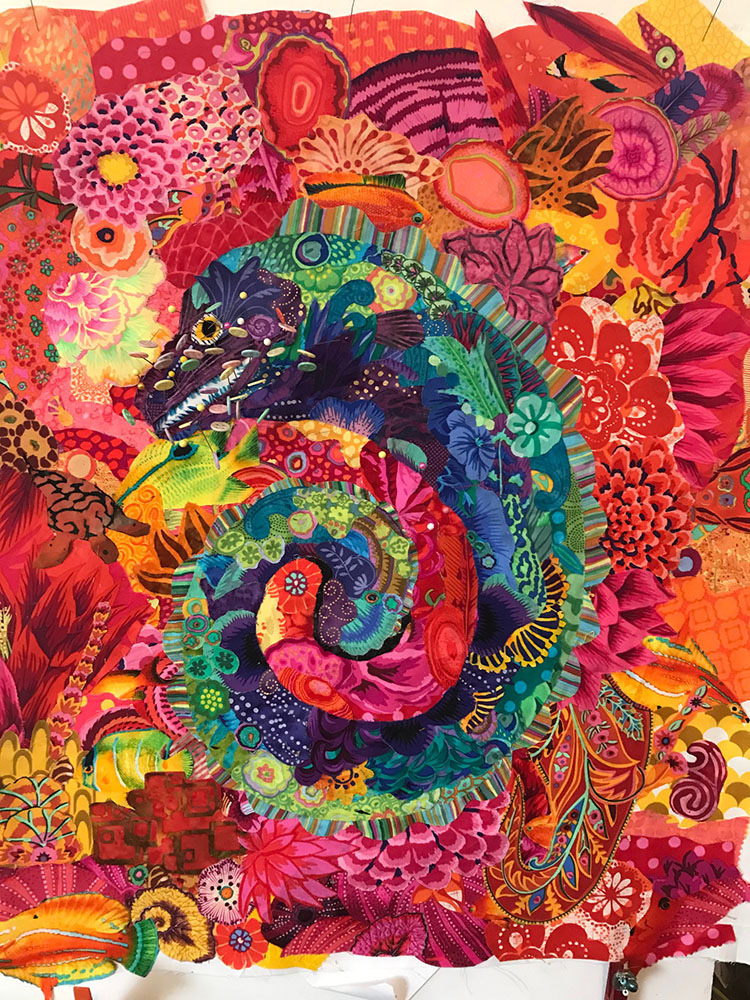
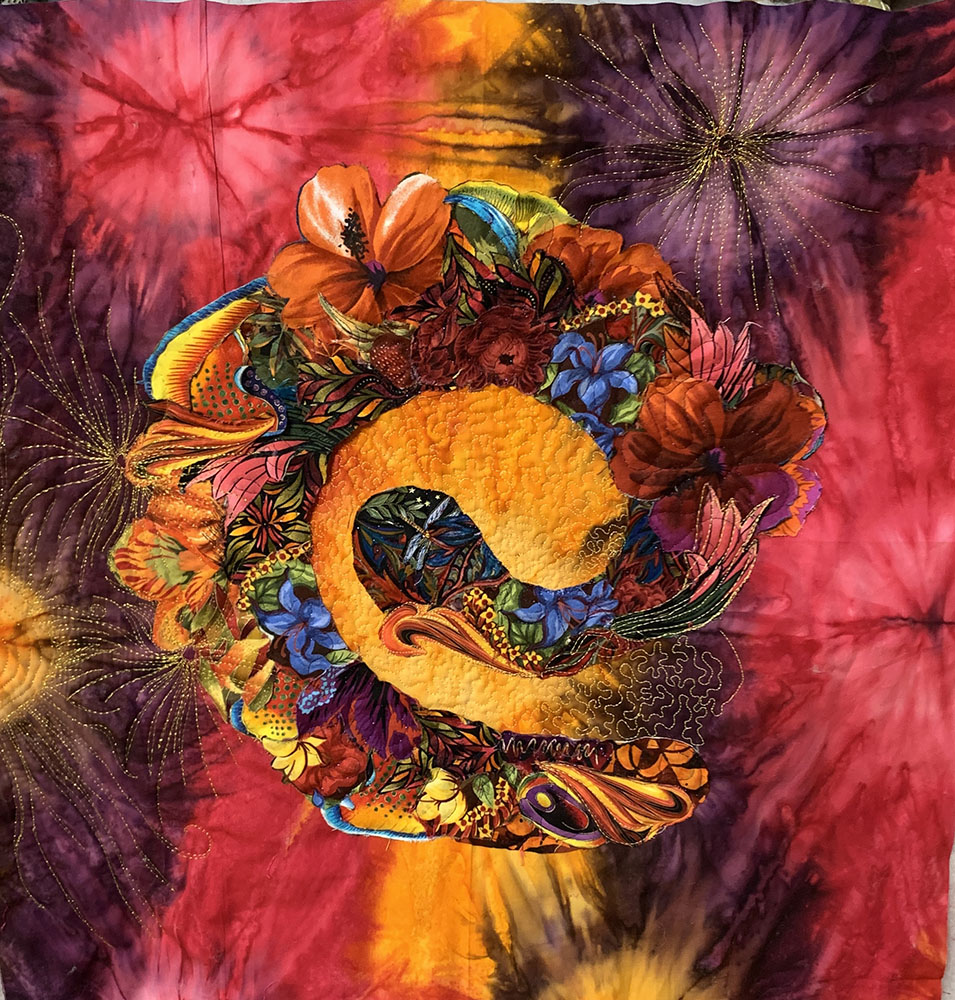
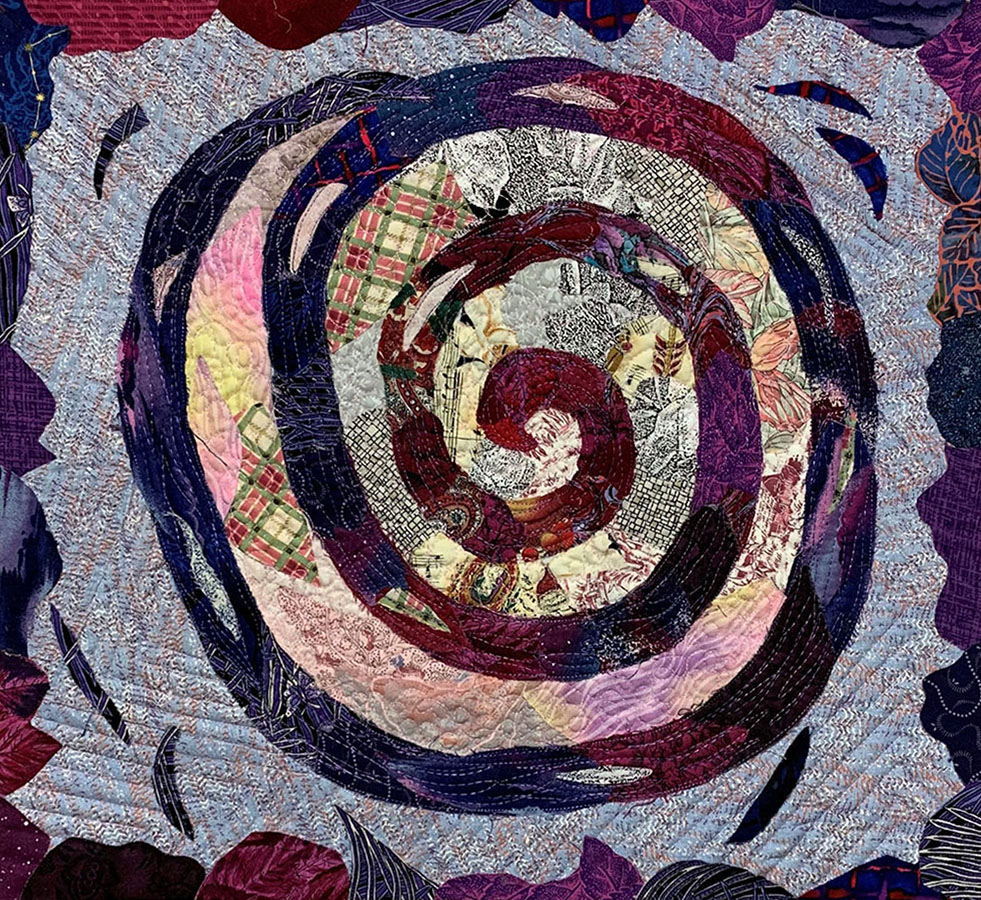
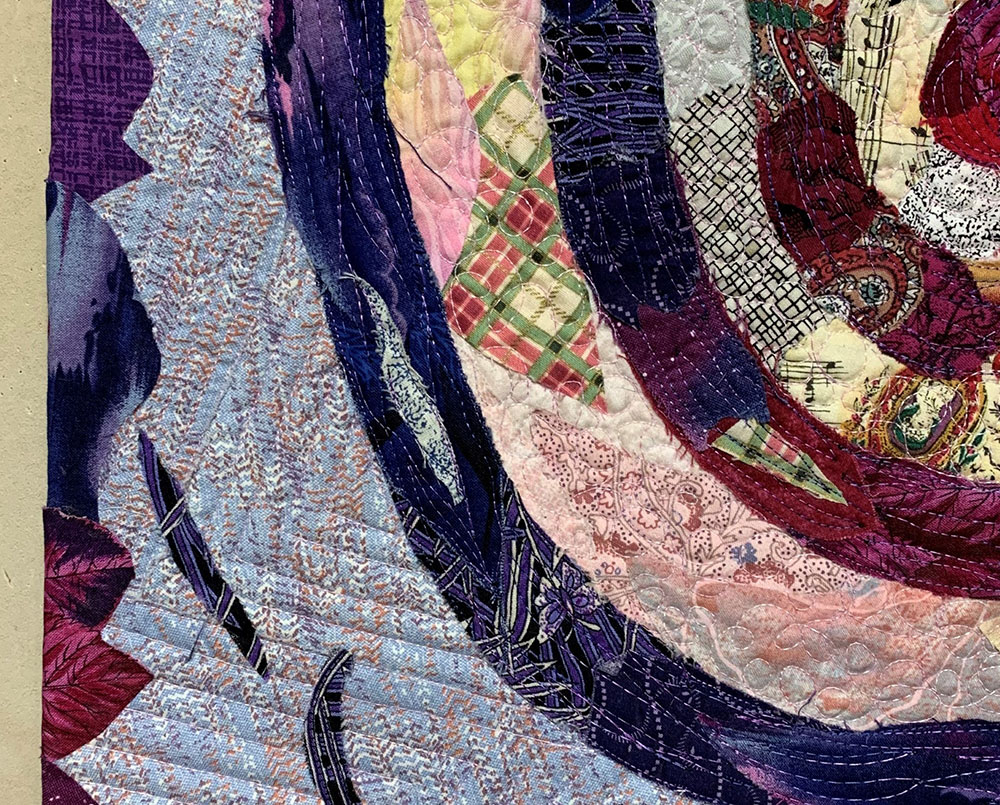
While drawing my spiral… I was immediately overwhelmed with visions of the eels my grandson and I saw while snorkeling on his “graduation” trip to Maui. Turning the spiral into a SpirEel seemed like a fun, creative challenge. After my first draft of the eel, I took apart his snout, mouth and lower jaw as it didn’t appear eel-ish enough!
Once the body was completely pieced, I began the background. My (ambitious) idea was to use dark values, so to create the illusion he was coming out of a deep hole & into the colorful coral reef. The dark values offered no contrast (everything merged into a dark blob) so I scratched that, which left me with two choices: a whole piece orange tone-on-tone (eel would have popped!) or challenge myself to create a pieced, colorful coral reef! As tempted as I was to go with the whole cloth background… I wanted to challenge myself! Let’s piece!!! Viewer advisory – grab your sunglasses … this thing is wild!!
Another whimsical challenge I added… I had previously made my grandson a quilt with bright tropical fish fabric to memorialize our Maui trip! I pulled out the remnants and “hid” several fish throughout the coral reef background…. and, added a turtle. The last background section that needs to be glued is the open mouth! It’s going to take patience and a very steady hand to glue the tiny pieces I used to build the mouth, as well as the teeny teeth… also adding the background without shifting all those little pieces! The background of the open mouth will likely be a tone-on-tone pink.
Susan… can I ask what color tulle you suggest trying with these colors… and, do you suggest one color/piece… or a color for the eel and a different color for the background?
Linda—I loved seeing your SpirEel after you described it in the Thursday Night Q&A—such a very happy looking fellow with his big smile. I’d be tempted to leave the eel as is with no tulle (and a lot of gluing of edges), but I’d also try a golden yellow (or maybe orange or pink?) tulle on the background only. A medium tone should blend and fade the background just a touch and let this guy stand out even more—probably.
Thank you Susan! This was fun—the instruction was amazing—very helpful (you are a great teacher!)… and this exercise was a welcome distraction from the crazies of our world!! I look forward to making a traditional spiral next!


Fourth Draft: Finishing
Maureen Logsdon

Status: Final Draft
From Maureen:
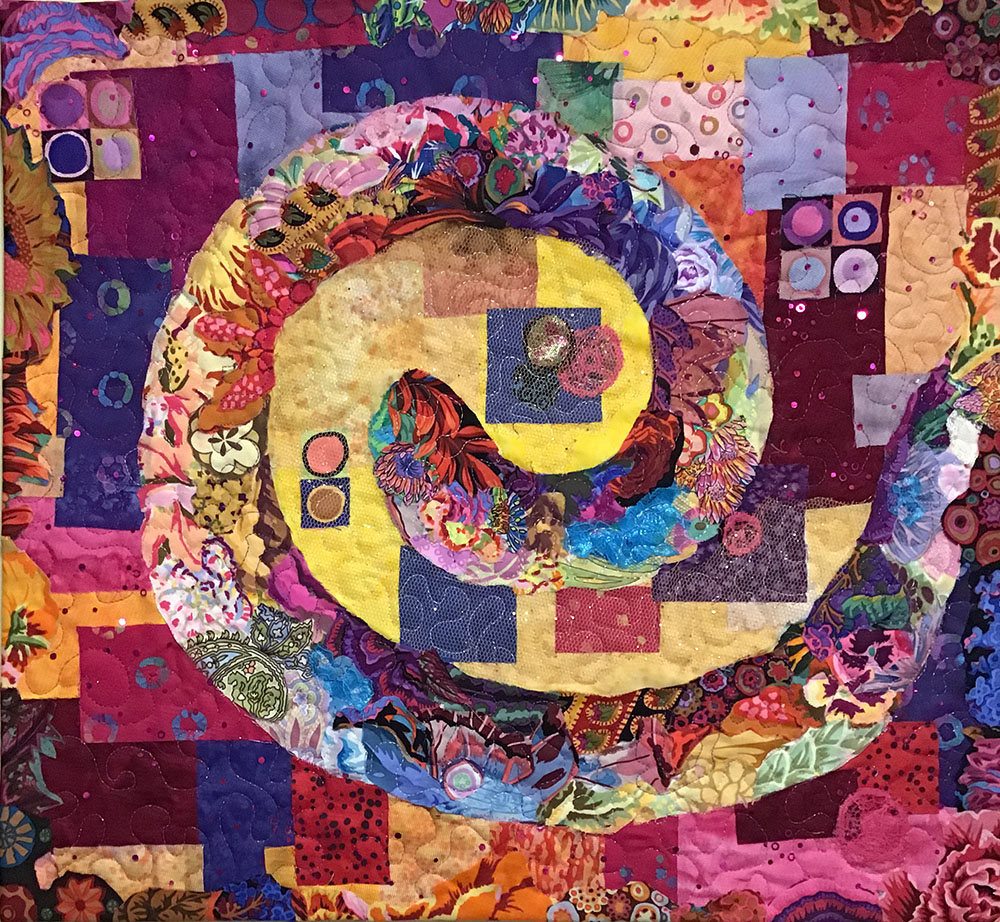
I have always been fascinated by collage quilts, and bought Susan’s book Serendipity Quilts many years ago. I had been following her blog and was super excited when she first announced her pandemic inspired Thursday night collage classes. I shared this with my quilting buddy and long time friend, Linda, and we have both been watching Susan’s Thursday night classes from the beginning. We’re both doing the Spiral collage and have used each other for sounding boards during the process.


This is my first collage quilt and the spiral is a perfect introduction to collage quilting. My original concept was a sunrise spiral with a night sky background. My sunny yellow spiral came together fairly easily over the course of a few days, but I struggled with the background. So this past Monday, I packed up all my multiple options for the background and went to my friend Linda’s home so we could brainstorm.


We had been texting each other pictures of our collage drafts almost daily, but fabric colors aren’t always accurate in photos. After narrowing the choices down to 1-2 fabrics, Linda started looking through her fabric stash and pulled out a green fabric to try on a whim, and the rest is history! My sunny garden meadow spiral collage took on a life of its own and I finished it in 24 hours. It has a happy, fun feel to it and I love it!
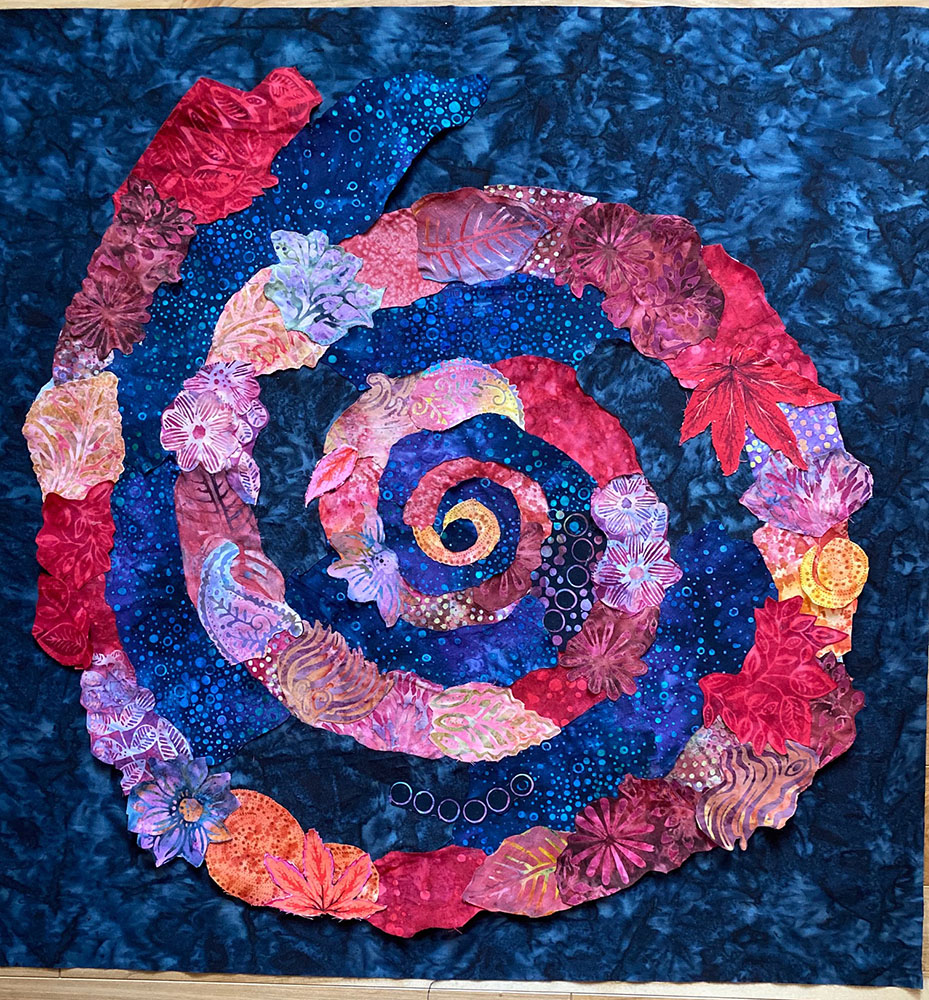
Sandy Schlossberg
Status: Quilting
From Sandy:
Now I understand why Susan keeps encouraging her students to create a spiral before attempting more complicated designs. This was very hard. Choosing fabric, auditioning it, eliminating it and cutting it was quite an experience. My studio is still in that messy, scary stage. I’m pleased that I ended up with a somewhat coherent piece.


Since I only have a few pieces of tulle and I didn’t like what I had on this spiral, I went ahead and just quilted with my decorative threads. I still have more to do. Also, I need to glue more and remember to leave adequate outside edges when adding tulle or collaging a background. I plan on putting this piece on stretcher bars. You may have noticed that this is called Spiral 1. Guess that means there will be a Spiral 2.
It’s wonderful to have a chance to learn this way. I can review previous lessons and stop and repeat as many times as I want. Thanks to you both and to Tom.
Below, Sandy is auditioning background fabrics for her Spiral.


Spirals Finished!
LeahGrace Kayler
Status: Complete
From LeahGrace:
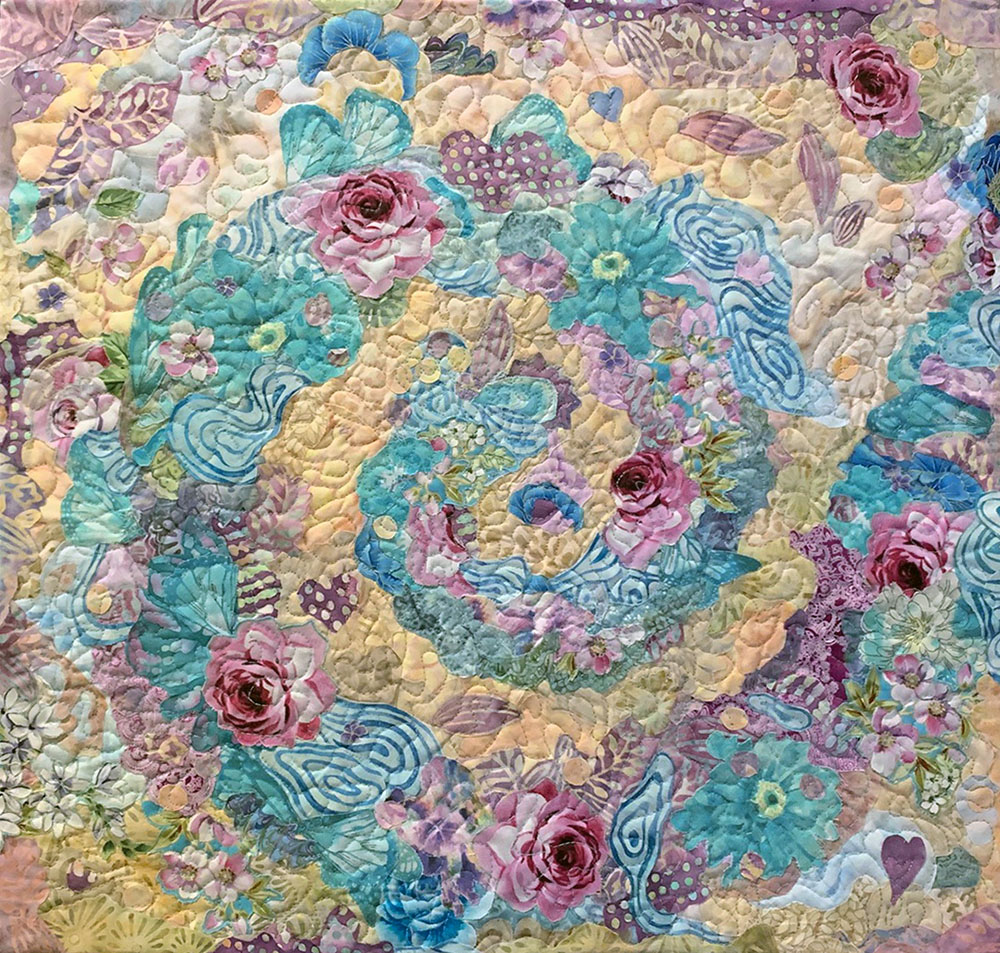
The idea of submitting my quilt for Susan’s blog made me bite the bullet and finish it. I am always afraid of sewing, but I did it! I learned so much from making this quilt. I realized it was time to finish it and accept what I had learned and all that I still have to learn. I did make some last minute changes to allow the blue/purple spiral to go off the edge. In its earlier iteration, the energy was stuck within the quilt.
Sue Cyr
Status: Complete
From Sue:
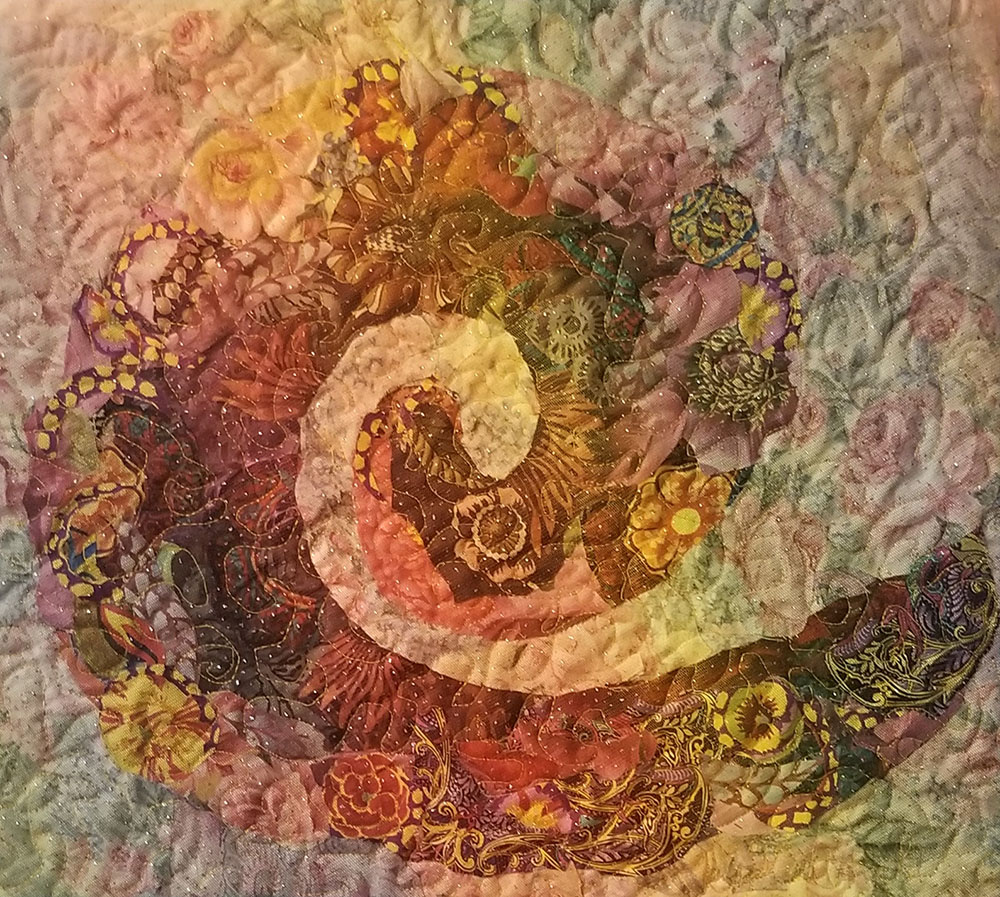
I had knee replacement surgery on my right knee and I couldn’t sit at the sewing machine for a while. I brought a bunch of mostly Kaffe fabrics to the table next to my recliner chair and it was a perfect project while I was sitting with the ice machine on my leg. I had never done fabric collage like this before but in my school art classes we did a tissue paper collage. This was really fun.


Martha Ginn
Status: Complete
Martha’s spiral was completed not during the Thursday Night Draft’s series, but as preparation for an in-person class. It is included here to give another example of a finished spiral and to let Martha explain how it helped her learning fabric collage.
From Martha:
Using Susan’s Serendipity Quilts book instructions (before the benefit of in-person class or Master Class Manual or Thursday Night Studio sessions), I see changes and improvements I could make after this first attempt. Book is good but in-person or video are amazingly helpful.
When I learned I was going to Susan’s class in October 2017 in Portland, I reread Susan’s book and made a spiral before class, sort of to get a head start on understanding the technique so I could take full advantage of learning at the class. Although I studied the book, took the week-long class and have made several successful (prize winning) fabric collage quilts, I gained valuable information (either new or refresher) in the Thursday Night Studio Live classes.


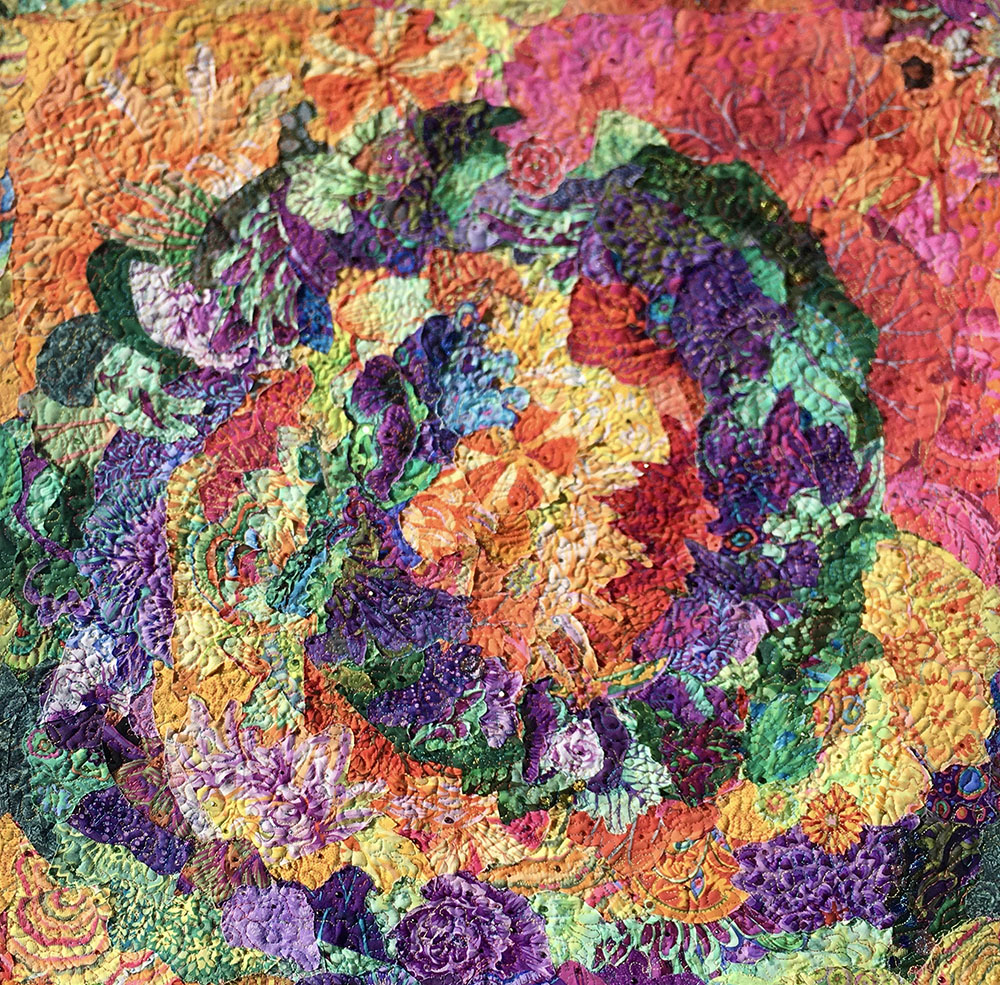
I added little snippets of opposites (dark over light, light over dark), which I DO NOT think add to the piece. I used the wrapped collage edge treatment, which seems appropriate for this piece. I did straight-line geometric quilting in the background as a diversion from the circular spiral.
Sandy Zube
Status: Complete
What perfect title for a spiral quilt. Learning fabric collage is a journey, one on which we never stop learning.
From Sandy:
I thoroughly enjoy the workshops and working along with feedback is a special bonus.
When I applied the tulle and fancy bits I tried to experiment without judging too much. Prior to applying the binding I was not thrilled by my application of the tulle but once I added the binding I felt it came together.
A side note: I used the Bernina free motion cording foot which has edges that curl up a bit. This foot gave me more freedom with the edges of the tulle.
I sincerely thank both of you and the other participants. I will continue to sign up for the workshops. Your work and delivery are spectacular.
Karen Stenback
Status: Complete


This is a VERY fun exercise in the creative collage process ….. the possibilities are endless! “Blossoming” by LeahGrace was so soft and delicate …. beautifully done with pastels. The softness of the pastels certainly showcases the variety of interpretations versus the bold brights. I enjoyed seeing every single one of these! Here’s to future spirals!
Thank you so much – this is great fun. I am signed up for the Sun class and I am looking forward to that. I couldn’t do the moon class because my quilt group zoom is that night ..
Sue
Thank you for including mine!