
Your quilt is done! Congratulations. Now it’s ready to prepare for display.
This is not a trivial step.
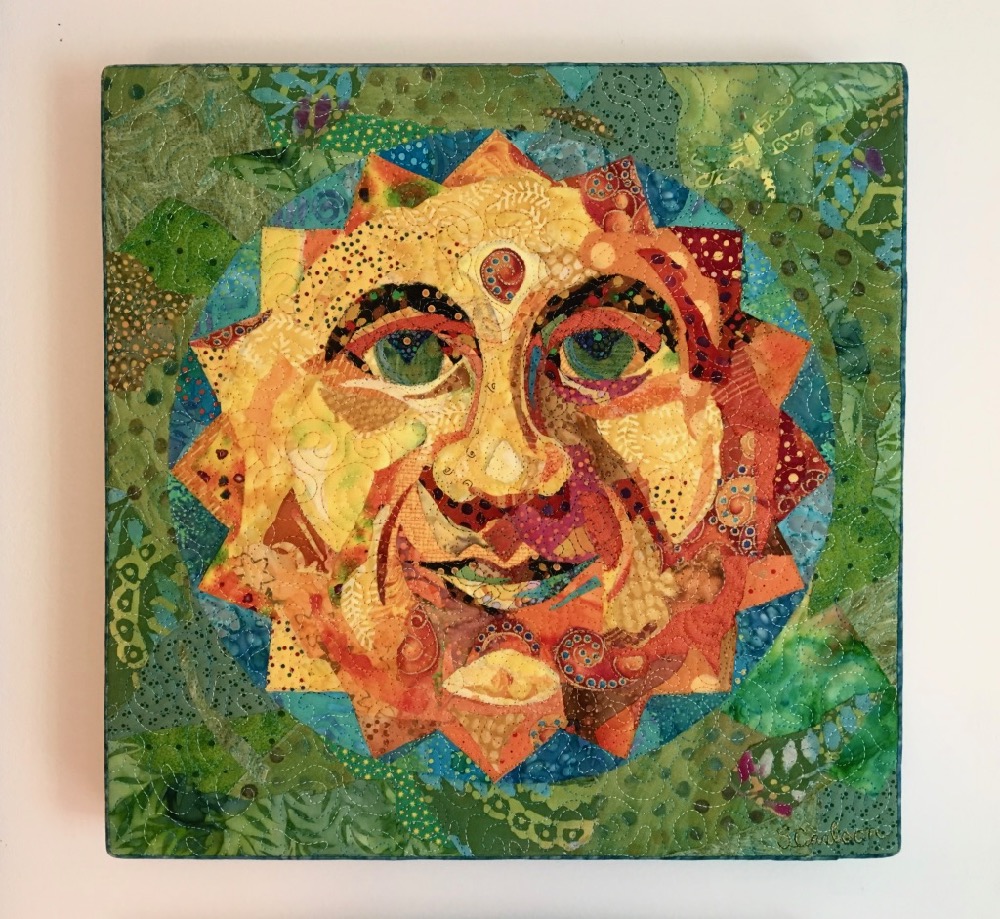
Originally, quilts were utilitarian—they were designed and constructed to be used. They were a craft. Today, the line between craft and art can get pretty blurry. Quilts are being recognized more and more as an art form.
One way to make the distinction clear is by how we refer to the objects we’re creating. There is a whole category for us: Art Quilts. By naming them art we consider them differently. We judge them with different criteria. We have different expectations of them.
Another way to make it clear that your quilt is art is simply by hanging it on a wall. Displaying a quilt, or any other object, elevates it (not just literally). It transforms it from object to art.
How to Hang Your Quilt
Over the years, I’ve used different methods of hanging quilts.
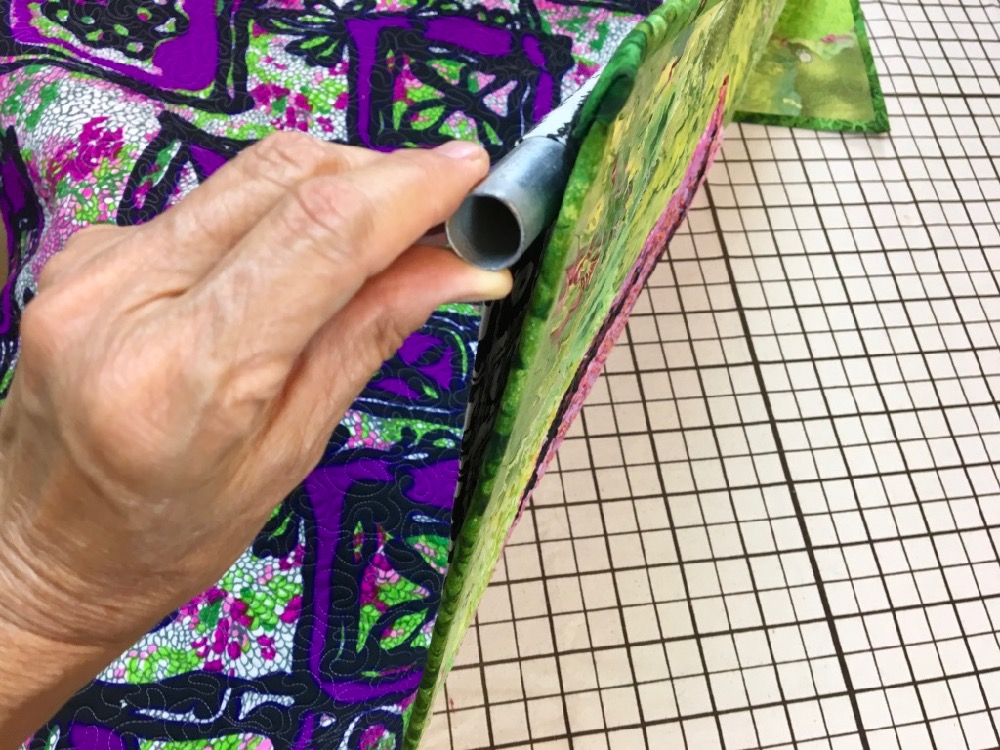
1.) Hanging Sleeve: There’s the common casing, or hanging sleeve, which is essentially attaching a fabric tube to the back of your quilt.
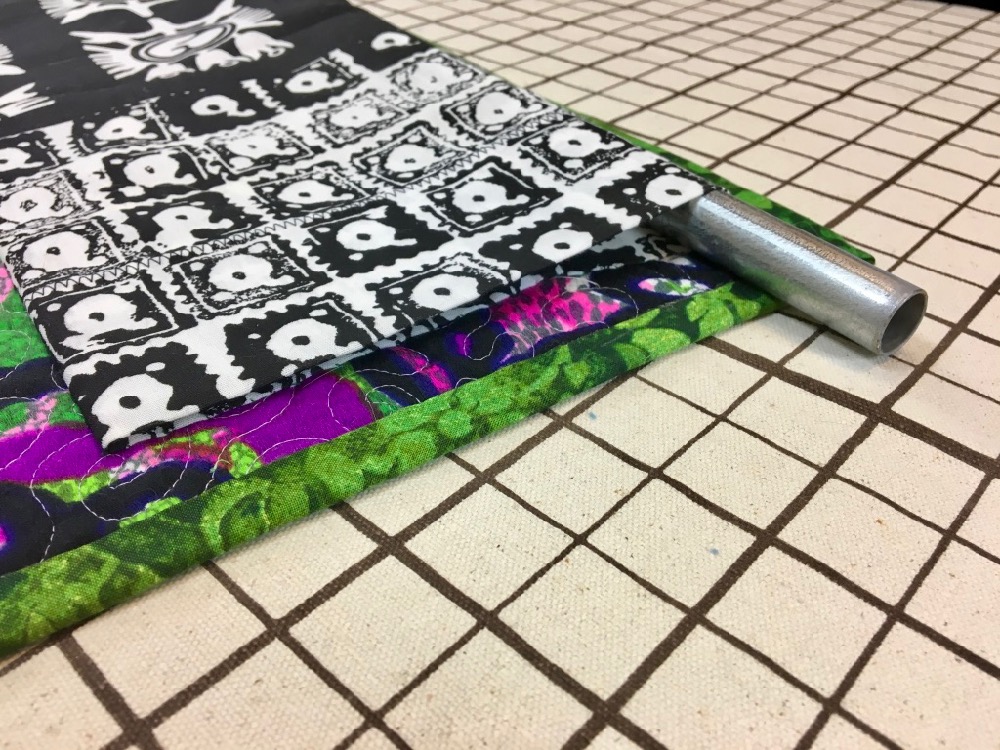
There are plenty of tutorials around the internet that describe how it’s done. In fact, I referred to this written description from IQF by Libby Lehman to refresh my memory when I added sleeves for my Specimens exhibit at the 2016 Houston International Quilt Festival. A quick search just now found a YouTube video from AQS by Bonnie Browning, with quite a few other viewing options in the side bar. Both of these links demonstrate how to create the sleeve with a convex curve of fabric so that the rod or hanging bar doesn’t cause a bulge on the top front of your quilt (below)—something I didn’t know when I started quilt making.
2.) Velcro: Way back when, a friend hung some irregularly-shaped felted pieces by attaching one side of a Velcro strip to the back of her artwork and attaching the matching strip to wooden stretcher bars. With her blessing, I used her idea and hand-stitched Velcro strips to all four back side edges of a quilt and stapled the matching strips to a complete stretcher bar frame that I painted black (below left).


The stretcher frame is about a half inch smaller than the quilt all around, so the effect is that the quilt is floating off the wall, creating a dimensional shadow behind the quilt (above right).

After hanging a couple of relatively large quilts this way, I realized I could simplify the job (and eliminate most of the tedious work of hand-sewing the velcro to the quilt) by attaching velcro only to the top of the quilt and hanging it from a single wooden bar (such as 1 x 3 inch strapping) that, again, I’ve painted black in case it’s seen from the side.
In order to hand-stitch the Velcro you need a strong thimble, strong needle, and thread that won’t fray easily (I usually reach for a polyester—though if it acts up, I’ll pick a different one). You don’t want to machine stitch the Velcro onto the quilt, the stitching would show through to the front of the quilt. I prefer to sew the softer “loop” side of the Velcro to my quilts and staple the “hook” side to the hanging bar. I use a staple gun to attach the Velcro to the top of the hanging bar (below left—bar flips over to match velcro strips).


Quite a few of my quilts have both Velcro and hanging sleeves on the backs (above right). At home, they’re hung with the velcro on wood method—with two screw eyes into the top of the wood, and two nails in the wall. When they travel with me to classes or to quilt shows, they hang from the sleeves on regular quilt racks.
3.) Stretching onto stretcher bars: At the end of my post Quilt Stories: Thread Drawing I talked about how I stretched those early quilts onto stretcher bars, a technique that my mom, Meta, taught me.


It involves sewing a continuous edging to the quilt top (above left) that then fits around a wooden stretcher frame and is stapled to the back (above right)—note screw eyes inside frame to hang on wall from an attached wire. It’s a way to achieve a framed effect without glass that, once again, elevates the quilt away from the wall so as to cast a shadow that I’m so fond of.
As I mentioned in the previous Quilt Stories post, the step-by-step instructions for this technique are covered in my book, Serendipity Quilts, and included as instruction and video as part of my Fabric Collage Online Master Class, but as a special addition to this post, here’s the demo (below) that I give in my classes. This video is an example of content received by my Patreon supporters. For a $5 per month or more subscription, supporters can access special videos plus monthly Zoom meetings and recordings. See the link in the sidebar for more information.
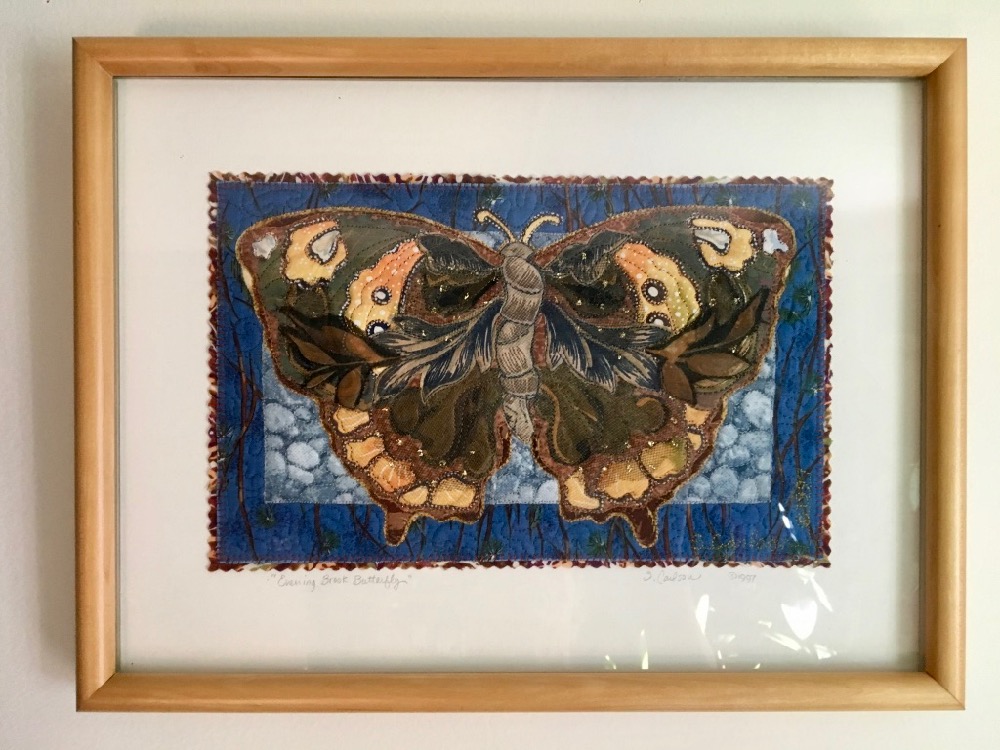
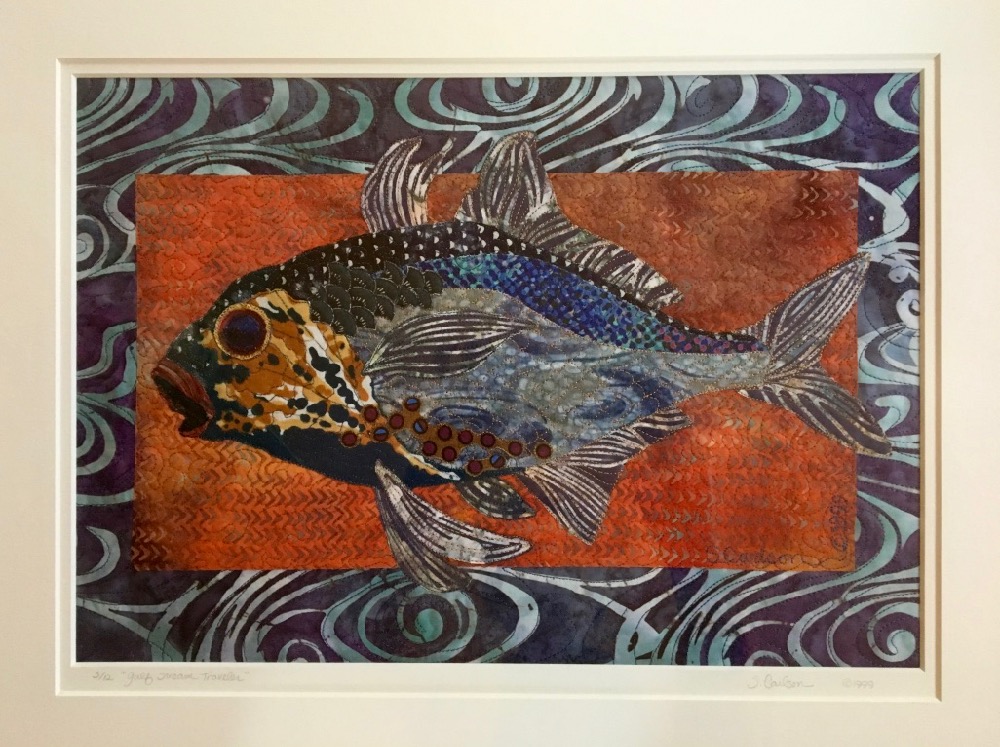
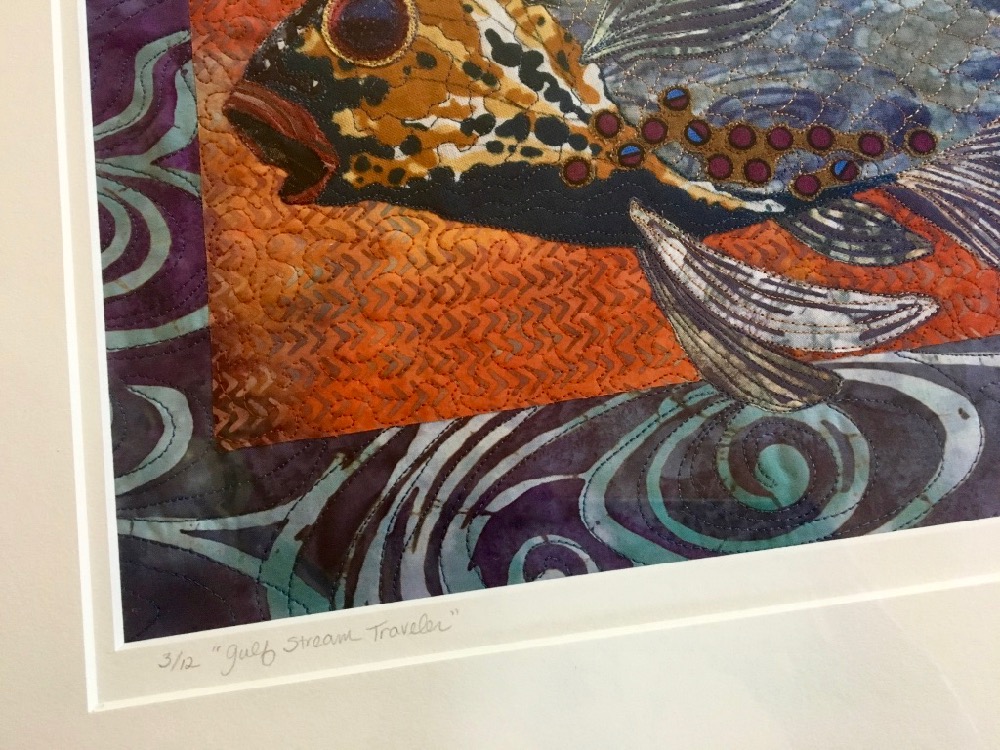
4.) Framing under glass: In another life, I was the manager of a picture frame shop. It was during that time that I started creating fabric collage quilts. After a couple years of collaging (and moving on to manage a fabric store), I started making small fish, butterfly, and bug quilts (3 by 5 inches to 24 by 36 inches) to sell at art shows and galleries. It seemed a natural solution to apply my knowledge of framing to display these (hundreds of) small quilts. Nothing says art like putting a frame around it!
If you do frame under glass, you need a way to keep the glass from pressing onto the quilt in order to create some breathing space. One way is with spacers—plexiglass bars that nestle into the rabbet (no, not rabbit—look it up) of the frame. The frame also needs to have a deeper rabbet to accommodate the added thickness of the spacer bars. A picture framer can help you with this if you’re not a DIY-er.
I usually “float” my finished quilt on the mat board, or in my case onto acid-free buff colored foam board. What I do that a picture framer won’t is glue my quilt to the top of the board. As you know, I’ve used glue from start to finish of the quilt, why stop now? And after more than a couple decades, those early framed quilts are looking just fine.
What a picture framer will do—and you can as well—is to attach the quilt with needle and thread through the back of the board. And that works just fine too.
Another way to secure the quilt for framing is by matting it. A double mat can be used in lieu of spacers, being thick enough to keep the glass from pressing onto the quilt.
If you plan on matting your quilt this way, you can even avoid edging your quilt altogether, since it will be hidden under the mat board anyway.
Where Will Your Quilt Hang?
As you decide how to hang your quilt, it’s important to consider where your quilt will hang. Be aware that most quilt shows and competitions require a sleeve on the back. Galleries, on the other hand, would likely be better prepared to hang work that is framed or mounted on stretcher bars. And at home, well, who knows.
There are, of course plenty more ideas for hanging quilts out there—ways to transform your quilt to art—these are just a few that I’ve used for my fabric collage quilts. Leave some of your favorite ideas in the comments below.
After all the work you’ve put into your art quilt, it deserves to have viewers ooh and ahh over it, whether it’s hanging in your home, in a show, or in a gallery.
Your posts are always so interesting and informative. Thank you.
Thank you, Susan!
Hi Susan!
Once again, thank you so much for such a clearly explained and beautifully illustrated topic. I look forward to finishing and hanging my “Cajun” quilt, started in your class. Happy end of summer to you and Tom!
And once again Juliet, thanks for such a nice comment! Will I see Cajun in September? In quilt or real life? In response to your email, yes to a walk! Thanks!
Hi! I would love to show you my progress on “Cajun” and his younger brother (Ranger) is raring to join the walk! See you soonðŸ•
Susan, is there a reason not to let glass touch the framed quilt other than the obvious aesthetics? Thanks!
Hi Stephanie – it’s an excepted thing to do in the framing world, something about humidity. But I have noticed on a framed piece of mine that does touch the glass a little, there seems to be some sort of “shadowing” on the interior of the glass that matches the quilt. The quilt seems ok, but I haven’t pulled it apart to look closer. In any case, it’s not something that’s shown up on “properly” spaced glass, so there must be something to it.
Thanks so much for all of these, Susan! I’ve been struggling to move away from the traditional “quilty” hanging sleeve and these are great suggestions. I will try them all.
You’re welcome, Lynda. Let me know how they work out!
Great tips for hanging our Art Quilts. I have been splitting my sleeve as some gallery’s and shows hang in different ways. I also glue my sleeves (Yes… glue them) on the back instead of hand stitching, makes life easier and saves time.
Thanks again….
Cindy â¤ï¸
Way to go, Cindy! Keep gluing – I love it. Yes, splitting the sleeve can be a good idea – especially on wider quilts –
and good to coordinate needs with shows and galleries. The sleeve on the back of my croc quilt was made in four five foot sections!
This video really helped me visualize your written instructions for using stretcher bars … Thank you !
You’re welcome, Kim – we are trying to add more video with these posts. It often helps to “see” something done, and not just read it.
Thank you Susan for sharing these techniques! Now to get my fanny in gear and get going on my first Susan Carlson style quilt. ~Paula
Alright, Paula – get going! Send me an update and then a final version for a future “Finish Line” post!
Susan, Love your posts. I read every one of them and sometimes think….duh, why didn’t I think of that. Of course no matter how long a person has been quilting I feel there is always something to be learned…and just love the information all your posts provide to all of us. Thank you.
An easier way to hand sew Velcro onto things is to first machine stitch the Velcro onto grosgrain ribbon that’s slightly wider. You can easily hand sew through the ribbon. Ribbon ends can be turned under and stitched or cut/melted with a soldering iron.
Thanks Susan, I have been wondering what I should do with the small piece I tried using your method. Boy, you sure were right about making it small being difficult verses larger. But, I never was one for making things simpler and paying the price.
Thank you so much for your art quilt comments. I did a “Yes, ma’am!” reading that last bit regarding ‘hang the quilt on the wall, change the perception’. That’s not an exact quote. The examples you offer are simple and easily pictured in the mind. So I will think about your examples when I go back before a gallery board that an art quilt is not art, unless it is framed.
I was trying to decide what to insert after ‘gallery board that…’ I inadvertently touched post. So board that believes/is admandant.
So grateful for all your wonderful tips, insights & shares!!!
Recently I had to attach Velcro to mount a quilt. I really hate sewing through that tough stuff by hand, so this is what I did. I cut a strip of fabric 1/2 inch wider than the Velcro, centered the Velcro on the strip and machine sewed it down each edge of the Velcro. Then I folded the fabric to the back side, leaving a tiny edge exposed. Using my hand needle, I was able to hand sew the Velcro strip and it was no harder than sewing on a fabric sleeve.
Thanks for another great lesson. I hate that you have to frame a quilt to make it art. I’m getting pressured to frame my fish too. Drives me a little crazy.
What an informative and helpful post, Susan! I’ve never made a wall quilt (only bed size), so I really wondered how you hung your huge croc. Now I plan to experiment: I’ll see if it works to sew Velcro near the top edge of fabric which will be hand sewn as a sleeve; then both hanging options would be on the art quilt.
You read my mind I was just looking at my rooster collage quilt and I made it with four hanging tabs and I was thinking there must be a better way Thank You
Hi Susan, I’m reading this as a TBT post and my “Remembering Cajun” quilt is finally hanging in our home! I used the sleeve method; inserted a flat steel bar and attached it to a Magnetic Invisible Quilt hanging system featured in the vendor area at Road to California quilt show. With the magnets, it was easy to re-position, center and level the quilt. Plus, it adapts to many different sizes…you know, just in case I ever finish something else! 😉
Happy August!
Juliet
You said in another post that your quilts aren’t washable. How are they cleaned? A quilt like this that wasn’t in a glass frame would become dusty in my house really quickly. Do you just shake them out or vacuum them?
Yes, for me, shaking them out works just fine. A quilt restoration trick is to lay a piece of (clean) window screening on top of quilt and then vacuum. That would certainly be a good second option.
Thanks Susan for all of this wonderful information. I have sold some of my pieces, and I think in the future, the framing and/or stretcher bar method might work best to make my pieces more professional looking. From personal experience I wanted to let you know something I learned about framing fibers. My husband’s grandmother did a crewel embroidery family tree which we recently received. She completed the piece in the 1960’s and it was framed with a glass over it. When we received it, the piece had a cloudy appearance. I took it to a professional framer to have the piece reframed. The cloudiness was due to the fibers giving off a “gas” over the years. It is extremely important to use archival/non-acid framing products if you are going to enclose your work with a glass front. Just thought others might want to know. Thanks for all you give to the quilting world.
This is another technique I used on one small quilt: https://twiggyandopal.blogspot.com/2016/01/hanging-mini-quilt-tutorial.html
What would suggest I would do as far as hanging a 4 foot by 6 foot Fabric Art Collage Quilt on a curved wall? It is a commissioned piece that they want hung on their curved wall that is where the main floor has stairs down to a lower level. The wall is 9 foot by 11 foot.
Thank you Susan for your great information on each individual process.
Hi there, I am in the UK and am searching for a way to hang a piece of textile art work I am working on. It is the shape of a sail, so a triangle! I have some calico to back it but am at a loss as to how to get it hang.
Any tips from anyone would be grateful, thanks!
Becky