
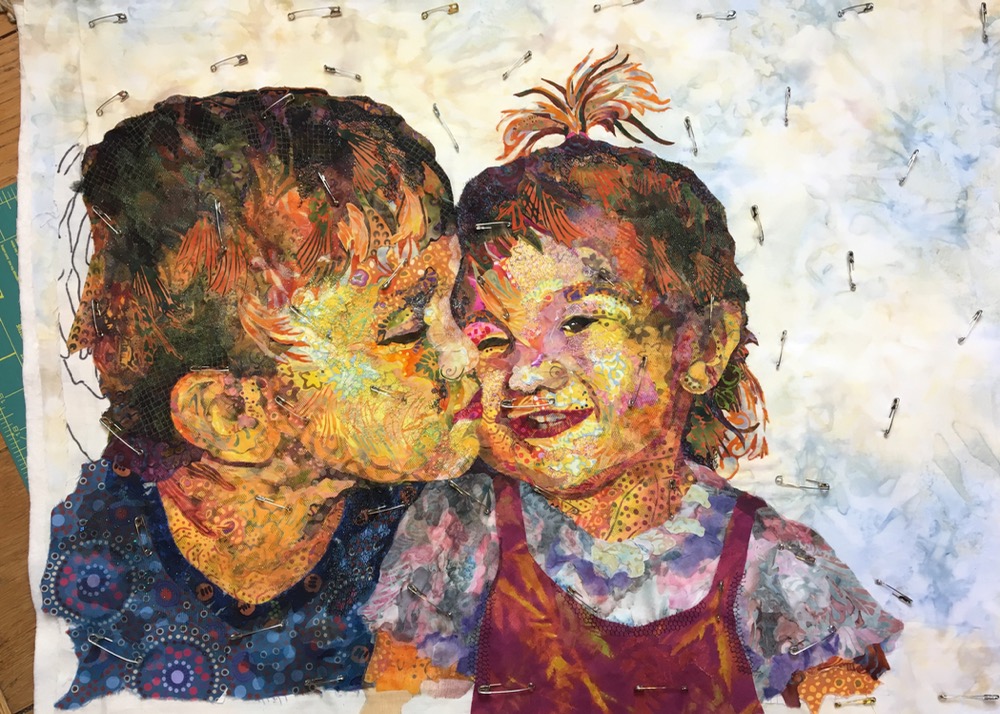
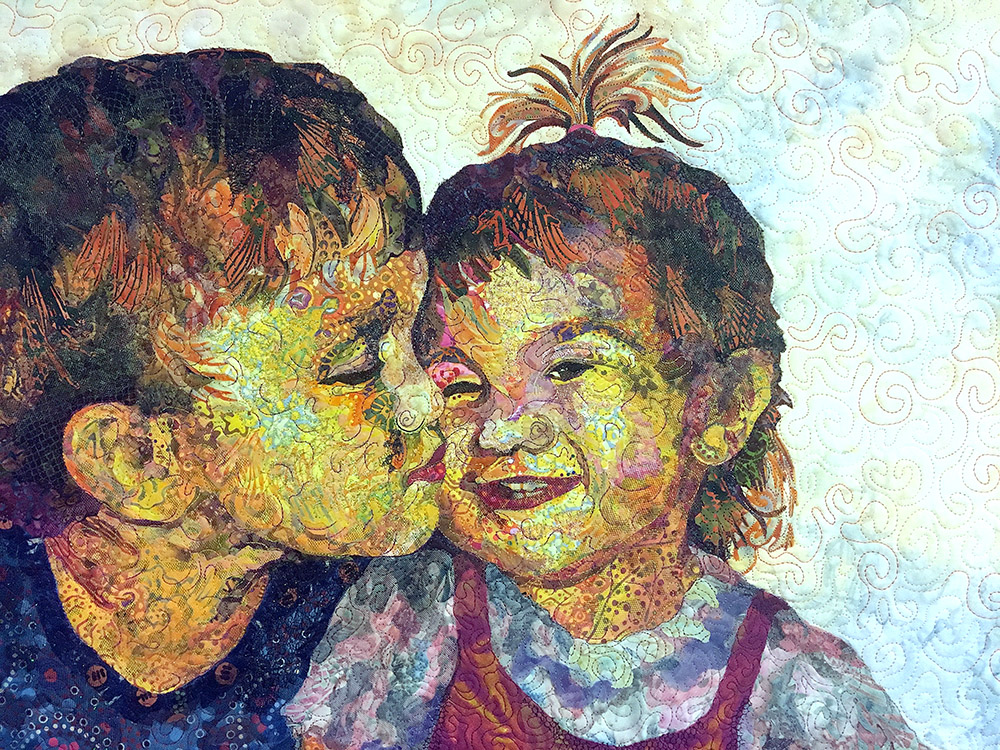
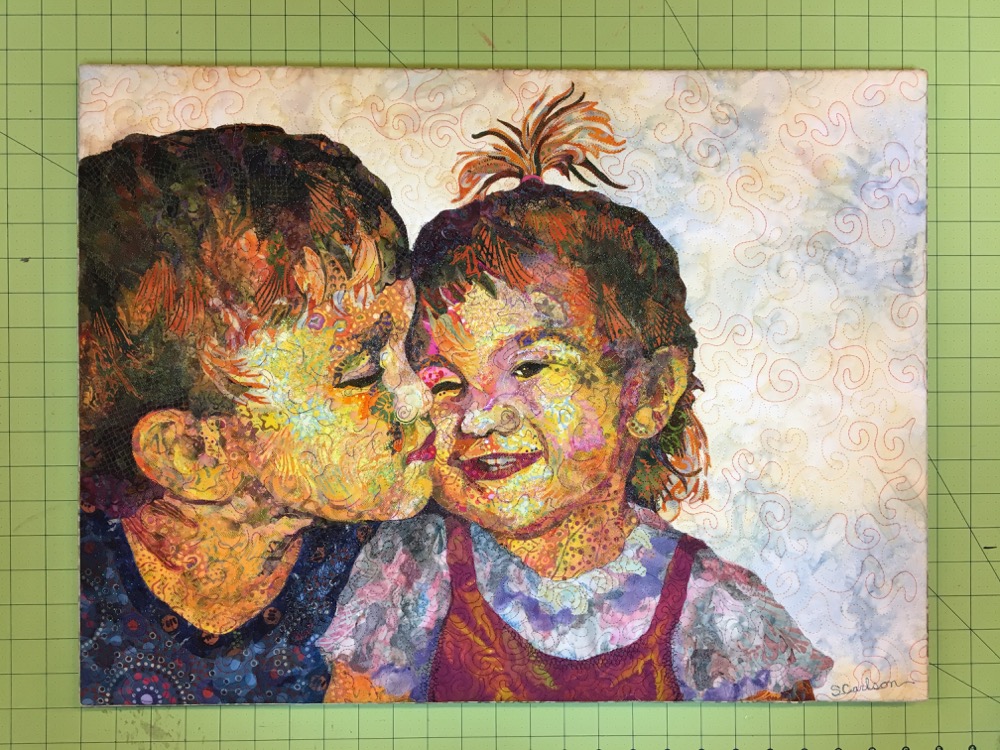
“Kissin’ Cousins” is a fabric collage quilt I made as a gift to my parents. It is a portrait of my son and my niece as little more than toddlers. The photograph it is based on is a long time favorite of my parents’.
This quilt, like many for which I don’t have a firm deadline, was one which took me a long time to finish. What was intended to be a Christmas present became a birthday/anniversary present became next year’s Christmas present and so on. Several years passed before it was completed with quilting and mounting onto stretcher bars.
Over that time, however, I kept a fairly complete photographic record of the fabric collage process. From making a pattern to choosing fabrics to cutting and gluing to quilting and finishing. These copious photos became very useful during the writing and producing of my Fabric Collage Online Master Class Manual—serving as a portraiture example. I supplemented the photos with video shot to further explain and describe the process.
If you don’t own the Master Class Manual this post will give you a sort of introduction to what’s included. If you already own the Master Class Manual you will find both the photos and descriptions familiar.
The Master Class Manual has six steps (plus a spiral quilt exercise).
- Getting Started: Choosing a Subject and Making a Design
- The Fabric Collage Technique: Fabric Selection, Cutting, and Gluing
- Backgrounds: Highlighting Your Image
- Details: Jazzing It Up
- Netting and Tulle: Adding Layers
- Quilting and Finishing
I’ll use these steps as an outline to how I made “Kissin’ Cousins” in this Quilt Stories post.
Getting Started: Choosing a Subject
Sometimes you choose an image. Other times an image chooses you. This was the case with the image below.
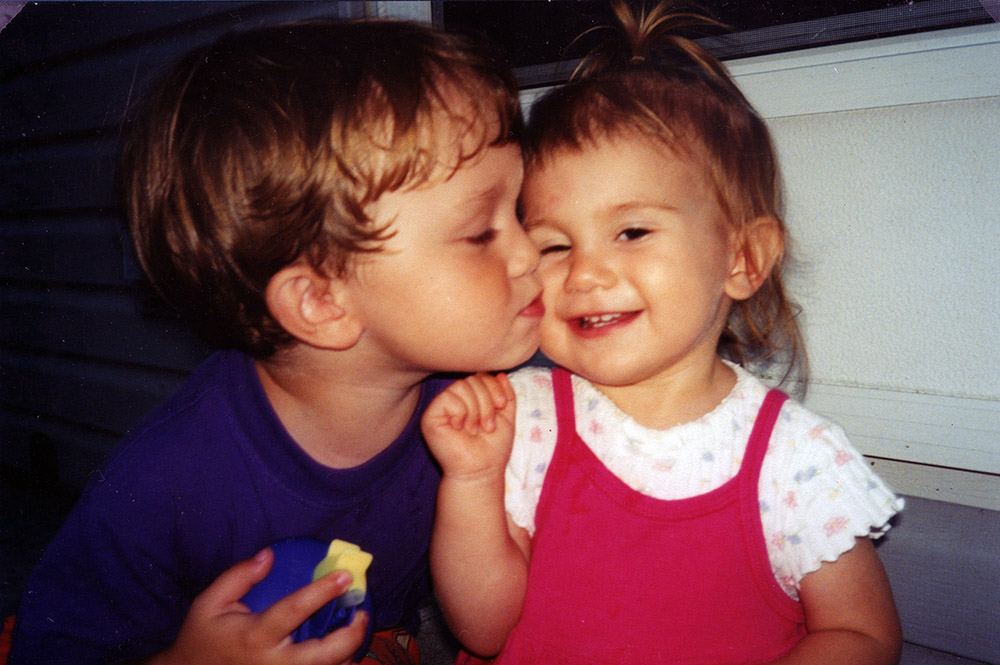
This picture of my son Sam and his cousin Maia (now both either in college or recently gradutated) is beloved by my parents, their grandparents. My parents made the observation that, “it would make a good quilt subject, wouldn’t it?” almost as soon as this picture was taken. So really, you see, I had no choice.
That said, is the photographic image objectively a good one to work from? Not really. The lighting isn’t what you’d call ideal. Their skin tones are fairly flat with little contrast, but it doesn’t matter. It appeared I was going to do this quilt come hell or high water.
In my classes, students can and have used fabric collage to create just about every imaginable subject matter. From still lifes to landscapes and buildings to old cars and tractors to animals and people. You can check some of them out in either my On the Road posts or The Finish Line posts. Projects tend to progress easier for those who start out with a really good image to work from and have a connection to the subject matter. Or, on the flip side, who have no connection to their subject whatsoever and feel free to “cut loose and let go,” the motto of my Serendipity Quilts book.
Getting Started: Making a Design
After choosing the image above to work from, the next task was to make a simple drawn design.
The basic steps are:
- Enlarge selected image to letter size: 8½ x 11 inches.
- Use tracing paper to outline shapes based on value.
- Enlarge tracing to desired size of completed quilt.
- Transfer outline to foundation fabric.
Step One: Enlarge selected image to letter size: 8½ x 11 inches.
Letter size is nice because it’s convenient. Most people have home printers nowadays, so it’s easy to print out an image as big as will fit on a regular piece of paper. But perhaps more importantly, it’s usually not too large of an enlargement to loose too much detail of the original photo. Much larger, and the image gets fuzzy and not useful to create a line drawing from.

I keep the original handy. It may be easier to see some details in that original version and I often refer back to it throughout the collage process.
Step Two: Use tracing paper to outline shapes based on value.
Using a nice, sharp pencil (I like mechanical pencils for this), I outlined the larger shapes based not on, say, parts of a face—nose, mouth, eyes—but in terms of value. A nose will be made up of several shapes—dark, medium, and light areas. I go into greater detail in creating a working design in Making a Pattern for Fabric Collage. I prefer to use tracing velum as it has a good transparency and draws (and erases) well.


I resisted the urge to be extremely detailed. All those lines would have been too confusing.
Step Three: Enlarge tracing to desired size of completed quilt.
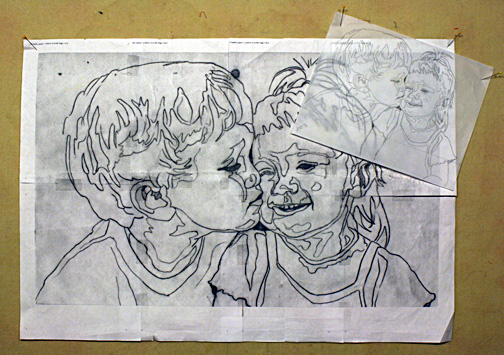
The easiest way to get your tracing enlarged is to take it to a local copy shop. Most big box business supply stores have a copy center. Tell them how big you want the finished pattern to be and let them do the math.
Another method is to enlarge it at home and “tile” it together. That’s what I did with this piece. If you look closely you can see that the enlargement is actually made up of eight pieces of paper cut and taped together. To do this, I scanned my tracing then printed it out at the percentage I had calculated (250%). Actually Tom did the scanning and printing. It’s nice to have in-house copy service.
Step Four: Transfer outline to foundation fabric.
Next I needed to choose a plain fabric for the foundation that I would be gluing onto. I usually use muslin, or some sort of inexpensive neutral colored fabric. I cut the piece slightly bigger than my paper pattern. When I slipped the pattern behind the fabric, I could see it well enough to use a permanent marker (I use a regular weight Sharpie) to trace the image onto this foundation.
The most important thing for my drawing is to get the features—eyes, nose, mouth, ears—positioned in exactly the right places and shaped correctly—in order for the darlings to look like themselves. Further in the collage process, when I’m selecting and cutting fabric to fill those shapes, I’ll be thankful I have an accurate design to work from.
Fabric Selection
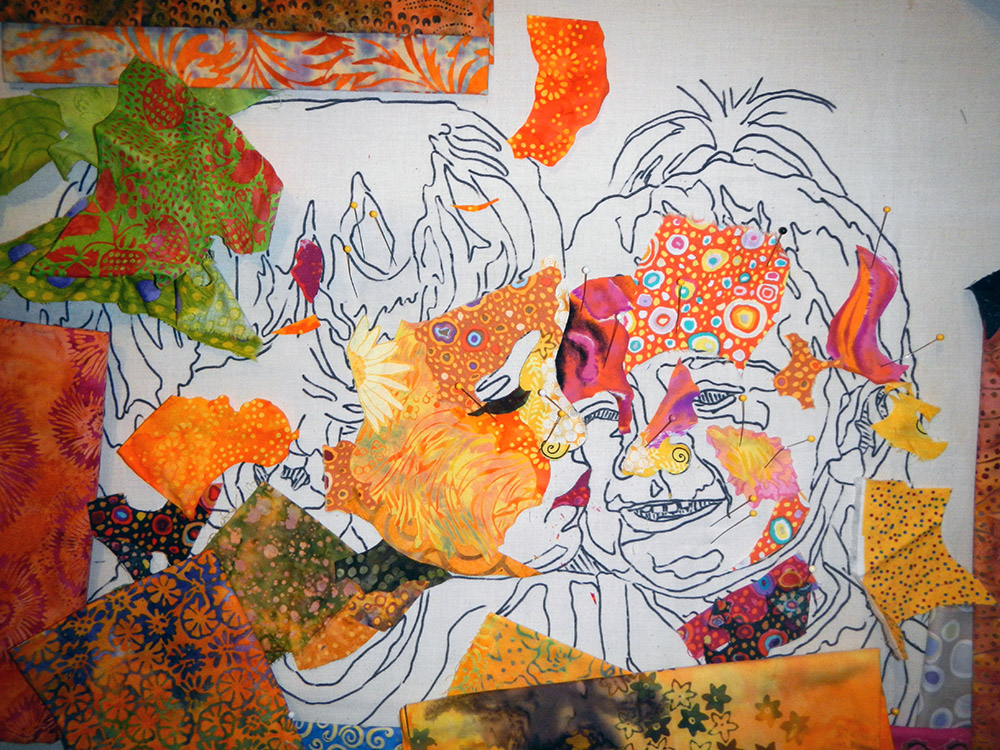
In the photo below you can see some of the fabrics I selected for “Kissin’ Cousins.” I placed the fabrics for each kid next to their faces. Some of these fabrics I used, some I didn’t, and I certainly added more in the process, but it was a start. In general, I chose cooler colors for Sam—blues, greens, and even purples mixed into the yellows—while I tried to work some warmer, pinky yellows into Maia’s face. The three fabrics above Sam’s face are for his hair.
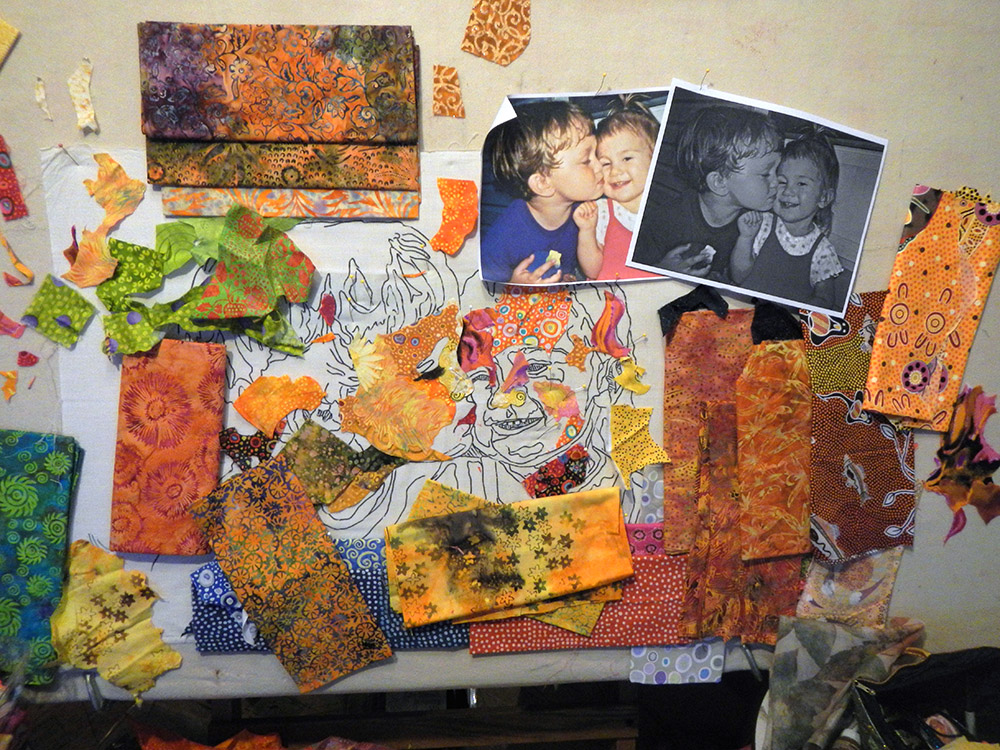
I chose yellows to be the predominant color of this piece. I love yellow—it’s sunny and warm. I didn’t want to use “naturalistic” colors, e.g., flesh-colors. As I noted in my blog post “Color Is Irrelevant,” I can choose whatever color I want to create my images as long as I pay attention to value. Because most of these were printed batiks, they naturally contained a range of light/dark values within each cut of fabric, easily expanding my fabric selection.
Cutting
For me, half the fun of fabric collage is the thrill of the hunt, finding just the right piece of fabric to do the job. This means using the patterns, prints, colors, variations in values, and textures as they exist in the fabric.
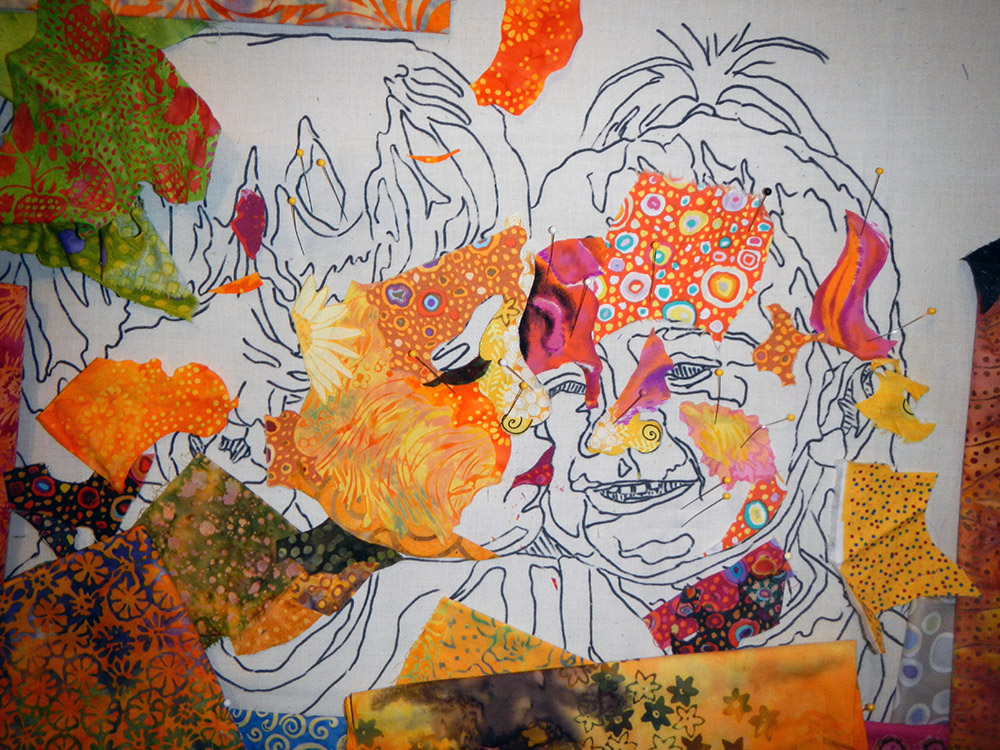
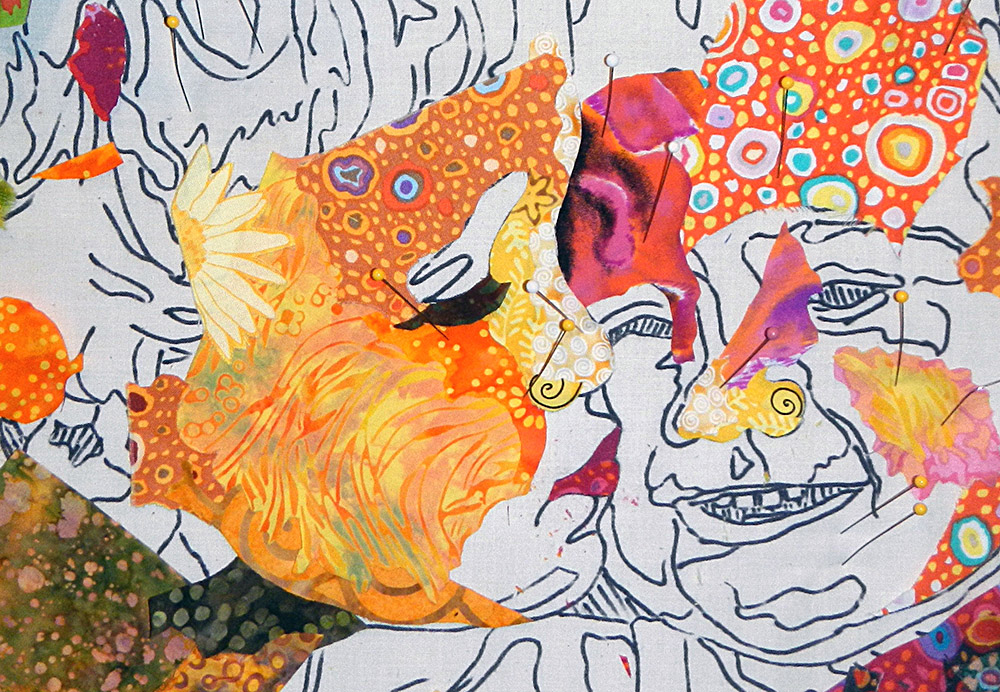
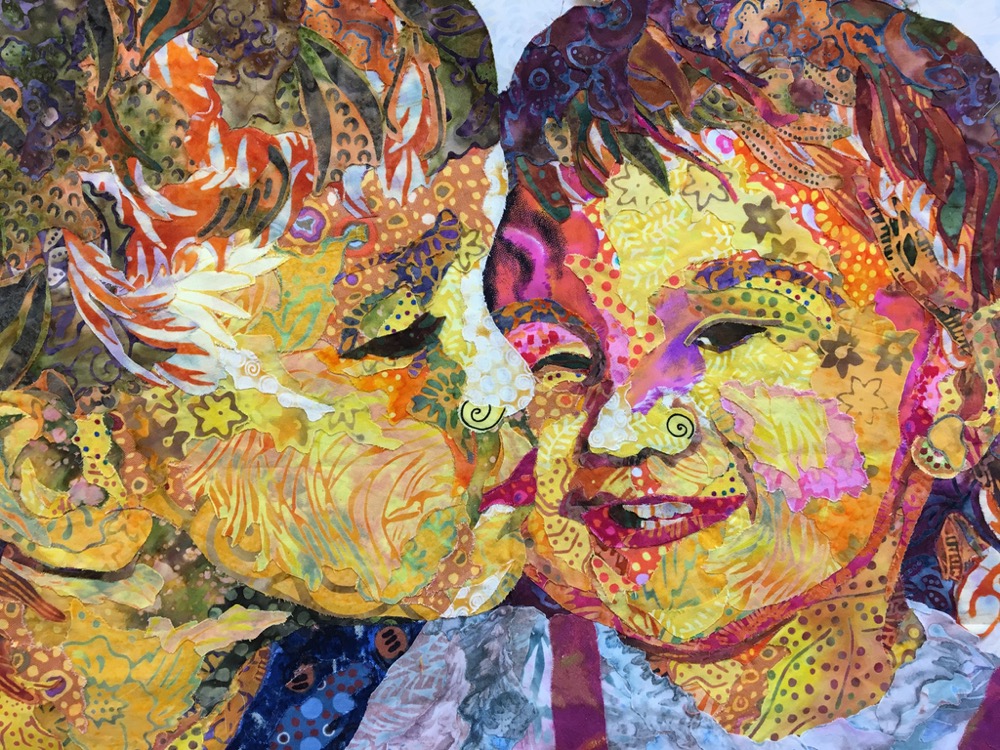
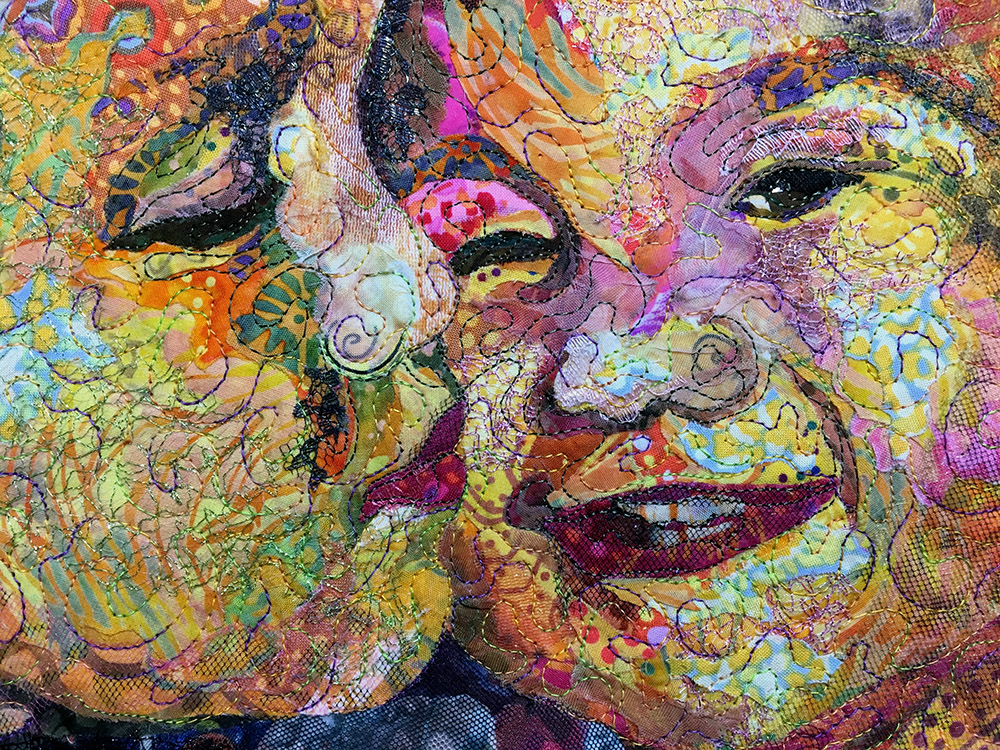
Look at the closeup of Sam’s cheek and jaw. In the highlight of the cheek, the part closest to the viewer, I used the curves in the fabric pattern to establish the roundness of his toddler face. The irregular edge I cut (using the print as a guide) blurs (or blends) the line between the two fabrics. If I had cut that piece of fabric straight, the hard line would have stood out instead of blending.
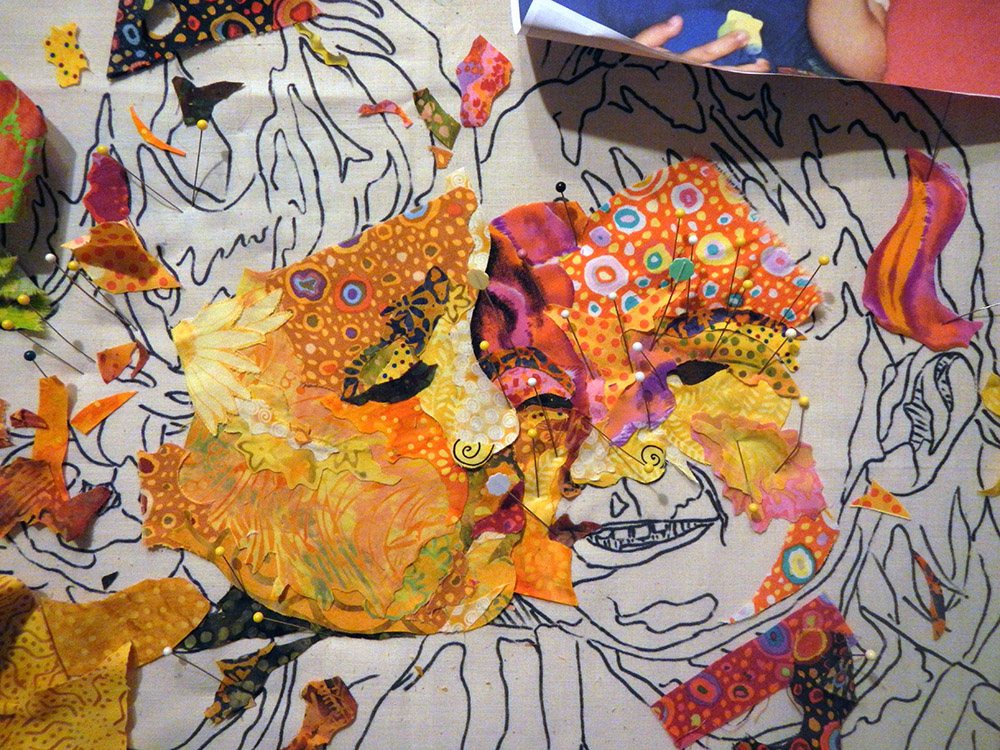
In the photo below, you can see I have several pieces of fabric already cut out and placed on the design: on Maia’s cheek, in her hair, and on her forehead. I cut these pieces out not based on the drawn design but using the print as a cutting guide, cutting with and around any pattern I saw in the fabric. I look for the flow of hair in the fabric. Or a curve that could be part of the contour of a cheek. I cut out these shapes not as I would a template, but as a dab of fabric color or curve to become part of an area within the drawn design. Rather than forcing fabric to fit into my design, I allow the fabric to dictate where possible.
Where I don’t let the fabric dictate is when it comes to the outside shape of the features. Notice I cut very carefully to the design to get the curve of the noses just right. In this piece the eyes were relatively simple. Sam’s are closed and Maia’s are squinty. There’s no need to build them the way I demonstrate in the post “An Eye for and Eye.” However, I did use that “top-down, bottom-up” approach for building Maia’s toothy grin later in the process.
Gluing
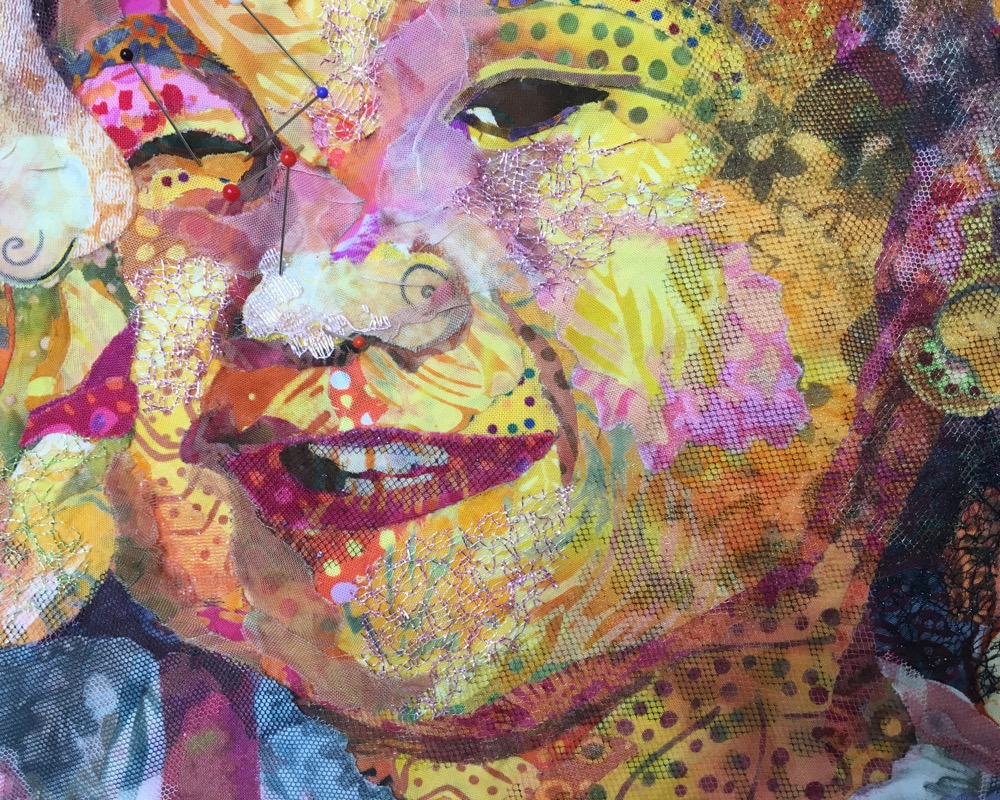
In the photo below I’ve made more progress with the piecing. I’m temporarily securing all the little bits of fabric in Maia’s face with pins. It’s about time to glue those pieces down before I lose them or disturb them.
I’ve covered gluing extensively in my post “Why Glue?” You can refer to that for the “how” and “why” of gluing.
What I want to point out, is the way I glue. Specifically, only tacking down the fabrics, usually by gluing at the center of each piece, so that I can continue to layer other fabrics under the ones that are already in place. This is important so that I can blend one fabric into the next. Look at Maia’s pink cheek in the photo above then in the photo below. If I had glued that pink fabric all the way to the edge I couldn’t have slipped the others under it to continue creating her face.
If you simplify fabric collage down to its very essence, it’s these three things: choosing fabric, cutting, and gluing. This is the heart of the process and the part that takes the longest—like days, weeks, months, years—depending on complexity and size, and deadlines.
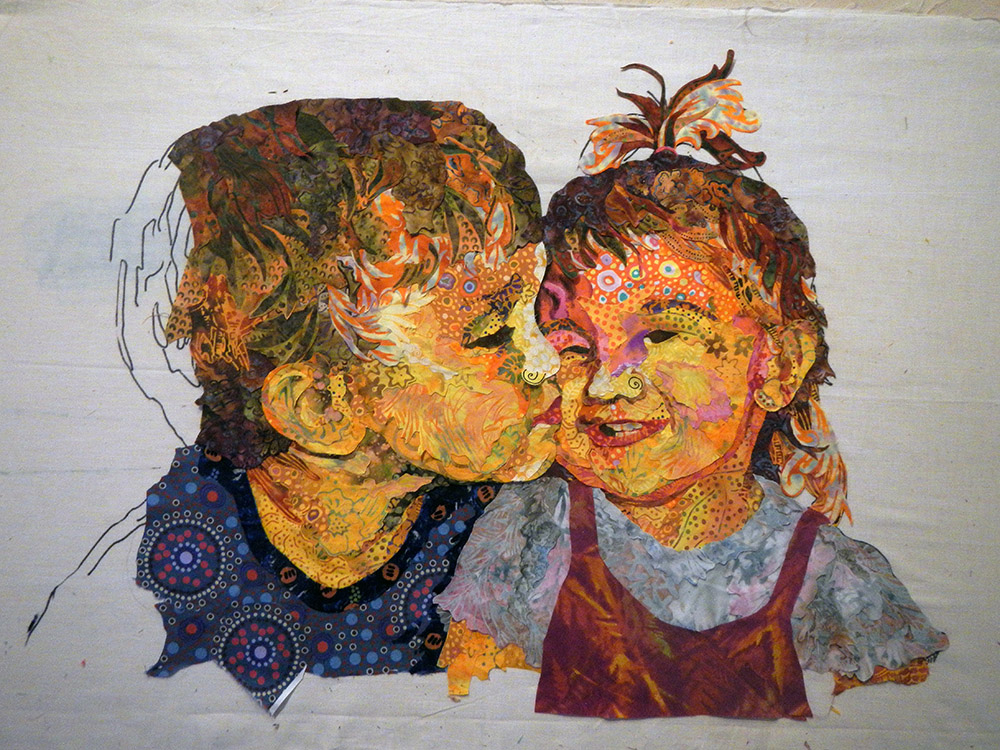
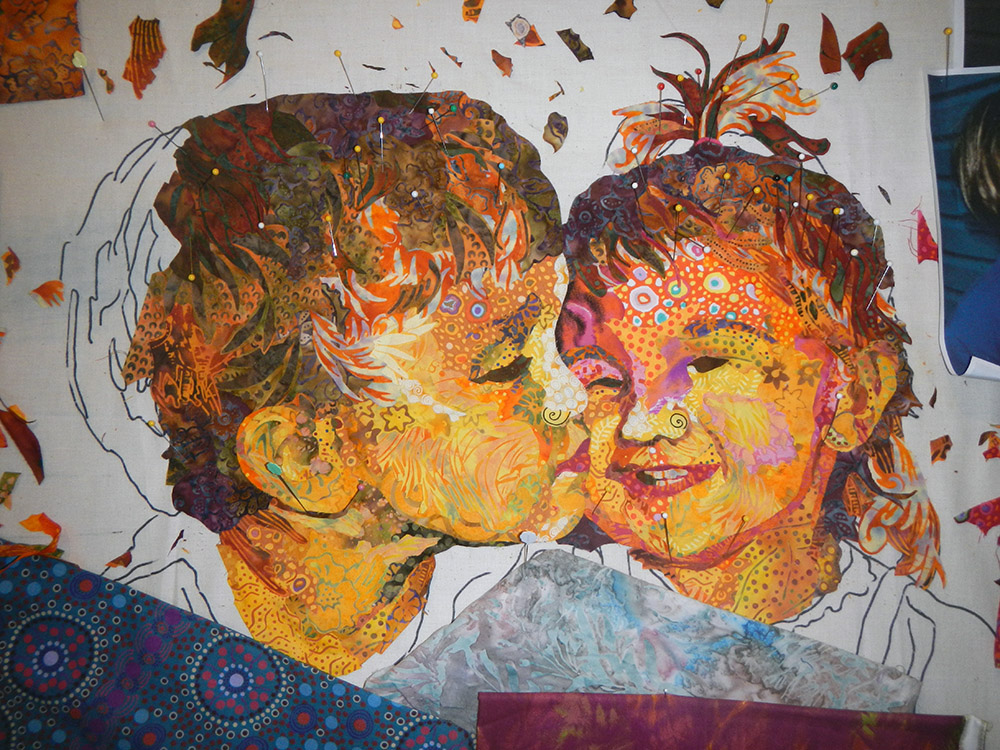
I decided to crop the back of Sam’s head in order to better center the kids’ faces when cropping the piece as a whole. I kept their clothes pretty simple. And I’m glad I didn’t do their hands, which would have added unneeded effort and distracted from the faces, which are of course the whole point of the piece.
Backgrounds: Highlighting Your Image
Choosing a background can be very daunting. There are so many possibilities. How do you narrow them down? In class, when a student is struggling with this step, I ask them the questions I ask myself in this position: What’s the story you’re trying to tell? What’s the subject? Where is the subject? What is it doing? Why did you choose this subject? What’s important about the subject?
For this particular portrait, it was all about their expressions. Plus, I knew I wanted a close cropping of the figures and a smaller finished quilt all around. So, unlike nearly every other quilt of mine, I decided it would be a one-piece-of-fabric background. See examples below.


Though I kinda liked the seafoam green of the upper left option, the batik on the lower right became my final choice. The audition process showed me that a lighter color and less contrast in the printed design was probably the best—nothing is absolute. Besides, when asked, my mom replied that her choice was “beige” for the background. I gulped, ’cause I really don’t do beige. But you can’t argue with your mama.
To read more about choosing backgrounds, check out this post: Telling the Story: Fabric Collage Backgrounds.
Details: Jazzing It Up
There’s always space for more details in the form of slivers of fabric as contour lines, or netting and other translucent fabrics for shadows and highlights, or…. It could go on and on. See an early post of mine where I refer to Anne Lamott’s book, Bird by Bird, and what she refers to as the “dental” or third and final draft of a creation, where you “check every tooth to see if it’s cramped, decayed, or even, God help us, healthy.”
Kissin’ Cousins remained in the state you see above for a long time, like maybe a few years. It wasn’t quite right, but I couldn’t put my finger on it. Then, finally it came to me. Funny thing is, it’s what I would have told a student to try, but do I listen to myself? Anyway, I had a new direction for finishing this piece.
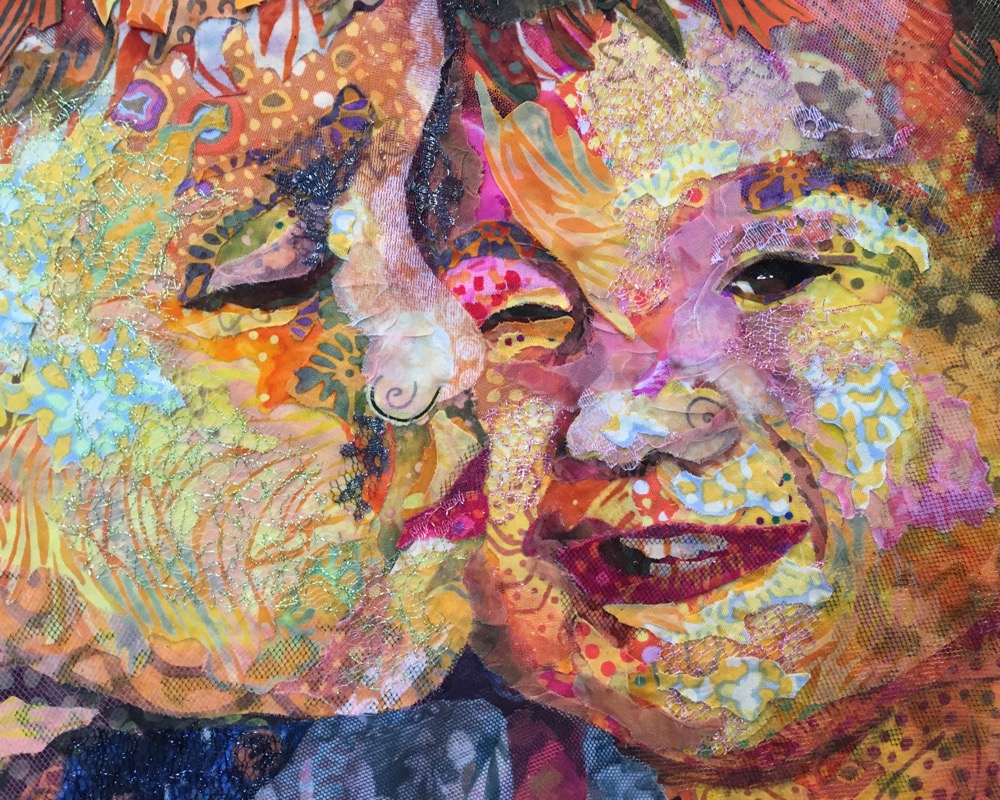
When I started wiggling all the “teeth” of the portraits, one of the things that stood out was Sam’s nose. It looked too bright in value and too flat, with no dimension to it (below left). I took a mottled autumn colored sparkle tulle and laid it onto the portrait (below right). It appeared to be a good bet.


Opening up the sheer fabric (below left) I cut out a palm-sized chunk of it (below right) so I could maneuver it along his nose easier.


I decided the best placement was what you see below. I found an area of the mottling that flowed from his eyebrow to the dip in the bridge of his nose, to the lighter point of his little button nose. I trimmed it to size and glued it in place.

Moving on I found more “loose teeth” which I also fixed.
Now came Maia’s turn, wiggling all of her “teeth”—turning her into a porcupine child from left to right below—with all the little bits of tulle and netting and other sheer fabrics being held in place with pins until I got around to gluing them down.


Below, she gets little touches of blush with bits of pink sparkle mesh.
And then, naturally, I had to go back and re-visit the highlights of Sam’s cheek (below). Do you see where this process can go on forever?
That’s it, I’m done!
Netting and Tulle: Adding Layers
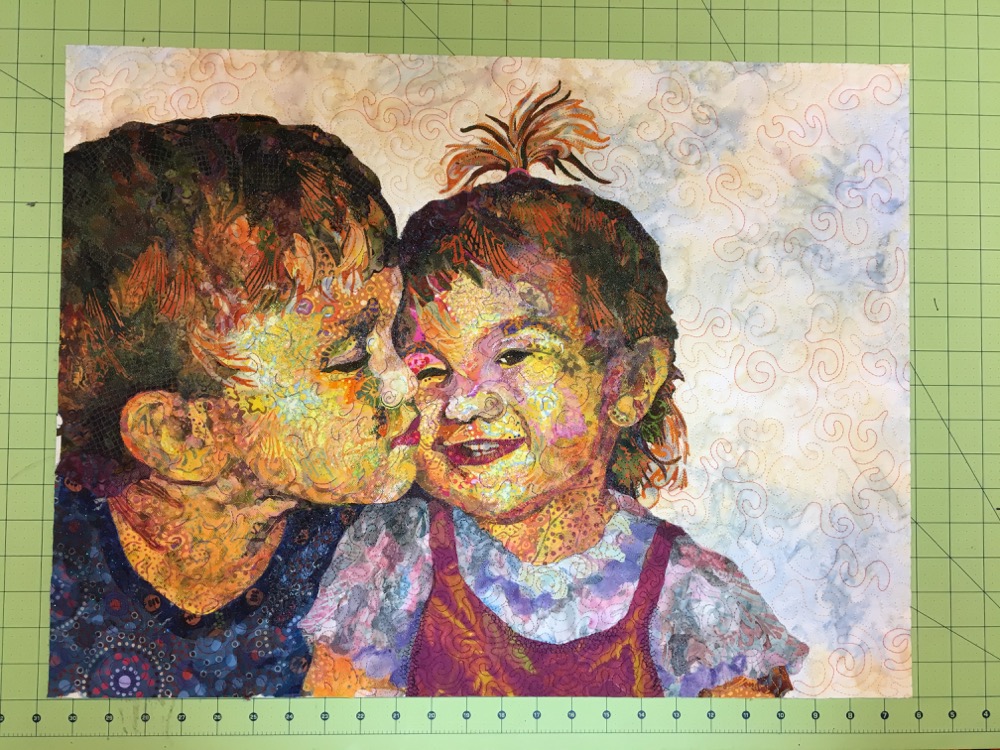
In a previous post, To Tulle or not to Tulle, I talked about using tulle in preparation for a quilting technique called shadow quilting. The issue with using tulle over the entire quilt is of course that it can change the colors that you’ve so painstakingly chosen during the piecing process. Still, it can work in some cases, so when I finished piecing “Kissin’ Cousins” I considered using a couple different tulles, but as you see below I ultimately decided against it.

It’s totally up to you and should be based on whether the image will benefit from it or not.
Quilting
The first step in quilting is assembling the layers. Since I decided not to use a layer of tulle over the entire top, I made sure the edges of all the bits of fabric were glued down securely. Then I safety pin basted the three layers together: top, batting, and backing.
Then I chose the thread I wanted to use for the quilting.
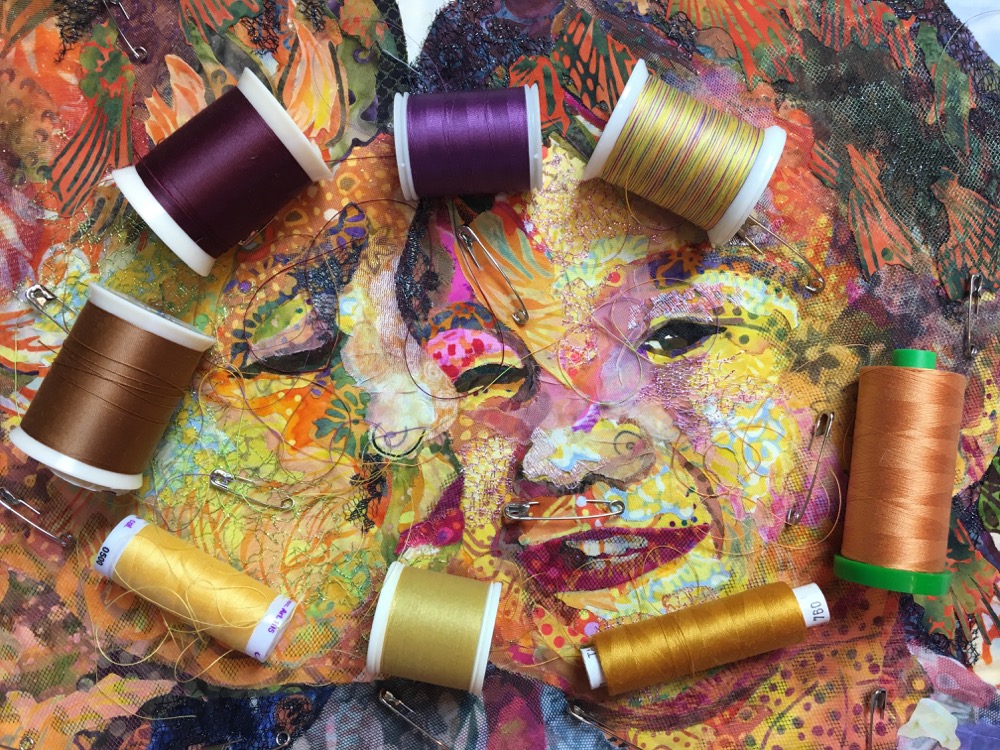
I started out with a wide variety of options, as seen above. Almost any of these would have been okay, which makes the selection process even more difficult, of course. But I did manage to narrow it down to the three below. Notice that I pulled out lengths of thread to stretch across the image, checking to see if I liked how they blend or contrast with the collaged image.
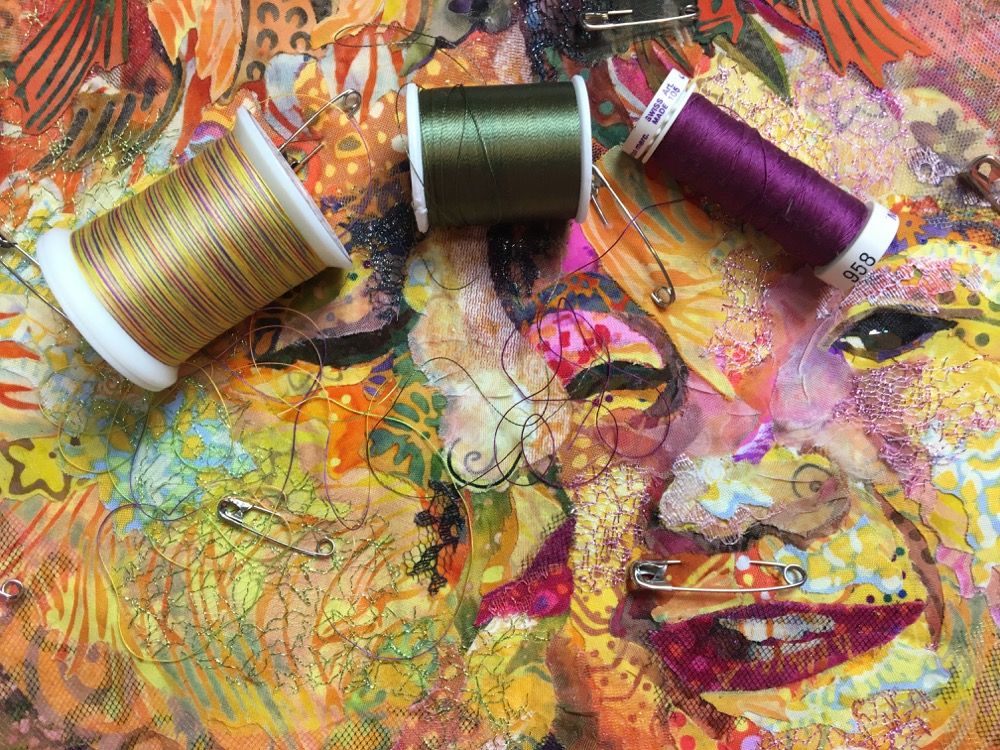
I decided to try the variegated thread. This was a risky choice, as I knew I wouldn’t be able to control where the light and dark segments fell on the portrait.
Ultimately, the variegated thread made the piece busier. It’s definitely “different” looking and has taken a little bit to get used to, but it grew on me. Because of the randomness of the darker bits of the thread, a few of those stitches fell in some interesting places that kinda worked with the contour of the faces. I like when that sort of unexpected thing happens. As far as taking a little bit of a risk and trying something different I think it was successful.
Finishing
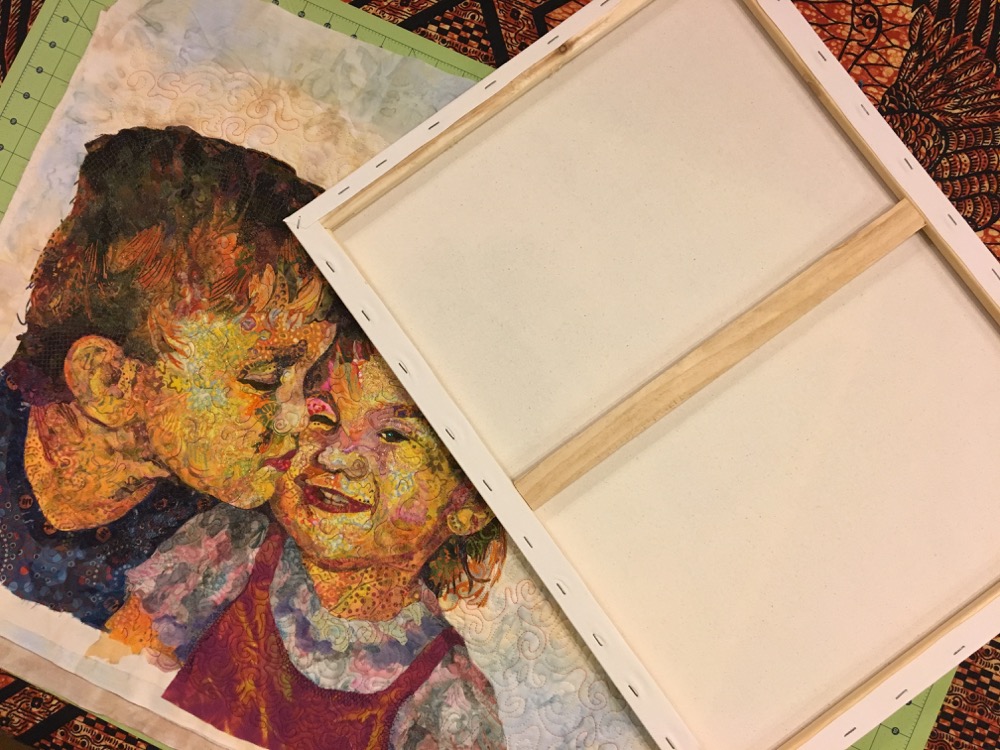
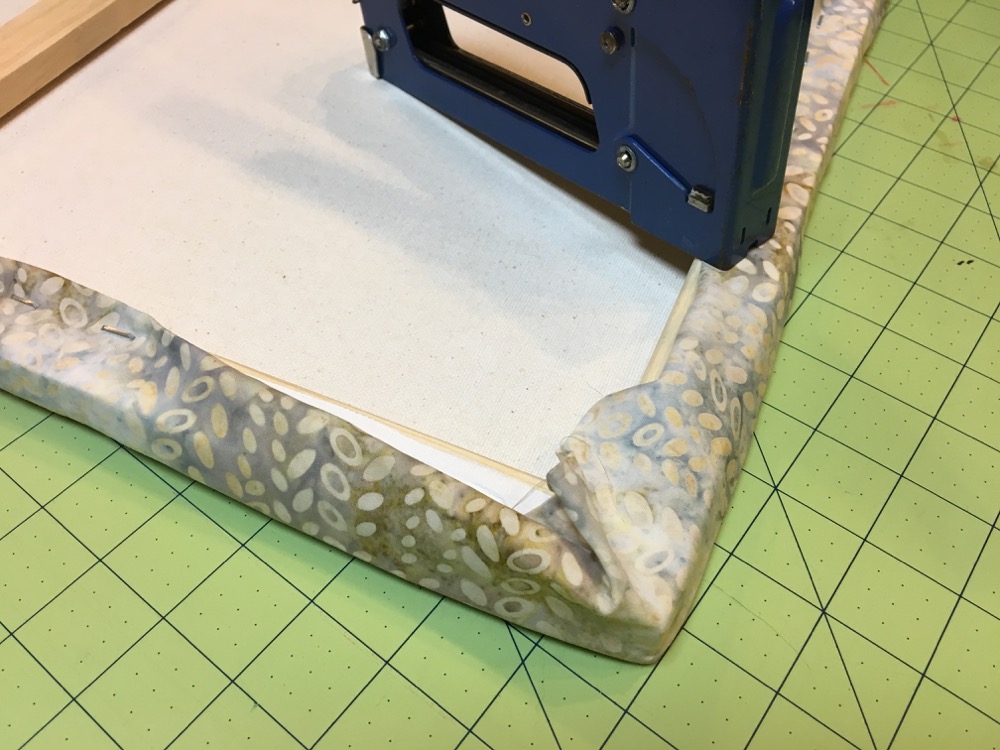
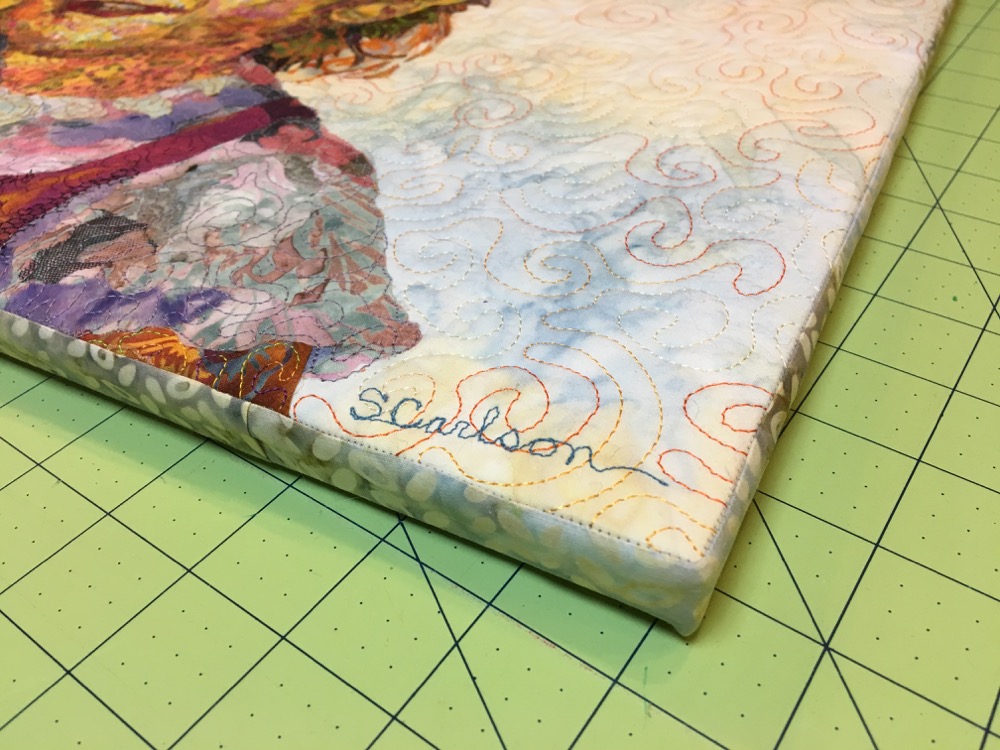
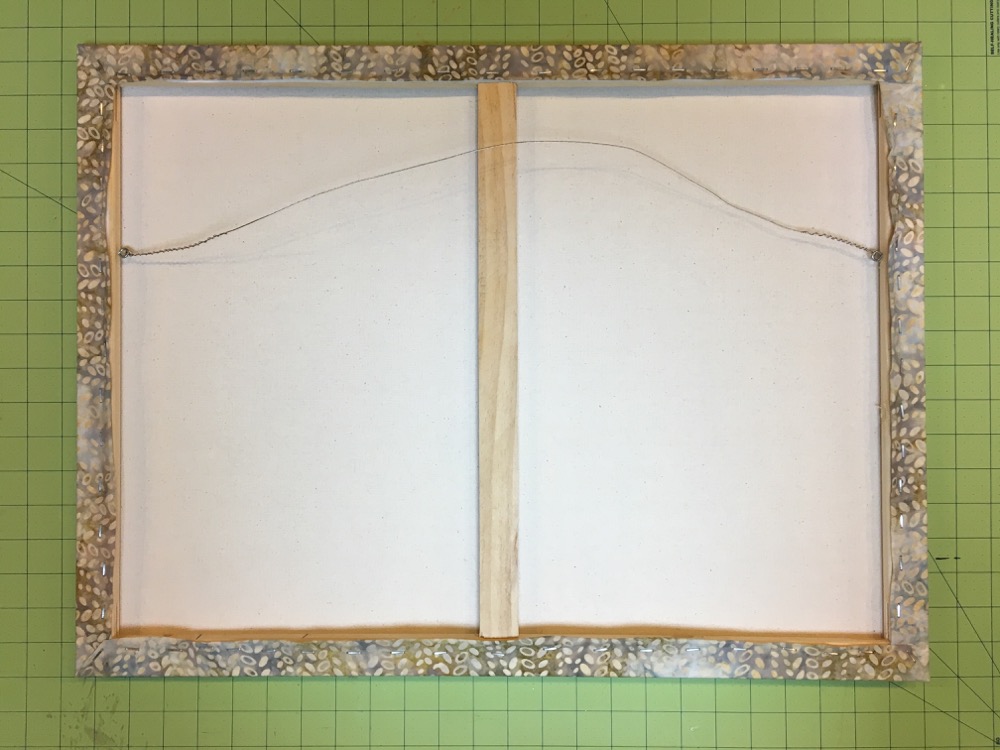
I knew from the beginning that I wanted to finish this piece by stretching it around a stretcher bar frame. I made it the size it is on purpose, to fit an 18 by 24 inch stretched canvas. I’ve described this technique in a previous blog post, “Hang It up: Making Your Art Quilt Art”, so I won’t go into detail how I did it here. As an overview, I trim the piece to size, plus a quarter inch all the way around, then sew on a continuous strip of fabric around the edge. I then stretch that edging fabric around the frame and staple it on the back. Here are some photos of the process.

So that’s how “Kissin’ Cousins” came to be—at last! I hope it also gave you a sense of the fabric collage process—at least as it applies to portraits. If you are interested in learning fabric collage in more detail, please check out the Fabric Collage Master Class Manual—with lifetime access, including any periodic updates.
Having just completed a 5 day class with Susan in Kalispell, Montana, I am still working on my project and this was a great blog for remembering what you said about each step. But what I love most now about reading your posts is that I know your voice and sense of humor and so it is like you are reading it to me! Love it!
Excellent blog post today, than you Susan!
What a wonderful review for someone who was in your class at Woodland Ridge- THANK YOU SO MUCH. My 3 grandkids “Washing the Car” are waiting for me to finish them – this will be so helpful.