
Backgrounds pose more of a challenge than you might think they should. I’ve seen that happen again and again with my students—and it’s the same for me—though saying that doesn’t really help them when they’re in the middle of background angst.
I’ve talked about backgrounds in a past blog post, but let’s break it down into one aspect of a background for this post—corners. I talk about corners when I make my presentations in classes, and it was one of the students from a recent class in Australia that said, “You should make a blog post out of this!” So here it is: a blog post about corners.
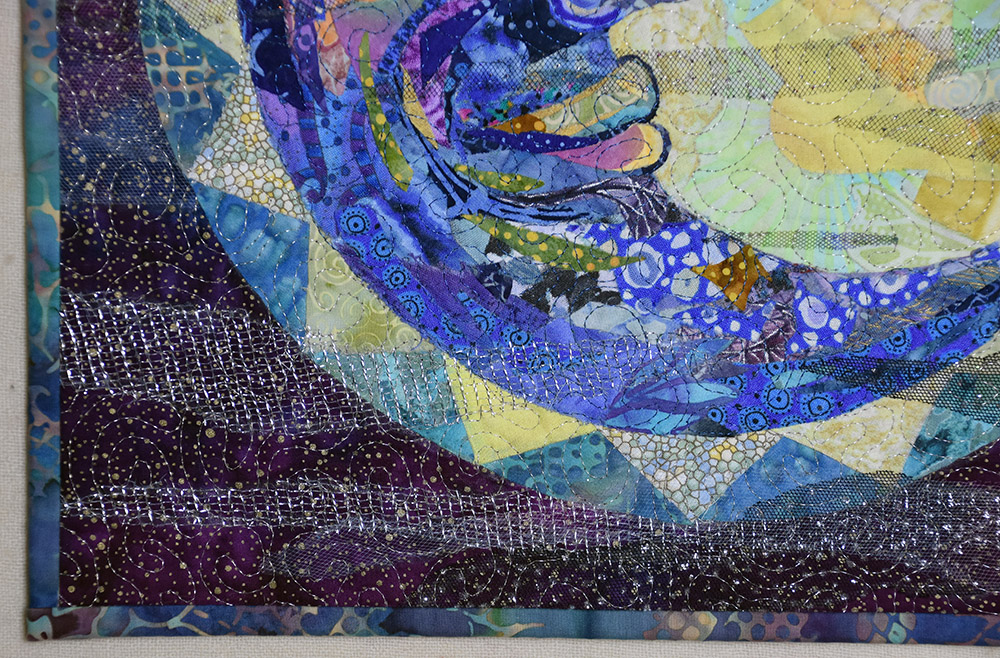
“Blue Moon” (14 x 14 inches, 2009) is one of my class examples of a very simple background—the collaged moon is glued onto a single piece of fabric for the background. However, it’s jazzed up just a bit with strips of netting and sparkle tulle (“tchulle!” for the Aussies). I simply cut strips of those sheer fabrics and glued them in place. Placing a circle on a square background creates some very empty corners. The sheer strips add interest to the corners and tell the story of wisps of clouds drifting across the face of the moon.
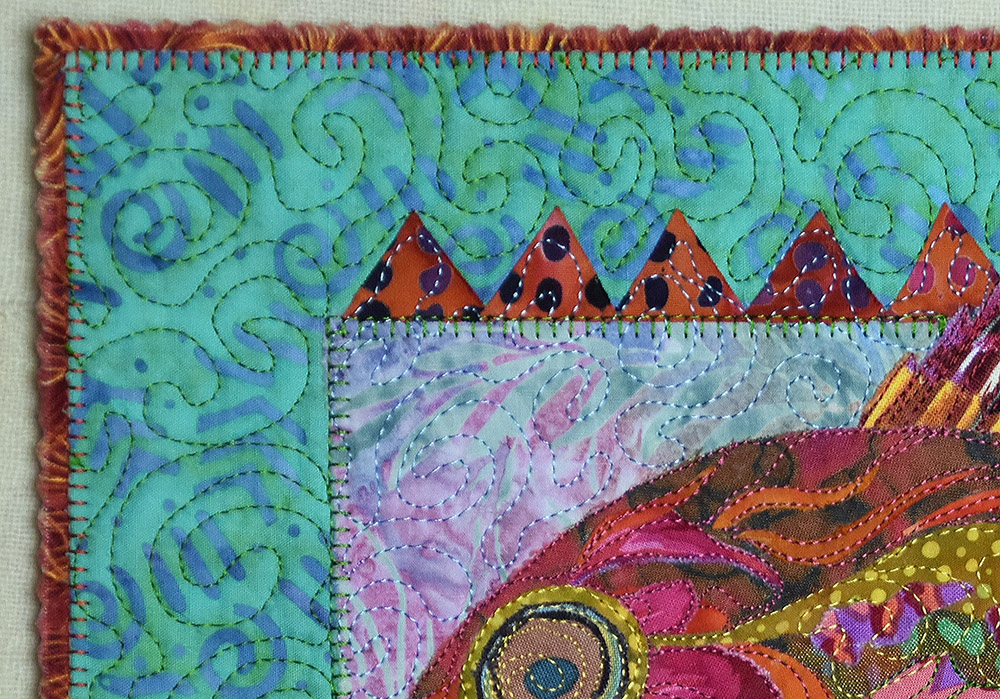
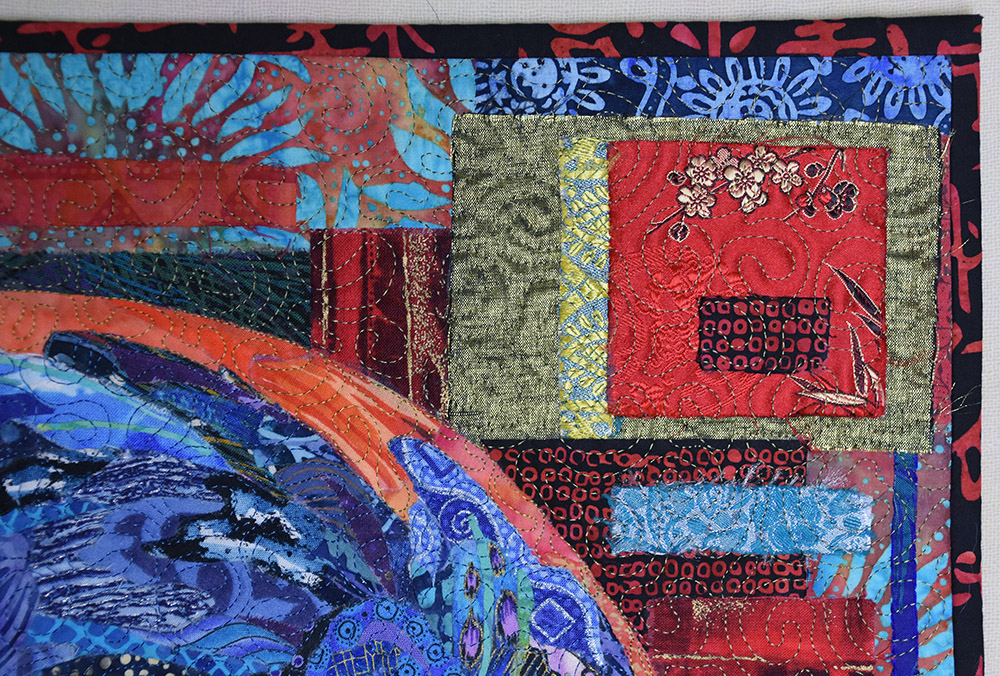
Another simple way to add interest to a corner is to fill it in with a “frame” or a “box” or a “highlight” as I like to see it. In the case of the fish below, the fabric I really wanted to use—the aqua of the outer border—was too close in value to the fish. Even though the colors were different, the fish body started to fade into the aqua. So I separated the two with a box cut from a lighter value batik which worked with both the fish colors and the aqua fabric. The added benefit is that the inner box breaks up all that empty space that the shape of a fish naturally creates when you square off the corners of a background.
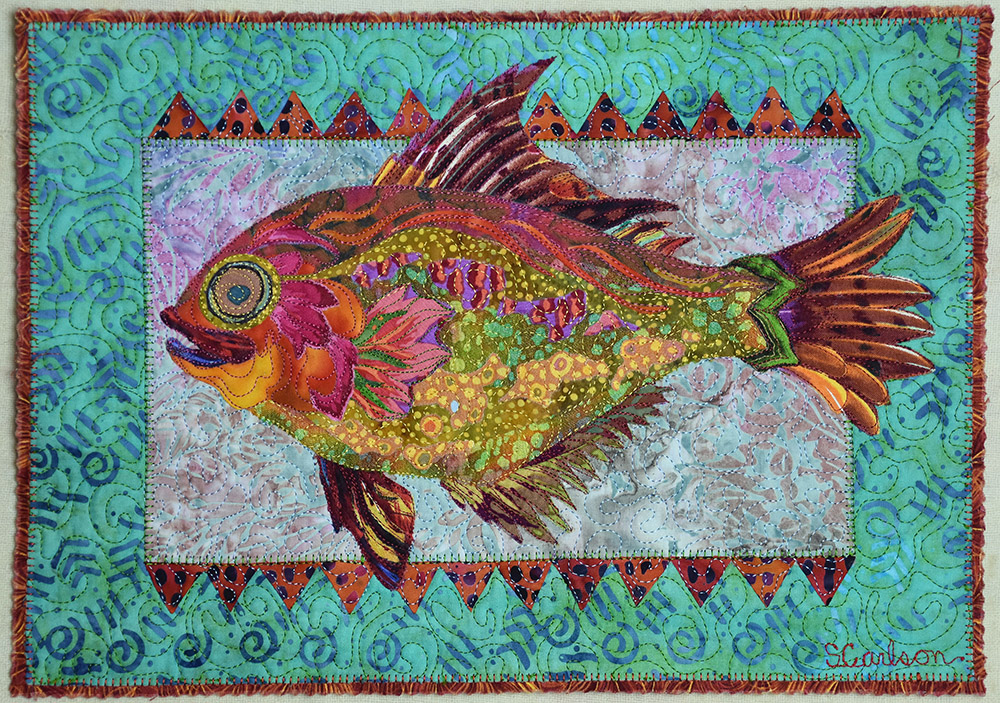
Adding an extra edge of free-hand rotary-cut triangles to that inner box, gave a little more attention and interest into the corners of the overall background. In the case of the triangles and all the background shapes, I continue to glue everything down. No need to revert to the sewing machine, even though these are straight lines. Keep that glue bottle handy!
In the betta fish yin-yang quilt below, I had four decidedly empty corners to fill without detracting from the primary image. As luck would have it—or “serendipity” as I would rather say—I happened to come across a little baggie of four squares of silk that I had squirreled away years before for some future project.
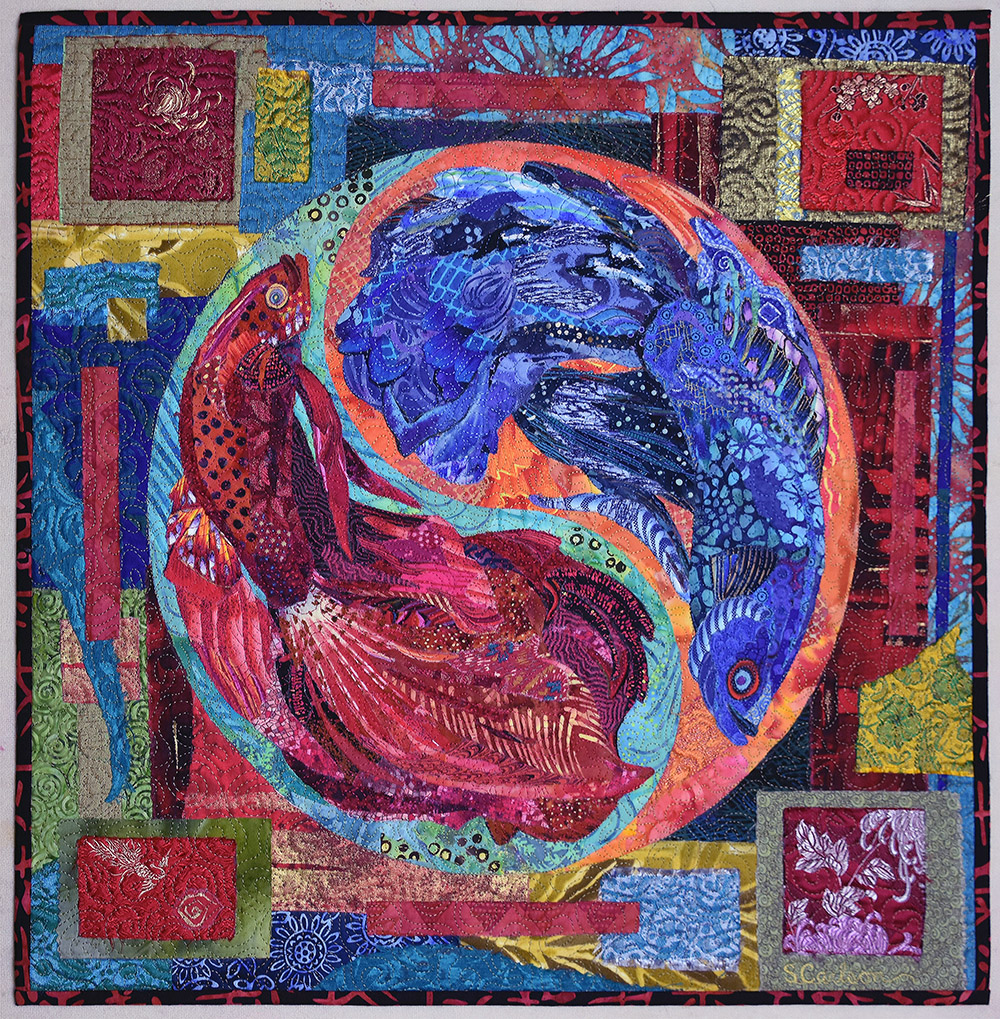
As the yin yang symbol is of Asian origin, the Chinese silk squares that had been gifted to me from a student were the perfect solution for the four corners. I decided that I’d frame each silk piece with a greenish fabric of some sort to set it apart from the rest of the grid-like collage of the background.
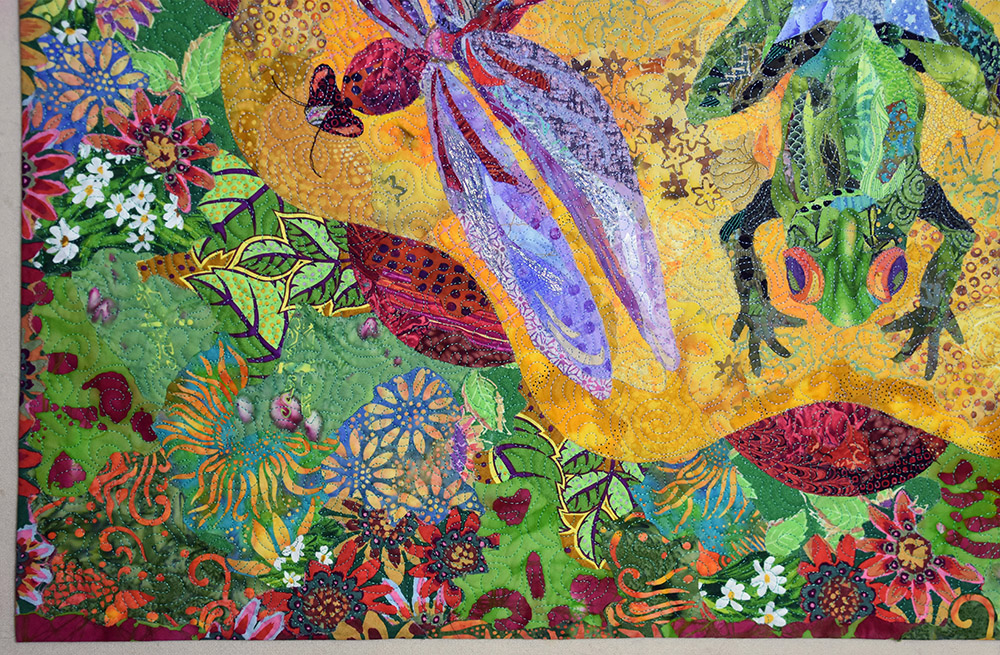
It’s not just squared off or straight edged shapes that can fill in the corners of a background. Most of the backgrounds on my quilts are filled with a collage of more “organically-cut” shapes or irregular scraps of fabrics.
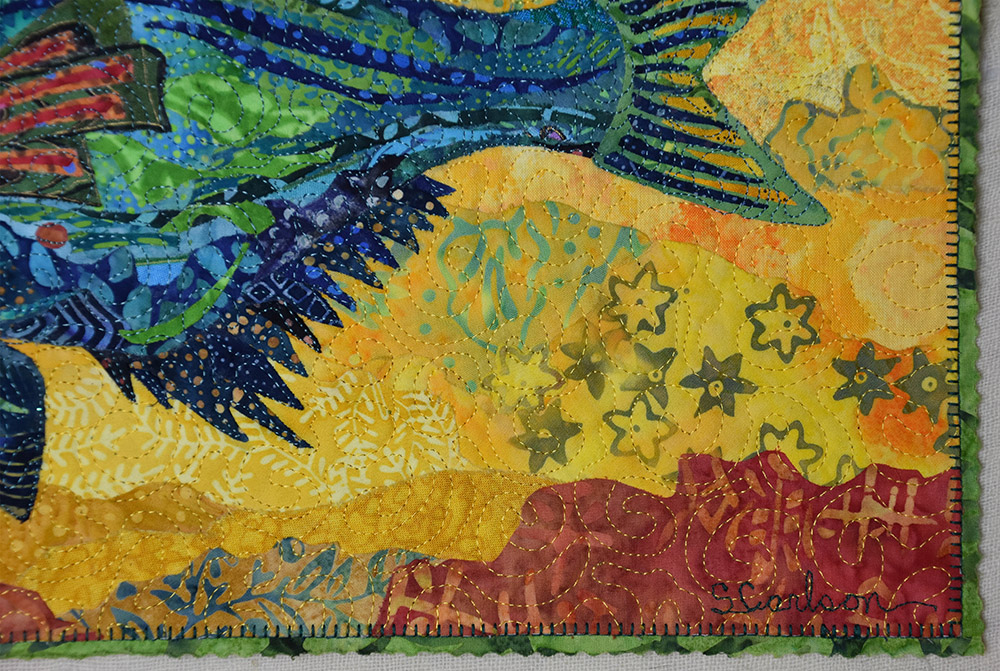
In the fish quilt below, I opened up my old suitcase scrap containers and rummaged for any bit of yellow that I saw. In the process, I pulled some red-orange scraps since bits of yellow in the print caught my eye. Those red-orange shapes happened to have a nice wavy cut on them, and as I started to play with them, they seemed to fill the corners nicely, creating a horizontal “watery” look.
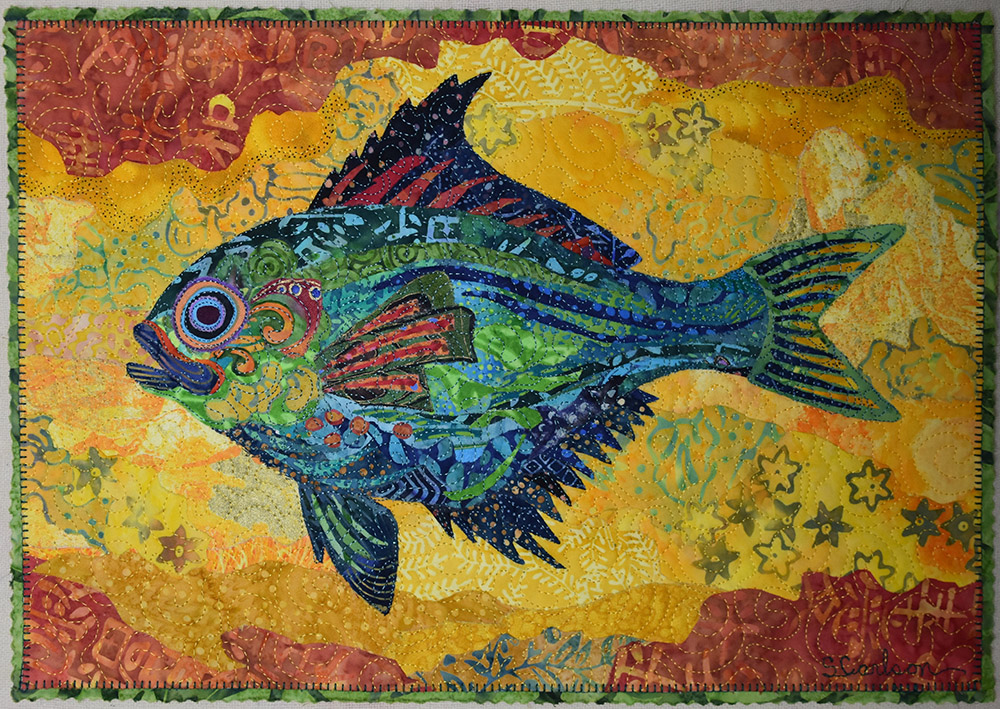
The yellow scraps were tucked in here and there for the background, paying attention to how each piece of fabric looked in relation to the part of the fish I placed it against. And as I worked away from the fish toward the corners, I found good use for the yellows that had a more contrasting print on them—helping to fill the background with more interest than just a color. I especially like the way the flowered print in the lower right helps to balance out the open space under the fish’s tail.
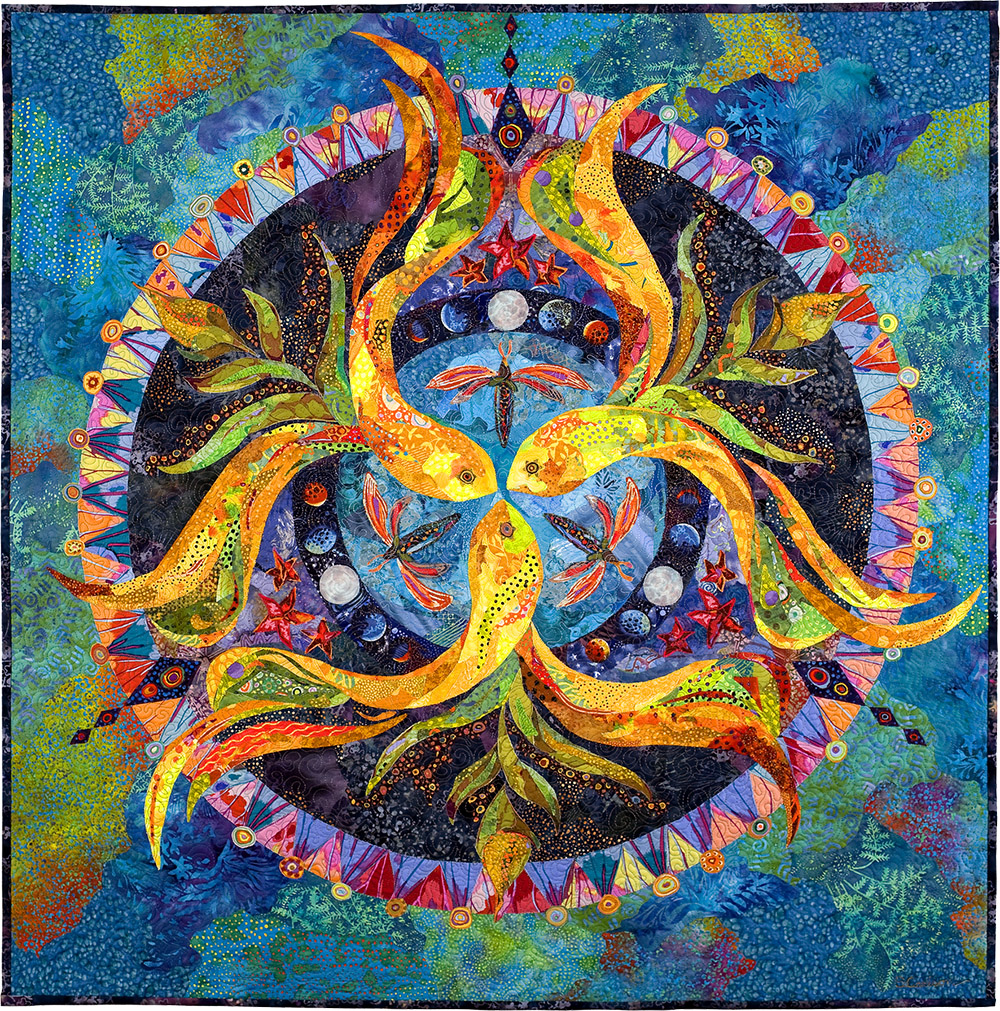
My garden mandala below, had the same issues as any round image on a square background has, big empty corners. The solution for these corners came about because of an initial problem with the background. I had cut groupings of flowers, leaves, and other fabrics with green in them, to fill the background behind the mandala. However, the flower prints proved too busy against the mandala, so I switched out flowers for fabric shapes with more green in them. That worked. Then I brought the flowers back in, adding a heavier ratio of flowers as I approached the edges of the quilt.
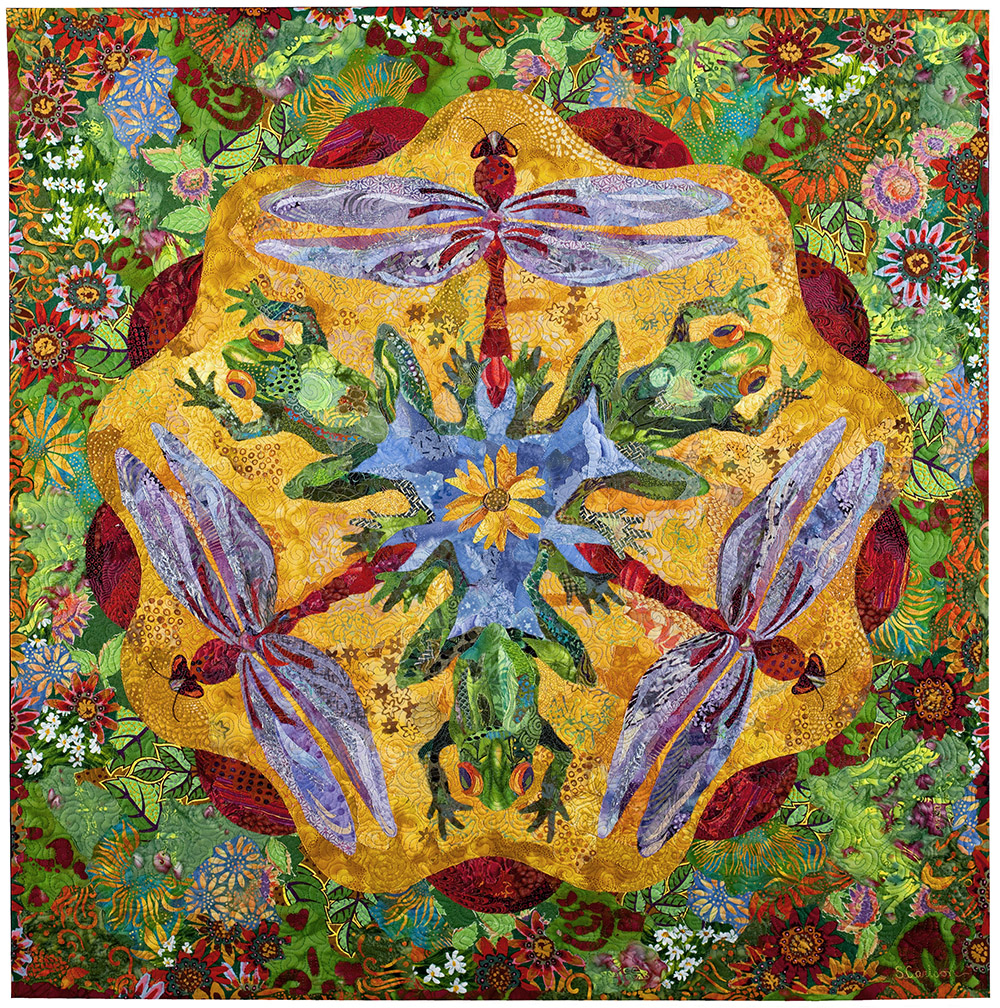
Very naturally, the flowered fabrics started “piling up” in the corners. I stepped back to look at the progress and saw a bit of a vignette developing. Very nice. The corners ended up getting filled in an unplanned, yet very satisfying sort of way. I just love serendipity.
And to finish out my little chat about background corners, I thought I’d throw in some corners with nothing special in them, just filled in with chunks of lovely fabrics.
The mandala below, was designed with a beautiful summer day in mind. As the center part of the mandala came together, placing it on a warm blue sky came to mind. So I gathered up some good fabric candidates, cut them into irregular chunks and arranged and rearranged until I was happy with it. A simple solution, but it worked for me.
By the way, this post is a couple days late for it, but Happy Summer Solstice to my Northern Hemisphere friends, and Happy Winter Solstice to those in the Southern Hemisphere.
Hi Susan, In Pond Mandala can you elaborate a little on that outer board of multi-colored triangles please? It’s rather mesmerizing….did you cut each triangle out & add the little circles? It boggles the mind! Thanks for all your creative inspiration & writing a blog that teaches me something new every time!
Yes. Each triangle was freehand cut and placed. So were the circles, which were cut from prints in fabric.
I have just started to follow you and am loving your work. It is so “fun” and creative. I teach at our local college and just must absorb more of your ideas. Thanks for the blog.
Wow do you want to come to Regina Sk Canada to teach. Love your work.â¤ï¸ðŸ‘ðŸ‘â¤ï¸
I have been thinking (more like agonizing!) about the background to my rooster I started in your class in Kalispell in June, even though I haven’t finished the bottom part of my rooster yet. However, things seems to be settling into place in my mind because of this blog, so thank you for this. Lots of lovely options to consider!
Merry Christmas to you and your family, and enjoy your down time….you deserve it!
I’m reading this for the second time, as I am currently stuck on a background. I think I have an idea involving the corners now. Thank you!
As always, even your reposts prove to be timely!! With many incoming “conversation bubbles” I know that Blue LuLu will find her way to completion. Thank you so much for your guidance inspirational magic!