Kissin’ Cousins: An Online Class Preview Part 4Susan2019-10-14T13:55:01-04:00
In this post I continue with the fourth and final installment of the preview of my online course, currently in development. I’m using an in-progress quilt, Kissin’ Cousins, to demonstrate each of the steps in the process.
As I said previously, the class will have six parts. They will closely resemble something like this:
Getting Started: Choosing a Subject and Making a Design
The Fabric Collage Technique: Fabric Selection, Cutting, and Gluing
In a previous post, To Tulle or not to Tulle, I talked about using tulle in preparation for a quilting technique called shadow quilting. Shadow quilting involves using a layer of netting or tulle over the entire piece in order to catch all the loose, raw edges. It’s another layer on top of your backing, batting, and top (or image). Starting out, years ago, I used shadow quilting on all my quilts because I was worried the pieces wouldn’t stay in place. Finally, I realized that by gluing down all the edges and doing a close overall stitch, I didn’t need to use that layer of tulle for shadow quilting.
The issue with using tulle over the entire quilt is of course that it can change the colors that you’ve so painstakingly chosen during the piecing process. Still, it can work in some cases, so when I finished piecing “Kissin’ Cousins” I considered using a couple different tulles, but as you see below I ultimately decided against it.
“Kissin’ Cousins” with golden tulle on the left and black tulle on the right.
Quoted from my To Tulle or not to Tulle post: “Now that I see it, I think I’ll leave this quilt without the final layer of tulle on top. Though the golden tulle is nearly invisible where it intersects Sam’s face, it certainly detracts from the dark values on his head. The black tulle on Maia’s side heightens the dark values, but shades the yellow’s of her face. I could keep looking at other colors of tulle, or say it’s done and move on.”
I decided to say it’s done and move on, but you might decide differently. It’s totally up to you and should be based on whether the image will benefit from it or not.
Quilting
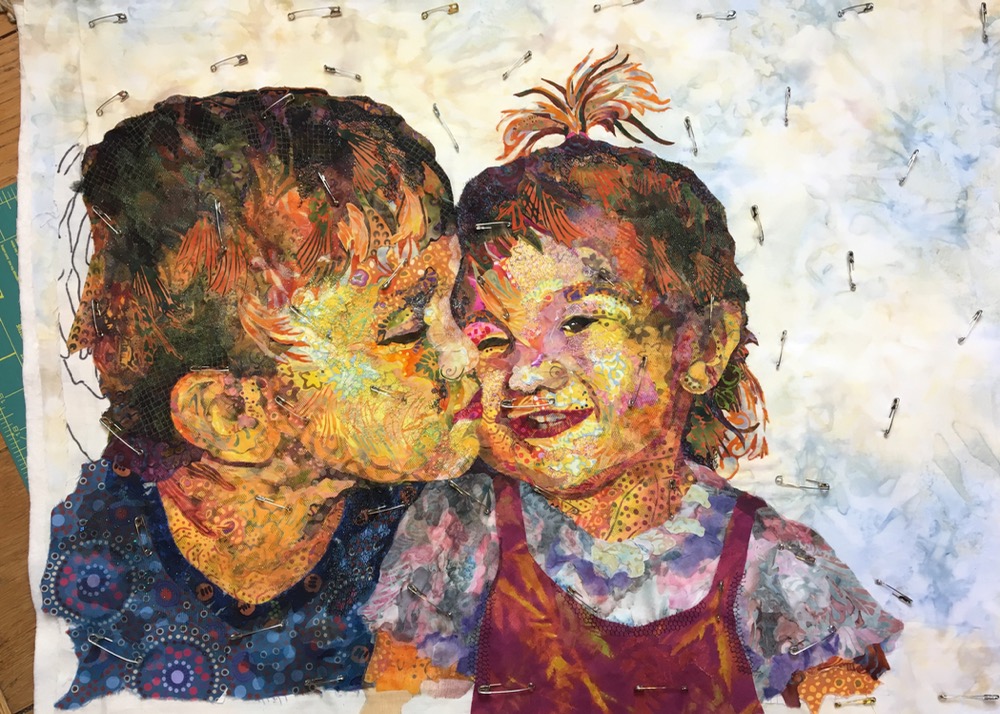
The first step in quilting is the assembly. Since I decided not to use tulle over the top, I simply made sure all my edges were glued down securely, then put together my three layers: top, batting, and backing.
I used safety pins to baste the layers together. In a previous blog post, “Free-Motion Quilting on Fabric Collage Quilts,” I share a neat trick I figured out for closing all those pins, which can be hard on your fingertips (and fingernails). I use a burnishing tool to lift the sharp tip into its slot. Check out the video on the post.
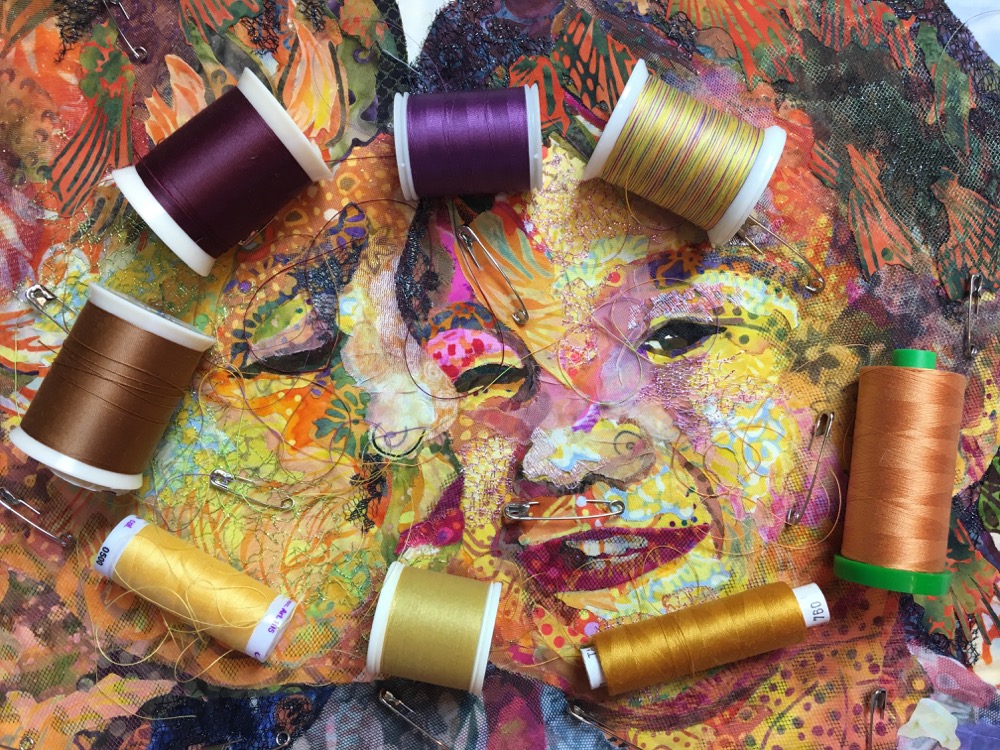
Once I had it assembled and basted, as above, I then chose the thread I wanted to use. As I have admitted before, I keep my quilting really basic, usually doing an overall semi-spiral pattern. I used to do a lot more with stitching, adding detail to features and so on, using lots of different color threads, either matching the colors of the areas I was quilting or using contrasting colors, but now I usually try to find as few threads as possible that will work for the entire quilt. I like the fabric to do the talking. That’s what makes me happy and satisfied with a piece.
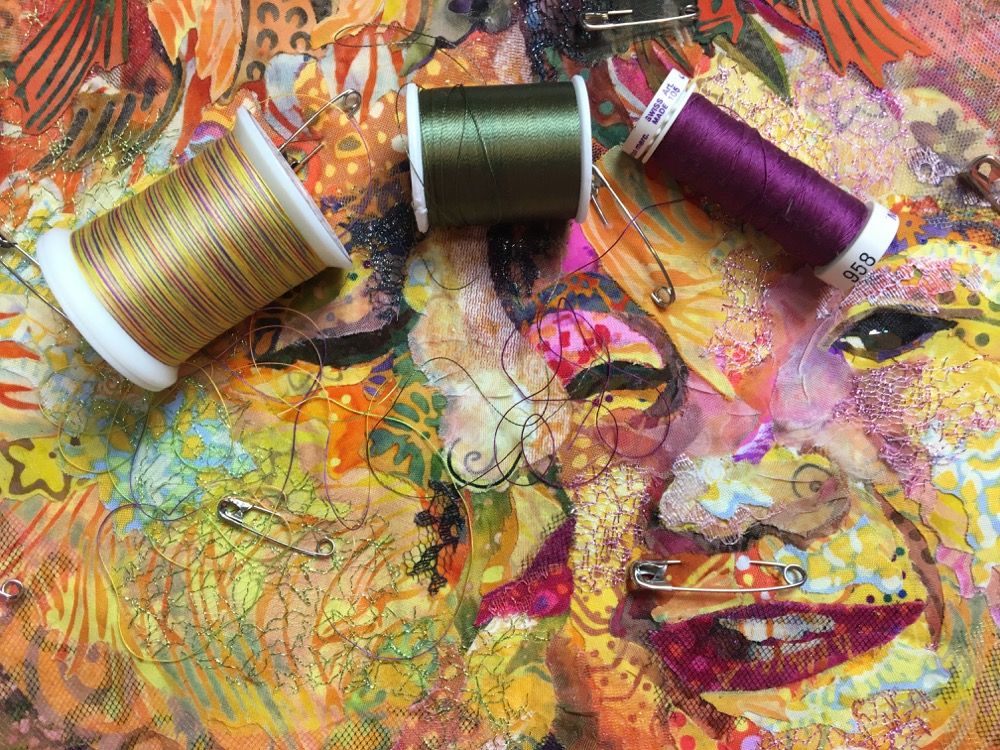
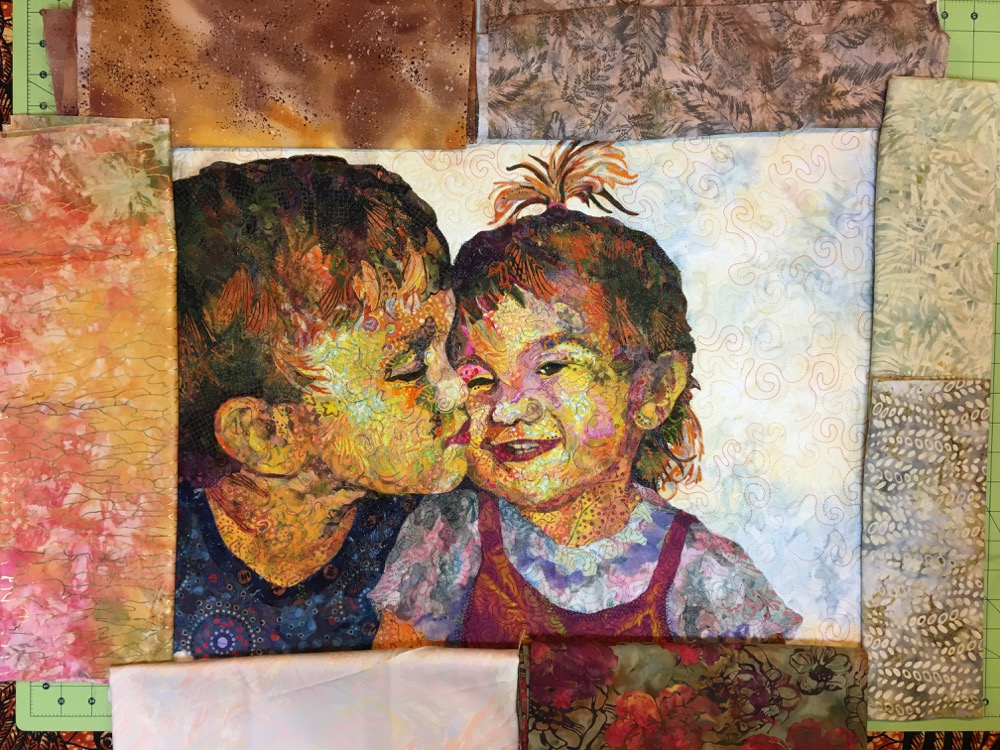
I started out with a wide variety of options, as seen above. Almost any of these would have been okay, which makes the selection process even more difficult, of course. But I did manage to narrow it down to the three below. Notice that I pull out lengths of thread to stretch across the image, checking to see if I like how they blend or contrast with the fabrics.
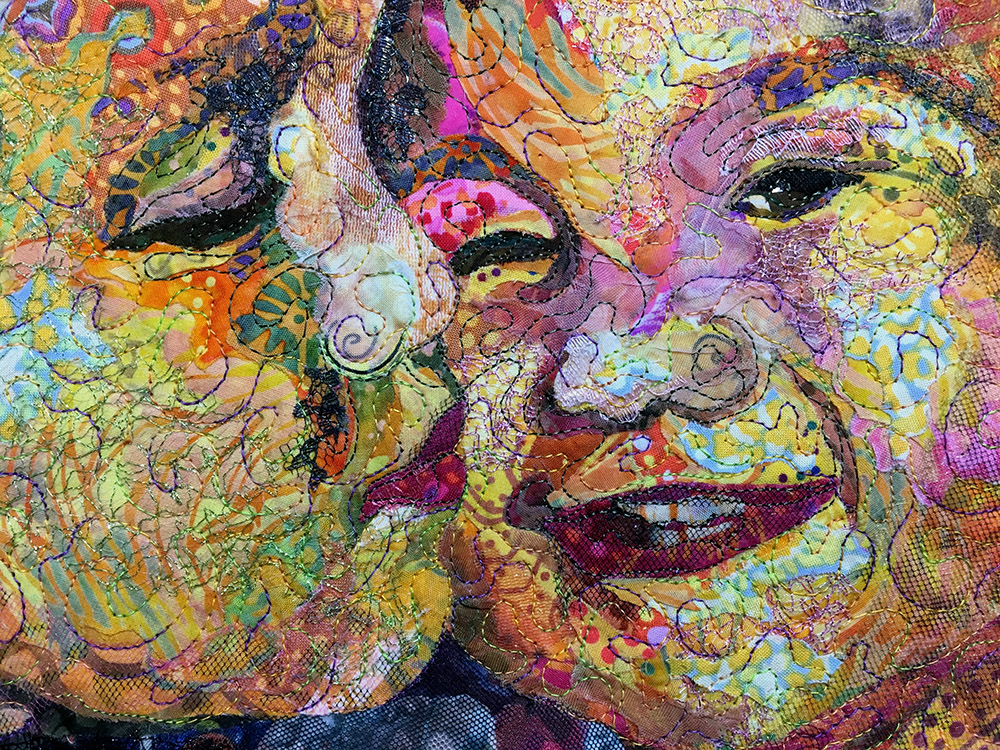
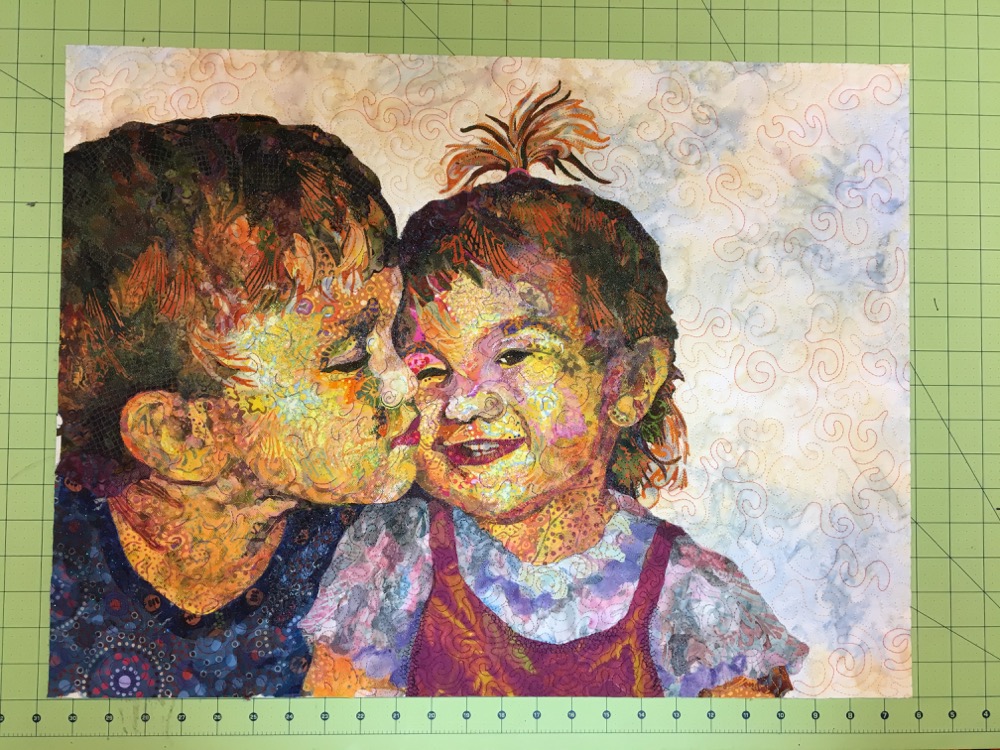
I decided I liked the variegated thread. This was a risky choice, as I knew I wouldn’t be able to control where the light and dark segments fell on the portrait. A stretch of dark thread could appear on a highlight or vice versa. I chose it because there were so many prints and I was curious to see how the thread would look in combination with the busy-ness of the prints. You can only guess so far. Eventually you just have to take the leap and do it.
The variegated thread made the piece busier. It’s definitely “different” looking and has taken a little bit to get used to, but it’s growing on me. Because of the randomness of the darker bits of the thread, a few of those stitches fell in some interesting places that work with the contour of the faces. I like it when that sort of unexpected thing happens. As far as taking a little bit of a risk and trying something different I think it was successful.
Finishing
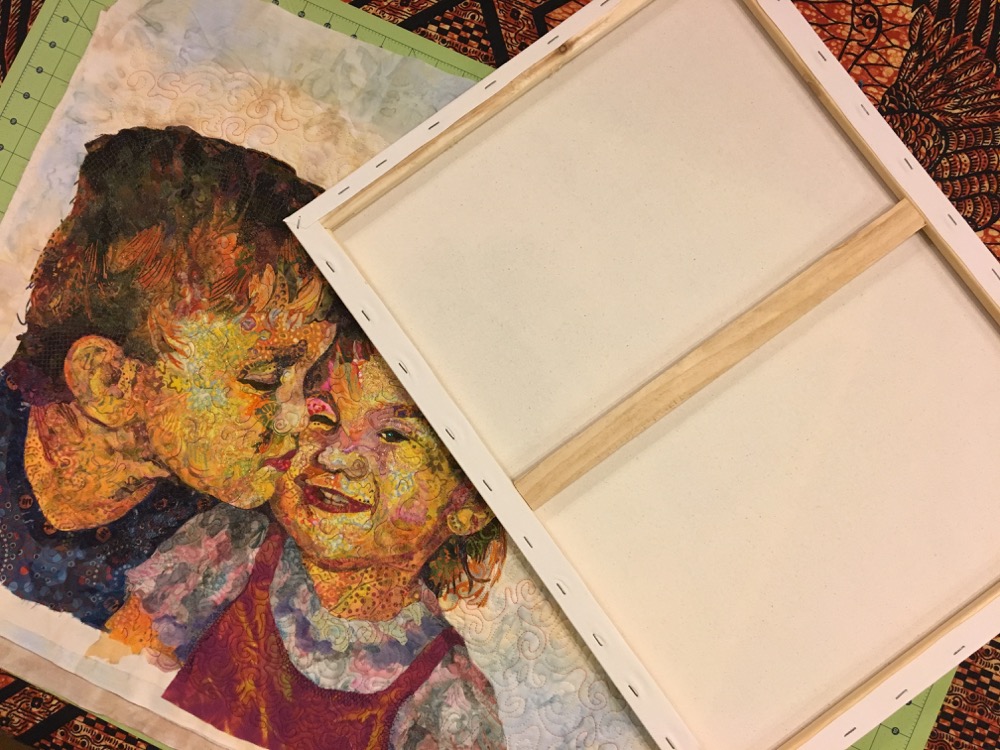
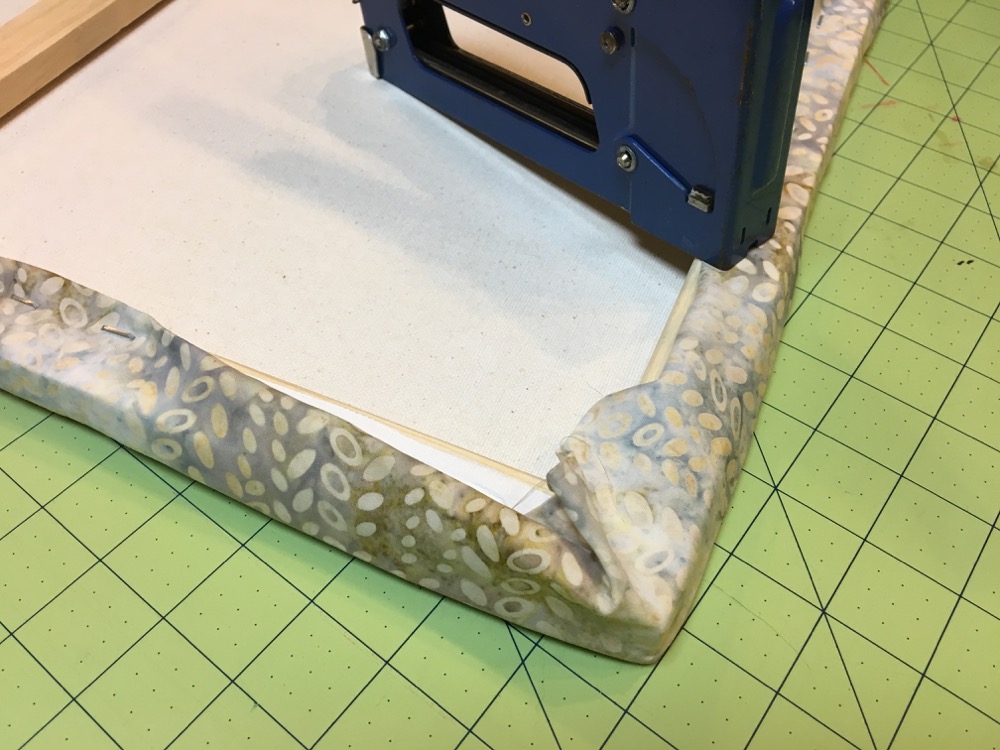
I knew from the beginning that I wanted to finish this piece by stretching it around a pre-fab stretcher bar frame. I made it the size it is on purpose, so that it would fit an 18 by 24 inch stretchedcanvas which I ordered online. I’ve described this technique in a previous blog post, “Hang It up: Making Your Art Quilt Art”, so I won’t go into detail how I did it here. As an overview, I trim the piece to size, plus a quarter inch all the way around, then sew on a continuous strip of fabric around the edge. I then stretch the fabric around the frame and staple it on the back. Here are some photos of the process.
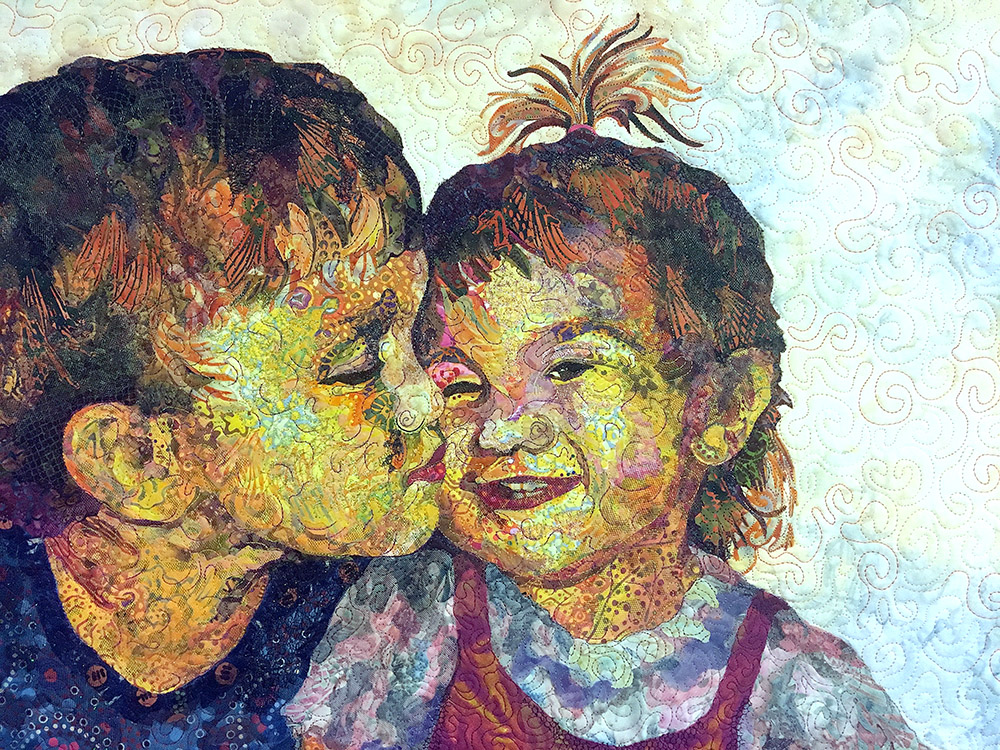
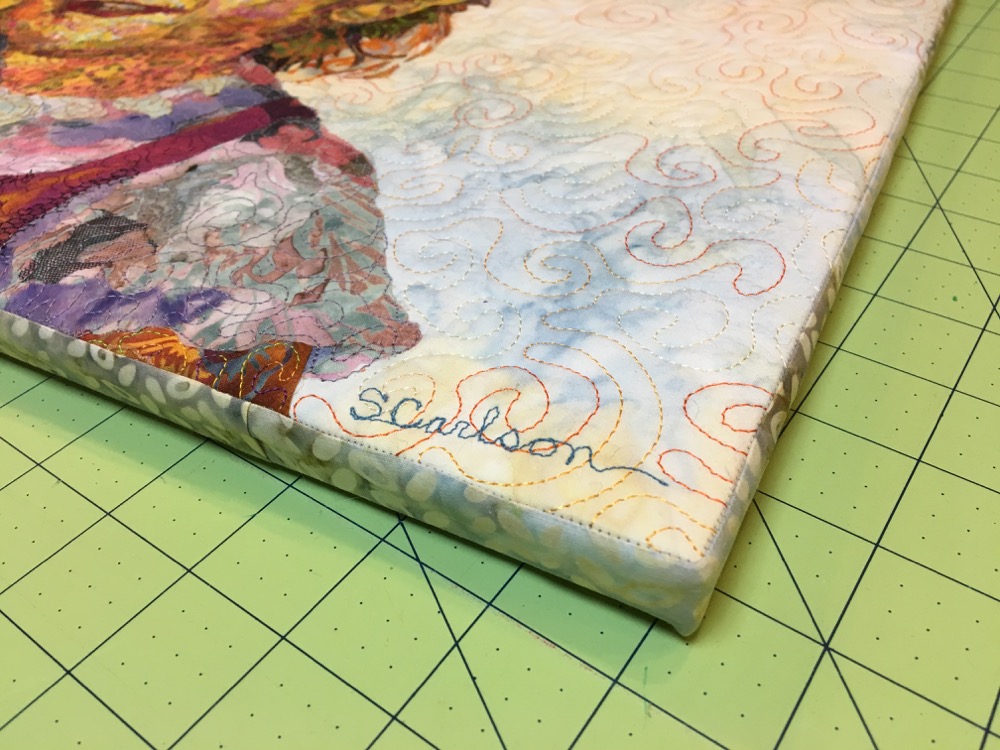
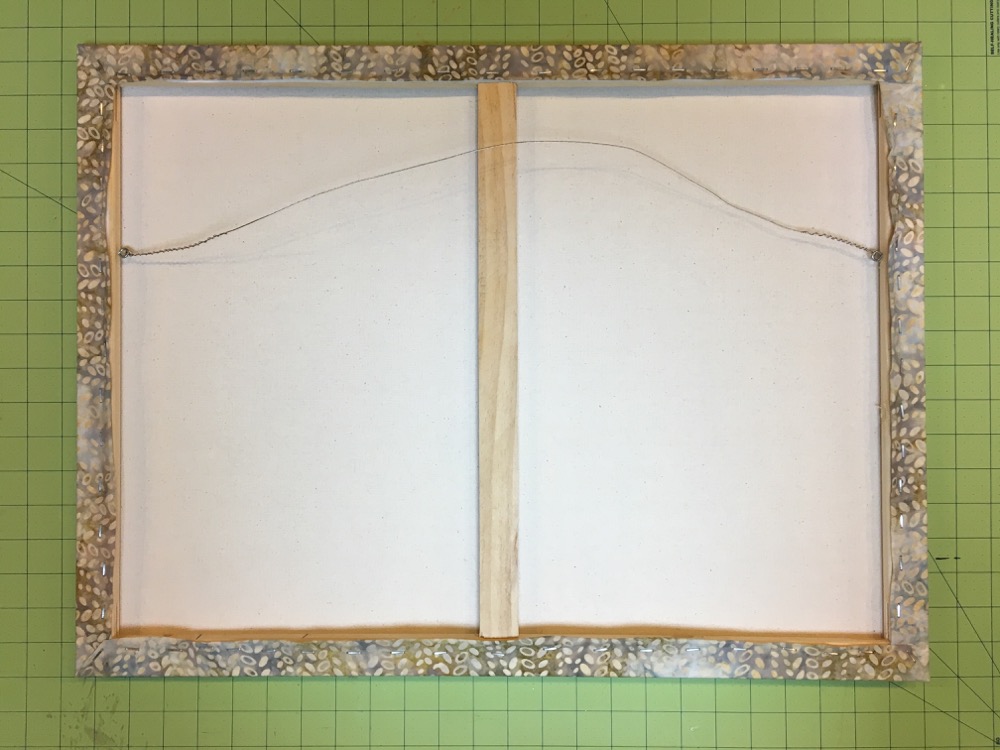
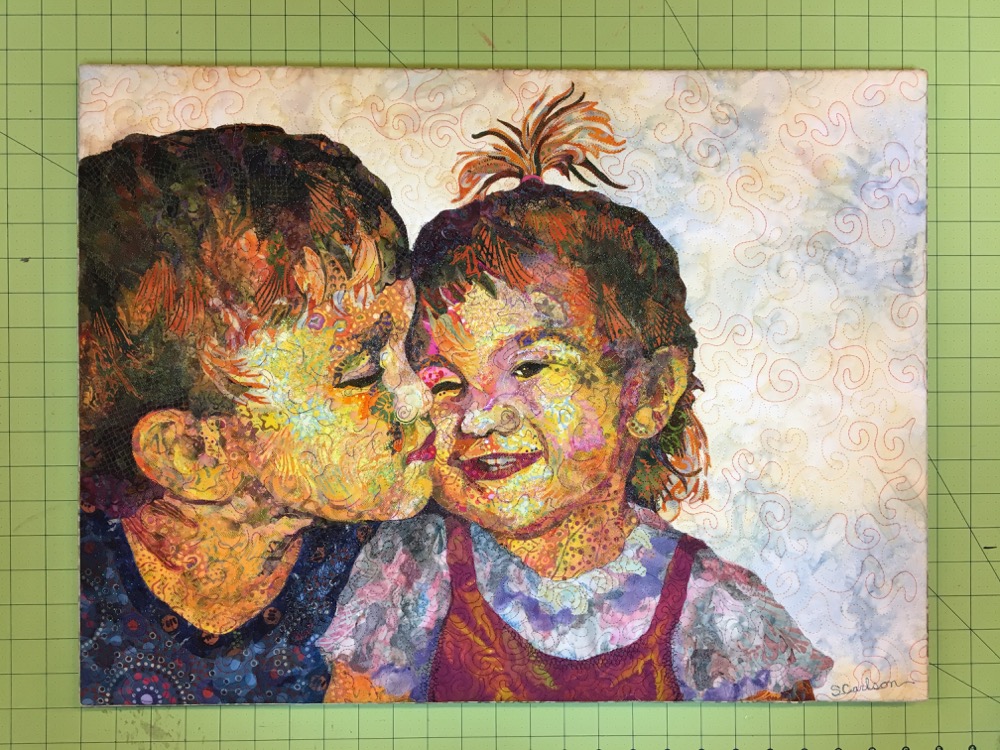
The stretcher bars and the piece after quilting is completed.Auditioning stretcher bar edging fabrics.Squaring up. The first two edges cut.Lining up for the final cut. Notice that I use my plastic rulers to not only make the cut straight but also square.Squared and cut to size.Stretcher bar edging sewn on. Where the beginning and end meet, I turn the beginning edge under and overlap it at the end. I also place this fold where it will be less noticeable, usually near the lower right corner.Stretching the fabric taught, turning it under itself, and stapling. I begin in the center of each side, then work back and forth from opposite sides. At the end, the corners neatly fold into a miter and get stapled.The finished edge.Two screw eyes and picture wire for hanging on a wall.Voila! “Kissin’ Cousins” is done! This portrait of my son and niece has been in the works and a UFO (Unfinished Object) for years. Nice to have it done.
Preview Complete
That’s it! That’s how this particular fabric collage quilt was made following the steps that will be described in much more detail in my online class/workpages. I hope it’s been helpful for you. It was certainly helpful for me as a sort of outline I can use to flesh out the class.
Speaking of the online class, I plan to have it ready for public consumption at the first of the new year. In the meantime, I will be making a trial run of the class available to my Patreon supporters who are signed up at the $10 to $20 levels. If they chose to, they will be able to help me by pointing out errors, finding places where gaps need to be filled, and testing out the online feedback system through a private Facebook page dedicated to the class. It’s not too late to sign up as a supporter and be a part of the trial run this fall.
Thank you for sharing your wonderful techniques. I just wondered if intending to stretch the piece on canvas would it really need a backing fabric? Would it work the same with just the front and batting? If I didn’t live in Scotland I would definitely be signing up for your retreats!
Correct, with a stretched canvas the backing is now hidden forever, so certainly I wouldn’t use any backing fabric that was particularly interesting. Though if I had used stretcher bars alone, without pre-stretched canvas, then my backing would still show. I’ve never quilted without a backing fabric, so I can’t speak if not using it would make much of a difference for me or not.
Siting here with WiFi in Evora Portugal patiently waiting for 2pm, 9am your time, so I can try to register for your class. Have tried before so I’m hoping this is the time.
Leslie
I signed up to be a patron at $10 level. I forgot the coupon code by the time I picked out which free pattern to get. I could never get back to that page to get the code to enter in the cart. I would like the Gecko pattern. Any way you can assist this tech challenged person? I’m looking forward to beta test your online class!
Susan, I am signed up for your Sept 2018 MISA Class. Do you think It will benefit me to also take your online class?
Or do you think I should wait for the MISA class and go in fresh? I have read your books but have yet to really read thru all of your online trial demo.
I would like to sign up for one of your online classes in 2018, I would be very grateful if you would let me know when this will be possible.
Thanking you in advance Sandra Tavel


Thank you for sharing your wonderful techniques. I just wondered if intending to stretch the piece on canvas would it really need a backing fabric? Would it work the same with just the front and batting? If I didn’t live in Scotland I would definitely be signing up for your retreats!
Correct, with a stretched canvas the backing is now hidden forever, so certainly I wouldn’t use any backing fabric that was particularly interesting. Though if I had used stretcher bars alone, without pre-stretched canvas, then my backing would still show. I’ve never quilted without a backing fabric, so I can’t speak if not using it would make much of a difference for me or not.
Siting here with WiFi in Evora Portugal patiently waiting for 2pm, 9am your time, so I can try to register for your class. Have tried before so I’m hoping this is the time.
Leslie
Good luck! I’m sitting here hoping everything goes smoothly!
I signed up to be a patron at $10 level. I forgot the coupon code by the time I picked out which free pattern to get. I could never get back to that page to get the code to enter in the cart. I would like the Gecko pattern. Any way you can assist this tech challenged person? I’m looking forward to beta test your online class!
I believe you should have received an email with that information. If you didn’t please email me and I will send it to you that way.
Susan, I am signed up for your Sept 2018 MISA Class. Do you think It will benefit me to also take your online class?
Or do you think I should wait for the MISA class and go in fresh? I have read your books but have yet to really read thru all of your online trial demo.
I would like to sign up for one of your online classes in 2018, I would be very grateful if you would let me know when this will be possible.
Thanking you in advance Sandra Tavel
I would like to take the online classes when available. I am a photographer and quilter and cannot wait to try this.
wow… I’m excited to do this.. thank you for taking the time to detail each step for us who can make it to your classes,