
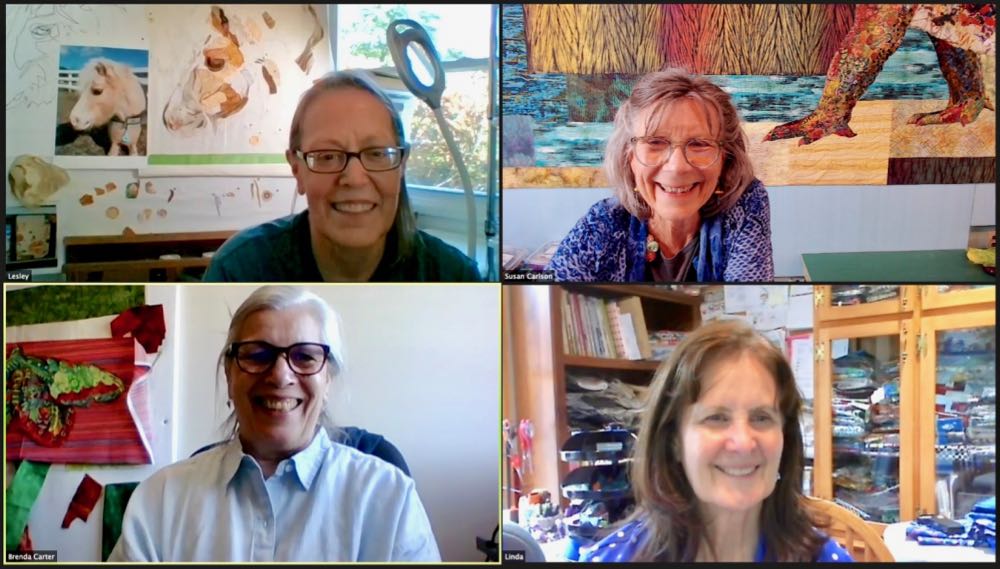
In last week’s post, I introduced you to the first group of students—the Zookeepers—and their quilts from my recent May 2021 Live Online Class. This week we move on to the second of three groups (or Zoom breakout rooms): Horseflies—a fun name for three very enjoyable ladies. I think you’ll agree when you see their work below—thanks to Linda (detail of her eagle above), Brenda, and Lesley for sharing.
If it isn’t clear how a Live Online Class works, please visit the link to my March 2021 Fabric Collage Live Online Class. That post explains the process in detail. You may also like to check out April’s Online Class post.
If online classes are an option for you, I am collecting expressions of interest for a class running in December, January, or February. Let me know by dropping an email to Tom ([email protected]) with the subject heading: “Expression of Interest: Live Online Class.” We’ll let you know in a separate email, when we’ve firmed up any dates and are getting ready to open general registration.
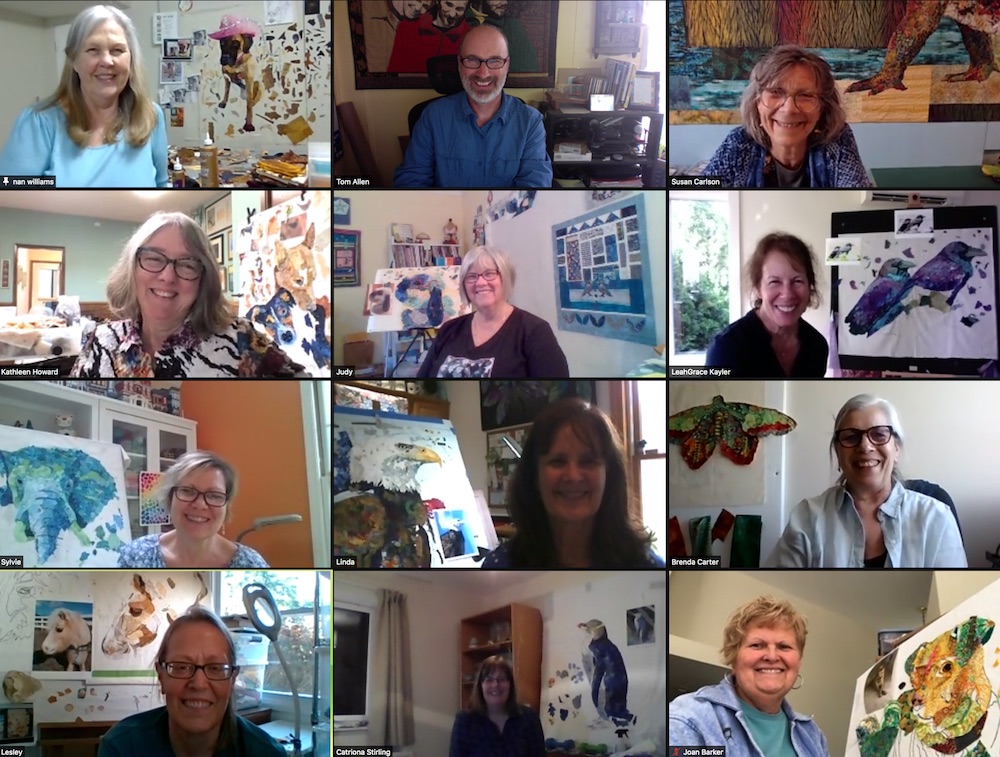
The photo above is all but one of my full class of students. After each morning’s meet up, these students were divided into Zoom breakout rooms. These smaller meetings within the larger meeting allowed my students to socialize while I was working with one of the other groups.
Horseflies
Why “Horseflies”? Because the subjects were a horse and two creatures that fly, an eagle and a moth. Tom actually came up with the name which I think grew on all of us after a couple days. In any case, it seemed to amuse everyone and the name stuck.
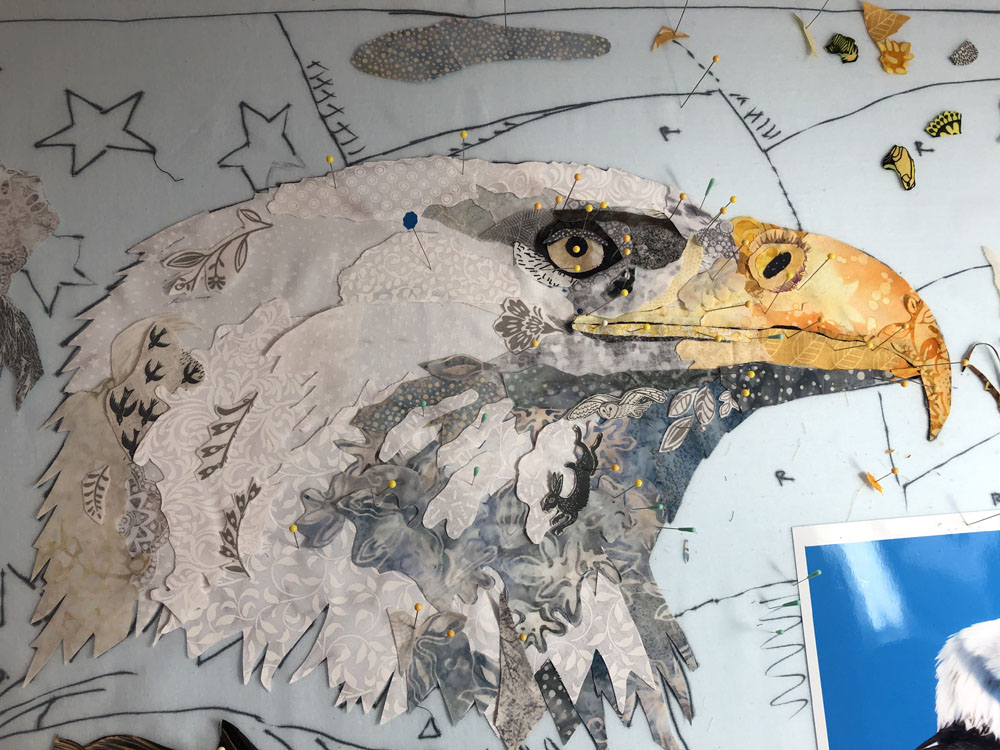
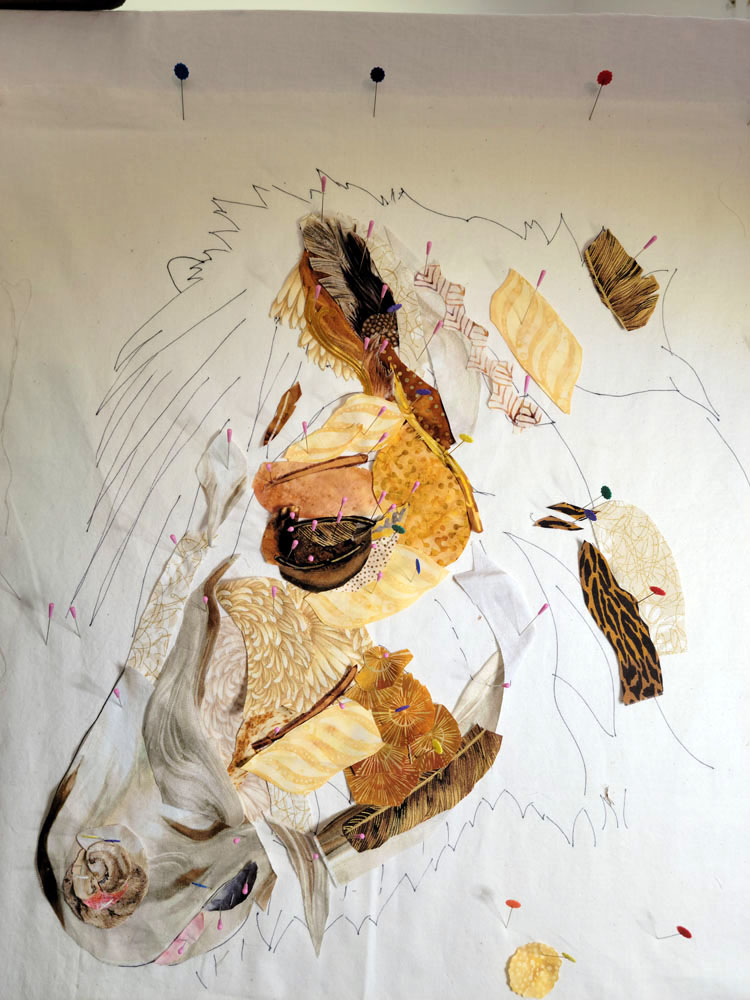
Linda Peterson—Linda’s theme of a bald eagle and American flag took a colorful turn on day four, when Linda said she was “bored with brown!” With a little encouragement and a through search of her stash, Linda found some colorful fabrics that she transformed into wing and body feathers. As you can see, Linda is well on her way to a handsome portrait of our country’s symbolic bird.

Linda had a great photo to work with from her friend, John Maurice. Before class began, she had created a very nice shaded pencil drawing of the eagle and her idea of a draped flag behind it, below right. This was more work on her part than I ask of students, but was still time well spent. I feel the more one is familiar with their subject, the better able they’ll be able to reinterpret it with fabric. It’s a big jump from photo to fabric and Linda made it seem pretty easy.


My standard response when asked where to start on a collage is to start with the nose, or in this case, the beak. As with all photos, click on them to see larger if needed.


The photos above are what I would call Linda’s first draft of the eagle’s face and head, the photo below is more of a second draft. You can see how her layers of fabric are building up one on top of the other—details that not only contours and values to the bird, but so much interest as you look closer. Be sure to find the birds, bunny, and owl.


By the beginning of Day Four, Linda had progressed down the neck and into the wing feathers, photos above. And that’s when she expressed her feeling about wanting to move from all the brown into color. Well, that’s all I need to hear from a student and she went on a stash-hunt to find some options for us to look at. The photos below are screenshots with annotations from fabrics she found. The first round finds are below left, and by Friday morning she found more luscious color to add, below right.
From Linda:
The immediate access to all our fabric in our studios at home was a definite plus. For me, on the fourth day, I changed direction and started to add color. Yea! If I had traveled someplace and brought only the fabric I started with, I would have surely been stuck. This allowed me to play with color with Susan’s guidance.


This is a common occurrence in my fabric collage classes: around day three or four (or even five!), the student’s eye has been trained to see their fabrics in ways they hadn’t been able to before, leading to sudden turns toward unexpected but satisfying directions. In the before and after photos below, you can see how perfectly lovely those large butterfly wings worked as the eagle’s large wing feathers. By then she had found even more colorful prints to work with for chest feathers, had a few great ideas for collaging the flag, and I knew she was on an inspirational roll.


From Linda:
Susan and Tom were an excellent team of artistic and technical talent. Susan was very patient with her suggestions and directions. She has a wonderful eye to see beyond what is there at first glance. She helped me look at things differently and it has changed how I look at fabric. It was a chance to “play” and be creative and add color! Life can get kind of serious, especially with this past year. Creativity is healing, and it is good to make it part of our daily lives. It was a reminder about how important it is to play. It was such a pleasure spending the week with Susan, Tom and the rest of the class. It was great to be with others who were also excited about learning and creating. This is an experience I will long remember and be thankful for!
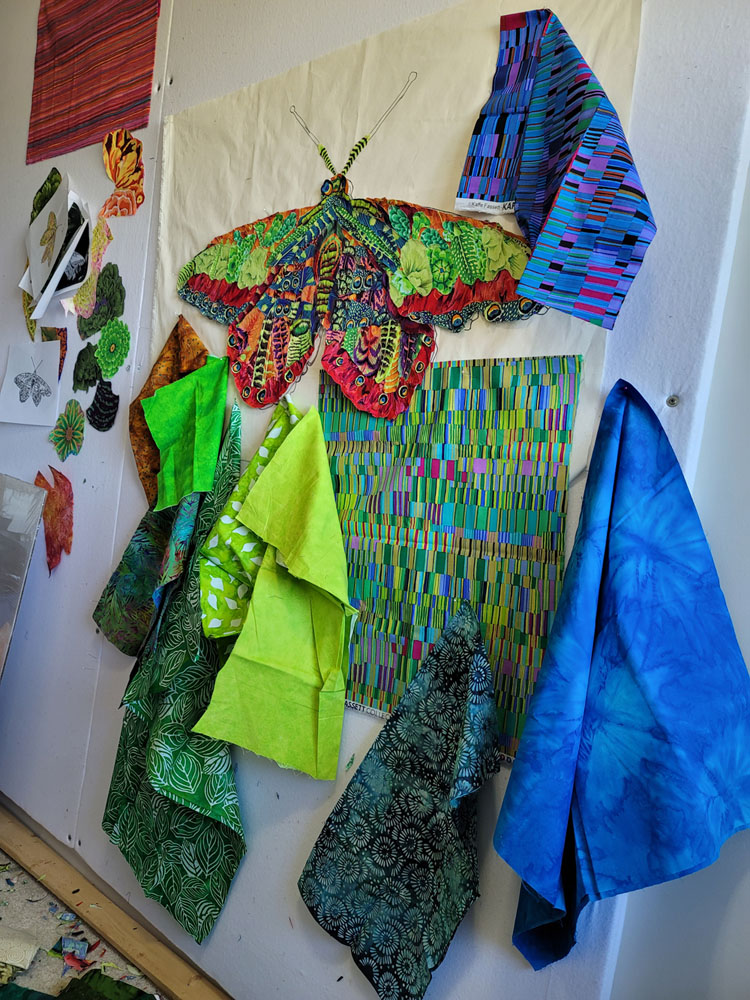
Brenda Carter—The other “fly” in the Horseflies group, was Brenda’s moth, which alternatively had the nicknames Christmas Moth and Psycho Moth.
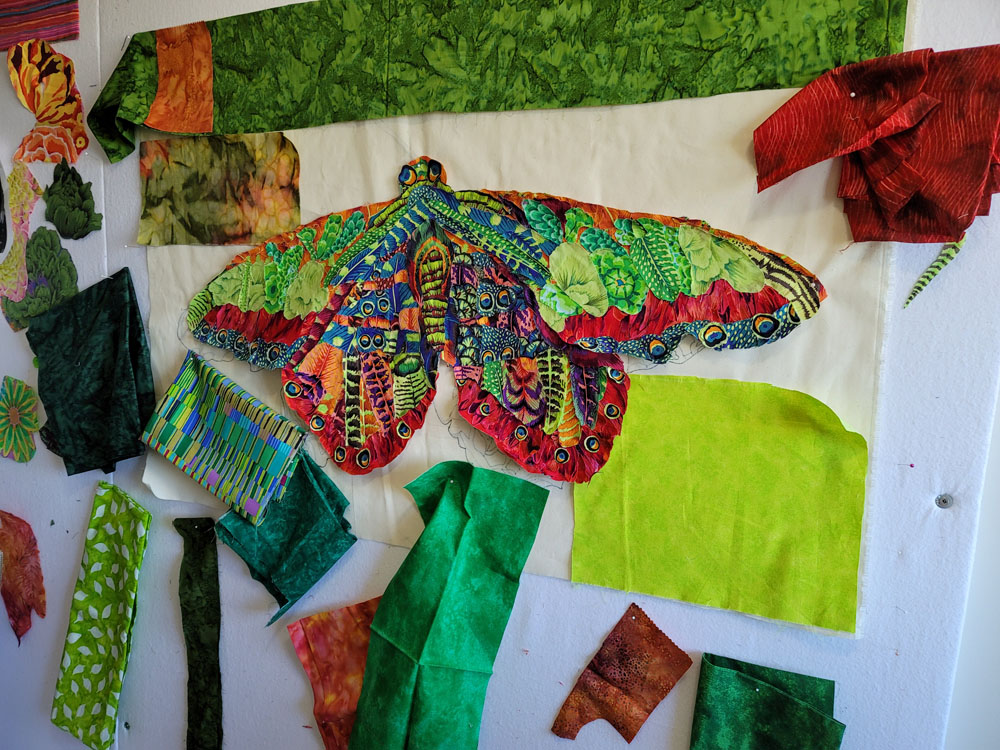
Brenda seemed to be all smiles and laughs all week, a pleasure to work with, and her resulting mega-moth is a pleasure to gaze at. It’s also a great example of how you start at one place, thinking you know where you’re going, but then inspiration (or your fabric) leads you in a different direction—and you follow it.
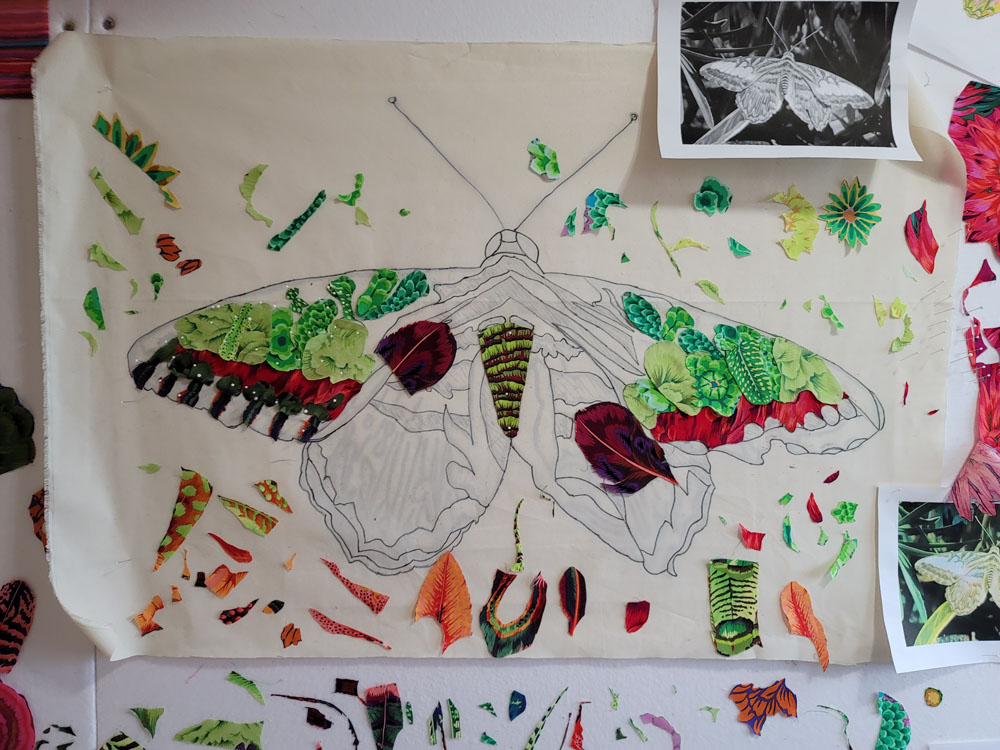
In the photo below you can see the faint lines of Brenda’s first moth drawing underneath the second simplified version. She didn’t need all the detail, just the basic areas of interest to begin placing fabric shapes into. The reds and greens Brenda began with led her to call it a Christmas Moth.
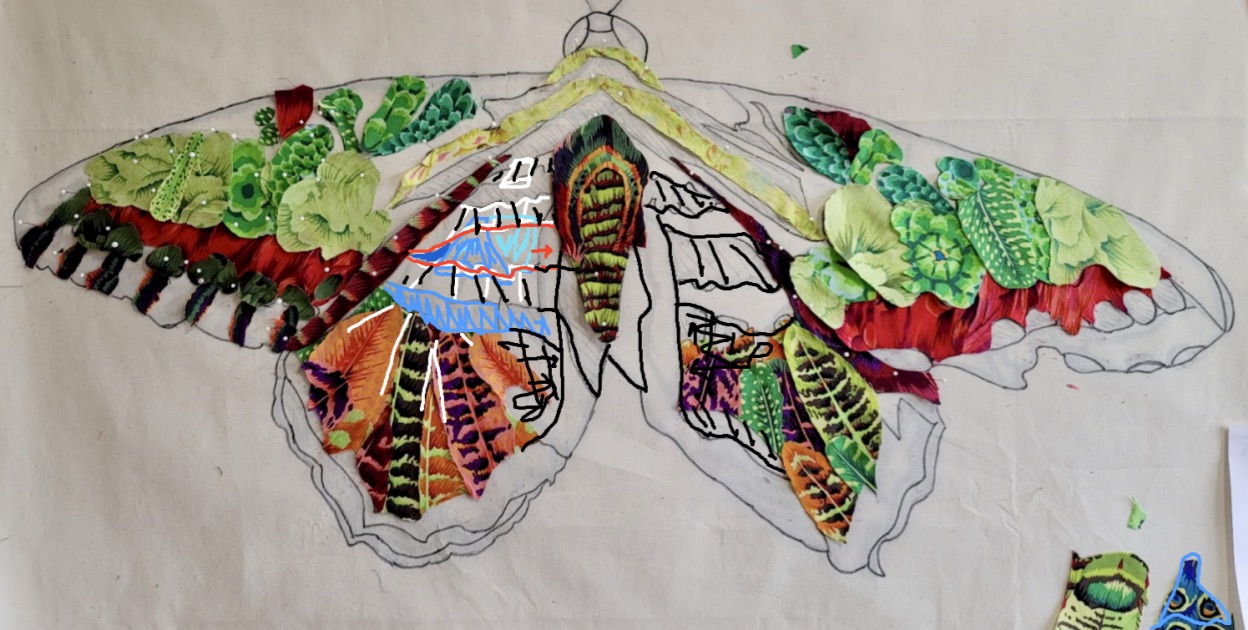
As Brenda moved along to the lower wings, below, a bit of orange worked its way in. She started questioning the upper wings, but my feeling is that you need to get farther along on the first draft—cover the foundation fabric—before you debate too much. You just can’t tell how things will look until colors and shapes are “connected.” I asked her what she liked about the lower wing and she immediately repied, “the feathers.” So we came up with a plan to proceed with (annotated below) to incorporate more feathered fabric.
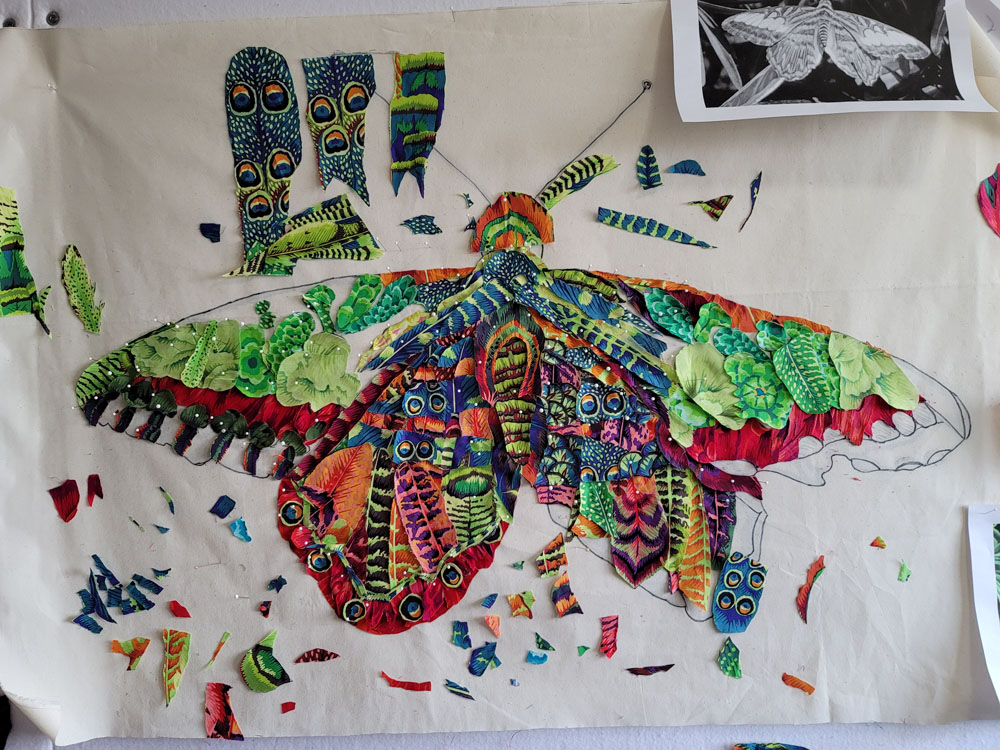
And that’s when Christmas Moth became Psycho Moth, below. What fun this is—like a psychedelic weaving of color and pattern.
Brenda’s fervor of collage construction meant that she had many, many pins to now contend with, and I know she spent many hours gluing fabric pieces onto the foundation fabric between class days four and five. She was ready to talk backgrounds, below, but it was only speculation until the moth was “released” from the base fabric and we could see how it actually looked against background options.
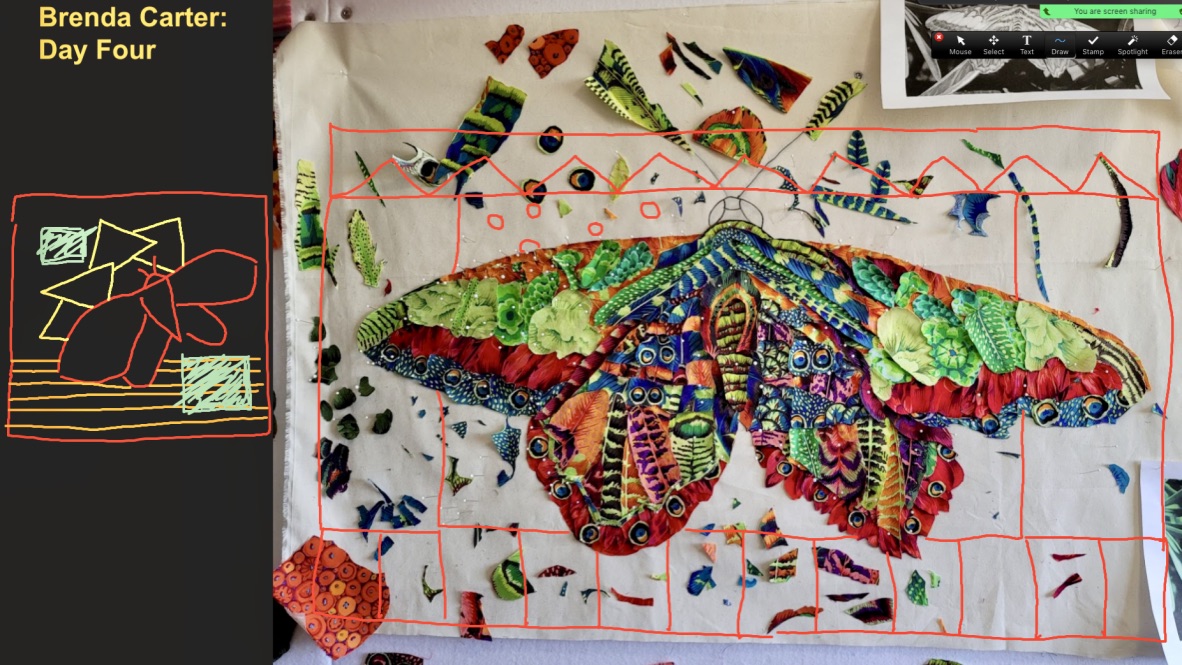
With the foundation fabric now cut away from the moth, Brenda could now audition all sorts of fabrics for background ideas —just like starting all over again. Good luck, Brenda!
From Brenda:
This is the first time participating in workshop of this nature. I have wanted to take part in a Susan Carlson workshop shop for years but distance, planning travel, arranging time off from work and registration filling up so quickly prevented it. Providing the workshop online is an excellent concept and very much appreciated! Plus, the way the work shop was set up was great. Susan presented a lot of information together in a short period of time and did a great job! The workshop was also set up with references to carry on with the collage process using [the Master Class] manual and internet for continuous learning.
Lesley Beck—Finally the horse in the “Horseflies.” Lesley volunteers with a therapy horse organization and creating a portrait of one of the equines was one of her ideas for this class. “Teddy” the miniature horse was the winner.
From Lesley:
I had never taken an online class before of any type and only one collage quilting class several years ago so jumping into Susan’s class was a revelation. I changed my photo choice on day one but thanks to working from home was able to run down to local copier for enlargements & start fresh. This is something I don’t recommend but Susan’s patience got me through it. Being online gave Susan the ability to “draw” on our work, highlighting areas on our drawings & fabric to use, move, or lose and her eye for detail is incredible. Absolutely loved seeing the variety of our groups’ quilts & their progress.


As you just read from Lesley, she had a bit of re-grouping to do on Day One, but since she now had a better photo and much better drawing to work with, it worked out for the best. On the morning of Day Two, we talked about starting with the nose and took a look at her fabric palette, in screenshot below. White or other solid colored animals usually pose some sort of issue with fabric selection or value range, and Teddy was no exception. But with some selective cutting on Lesley’s part and the use of the back of some fabric prints, she had enough light colors 10to get going.
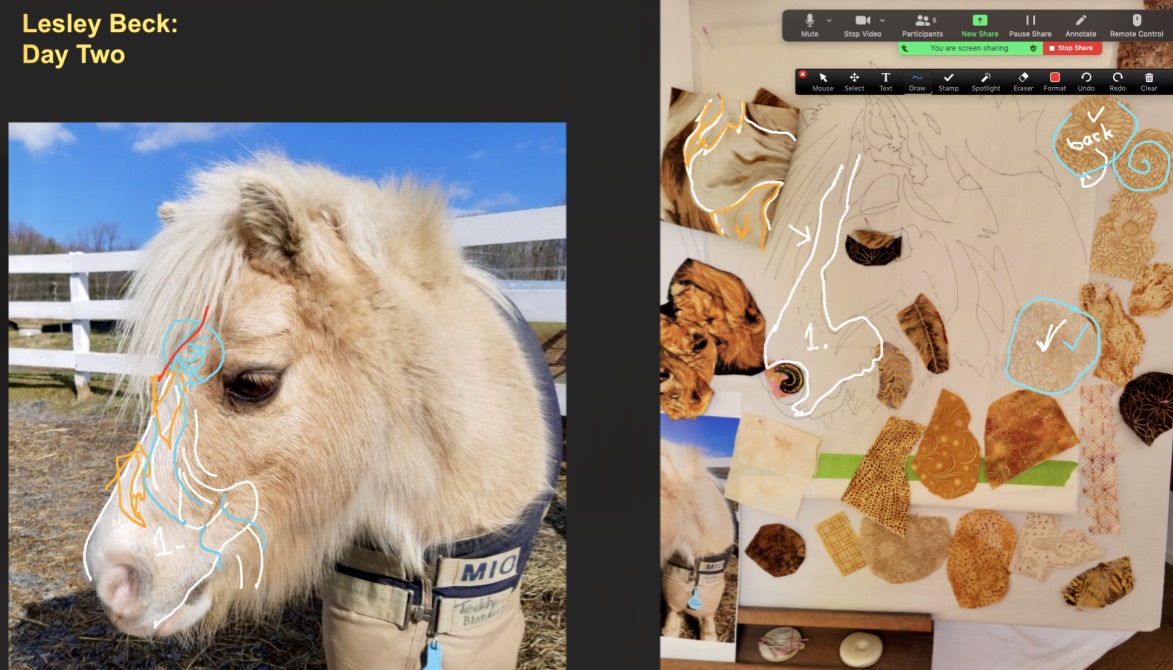
In the photos above, you can see that Teddy’s actual nose is quite light with no defined dark nostril hole, not what you’d usually expect. In the collage to the right, Lesley found a great spiral curve for a nostril, but too dark for Teddy.
Below, she continued working up Teddy’s face—creating a perfectly simple and sweet eye in the process. Only four pieces of fabric, but I said to glue them down quick, you got it on the first try. All the while Lesley kept trying options for the nose, see in middle photo below, and was getting closer but she needed the “right” curved shape—both nautilus and paisley came to mind—and then on a next consult, there it was, the right shape, color, and value for the nose. Lesley found it using the reverse side of a mushroom cap print from the fabric of old kitchen curtains, below right. Brilliant.


From Lesley:
Biggest benefits of online class: 1. Not packing clothing & fabric. 2. Being able to search through my own fabric. 3. Was able to run to FedEx/Kinkos for photo & drawing enlargements. 4. Being home to see to my own life.
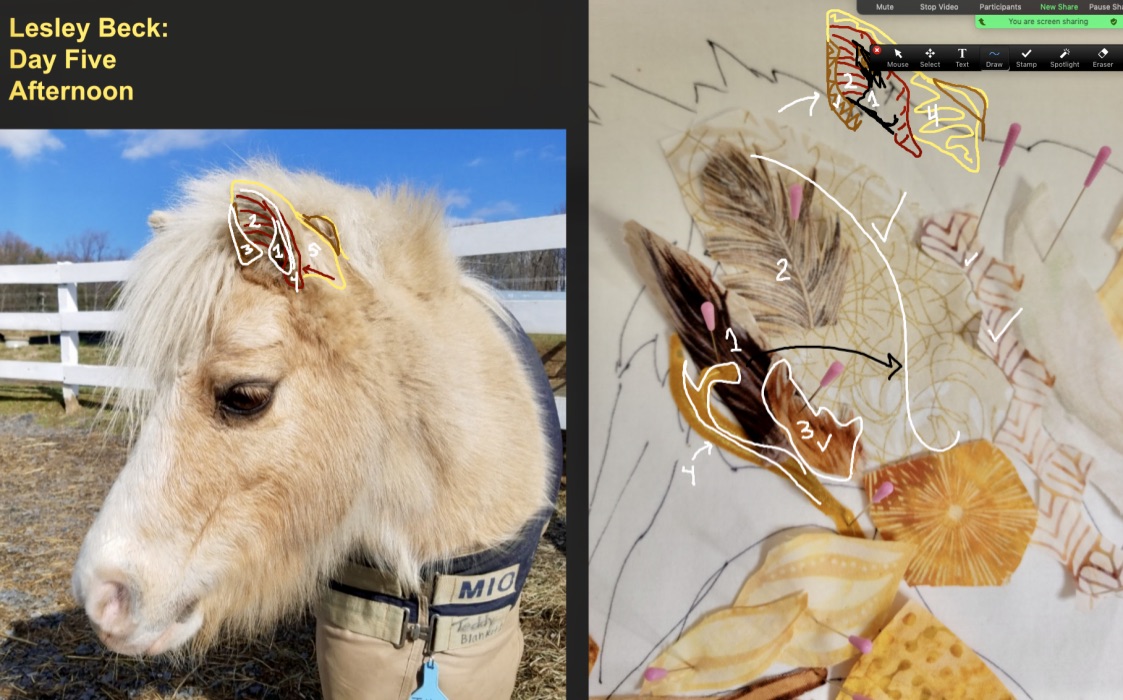
In the nick of time, Lesley got all four major features in place—eye, nose, mouth and ear. In the photo above, she has all the pieces cut to assemble the ear, just in need of a little rearranging, see below. And check out how good that nose looks now. In the final class slideshow, Lesley told us that the nose finally came together with the use of 2 mushrooms, one radish, and a potato. Thank goodness for those old curtains.
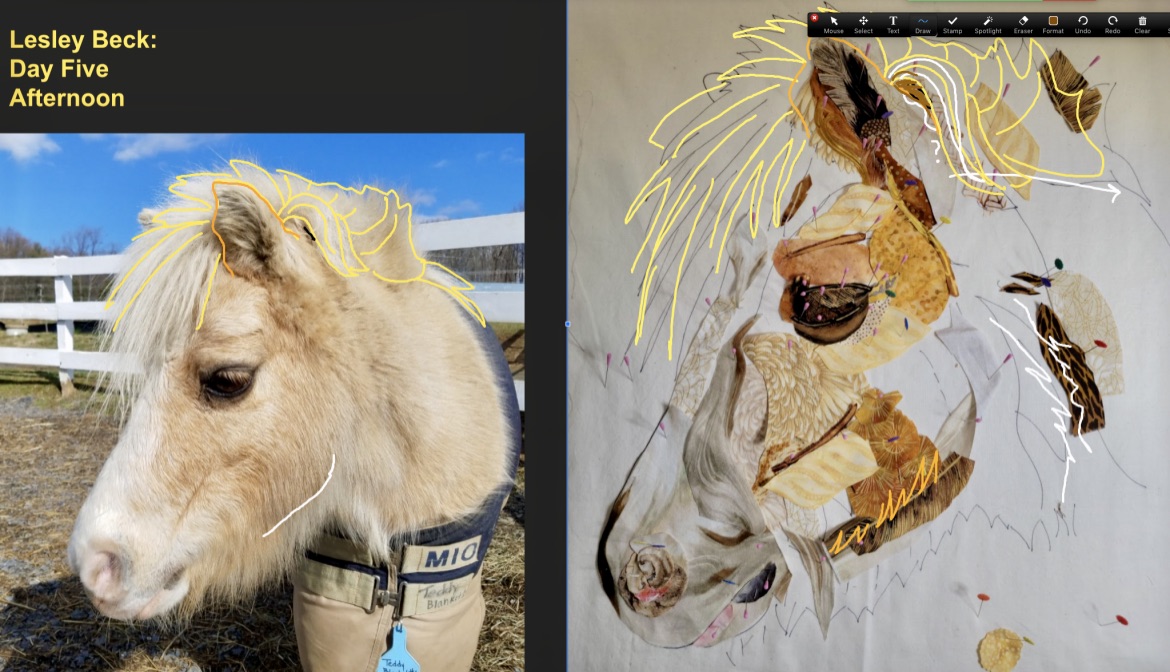
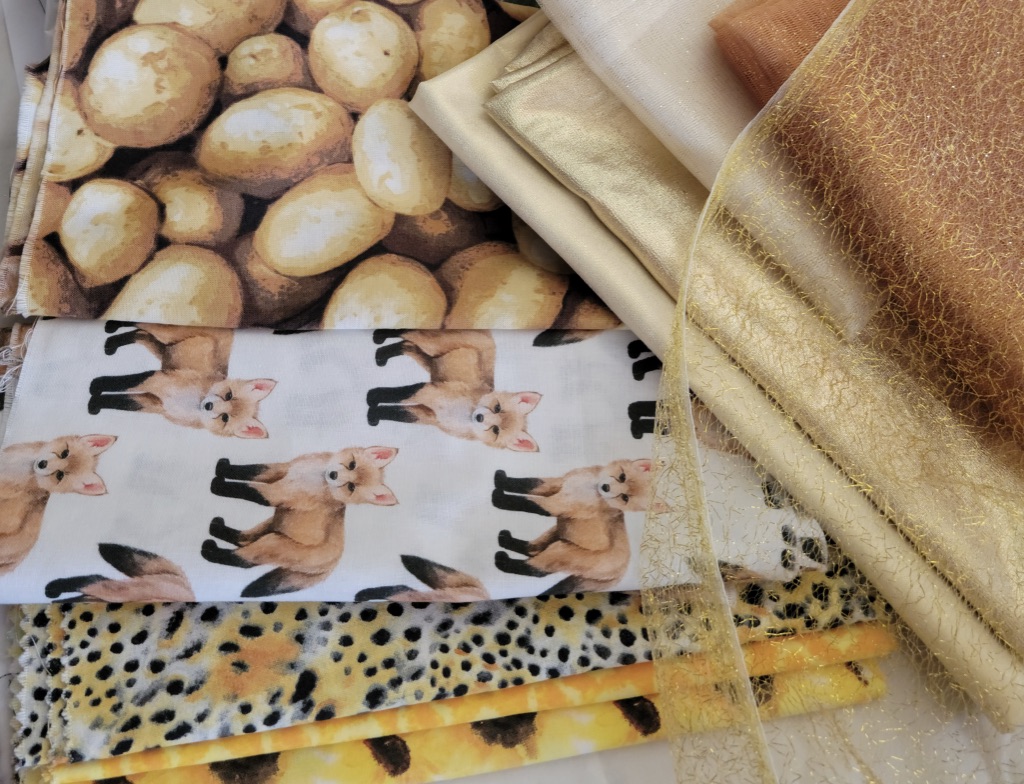
After class ended, Lesley went on a fabric hunt, “mainly for the mane,” and sent me the photo below. One of her fabrics we talked about during class was of running horses, so a flowing horsetail was already cut for Teddy’s ear. I’m happy to see that Lesley is now expanding her sight to (potentially) include, “pink fox ears & body and more potatoes!” into Teddy’s portrait. I’m curious to see if the cheetah print fabrics make it in, and it looks like he may get a bit of sparkle before all is said and done as well! It’ll be fun to see what happens.
Next week will be the third and final post covering this May online class. “Three Dogs and a Bunny” is the name the ladies gave to their breakout room, which kinda gives away the surprise of what their subject matter will be. But be sure to tune in then as I wrap up those final four projects and thoughts.
I so wished I could have taken this class but scheduling didn’t allow it. After seeing all these projects wish I was there. Hope you do these classes online again so I can take one. The projects are amazing!
Love it! Great choice of fabrics. Hope to see the final results!
How fun to see all the process and detail as the pieces transformed. The detail in the drawings, (the marking on the drawings) is something you can not do with an in person class. Having the multiple colors to work with on the computer helps to define each area of work. The other nice thing in seeing these pieces is your thought process in assisting each student. As you move around the class we don’t get to hear that.
You are so generous with these blogs and I so love getting to follow along with your students.
WOW!