
I like to imagine my readers opening their emails on Saturday morning to read the blog, cup of coffee in hand. It gives me a lot of pleasure to picture that image both because people are appreciating the blog and because coffee is comfort for me, too. I can identify with it.
Each month, about 120 readers contribute anything from a single dollar to twenty dollars in order to support this blog—and to help to keep it free and accessible to everyone. They have made it possible for us to spend the time and energy bringing a new blog post to you each Saturday morning for the past three years.
Because it is relatively time-consuming to produce the blog, I wouldn’t be able to afford to do it without the support of my Patreon contributors. It takes two days, more or less, to write a blog post. As I’ve said before, it’s a two person job, and I couldn’t do it without my husband Tom’s help.
I have a couple of goals I hope to achieve by writing this blog.
The first goal is to promote the appreciation of and enthusiasm for fabric collage. The second is to pass along the techniques of fabric collage.
To achieve the first goal, I write On the Road and Finish Line posts both of which feature student works, in addition to my own Quilt Stories. For the second goal, I write How-To posts, focusing on specific skills and ideas in the technique of fabric collage.
If you too think these are worthy goals, or if you are one of the people who tell me that Saturday morning is one of their favorite times of the week (because of the post arriving in your email), I hope you’ll consider supporting the blog (and my other endeavors) through Patreon, that is if you don’t already. And if you do, I raise my cuppa to you.
If you need further convincing or just want to know about some of my upcoming plans, read on.
Even further on you’ll find a repeat blog post that describes how our video production has evolved since receiving Patreon support to upgrade our audio-video equipment.
More than Just the Blog
Besides writing the blog, what does Patreon support?
In the past I have used it to make improvements to the blog and to take on new projects. Part of the proceeds were invested in better video and audio equipment, allowing me to add more quality video to the posts.
Another improvement to the blog was adding the Throwback Thursday posts. Bringing back useful and inspiring past posts is especially helpful for those who are new to fabric collage, or new to the blog itself. Tom took this job on and spends another few hours every week to get it selected, introduced, and scheduled for posting.
Patreon contributors supported my efforts to create the Fabric Collage Online Master Class Manual. Not only did that support spur us to spend a year pulling all the various aspects of fabric collage together into one cohesive seven-part volume, they also volunteered to be my guinea pigs by participating in the test run of the Master Class Manual.
With the generous support of so many, I’ve made available a monthly scholarship for the Fabric Collage Online Master Class Manual. I give away one Master Class Manual each month to someone who can’t afford to purchase it on their own. A few of my Patrons have also made separate donations to enable us to extend that reach even more.
These are some things Patreon support has enabled me to do.
But now it’s a new year with new goals, all of which fit into my overarching goals of increasing the accessibility to and excitement for fabric collage.
New Goals
The new goals I have are all about how to provide access to people around the world to my way of teaching fabric collage.
I can’t in person reach all the people who would like to take a class from me. Nor is everyone who would like to attend a class physically or financially able to do so.
Fortunately, we live in an age where technology can help.
Online Master Class Modules
The Fabric Collage Online Master Class Manual was always intended to be only a first step. It provides an overview of the entire fabric collage technique (as I do it, at least). It’s a process-based resource rather than a project-based resource. Meaning it’s designed to give you the knowledge and skills to produce any fabric collage quilt you choose.
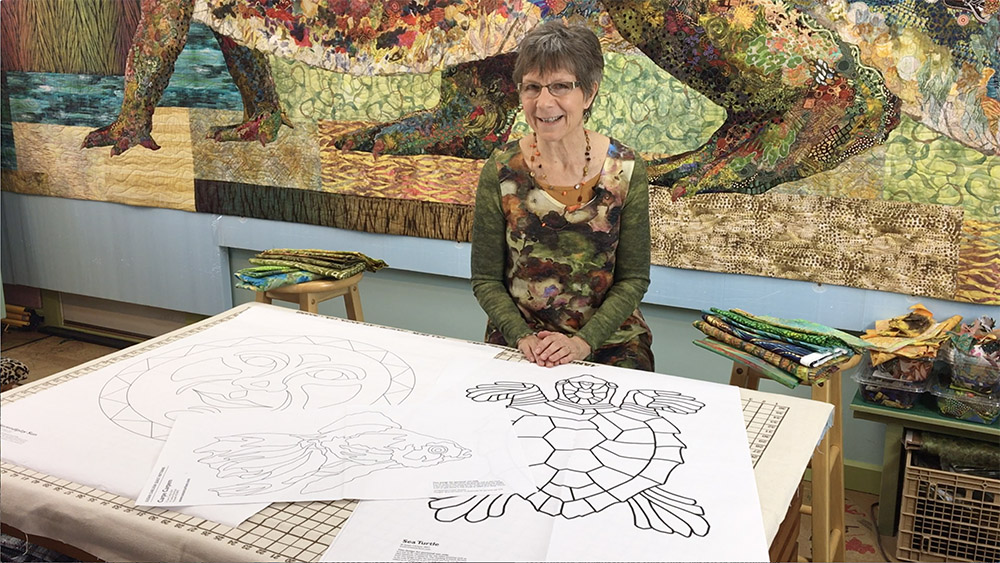
But what if you don’t know quite what to choose? What if you’d like a nice and straightforward project to focus on, learn a few skills, finish it, and move on? That’s where our plans for Fabric Collage Online Master Class Modules come into play. They will use the Master Class Manual as a reference then lead you step-by-step through a specific project.
Some Modules I have in mind are:
- Sea Turtle
- Fish
- Bugs and Butterflies
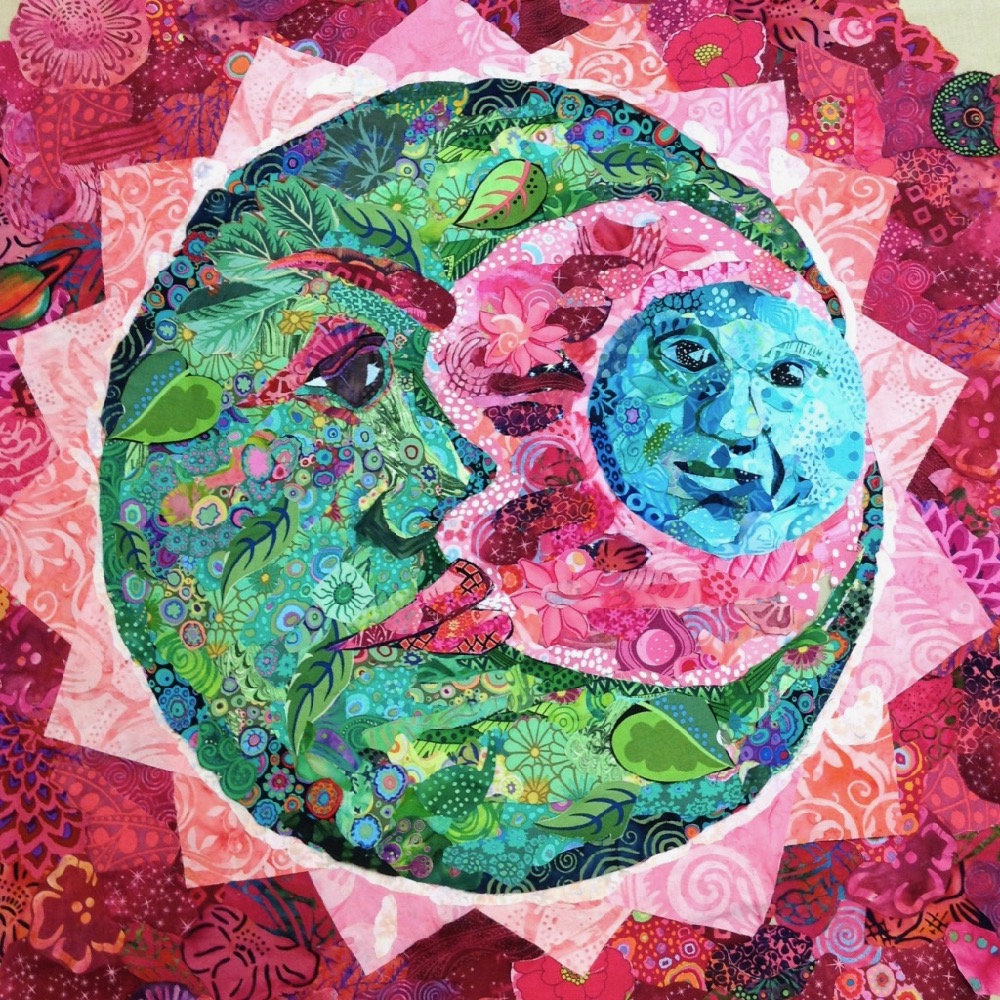
- Sun and Moon Faces
- Pet Portraits
- People Portraits


Like the Master Class Manual, the Modules will be designed for you to work independently, using video, photos, and text, on your own time schedule. Once purchased the Modules (as is the Manual) will be yours for life.
Real Time Video Classroom
Step into my studio—from anywhere around the world.
Video conferencing offers the opportunity of bringing my classroom to you. The technology, similar to Skype, allows for a classroom size group of people (say, 12-15) to interact via video and audio.
While still in the “what if” stage of development, I imagine these classes to be as similar to my in-person, five-day classes as possible—though possibly stretched out to provide work time for students. Each “morning” I would make a presentation of about an hour. Participants could ask questions “in person” and even be able to show me their in-progress projects for critique. Portions of this would be recorded for review at any later time, based on individual needs.
This technology could also be used for private coaching sessions at any time, not just in online classes.
Tom has already been doing research on this and is chomping at the bit to make some equipment purchases and get it going.
Patreon Benefits
Patreon members receive benefits based on their level of giving. In some circles these are called “inducements” because they encourage giving, like receiving a tote bag when you donate to public radio or television.
- $20 Level
A private Facebook group for sharing and feedback—from myself and others in the group. In addition I can provide monthly individualized written feedback on your fabric collage project. Plus everything below. - $10 Level
A free “Specimens” quilt show catalog. Plus everything below. - $5 Level
A monthly video produced just for Patreon members. Plus everything below. - $2 Level
A free Susan Carlson quilt “wallpaper” image for your computer or electronic device. Plus everything below. - $1 Level
My heartfelt thank you.
This year I will also offer these “unofficial” inducements:
- Advanced sign up for my Maine Quilt Retreats. To qualify for this benefit you can be at any current monthly Patreon level, but will need to have reached an overall contribution total of $50 or more at the time classes are opened for registration (beginning for my 2020 retreats).
- At the $5 per month level, you’ll be able to follow along with development of a Sea Turtle Master Class Module (and other Modules as they enter development). I’ll share video extracts over the coming months leading up to its launch by the end of this summer.
- I will also ask for guinea pigs for testing of Master Class Modules once completed, which will be reserved for $10 and $20 per month contributors.
- Patreon members also receive discounts for purchase of the Master Class Manual and upcoming Master Class Modules. The amount of discount is based on lifetime giving.
- If the video conferencing technology works for online classes, we would like to eventually expand this to include a short monthly in-person session my for $20-per-month Patreon contributors.
So, those are my plans. With the support of my Patreon members, I hope to bring new ways to appreciate and learn fabric collage to people all around the world.
Thanks for all the ways you show your support, whether you are able to contribute monthly or not. For you my loyal readers, here’s that repeat blog post I promised.
Behind the Scenes: Shooting Video for Blog and Class
Background
About year ago I started incorporating more video into this blog about fabric collage. Video is everywhere these days. It has become or is becoming the preferred media in many online sites. There’s YouTube of course, but also you may notice your Facebook feed is littered with video. And as you may know for many quilting and craft sites video has become an ubiquitous teaching tool.
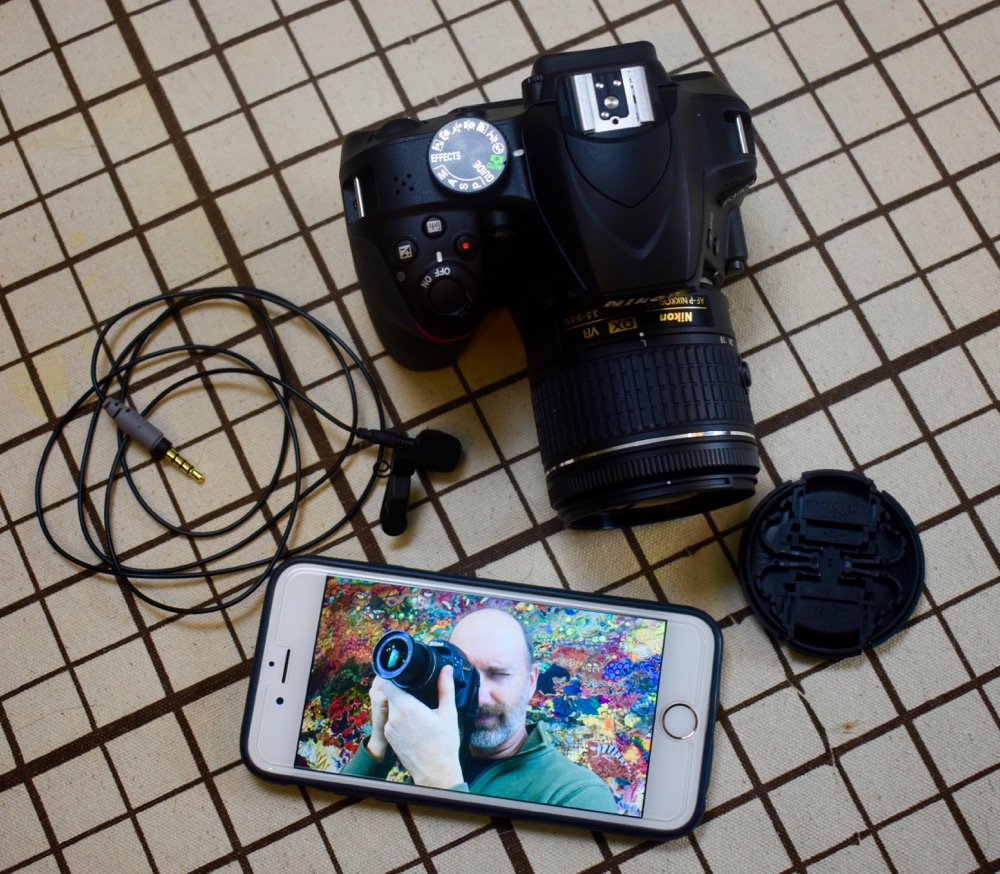
It seemed like a natural and helpful step to take to use video to help explain some of the ideas and techniques I was sharing each week. It also represented another area where I and my helper-husband Tom had little expertise. But we had iPhones and everybody was doing it. How hard could it be?
The short, unsatisfying answer to that question is: it depends.
It depends on how picky you are as a videographer. And it depends on your audience’s expectations.
Take a look at what an iPhone video looks like without special lights or sound equipment. This recreates an early test Tom did.
Turns out Tom and I are pretty picky. We are perfectionists when it comes to certain things like my art, his writing, and this blog which combines the two. (We are not so picky on things like, oh, say, housekeeping… But that’s another story.) We knew right away we had to do better than that.
Our audience is also picky. Because video is everywhere, people are more savvy than they may know. Their expectations have been raised. How long would you watch a video with tinny sound or a jiggling, out-of-focus or low-resolution picture? You may not even know you are noticing it. You may just be slightly annoyed. But you notice.
One of the first segments we shot shows that we were trying, despite our ignorance, to produce good quality video. Back in January 2017 we did a video to accompany a blog post called “Choosing Fabric for Fabric Collage.” The post was actually an update to an earlier post that didn’t use video at all.
For that video we had purchased “klieg” lamps from a home improvement store for lights and were using a $10 lapel microphone to record the sound. Obviously we knew we needed lights and a microphone but we were trying to cut corners on the expenses where we could.
Long story short: Tom now has a nice set of lights for doing repair projects and the cheapo microphone is stuffed in a drawer somewhere. We bought a set of three studio lights and a $40 lapel mic.
The two photos below demonstrate the difference in the lighting between the first video and one done after the upgrades. Tom has taken stills from each video so you can see them side by side (or top to bottom). Notice how harsh the shadows are in the first. The lighting is very uneven—too bright toward the center and fading to shadow at the edges. The second, with upgraded lights, is clearly more even and, importantly, more flattering.
Now as for the sound, it’s a little more subtle but you can hear the difference in the clip below, which features a bit of that first video and a bit from a later one. The first section with the old mic is a little muddy, a little ragged, almost echo-y. The second section is cleaner and clearer.
It’s not professional grade television quality video and sound (yet). But it is an improvement.
Production
Maybe we should start with a written script, but we don’t. Most of the videos are simply recreations of instructional talks I give at certain times in the classes I teach. So I know what I want to say. The trick is to sound natural saying it and remembering to cover all the points. But like any skill you practice, I think I’m getting better at it over time.
I have a grouping of clothes that I call my “teaching wardrobe” and usually I choose from them for the videos. I have the superstition that if I put on clothes that I feel comfortable teaching in, it’ll put me in the right frame of mind and I can pretend I have a class of eager faces in front of me.
However, the dangly necklaces that I also enjoy dressing up in for teaching, may need to stay behind for videos. It seems I sometimes gesture too much and they hit the clip-on mic, something that’s not noticed until Tom is back on his computer for edits. Oops.
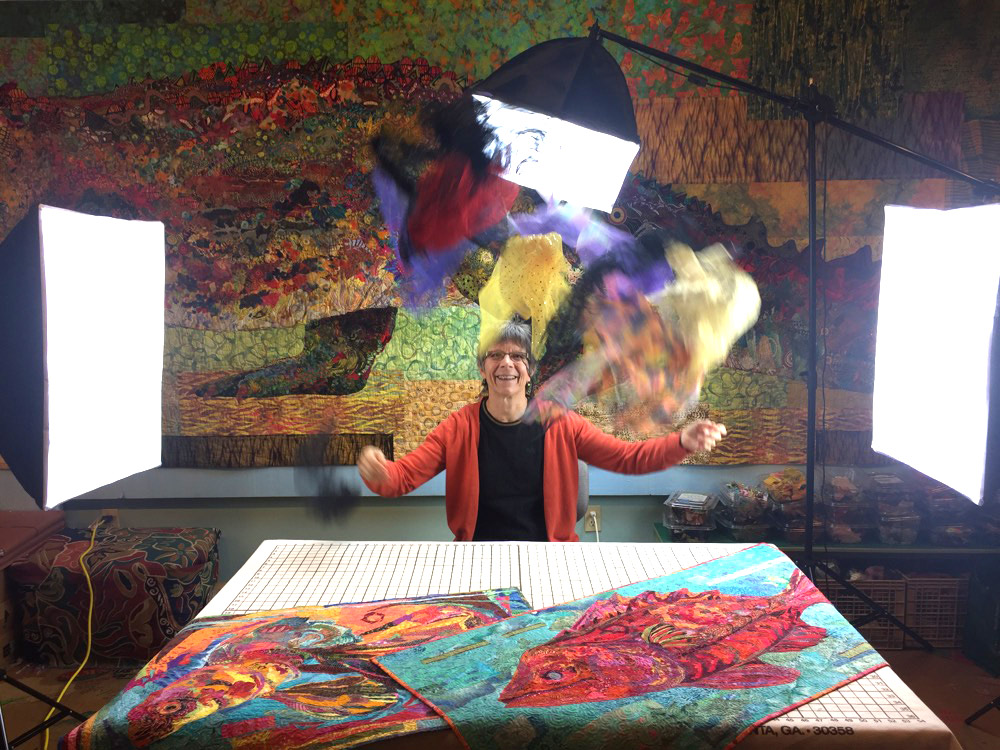
Tom’s first step though, is to set up the lights. The photo below, where I was having fun with some sheers, shows what the lights look like. Typically they won’t be that close to me, but it gives you an idea. One on each side and one above.
We also use the bank of natural-light fluorescents I use to light the pinning wall behind me. So between the two we get good coverage.
The set is pretty much the same each time. I have a work table in front of my pinning wall (currently the display wall for Stevie the twenty-foot long crocodile, a.k.a. “Crocodylus Smylus,” ).
Then Tom sets up the camera. For everything so far, we have used our iPhones to record the video. The lapel mic plugs directly into one of the phones, which is usually mounted on a tripod and takes an overall shot of me and my work surface, like the shots in the photos above. Tom will either set up a second tripod or more commonly simply hand-hold the second iPhone in order to get closeup shots.
How does Tom manage to get the closeup shots but not be in the picture? There’s a very low-tech solution. He usually stands on a stool, just out of the shot, and holds the camera over the work table. So when you see the shot of me talking to the camera, you should imagine Tom hovering just out of the frame and above, like a mountain lion or vulture. Good thing I trust him.
That’s it really. Decide what I’m going to say. Light the lights, plug in the mic, roll cameras, try to remember the sequence of what I want to say. That’s not the end of the production, however.
Post-Production
In a typical video, I try to do everything in one or two shots. Maybe I’ll do a brief introduction and then cut to the main part of the talk. But in the end the bulk of the footage is made up of two shots, an overall and a closeup. Both these videos run the entire length of the scene.
Tom uses a video editing program to cut back and forth between the two shots, usually starting out with an overall, and cutting to the closeups where appropriate.
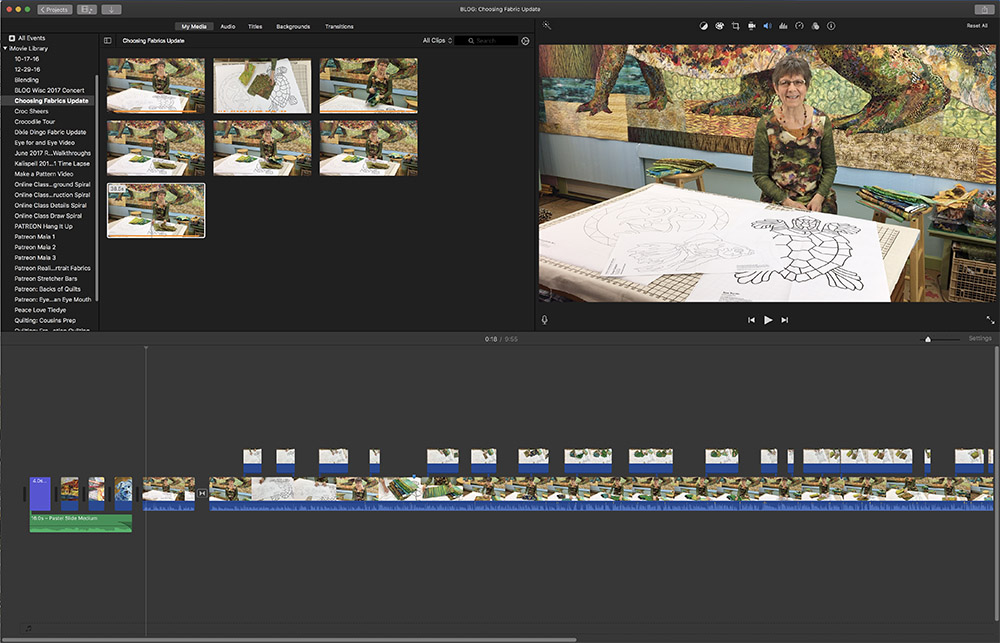
There are three main areas in the editing software. Above left is the raw footage. Bottom is a timeline of the scene with the two shots, overall and closeup. Above right is a preview of the edited video.
Tom also inserts a title screen at the beginning and adds transitions such fade-to-black at the end of the video and sometimes between scenes.
Lastly, Tom uploads the finished video to YouTube.com. He then embeds a code in the blog that makes it magically appear in the post. Abracadabra!
Post Post-Production
We haven’t stopped trying to improve the video. In fact, we just purchased two new cameras. They are digital SLR (single lens reflex) cameras that shoot at a higher resolution and allow for optical zoom for when we need to really show detail.
This too will be a learning process. In fact, just this week we tried using one the new cameras to reshoot a video for the online class. Some of the students in the current trial run of the class noted that when I drew a spiral for the spiral exercise, the pencil lines really didn’t show up—so we re-shot that particular video. However, we wound up re-re-shooting it because the closeup was out-of-focus. In the end the new video is a big improvement. The (sound removed) excerpt below shows a comparison between the original video closeup and the new one.
We’ll keep on learning better ways to provide the information you want. We hope you’ll keep on reading.
Hello Susan,
I am interested To know if it is possible to receive your lessons in France, (as you mention that your husband is looking into this idea, with regard to international possibilities) I would also like to know if one has To take your’ Master class Manual’ before having the possibility of taking ‘Master class Modules’, probably this will be the case, the first one being the basis of COLLAGE possibilities. Why I am asking is because the thought of making a face (in your style in the Modules) really speaks to me, ( faces being my pet subject) . I await your reply with regards to the possibility of receiving your courses on my computer, and what is needed ( if anything) To be able to take part in Master or Module courses.Thanking you in advance, Sandra Tavel
The Master Class Manual is available anywhere you have internet access. It is designed to be used independently, without any feedback from a teacher. It’s like an online book that uses video, photos, and text. The Modules will use the Manual as a sort of textbook that they will refer to. So, yes, the Manual will be required reading. The Modules at this point are still under development. They will be released in order of increasing complexity, meaning the Portraits Module, will be probably released two years from now. If you want to jump in to creating a portrait, you may want to get the Manual, which gives you all the steps for creating a fabric collage quilt, but which does not give provide step-by-step instructions for a portrait. Also, I have blog posts that cover my creation of a portrait that may be of help to you: search the site for “Kissin’ Cousins” which is the name of the quilt. Or follow this link: https://susancarlson.com/?s=Kissin%27+Cousins.
I was investigating how to go from a $10 Patreon to a $20 and can not find a way to do that. How would I go about doing that?
I too am sitting here on the west coast with my coffee and reading your blog.
Today we are house bound with several feet of snow, really abnormal for our area and the first time in 10 yrs we have seen this kind od snow. Great day for the studio.
Thank you and Tom for all that you do for us.
You know we’ve never had to do that ourselves, so I’m not sure. But I know others have changed the amounts of their contributions. You should be able to do it under your Patreon account. Thanks so much for your support.
I will continue to pursue, maybe with my husbands savy computer skills I can figure it out. Will let you know how once I find it.
Thanks for your quick response.
Try https://www.patreon.com/pledges
Sign in
Go to Your memberships (Active)
(Find Susan Carlson if you have more than one membership)
Edit your amount
Thanks!
Log into your Patreon. On the right hand side click on the round photo in the corner and select “your memberships”. On that page you will see your current membership…on the right hand side is an “edit” button. On the next page you will see “your level” “tier 3” for example. Beside that is another edit button. Click on that. Select the level you want to change to then select “update”. You can go back to “your memberships” following the first few steps and you will see your new level. 🙂
Thanks, Laurie!
Thanks Laurie, I am not very good at this computer stuff so any help I can get is wonderful. I now have the necessary info to make my changes. Very kind of you to help.
Leslie
Thank you Laurie, found it and completed the process, appreciate your help.
You are most welcome…glad to help!!
I’m glad to know that online modules and classes will be offered in the future! Looking forward to it! I’m in Texas so I’m geographically challenged as well as financially challenged. This will give me an opportunity to experience one of your online classes…can’t wait!
I must have missed something but I do not see a place to purchase a “level” for your Video – Blog. It was a lot to read and digest but I’m interested.
Hi Susan, I took your online class which is great! It has been so liberating and gave me the freedom to explore the use of color, composition, new technique, use of my many fabrics, and I could just go on an on. I look forward to the modules you will be offering. You are a blessing to us who can not attend one of your classes in person. Thank you for all the information you share with us.
Nancy, thanks for your very kind words.
Admiring the commitment you put into your blog
and in depth information you present. It’s nice to come across
a blog every once in a while that isn’t the same outdated rehashed material.
Wonderful read! I’ve saved your site and I’m including your RSS feeds to my Google account.
Wetting this post must have also taken quite a lot of effort to show the before/after videos ! I appreciate the effort Tom & you put into these posts/videos! I have learnt a lot from you and look forward to doing more collages ( I have only done 2 so far)
I mean “writing his post†! Sorry for the typo!