
I think one of the favorite categories of my blog is the Finish Line. These posts showcase the completed work of my students, with the addition of any photos I may have from the actual classes the quilts were begun in. They generate so many comments and are so appreciated by others who are delving into this fabric collage process. It’s also one of my favorite categories because I get to revisit the class, location, and moment in time as I search out and select the classroom photos from the “archives.”
My students and readers have been great with sending me photos of finished quilts, so I had some fun and started sorting them into related groups such as “birds” for both this and next week’s posts—with more to come! Good going everyone.
I finished off last year with a series of Finish Line posts, and it looks like I’ll do the same this year—makes for a good wrap-up. So sit back with a cuppa, or maybe some mulled wine, and enjoy some reminiscing for the next few weeks. Soon-to-come groupings include sun and moon faces, and quilts begun in my Maine Retreats.
Please enjoy the newest selection of finished quilts below, and if you’re ready to submit your own fabric collage beauty, please click on the button! Thank you!
Submit Quilt for "Finish Line"
Woodland Ridge Retreat, Downsville, WI: March 2017
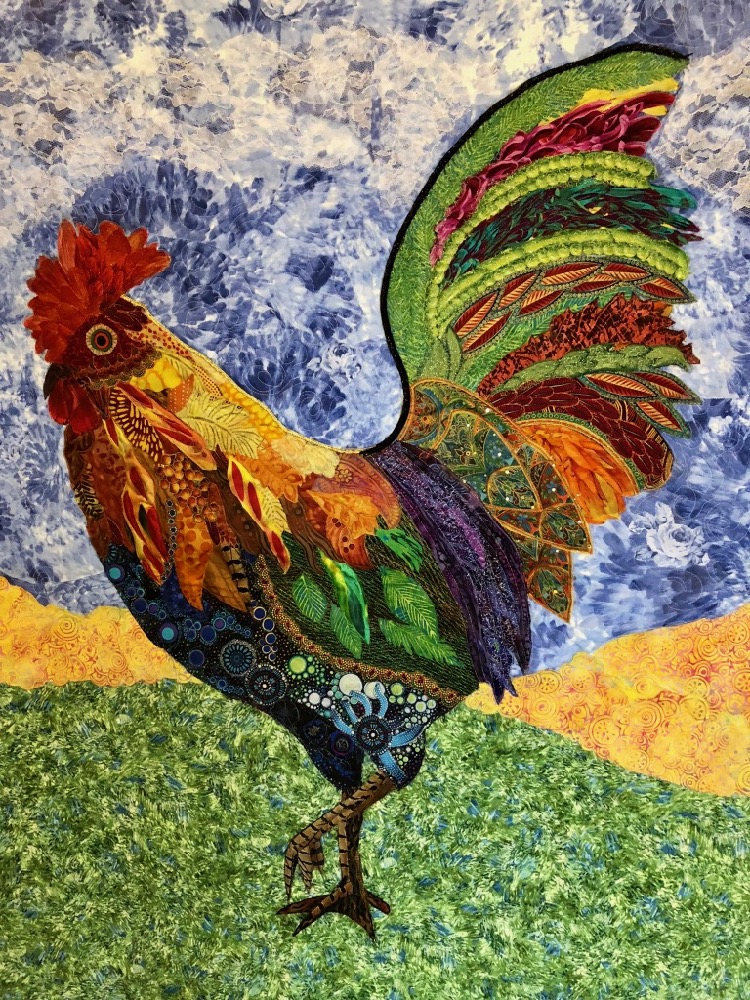
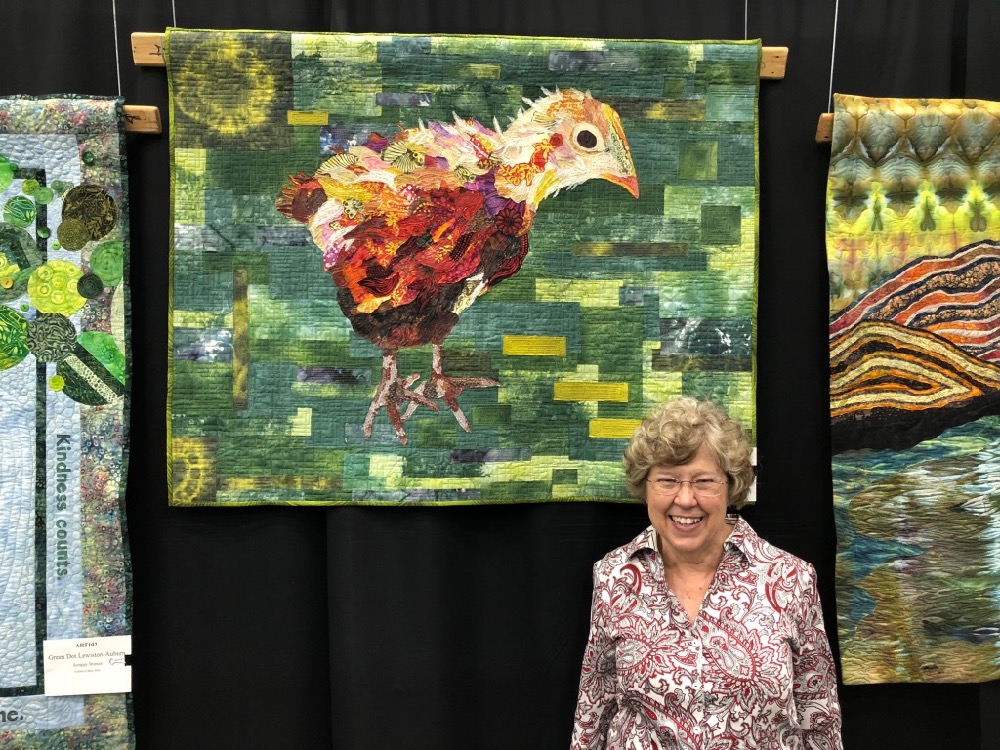
My final travels of this year were in Wisconsin, at a retreat center I’ve taught at previously. Nancy Patush was in the spring of 2017 class, as well as the most recent, last month in November 2018. Nancy began her fabric collage journey with a fanciful rooster, which I got to see in person this year (photo above).


Nancy threw all sorts of colors and patterns into her bird. The close-up below shows some of the great details she added to give form and feathery texture. And get a load of those chicken legs! Very effective.


One thing that struck me as I looked back at the photos was how his head and neck hardly changed at all from class to finished (above photos). But in the tail comparison below, Nancy re-worked the feathers quite a bit. And that’s one of the beauties of fabric collage—you can easily make changes like that. Now, I don’t know if those were easy decisions to make, but what a showy tail he has now—as it should be on a rooster. And what a handsome specimen he is.
Click on these or any of the photos in the post to get larger viewing versions.


MISA West, Tucson, AZ: January 2017
I have some time off now until mid-January, when I’ll be heading back to Tanque Verde Ranch in Tucson, Arizona. This is a winter retreat location for MISA—Madeline Island School of the Arts—otherwise located in northern Wisconsin. A great summertime location (I taught there this past September), but a bit ice-locked this time of year. So, hello Arizona!
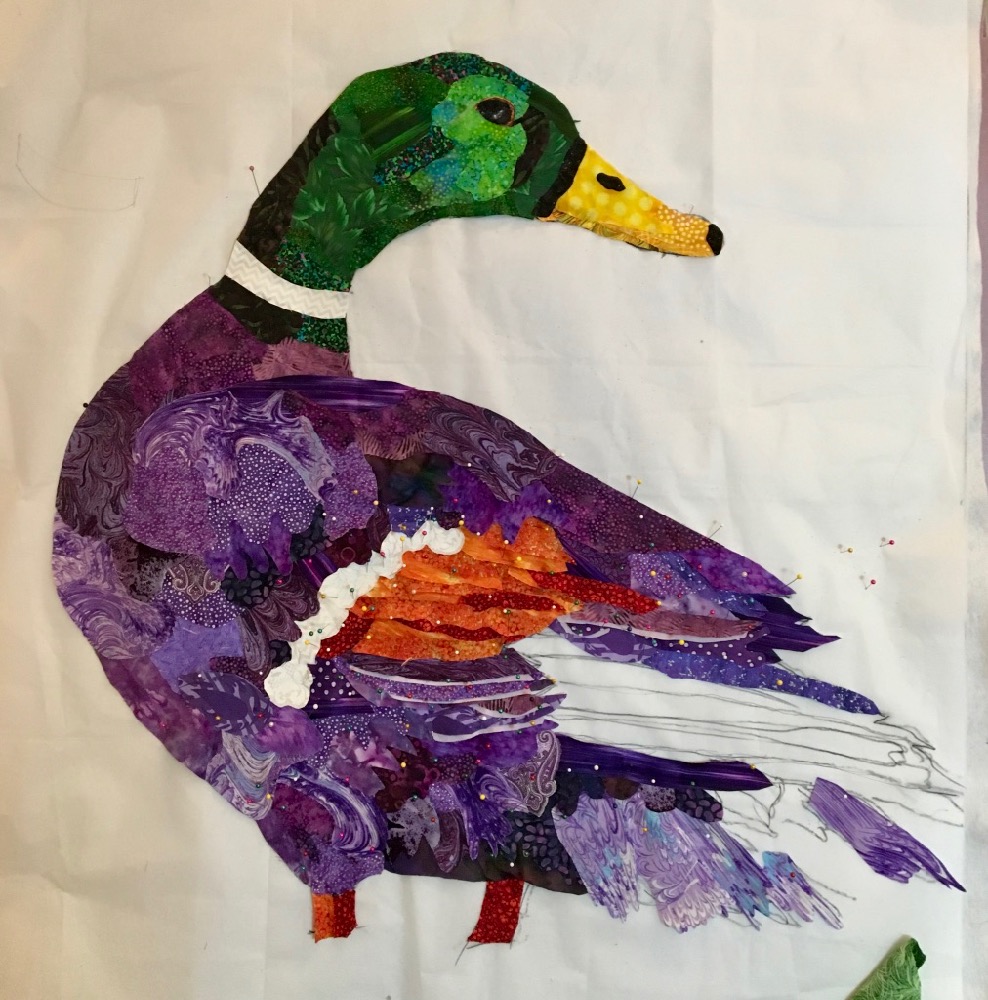
When I was there two years ago, I met Jane Munsell, that’s her working hard to the left of photo below.


Jane had brought a few photos of ducks for inspiration, but right off she told me she wanted to do her duck in alternate colors. No argument from me! She obviously kept his distinctive green head, but then expanded the feather colors into those beautiful purples and oranges. Jane also did a nice job using flowing prints in her fabrics to give the indication of feathers without having to cut out every single feather. She kept the detail where it was important—in the face and in the showy wing and tail feathers.


When I talk about backgrounds in class, I warn students that it can be harder than they think it should be. And since people rarely get to the background during the class, I tell them that when they’re on their own, to try not to get discouraged and keep trying options until something clicks for them.
In an email from Jane:
OMG, I thought the duck would be the hardest thing to do but I’m making a mess on the background and driving myself crazy, now the duck is the easiest part. Everything looks so messy to me. I did two types of background, one with the blue shade that I thought you mentioned in class in AZ. Then I went with a different color, can you tell the penchant for purple? I must have done the purple 5 different ways and to me it looks like I have too many pieces.


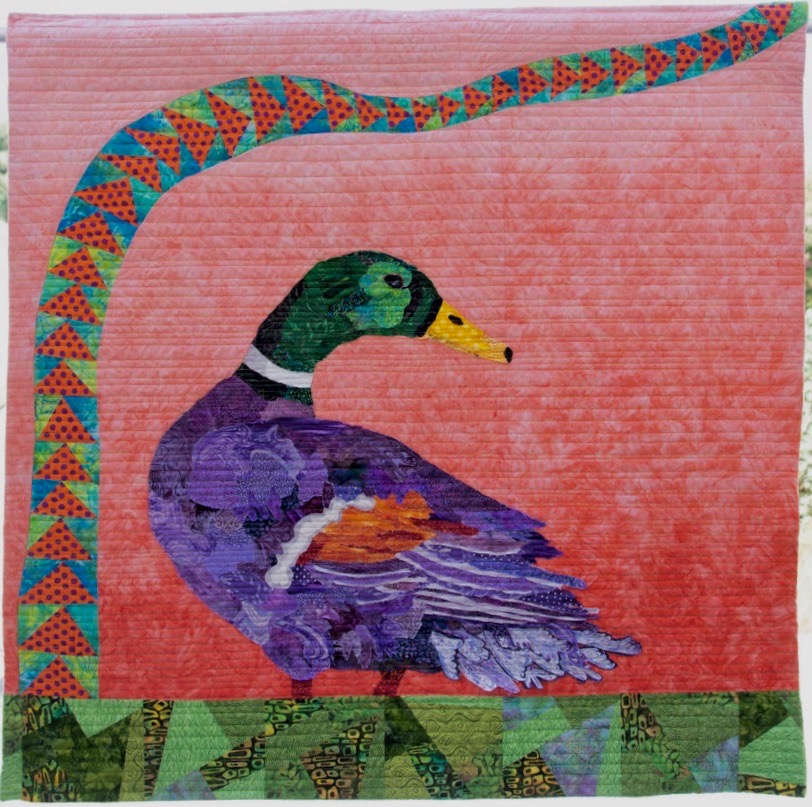
Not too long ago I got the Finish Line photo of “Mr. M.” (for Mallard), below. With all the permutations that background went through (click on the photos above to see what Jane tried), nothing clicked for Jane. She said it herself, it looked like too many pieces. I remember her saying that the mallard was in a grassy landscape. In the finished quilt, she kept that part of his story, and added an allusion to migration with the flying geese pattern design. What I especially like is that Jane found a solution that worked for her, and got it done.
Independently Made in Maine
In October of 2017, I took a short drive north and gave a lecture at a quilt guild here in Maine. Lori Horton, who had been in a past class at a local quilt store, came up to say hi and show me this quilt she had finally finished.
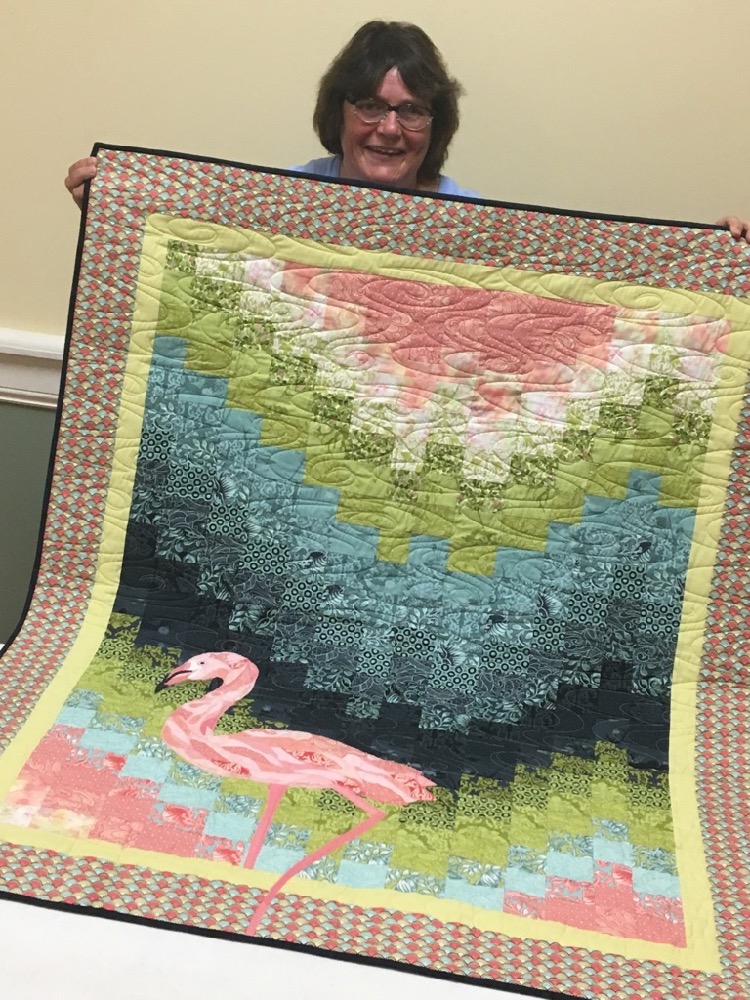
This isn’t a quilt she began in a class with me, but it was because of the fabric collage class she had taken, she learned a technique to help her finish it. I liked her story, so here it is in her words.
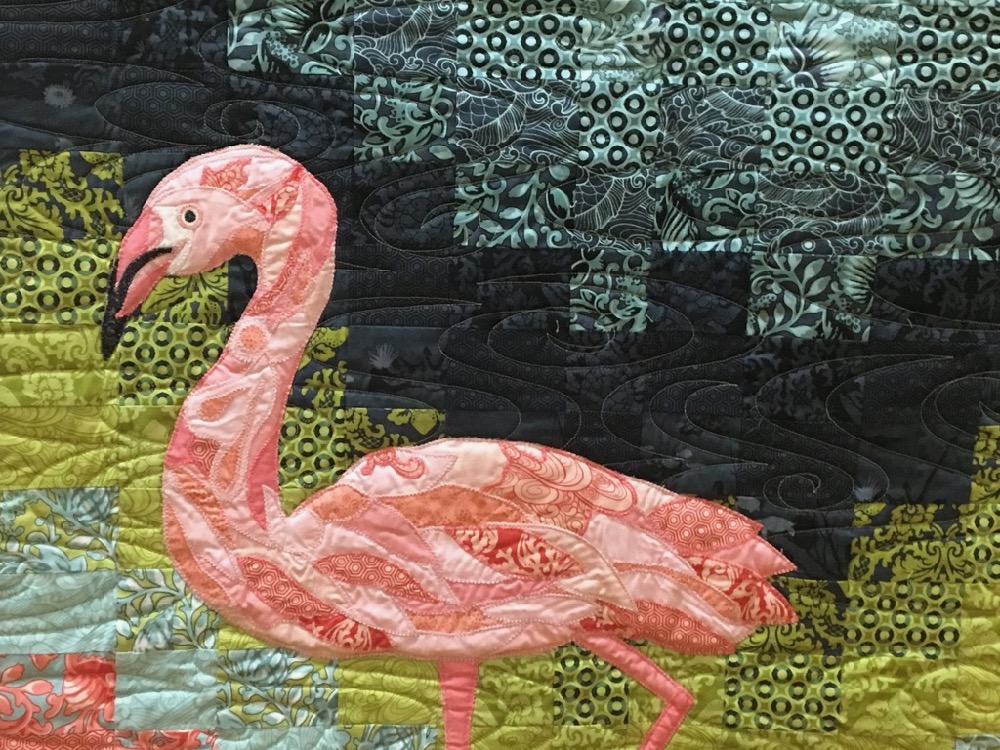
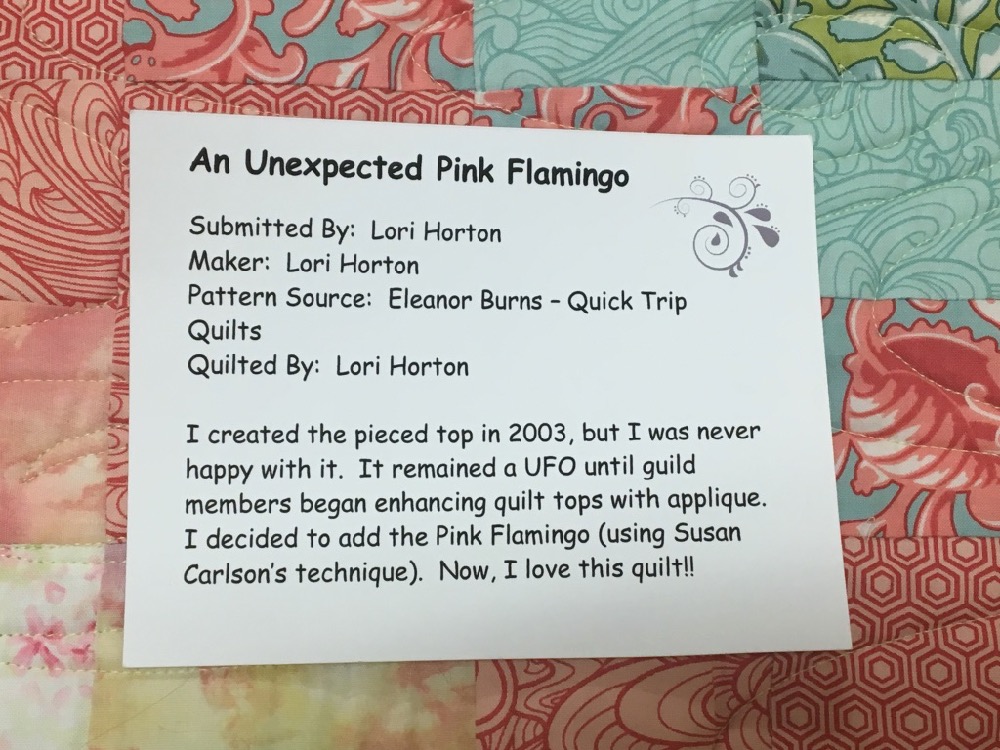
I took your 3 part class at Quiltessentials about a year ago. I drew out the [flamingo] design on muslin free-hand from a photo on the internet. Then I divided it in sections – basically face, neck and body. Then I used your techniques as you taught in class with a dot of glue to hold the fabric in place until I was happy with the overall appearance/colors/definition.
I had no idea how else to do it, as I said, I’ve never appliqued before. Sandy Bechard (a friend that is very good with blanket stitch) then did that portion for me. A few feathers got over instead of under because it still only had the dots of glue on it, but no worries, it still looked great.
I used your technique since it was the only way I could envision creating a flamingo. I didn’t know how else to create the look. The quilt needed something and I was looking for fish ideas when I happened on a flamingo. Only on google!! I thought, the flamingo colors would go better with the quilt than fish, so why not!
I didn’t want all of the individual feathers to stitch through the quilt, or have to go around the flamingo. So I quilted the quilt and then added the flamingo using the window pane technique for wonder under. Then I positioned the flamingo and ironed it to the completed quilt. Then Sandy worked her magic so the outline of the flamingo is the only visible blanket stitching on the back of the quilt. Which is kind of neat actually.
I like the stories that come with quilts, and this one starts with the background and led Lori to the, eventual, subject. Another example of finding a solution and making it work.
Maine Quilt Retreat, Harpswell, ME: June 2017
Nancy Cooledge came to my Maine retreat last year with a photo of one of her chickens, and a desire to depict that stage of a chicken’s life where they are past the cute and fluffy stage and have entered the awkward teenage chicken years. I have to say that was something I had never thought about.
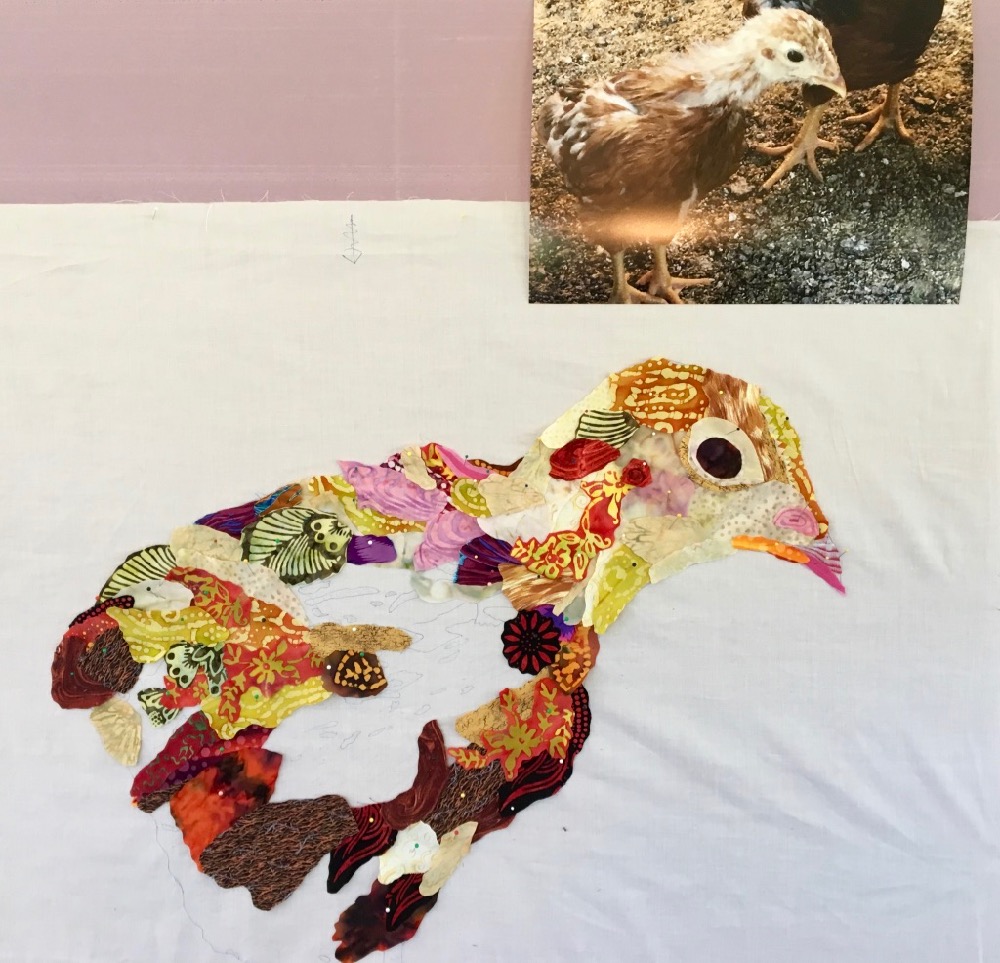
Nancy totally impressed me with the knowledge she has about her chickens, and she made fabric choices to relay that information—to indicate feathers that flipped up in an unruly fashion, little bits of leftover down, or prickly pin feathers poking out. It made me smile every time I looked at the chick, but Nancy was adamant for her not to become cute or pretty, because they definitely weren’t at that stage. I had to take her word for it.


I saw Nancy’s finished “Adolescent Chick” at the Maine Quilt Show this past July—and by happy chance, I ran into Nancy as well. I look at this photo of the two of them below, and it makes me smile again. Nancy is this little and nice person, and the chick is so big and gawky.
Before running into Nancy, I was in the aisle taking some photos of the quilt and a trio of ladies walked by. One looked at the chick quilt and told her friends that it had to be the ugliest chicken she had ever seen. Then she noticed me and apologized for her comment in case I was the quilter. I said I wasn’t but that I knew who had made it, and that she had worked hard to get it ugly, so obviously it was perfect. But I’m not sure the woman got it.

But my dad, pictured with the quilt below right, did get the idea. He came to the quilt show and without my prompting, chose Nancy’s quilt as his favorite. He grew up on a Nebraska farm and this quilt brought back memories of chicks he had raised.
Nancy proudly emailed me recently:
Adolescent Chick, or ugly chicken, has been in a quilt show at a museum in PA for the last 6 weeks. Last night they announced that Adolescent Chick won the Viewers Choice Award [amid some stiff competition].
And as a PS: Nancy told me that ugly chick has grown into a big and beautifully feathered hen.


Maine Quilt Retreat, Harpswell, ME: June 2017
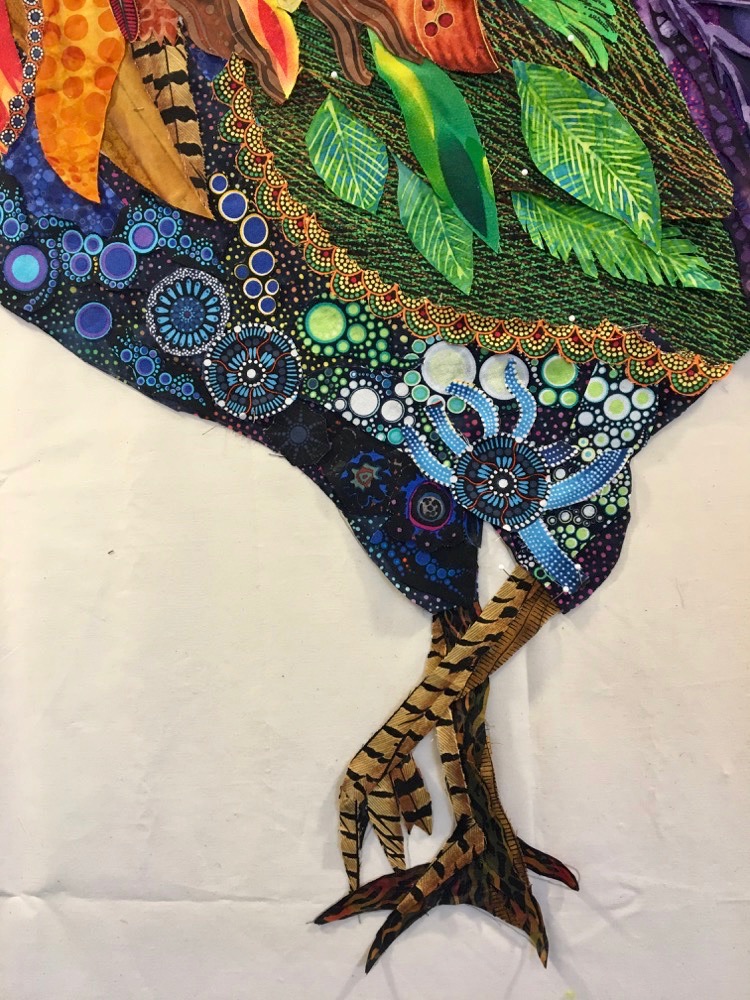
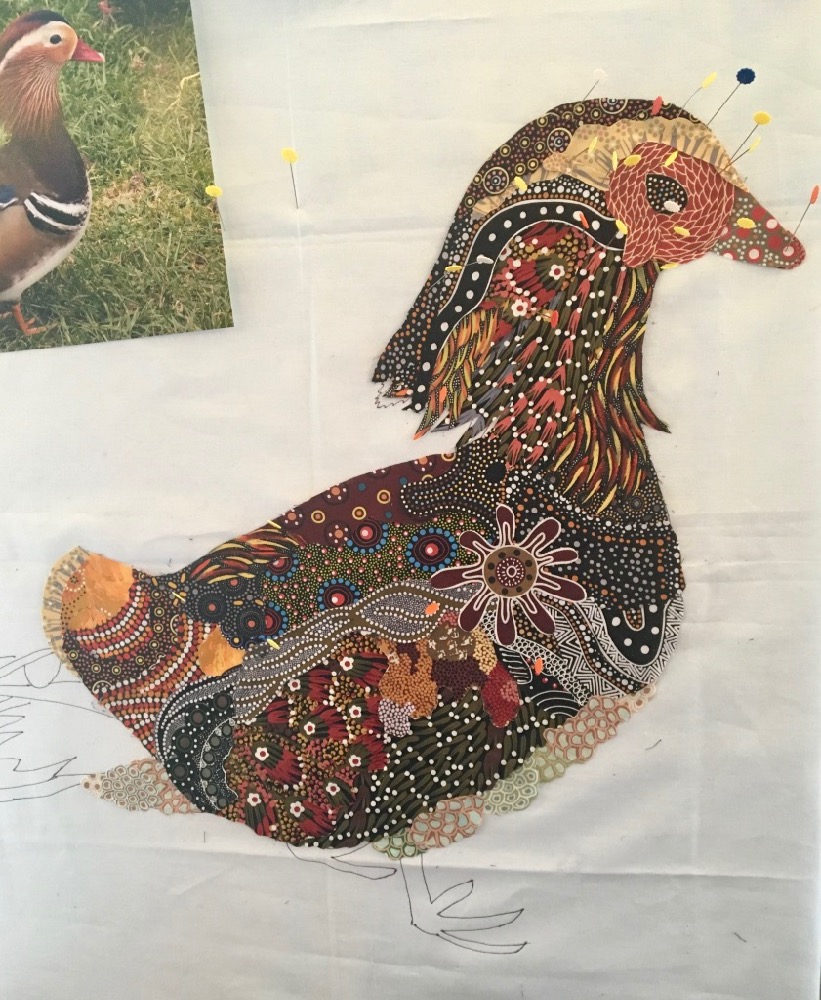
In the same quilt retreat that Nancy began her ugly chicken, Becky Price started her beautiful wood duck. As Becky says:
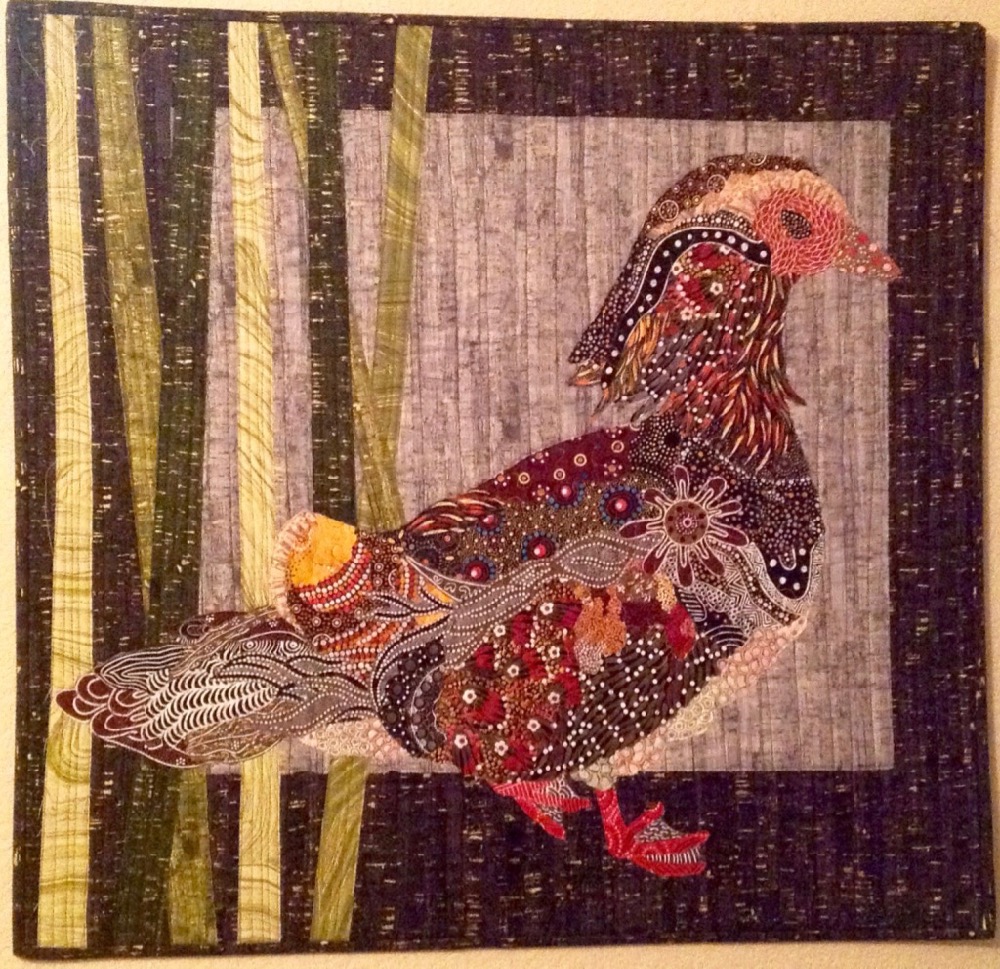
The Wood Duck was my 2nd choice of a picture for the first class I took at the lovely Harpswell Inn, in Maine. The duck turned out to be the perfect project to use my favorite collection of Australian fabrics. The many prints and colors worked well for cutting out lots of shapes and gave my duck what I call a “whimsical” look. The background was more of a challenge then I thought it would be. It’s like a whole other project and I ended up going with a simple background. When I look at the duck now, after taking a 2nd class [Empty Spools Seminars—March 2018], I realized I could have kept adding more.


I love looking back at these progression photos to see how the images take shape and seemingly emerge from the foundation fabric. Becky says that she sees how she could have kept adding more. Maybe so, there’s almost always room to add more, but I think she did a great job working with the Australian Aboriginal fabrics and all the great lines, curves, and patterns in the designs. Her duck is full of visual texture and interest.
Becky may have struggled with the background, but it’s effective—an abstracted environment of reeds for an abstracted water bird. A very nice finish.
Australasian Quilt Convention, Melbourne, Australia: April 2016
And finishing off this week’s Avian Edition of the Finish Line, we’ll go to Australia and a class I taught two years ago. It’s a happy thought that I’ll be returning to AQC in Melbourne this coming April 2019.
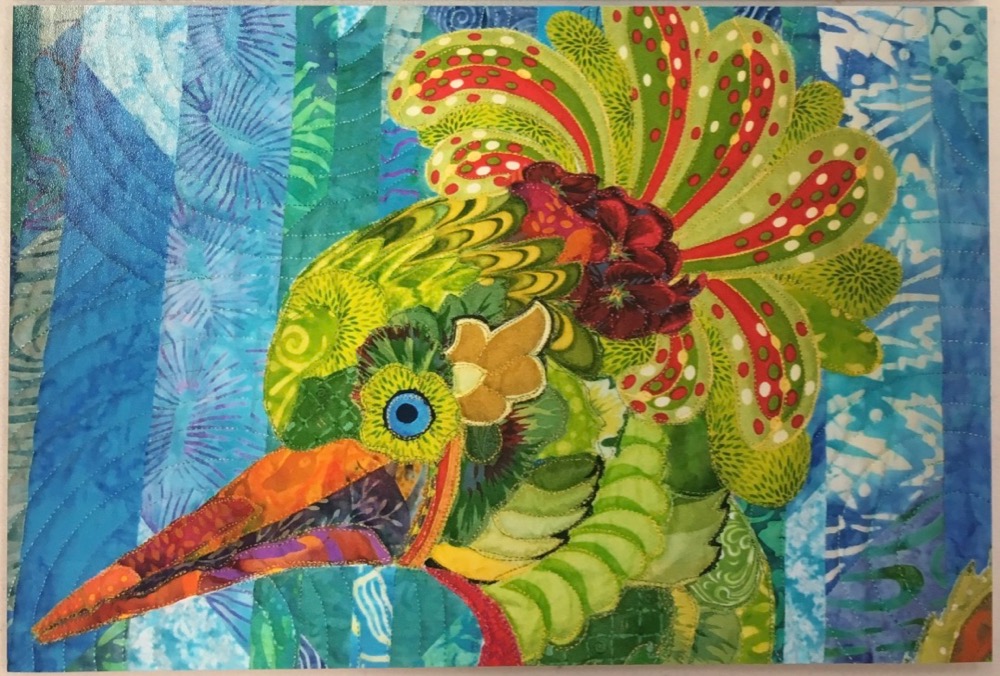
2016 was my first trip to Australia and what a lovely group of ladies I had in my class. I’ve enjoyed looking over all the class photos again as I searched for Phillipa Thomas’s in-progress photos.


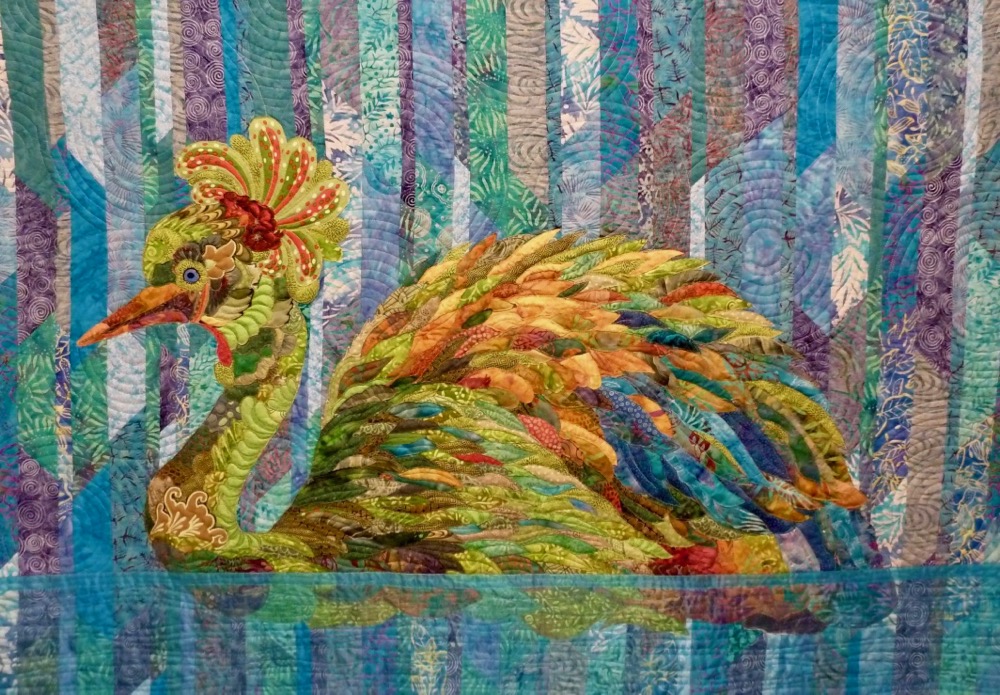
Aside from using lovely shades of green, Phillipa used the fabric prints to their best advantage for the feathery and curved contours of the bird’s neck. The crown of feathers is a great addition, as are the little decorative accents tucked in here and there.


I saw a finished photo of Phillipa’s swan when I was teaching in Australia earlier this year. I contacted her for this post and she sent me the photos below. I really like how she’s treated the underwater part of the bird. There’s a distinct water line with just a touch of shading for the water. Nice finishing touch.
Phillipa also shared with me:
I was very excited to win a first for my bird at QuiltWest and also a major prize of ‘best use of colour’…all thanks to your great workshop. I’ll be at AQC too so look forward to meeting up with you there, Phil
See more of Phillipa Thomas’s work at: https://pippaquilt.blogspot.com/
Nancy nailed it on her rooster’s legs and feet. The entire piece is wonderful!
Susan,
I LOVE your posts, but repeatedly the large photos are not appearing – the final, finished work of each piece.
In this post, 14 large photos are nothing more than blank boxes of white screen! The smaller photos of the works in progress appear, but the final large photos are not there. This has been like this for a very long time and I’ve been satisfied with just viewing the works in progress, but this time, I really would like to have seen these bird pieces as finished work.
I’m no “techie†so I don’t understand how I’m able to view the small photos and the large ones just are not on the screen!
Is anyone else having this same problem?
I haven’t heard of this problem. Have you tried reloading the page?
Loved Saturday’s post on backgrounds. Please do more of these. The background can be so important. Patti
I love looking at the pictures of the collages in Susan’s classes. What an inspiration! It’s interesting seeing the progression from start to finish and how much some of the collages change over the process.
Phillipa’s bird is such a perfect collage specimen! All those details of the crown and neck must have been hard work but so worth it ! Her treatment of the water line is novel, loved it!
THANKS for the inspiration!
Great! Students did wonderful work. Enjoyed looking at each of them!!
I really enjoy reading the stories behind the creations. I have had some of these same problems and it’s fun to see how others get past problems. Thanks for these posts.
Thanks for showing these works in process. It helps me understand much better, as I can see changes from one picture to the next.
They are white pages for me too but I click on them and they open!
Thank you for reposting these bird quilts. I am just starting a hummingbird quilt so it is great to see all these great ideas for feathers an d backgrounds.
I also had the large white boxes void of a picture and I clicked the left hand corner that has a symbol there and the picture appeared. Enjoyed the post Susan as always!!
Thank you for giving us pictures of such beautiful projects. They all offer so many different possibilities/options for future pieces. These are all great masterpieces in their own right!
Excellent use of colours what a pleasure to see how they have been put together.I love the way Philippe gave thé illusion of water , (with what looks like organza,) anyway, it was a very effective choice.
Beautiful work ladies and congratulations to Nancy for her wonderful ugly chicken so life like.
I did an Eastern Rosella in Australia with Susan back in 2018 and he hangs on my wall for me to enjoy, and friends and family to admire, it was a wonderful class.
Enjoyed these pics and stories so much, including about the awkward teenage (chicken) stage. Even ugly stages/moments are part of life!