
Fabric collage is 10 percent making a design, quilting and finishing. Between the making-a-design and quilting, 90 percent of your time is spent cutting and gluing.
During this time you’re working on a surface. Usually you would have your work attached to some sort of pinning board (though I know some people work on their dining room tables). A pinning board is handy because … well … you can pin to it. Holding all those little pieces in place until you get around to gluing them is a big advantage. You don’t want an errant sneeze—or in my case, a wagging dog tail—to scatter your day’s work on the floor.
A pinning board can be any size and be made from any of several different materials. They can be small enough to be propped up on a table using an artist’s easel. They can be as simple as cardboard covered with a pillowcase. Or as complex as a twenty foot long, seven foot high pinning wall.
Foam Core
The most accessible type of pinning surface is probably foam core, which is available in almost any art supply or craft shop such as Joann Fabrics. These sheets of artist and craft material come in many sizes, the most common being 2 feet by 3 feet. It will be easiest on you if your quilt fits within those limits. At that size they are rigid enough so they won’t fold up on you or even bend into a curve too badly, but they’re really not sturdy enough to tape together to make larger.
There are a few “downsides” to using foam core. The surface of foam core isn’t made to pin into. The paper coating is fairly stiff and a little slippery, necessitating a little extra oomph to push the pins in. Once you break through the surface, the thinness of foam core means you can’t go very deep with your pin before breaking through the back. So the pin may be secure enough for the moment, but not as secure as it could be.
The other downside is that while working on your piece, no matter how little glue you use (and it should be just little bits to start), some seeps through and sticks the foundation fabric to the paper surface. It can be ripped off with little effort but this worries some people. As I tell students, it just adds a little more fiber to the back. Especially if the paper is acid-free, as foam core often is, in the end it won’t matter to your piece.
Styrofoam Insulation
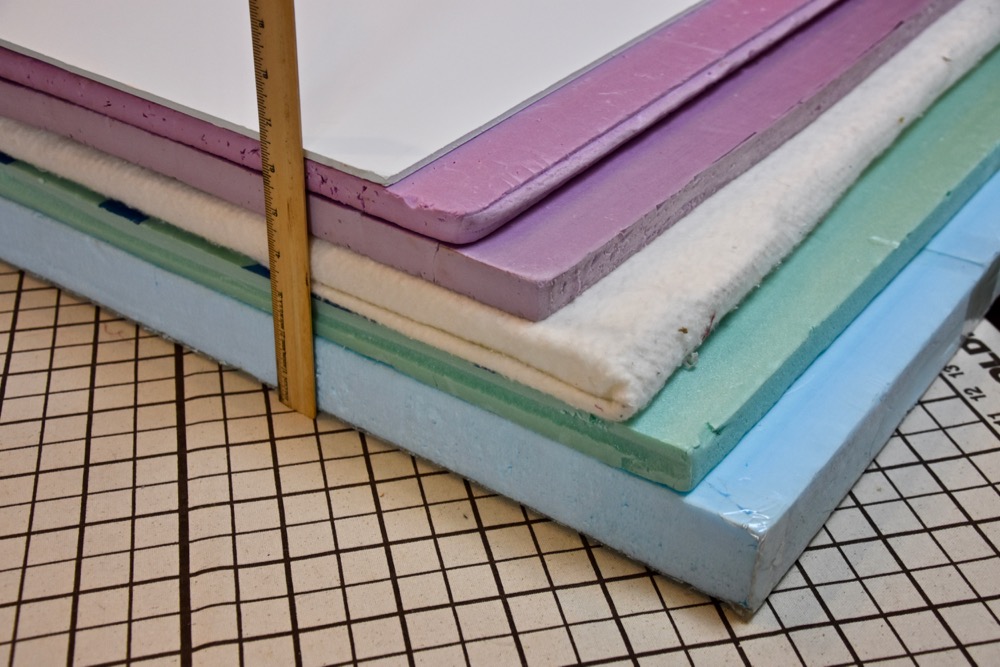
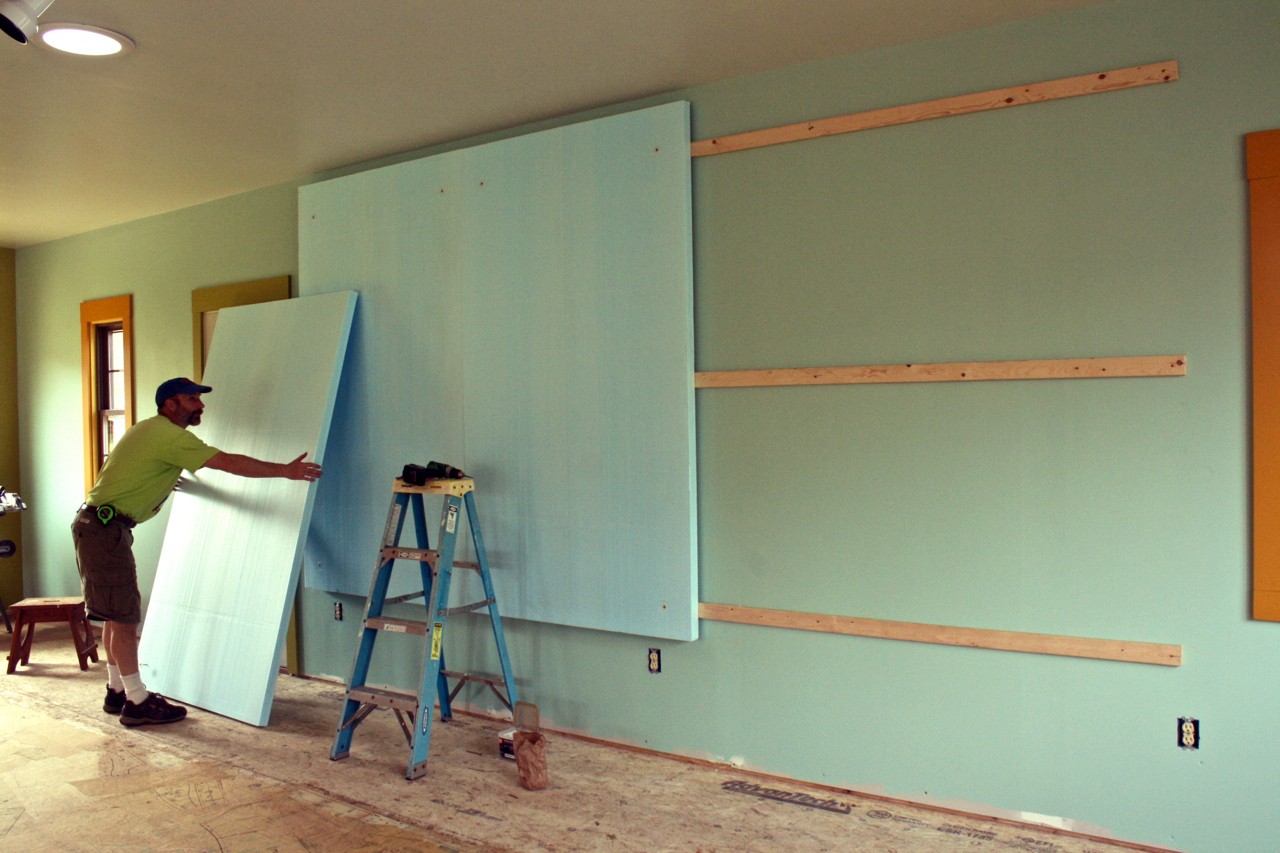
Styrofoam insulation is my go-to surface for pinning boards at my Maine quilt retreats and for the pinning wall in my studio. Found at your local building-supply store, each company seems to carry a different color. In Maine, Lowe’s sells 2-inch thick styrofoam in a light blue, 1 inch in green. Home Depot offers 2-inch and 1-inch in pink. It may be different in your neck of the woods. Just know that you can find different colors at different places—if that’s important to you…
Styrofoam is quite durable, but its biggest advantage is that it is easy to push pins into. Fabric collage is a time-consuming process. You will use hundreds if not thousands of pins. Over time having a nice soft pinning surface will make your fingers less sore.
These sheets are mostly sold in four by eight foot pieces. If you want them smaller the store employees will usually cut them down for you if you ask real nice. If you need a bigger surface you can easily join two or more together using packing tape.
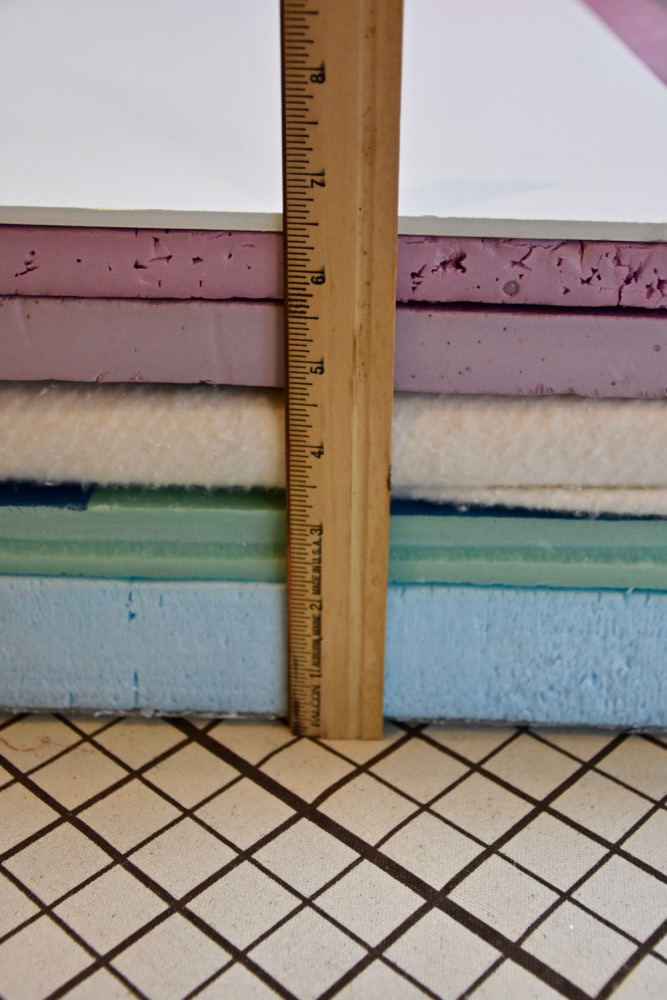
Styrofoam insulation comes in different thicknesses.
Three-quarter-inch thick sheets tend to be quite flexible. If you plan to lean a large sheet against a wall to work on, there could be considerable flexing happening, especially when you go to push pins into it. But if you cut it down to a smaller size this problem isn’t as pronounced.
One-inch thick sheets, despite being only a little thicker, are quite a bit more rigid. I like these for my retreats because when cut down to 4 by 5 feet I can carry a lot of them to my Maine retreats in my Honda Element. They’re easier to transport than the two-inch thick ones.
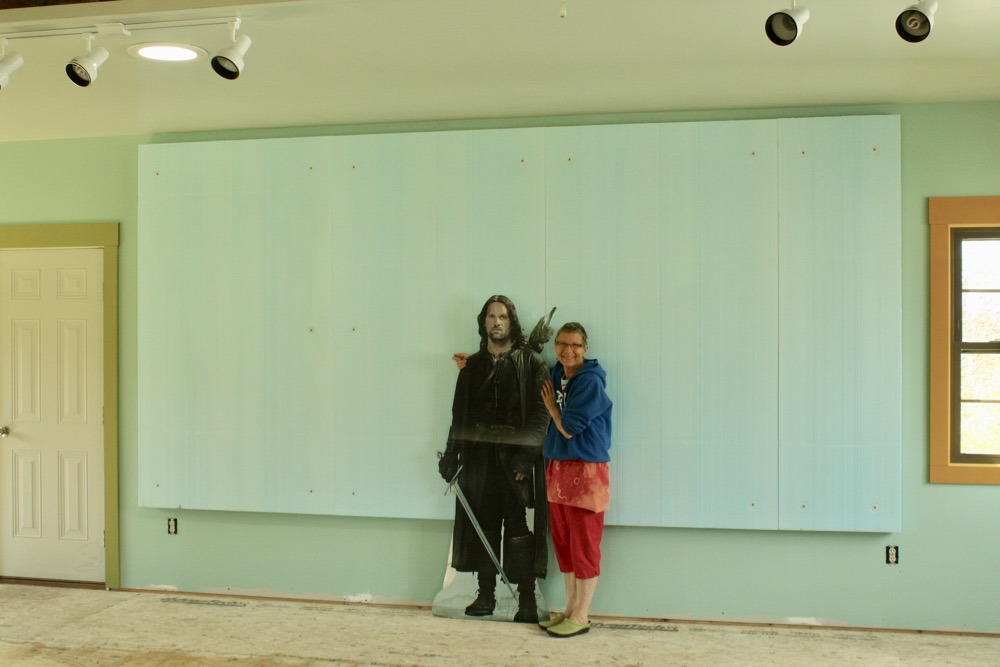
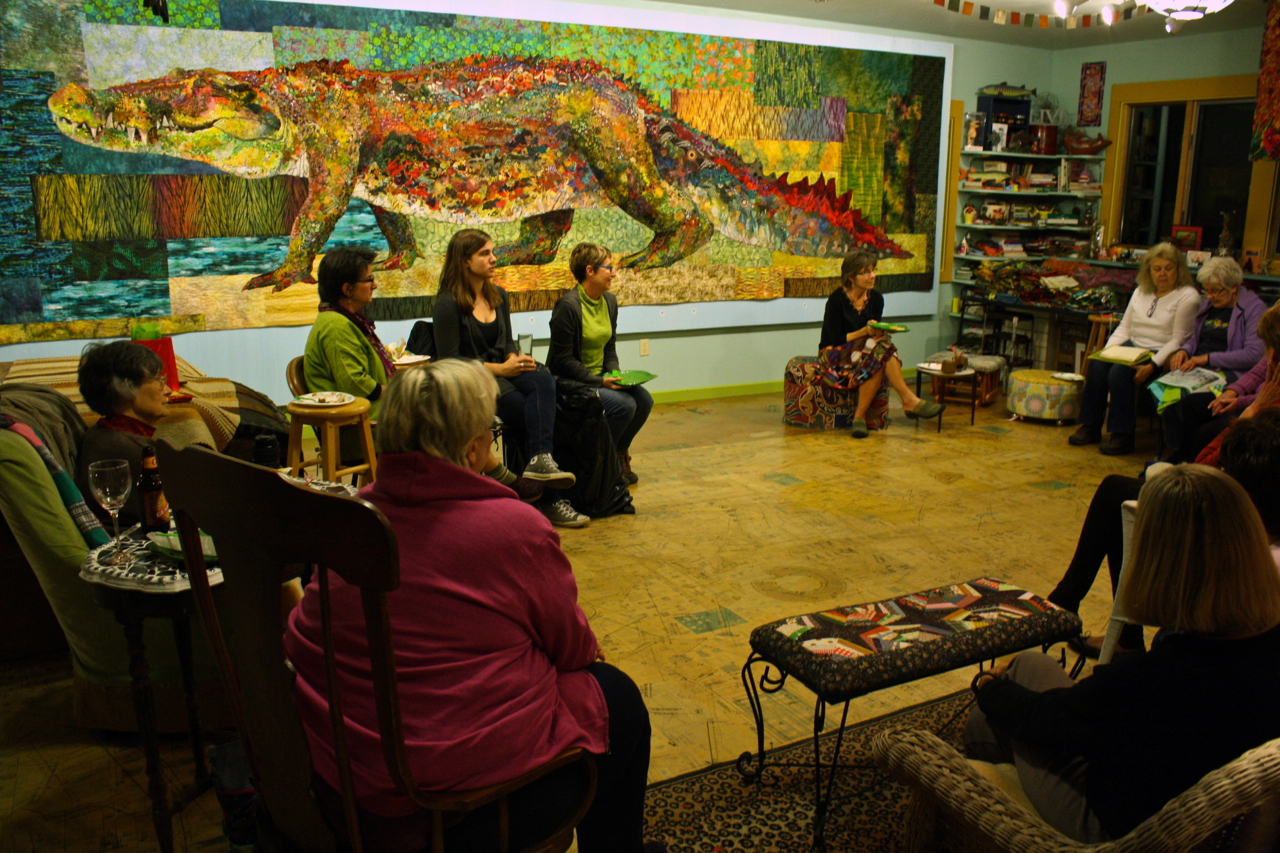
I tote around a few of the two-inch thick sheets cut down to relatively small sizes—2 by 3 feet, say—but mostly I save the two-inch thick styrofoam for use on my pinning wall. A story I have told before is that when I designed my studio, I made space for a fourteen foot long pinning wall. After he constructed it, my husband Tom, wiped his brow and said, “There, that ought to hold you.” So… the first quilt I made on the wall was my “Crocodylus Smylus,” which measures in at 21 feet. Tom’s next job then was to figure out how to add on two and a half more sheets of styrofoam.
Other Surfaces
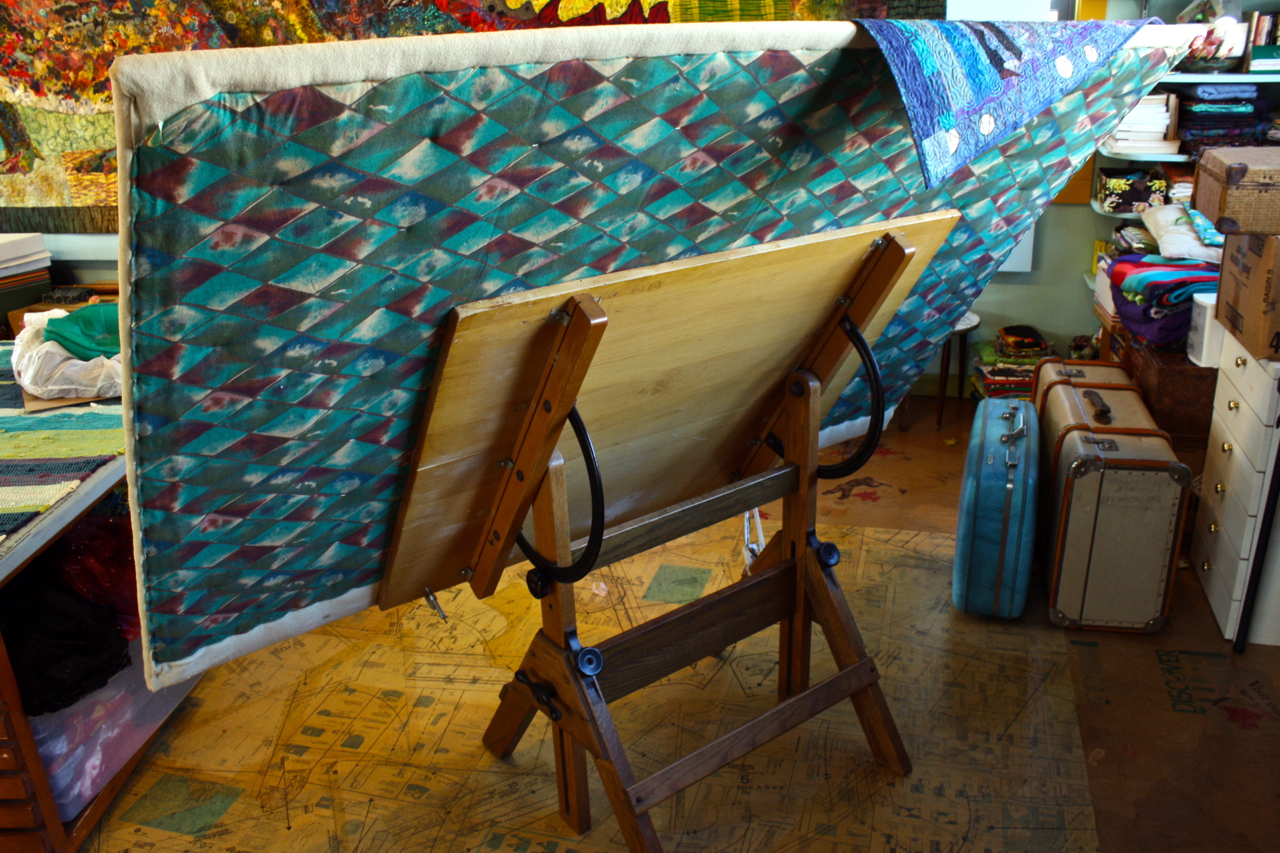
Since my nice studio and pinning wall are relatively new additions to my life, most of my quilts have been made on an architectural drawing board that I expanded in size to 4 feet by 6 feet by attaching a sheet of a building material called Homasote. This Homasote board I covered in a piece of flannel to give it some grip. I used Homasote because at the time (thirty years ago) it was one of the very few semi-permeable surfaces I could find. Styrofoam insulation wasn’t as common and was almost always covered with foil on both sides (which again, would have been harder to pin into).
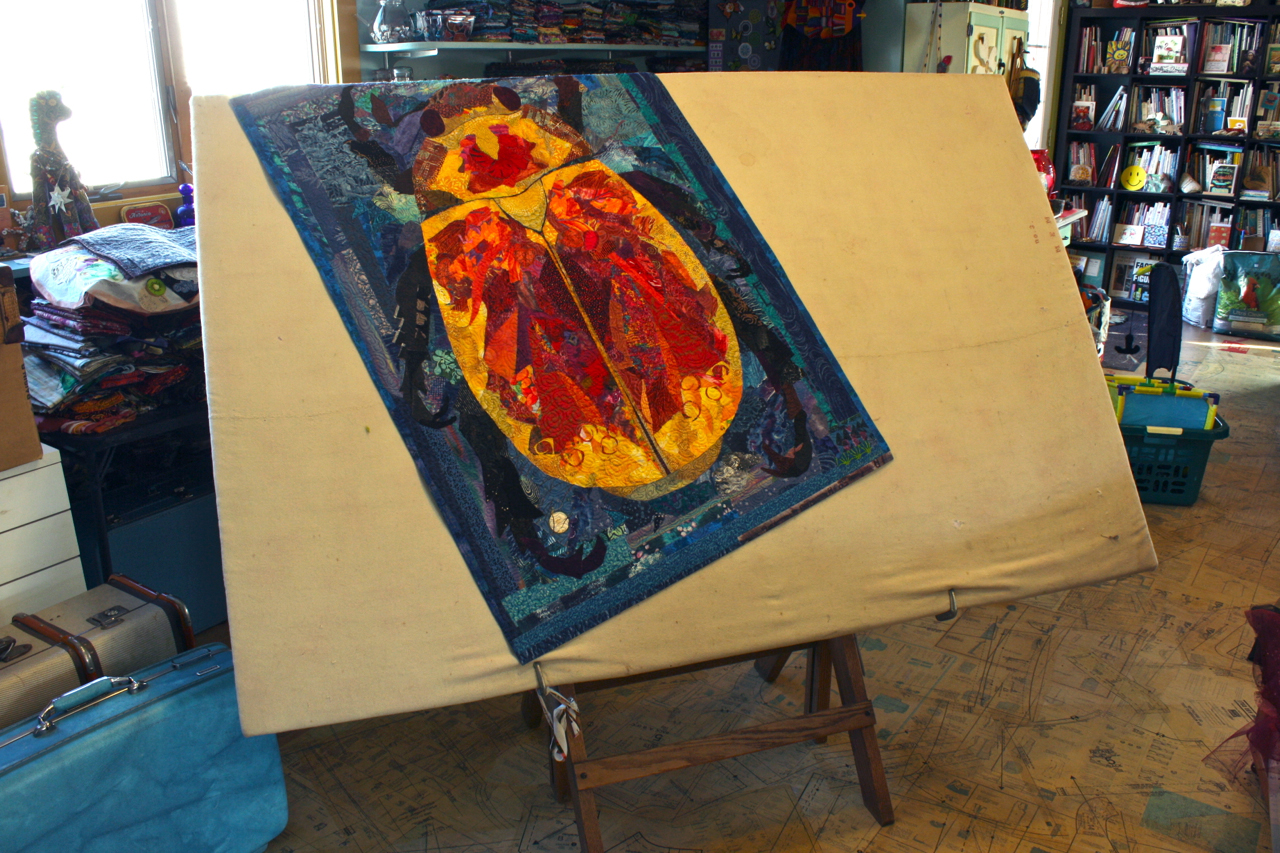
I find being able to sit while I work is more comfortable in the long run. The ability to angle the surface assures me a good perspective to see what I’m working on while also ensuring that the pieces of fabric don’t slide off before I get them pinned.
These days, I wouldn’t suggest using Homasote as a pinning surface. It’s quite dense, making it a little more difficult to drive pins into. It also adds a lot of weight to my drawing table when I move it around. I don’t have any excuse for keeping it as long as I have—just inertia and sentimentality, I guess. If I were to do it again, I would use two-inch styrofoam, which I would probably cover with flannel, because of the sliding factor. However, I haven’t covered my pinning wall with anything, I just pin straight through the foundation fabric into the styrofoam.
Cover Up?
Often pinning boards will be covered in some sort of a soft material which provides a “grip” to hold pieces of fabric in place. This can be flannel, wool, cotton batting, and so on.
For fabric collage, this isn’t necessary. Foundation fabric, with your image traced onto it, will be pinned onto whatever work surface you’re using. That fabric itself provides plenty of acreage to arrange fabrics either where they need to be or on the side to consider using later. Plus, you’re using straight pins to hold them all, temporarily, in place anyway. As I mentioned, glue will no doubt seep through your foundation fabric at one spot or another, and it’s less likely to adhere to bare styrofoam than it is to a pinning board that’s been covered with flannel or such. I don’t consider it a problem—just something to keep in mind.
What do you use for a pinning board? Share with others in the comments below.
thanks for such a detailed explanation…My design wall needs to be replaced..By the way, don’t be tempted to cover the foam with flannel before drilling the screws through it….you’ll be de-tangling strings from the drill bit and perhaps saying a few words you didn’t know you knew!!!!
I use two 4’ x 4’ styrofoam insulation boards. They are both covered by batting. These were made for me by my daughter (an architect) and her husband (a builder). I can use them either singly or together.
Thank you for this timely article. I am in the process of trying to figure out what I want vs need. My husband has been trying to help but he isn’t sure what I need either. So this has been very helpful for me and Tom’s suggestions for my husband has been too. Thank you so much. I look forward to you emails because there’s so much to learn and you are so generous in your instructions.
Hi Susan and all…
This is Cindy Thompson (Iggy the Iguana) from California. I have searched ways to pin my projects to boards and found that the R-Tech insulation boards work best for me. I have a 1 1/2 inch thick and 2 inch thick size boards and cut them to 6 ft x 4 ft. They come in 8 ft x 4 ft sheets. You can easily cut to your desired size with a serrated knife after scoring. I have covered mine with white flannel fabric which helps fabric to stay while pinning. What’s really cool is that I have covered the foil side and when I’m using fusible (on other projects…lol) I can easily touch my iron to the fabric and it adheres while its on the board not allowing the heat to penetrate.
They also fit nicely against a wall standing/leaning and are moveable and not heavy. I can take them in other rooms to work on. I also have a smaller board/version that fits in the back of my SUV which I take it to Asilomar ( Empty Spools) retreat as there is always a need for a traveling board.
As always thanks for sharing your ideas and talent.
Cindy, what size board do you bring to Asilomar? I’m planning on bringing one. Also, thinking my subject will be a bearded dragon ;D
Hi MG,
I live close about 1 1/2 hours away so I’m able to bring my own vehicle and a size that’s perfect for transporting. I’ve gone several times and the board I take depends on what I’m working on. Asilomar will have thin 3 X 4 boards available in each classroom. Projects that aren’t completed I’d recommend taking and using one of those folding boards (Elmer’s Tri Fold Display Boards). I covered the inside of mine with flannel and taped to the back. It easily folded up my project to take home. You can prop them on a chair for a comfortable height and able to pin fabric to these on a slant. I recently purchased one that was not cardboard but thin white styrofoam. Hope this helps.
Thanks Cindy, that’s great info!
MG
How informative and especially loved the photo’s showing Tom’s installation on the wall!
I see a summer project on the horizon. I currently have two 4X4 styrofoam panels with double sided Velcro holding them in place.
I too have a wall with insulation. It was interesting to read Cindy’s note about the foil on one side. Occasionally I will be working on something with fusible and I noticed in a picture of Danny Amazonas working, that he used an iron on his board. Well I did that once, only once and out a deep impression into my wall.🙀. Not even thinking about what I was doing. Will have to try a foil board in the future. Needless to say my husband had to take the wall down and turn it around.
Love getting up to your blogs on Thursday and Saturday.
Leslie
I am so lucky to have a handy husband who built me a fabulous system. On the end wall of my studio, he built a 3 foot deep system of drawers and shelves to house my stash, finished work, even a refrigerator. This is covered by four “barn” doors made of 2″ foil covered insulation board covered with beige flannel. They slde on a ceiling mounted track. Voila an 8 x 16 foot design wall. Spoled and grateful.
That sounds like a great method. Genius, wish we could share photos here.
Around here we are able to go to Home Depot for already cut pieces of 1 inch pink foam cut to 24″x36″.
Several months ago my husband installed the big blue foam on the wall for me. I promptly tore off the plastic and began using. Have noticed a subtle chemical smell wafting past . How does one deal with this odor and is it harmful? Absolutely love your blog and share it often.
Shirley, This is confusing. I’ve never seen the foam panels wrapped in plastic. I’ve never noticed any odor from the ones we installed. It would be worrisome for me if I did. I don’t like anything off-gassing and have avoided things like wall-to-wall carpeting because of it. Personally, I would look into it.