One of nature’s most successful animals, birds are everywhere—including my fabric collage classes! I see one or two birds in almost every classroom. Their exotic colors and interesting shapes make them great fabric collage subjects.
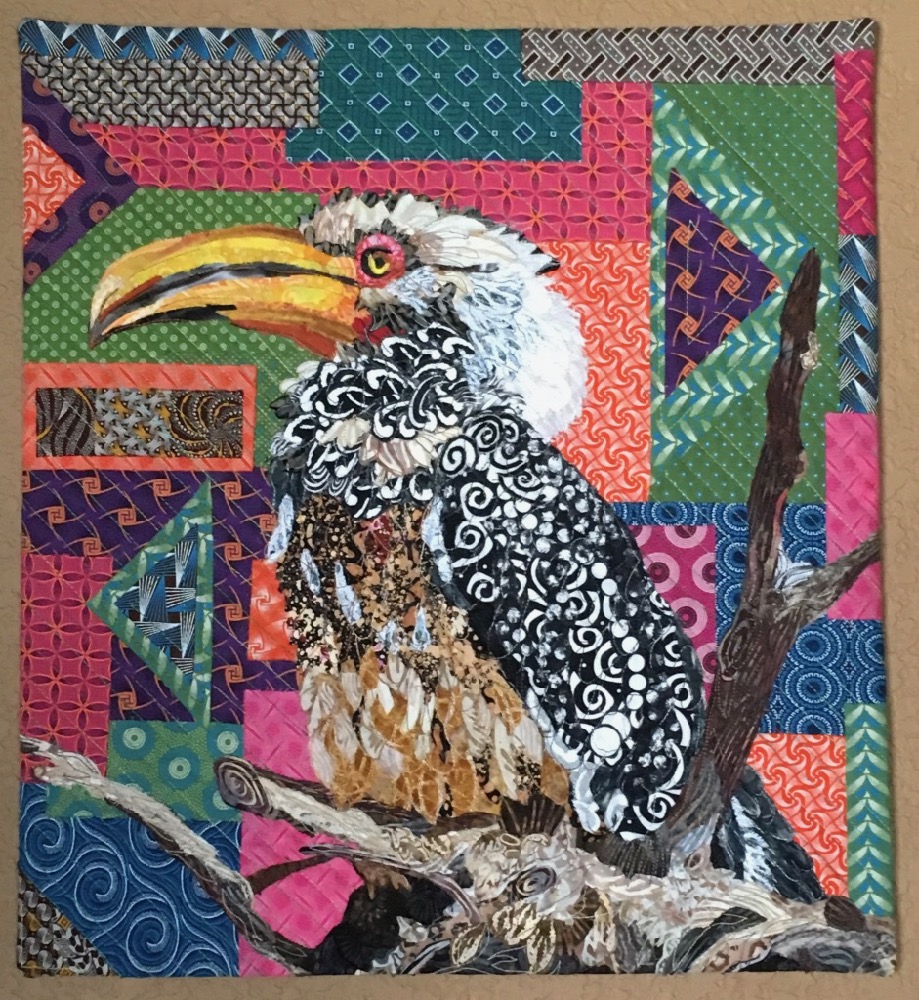
If you decide to make a bird collage quilt, however, please take this one hint to heart: don’t try to cut each individual feather separately. That’s far too tedious. Look for fabrics that will suggest feathers. Linda Barr with her hornbill below does an especially good job of it, but you’ll see that technique employed again and again in these avian quilts, the one’s in last week’s aviary, and other bird quilts scattered throughout the other Finish Line posts.
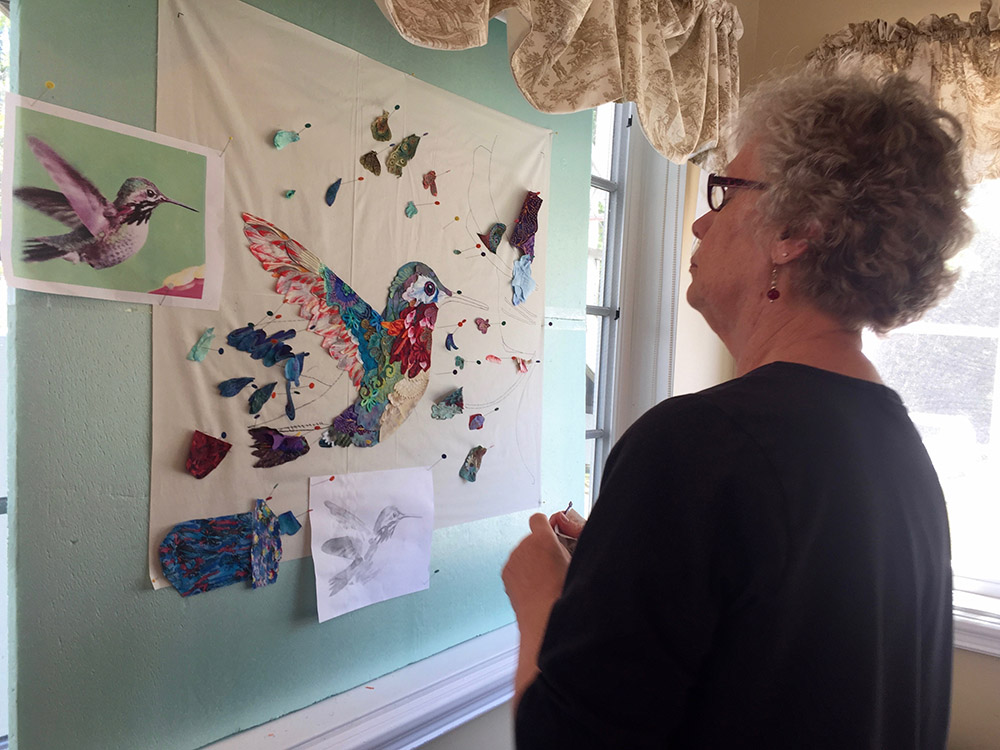
Like Brigitte Schoen’s hummingbird above, many of the quilts in this post were started or continued in one of my Maine Quilt Retreats. I didn’t plan the post that way. It just sorta happened.
I have to say that quality of the photos I’m receiving just keep getting better. Brigitte’s picture of her finished hummingbird is an especially good example to strive toward for those who send me photos of their fabric collage quilts for future installments of The Finish Line. I hope to see yours soon!
In the meantime, enjoy this wildly feathered selection of finished quilts below, and if you’re ready to submit your own fabric collage beauty, please click on the button! Thank you!
Submit Quilt for "Finish Line"
Independently made: 2017
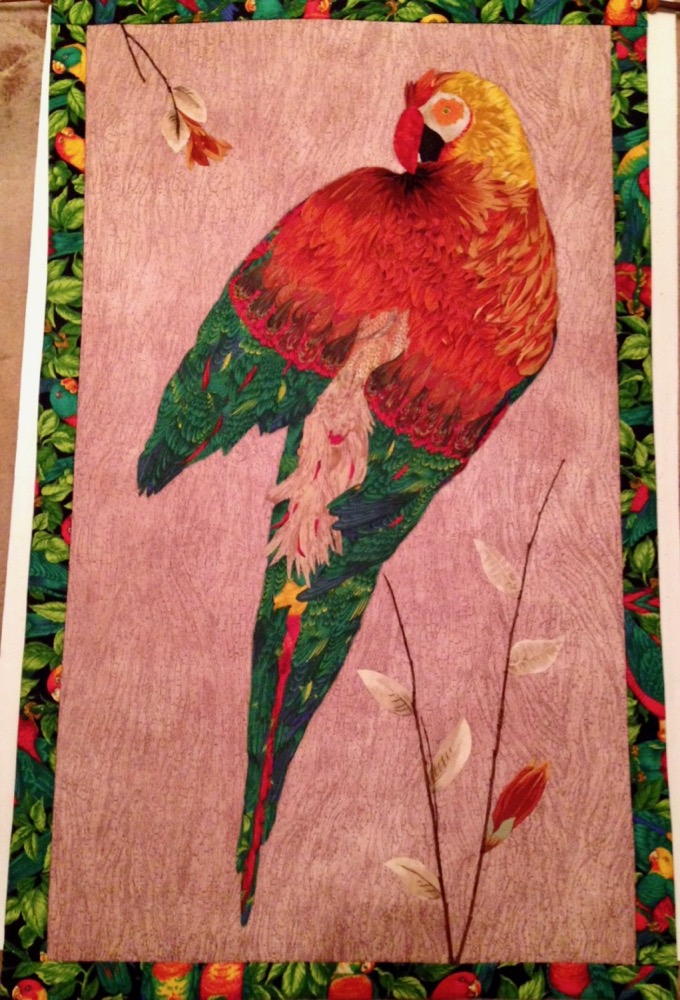
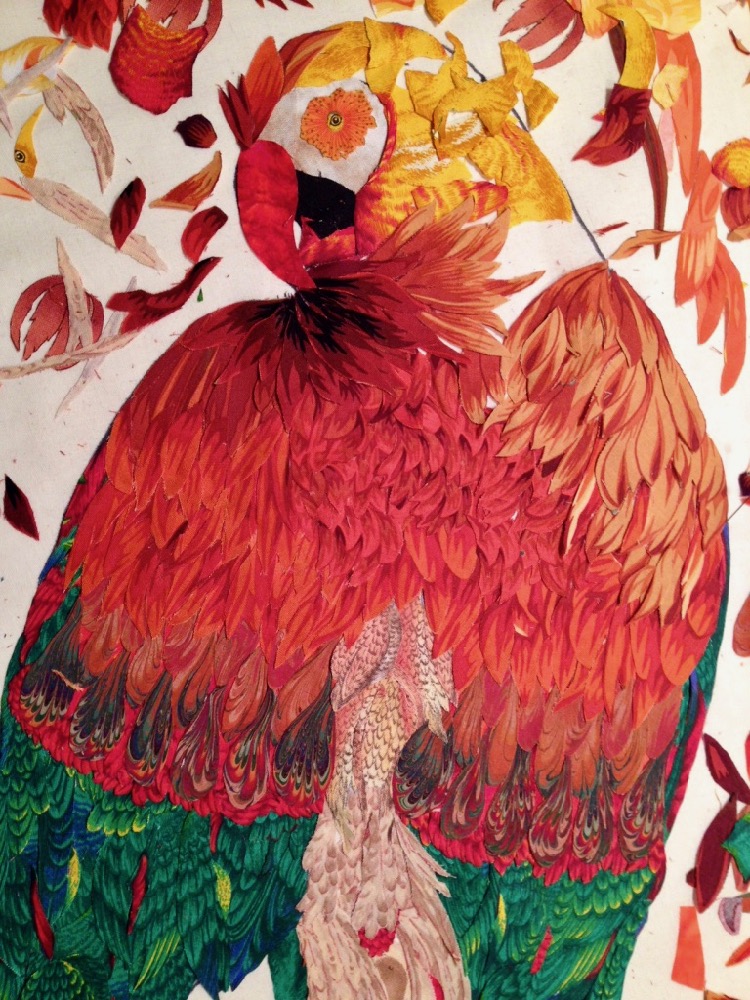
Sally Evans has attended a few local classes of mine. Her first project from a few years before, a moon portrait, can be seen in this Finish Line Volume 4 post. However, this parrot quilt of hers was begun and finished all on her own. She recently sent me the photo of the finished quilt and it fits great into this post not only because of the bird theme, but also for this gift-giving time of year. Here is what she wrote to me:
I got my sister-in-law’s name for Christmas that year and she likes birds, gardening and the outdoors. I had that orange fabric that is actually flower petals—thought it would be perfect for feathers.
The photo above is a nice in-progress shot that Sally was able to find for me. It has some good detail showing the variety of fabric prints—including marbleized—she used to create all those feathers. I especially like her use of the black gradation in the petals under the bird’s beak. What an effective way to add the shadowing that accentuates the twisting of his head.
Maine Quilt Retreat, Portland, ME: October 2017
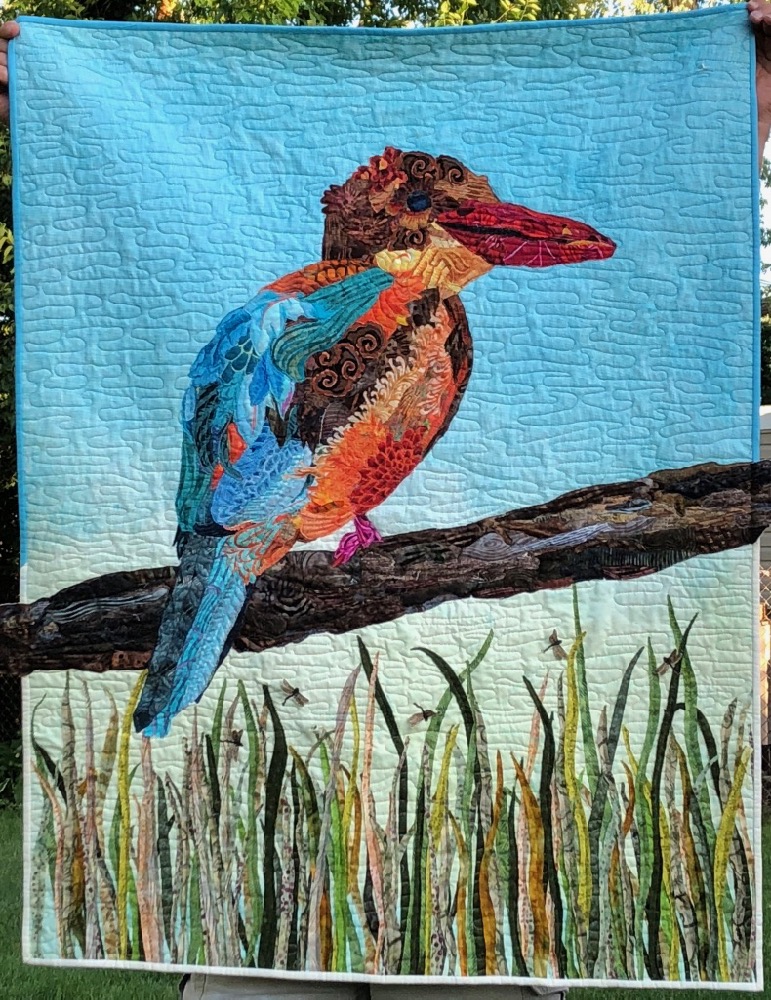
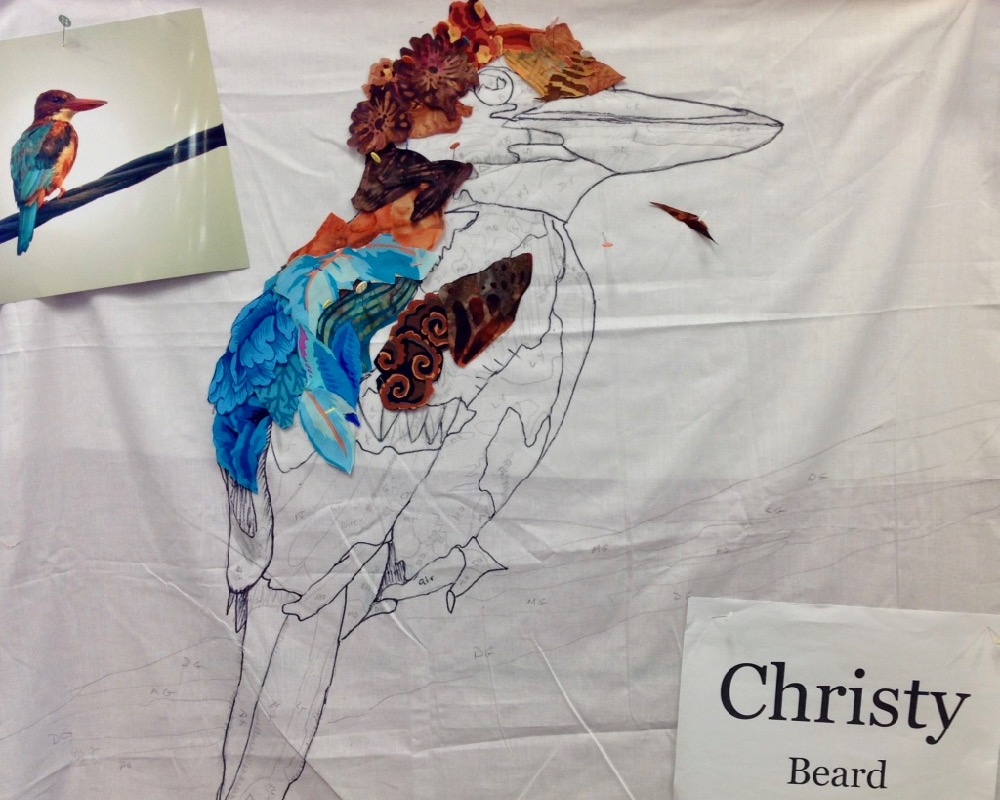
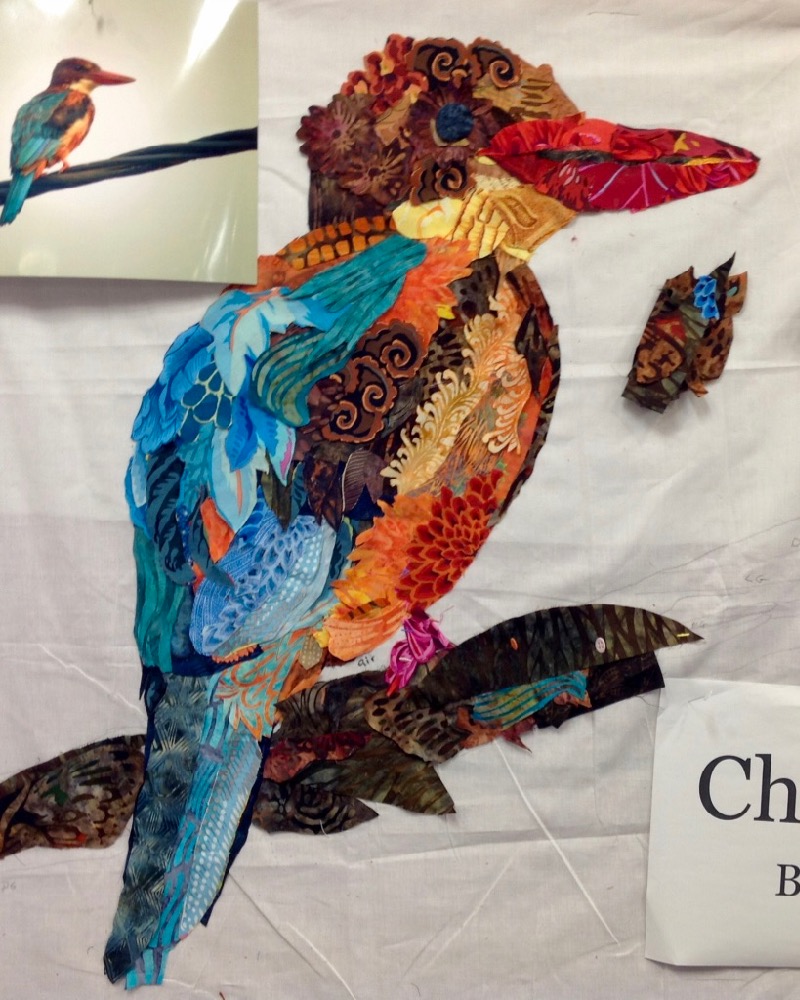
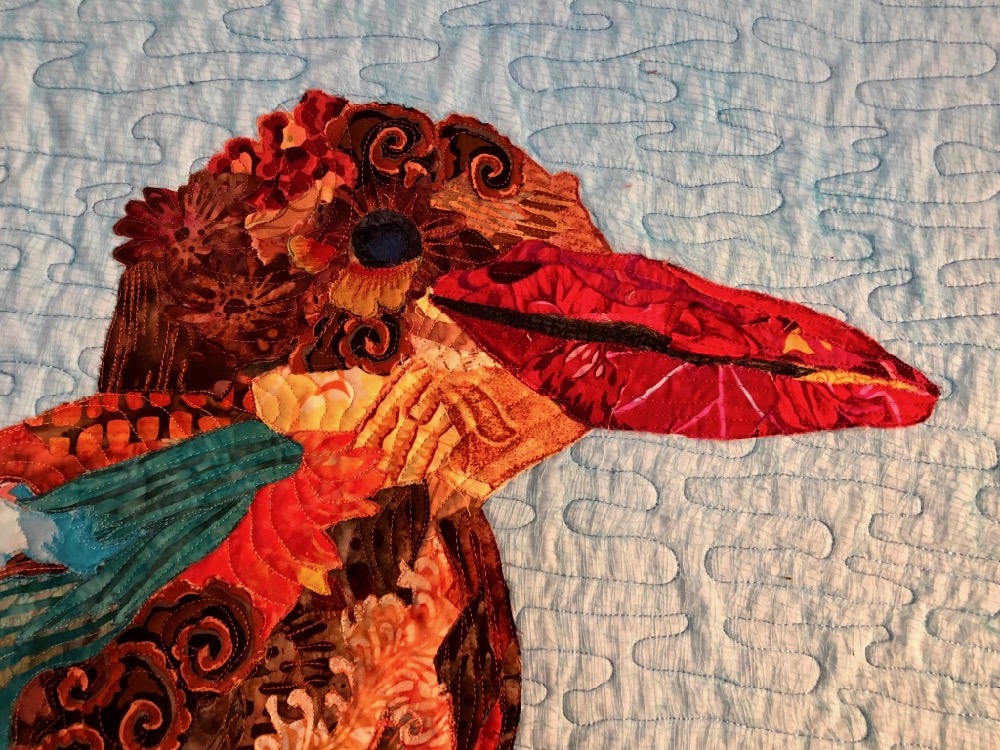
For the last two years, I’ve had the pleasure of having Christy Beard in my Portland, Maine retreats. Both times she’s worked on birds, starting with this kingfisher in 2017 and a bald eagle parent and chick you may have seen in this recent 2018 post. She hasn’t had time to finish the eagles, but here’s in-progress and finished photos of her kingfisher quilt. She gave me a great write-up too, so I’ll let Christy tell the story in her own words.
Upon signing up for the class I read many of Susan’s blog posts and her book Serendipity Quilts. I was drawn by student work that had distinct patterns and bright happy colors. Quite frankly, feathers and their lines seemed an easier pattern to mimic with fabric than skin tone or fur. I still believe this. I knew I wanted feathers, thus a bird, and lots of bright colors. The kingfisher fit the bill. I had never heard of the bird, but his beauty lured me in. I mimicked the colors on the photo as closely as possible. This was a new process for me and I did not want the stress of creating a color palette along with trying to learn a technique. Anyway, how could I improve on his colors?
As far as the picture itself, I found my picture through a web search. It had no copyright restrictions. Susan is adamant about copyright, so using messaging I contacted the photographer who lived in India. He gave me his permission to use the photo. Contacting the photographer made the process more personal.
The fabric buying; I loved it! I went to a local batik store armed with my photo and walked through buying fabrics with lines that could be interpreted as feathery and matched his colors. A friend collects Kaffe Fassett fabrics and she gave me fabrics with the correct colors and lines and a few more. She actually forced me to take a brown and golden orange fabric that was more circular in design . Funny thing, it turned out to be my favorite fabric because it was unique. It can be seen on his chest and on top of his head.
Anyone who knows me would have bet I would never have finished the Kingfisher, but the process is intriguing so I had to complete him. He was downright fun and yet a challenge! Yes, I decided he was a male. Susan emphasized that the story was important. We needed to know about the subject. I spent free time looking at kingfisher videos and reading about their habitat and diet. A video that caught my attention showed a kingfisher diving fully underwater and coming out with a fish. At that point he became a proud hunter. That helped me make decisions about the finishing choices. I could not insult him with glitter nor could I cage him in with my design choice.
Thank you Christy, for taking us through the start to finish thought process of this quilt of yours! Your explanation helps to not only understand how you made the one quilt, but gives us a better understanding of the overall fabric collage process itself. And good luck with those eagles—I hope to post them finished next year. No pressure.
Maine Advanced Quilt Retreat, Portland, ME: October 2017
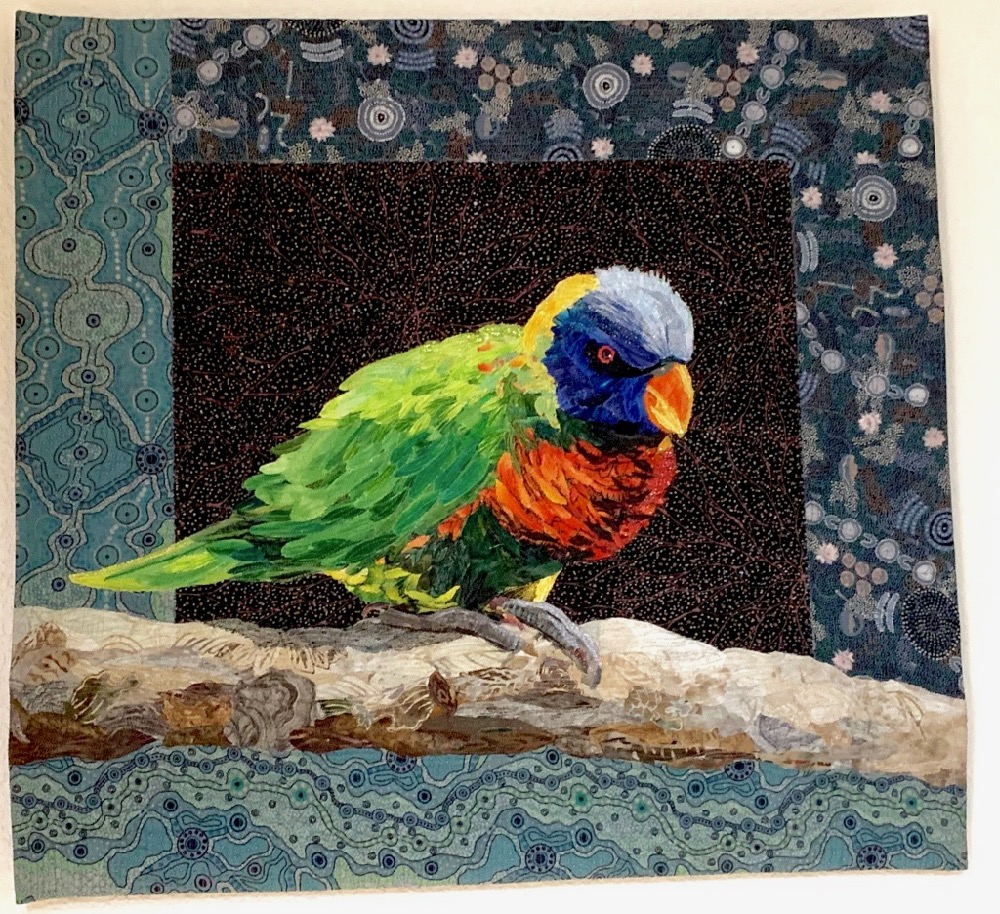
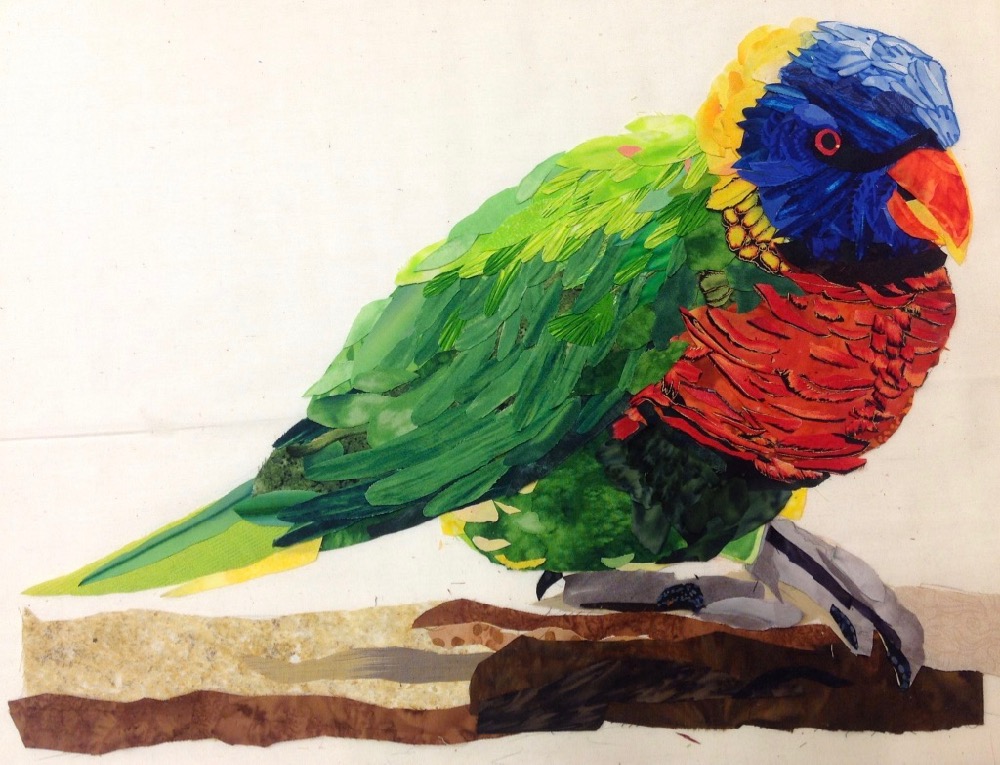
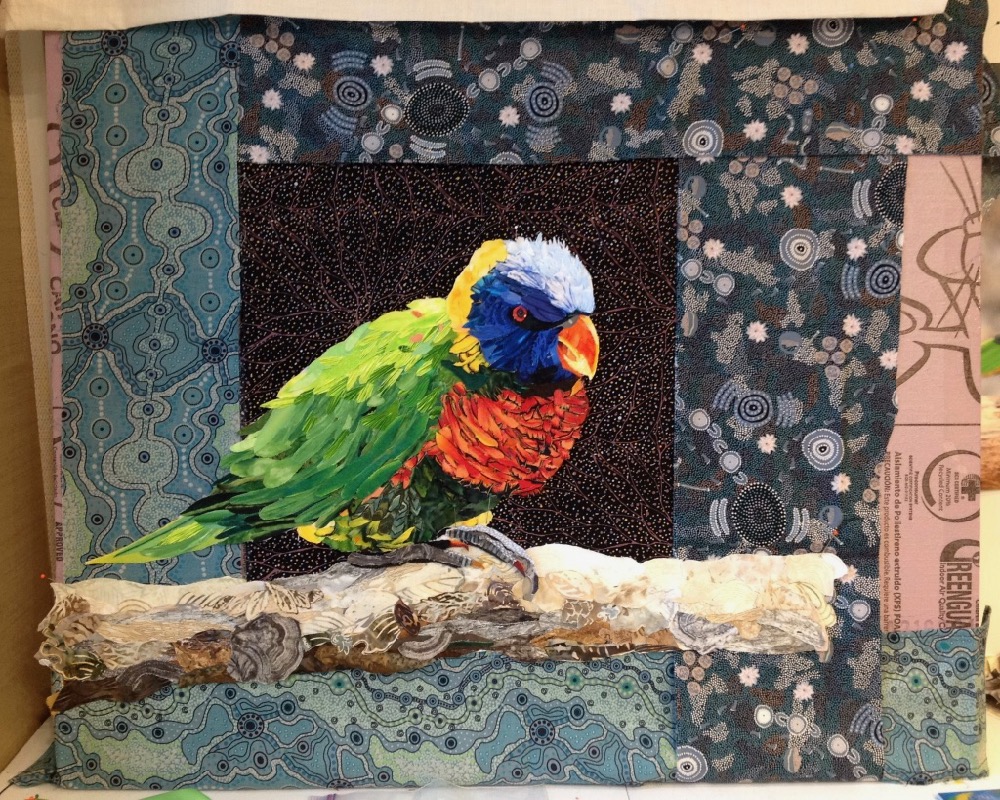
Way back in July 2012, I taught at a conference for the Colorado Quilt Guild. In that class I met Tish Atkinson, and she got a really good start on this lorikeet collage which, amazingly, I found the photo of in my iPad archives.
Flash forward five and a quarter years, and Tish came to Maine to finish this long-standing UFO (UnFinished Object). The bird was still needed some fine-tuning, but mostly she needed to figure out the background. When considering backgrounds, I almost always ask, “What’s the story?” Tish answered:
I based this quilt on my memory of waking up after our first night in Croajingolong National Park in Australia. There were more than a dozen lorikeet birds singing and eating a pear outside my window. When I look at this piece, I can still hear them singing.
So, Tish created a beautiful collaged branch for her bird to rest on, and finished it with a simple block and border to frame and highlight him. Even though this has a traditional quilt block look to it, the background is still glued together. The three fabrics she chose for the background are of Australian Aboriginal design, adding to her story.
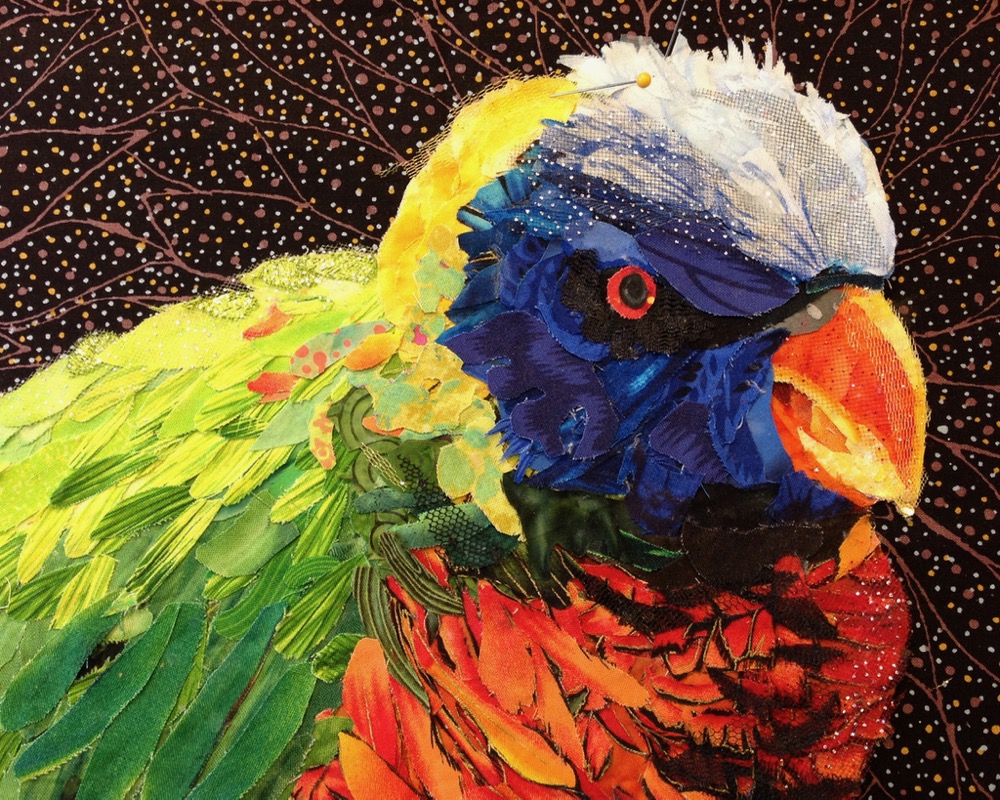
A final bit of collage work that Tish added in the detail photo above, was little bits of black netting for additional shading on his neck and chest, with a little silver glittered tulle for some morning sparkle on his head.
Unlike in 2012, I have myself now experienced these flying rainbows called lorikeets and their chattering song—it was a highlight of each day in Urunga last May. To hear their voices yourself, I made two audio recordings of them in this post of my Australia travels—one with morning birds, and one as the lorikeets settled to roost for the night.
Maine Quilt Retreat, Harpswell, ME: September 2017
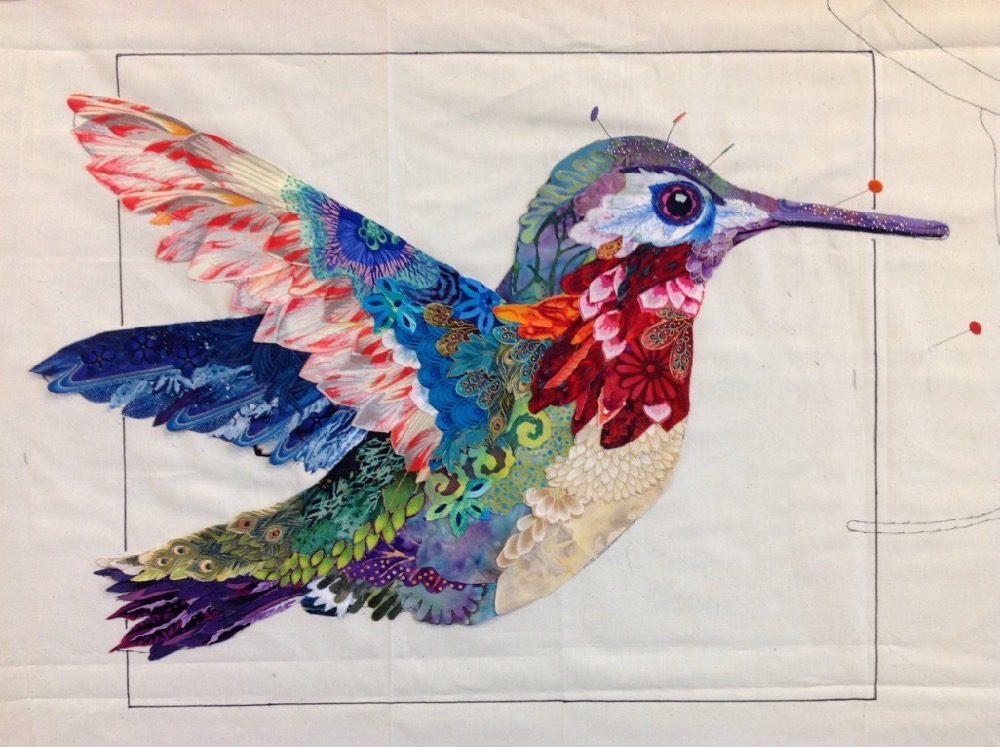
Brigitte Schoen signed up for last year’s Maine September retreat in Harpswell, my home town. Prior to class, she sent me an email:
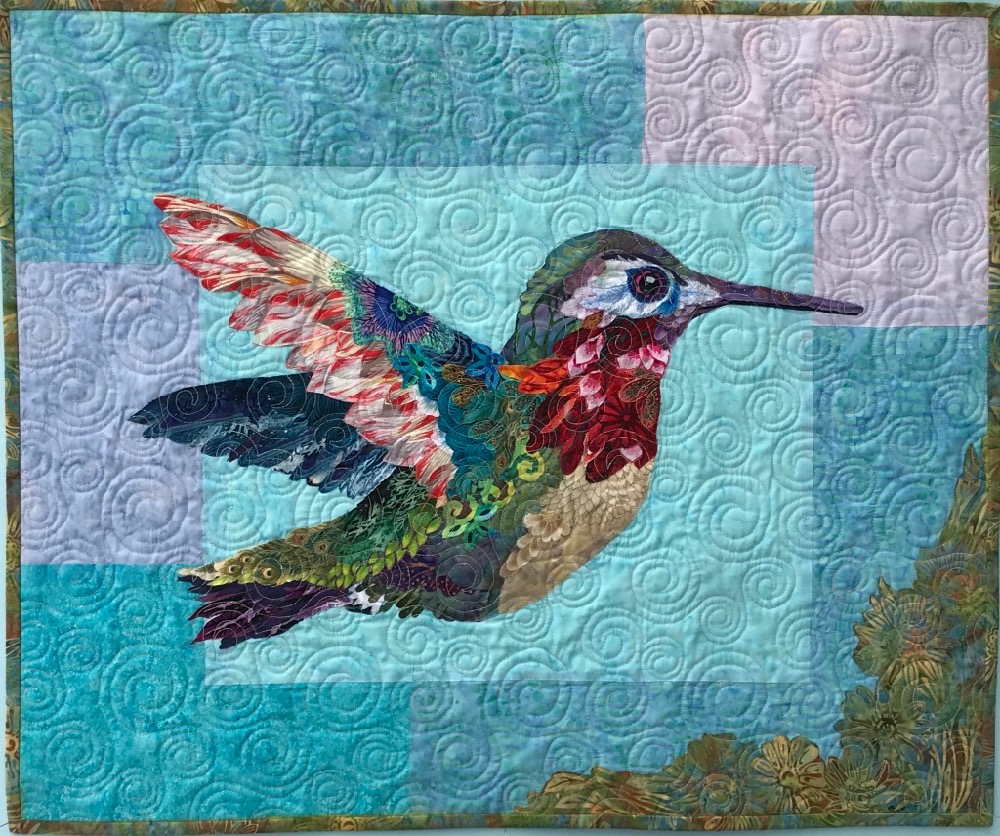
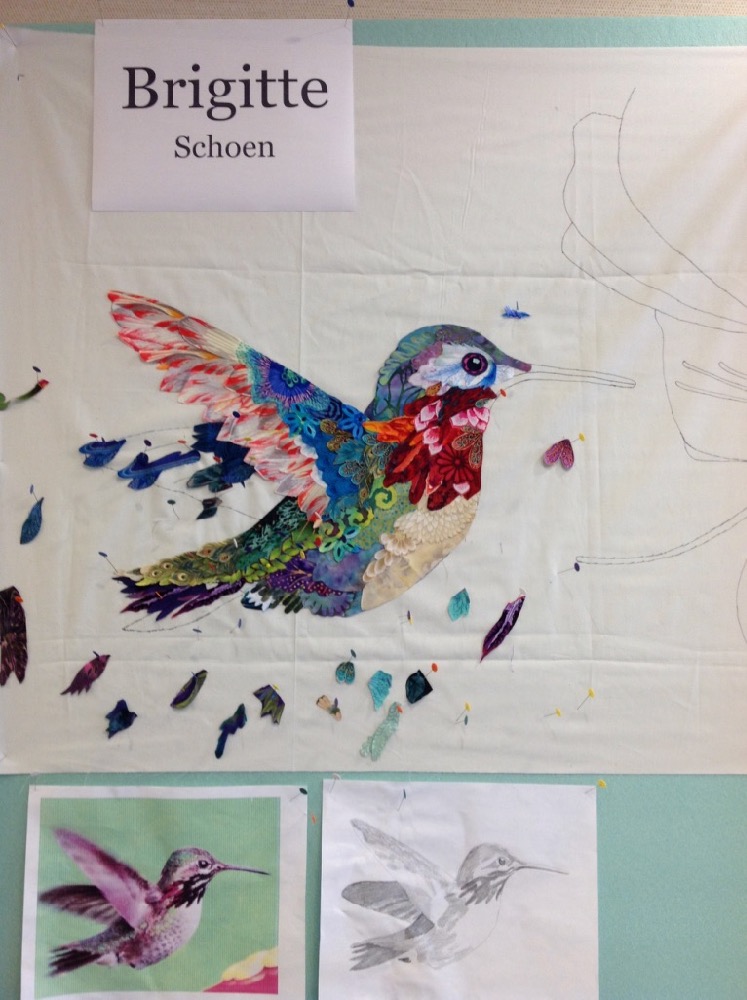
I am emailing you a picture of a hummingbird that I would like to use for your class. I plan to use the bird and instead of the bird feeder I’ll use an image of a flower. It is from Birds and Blooms magazine (their July 2017 issue) and I have received permission to use the image.
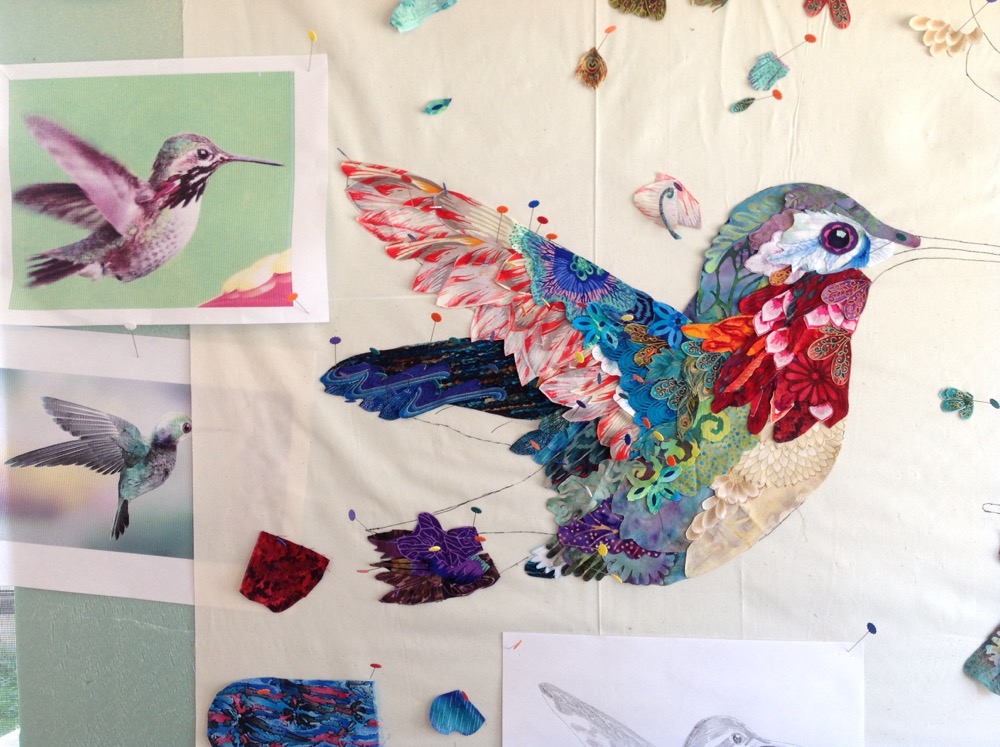
I like that Brigitte was willing to alter the colors on her hummer specimen. She looked at the light and dark values as a guide, but then used her fabric choices to determine the final look of the bird. For instance, the black patch under his neck became a dark red patch in Brigitte’s version. She also made the patch larger than in the photo. Why not? Adding more color and interest is good.
Brigitte had a vision for her hummingbird:
I fell in love with the bird’s pose but took liberties with the colors since the bird in the magazine was not a Ruby-Throated Hummingbird, my local flying jewel in Bucksport, Maine.
And then there was a last minute opening in the next month’s Maine retreat, this time in the city of Portland. Being “local,” Brigitte was able to step into the class and continue work on her project. In comparing the above and below photos, you can see that she made some progress on her own between classes.
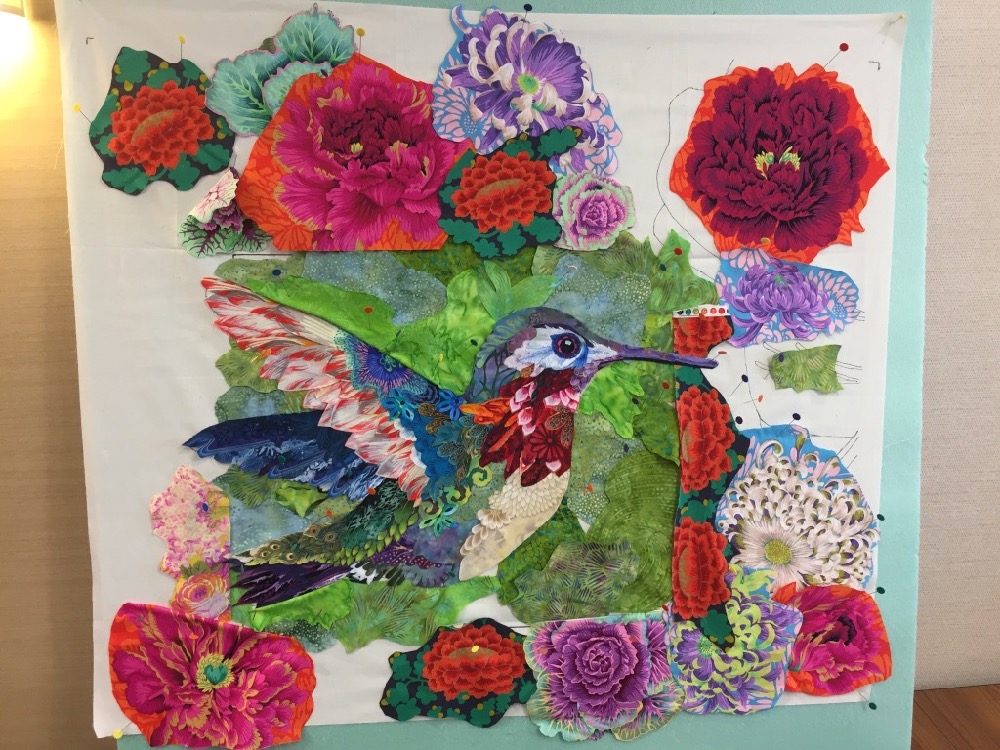
But like Tish Atkinson and her lorikeet (in this same October retreat), Brigitte also wanted to get her background figured out in class. After a couple days of fleshing out the hummingbird, she drew a box onto the foundation fabric as a guide to “spotlight” the little fellow with some accent color.
As Brigitte told me, she finally completed the quilt in August 2018. The finished version of the background (below) turned out to be quite different from the last time I saw it in class (above). It’s like they’re two different quilts. And maybe that’s a good point—in that search for a “perfect” background, there are options that go with different visions, and different stories. Brigitte’s hummingbird went from busily taking in nectar from as many flowers as possible, to buzzing across the open sky from one destination to another. I’ve seen hummers in our yard doing both those things.
I saw Brigitte again this year in a Portland retreat. This class my husband Tom, stopped in to give a demo on how to take photos of your quilts with a smart phone, based on the blog post guest-written by our friend Joel Davidson. When I asked Brigitte for a finished photo for this blog post, she replied:
I am more than happy to send you a photo. I have been waiting for a clear cloudy afternoon to take the picture. I tried earlier, but then it started to snow and I had to hurry. I used Tom’s training to take the pictures.
Very nice photo, Brigitte, and you beat the snow. I think I’ll have to add Tom’s photo demo onto the schedule for my 2019 retreats!
Denver, CO: February 2016
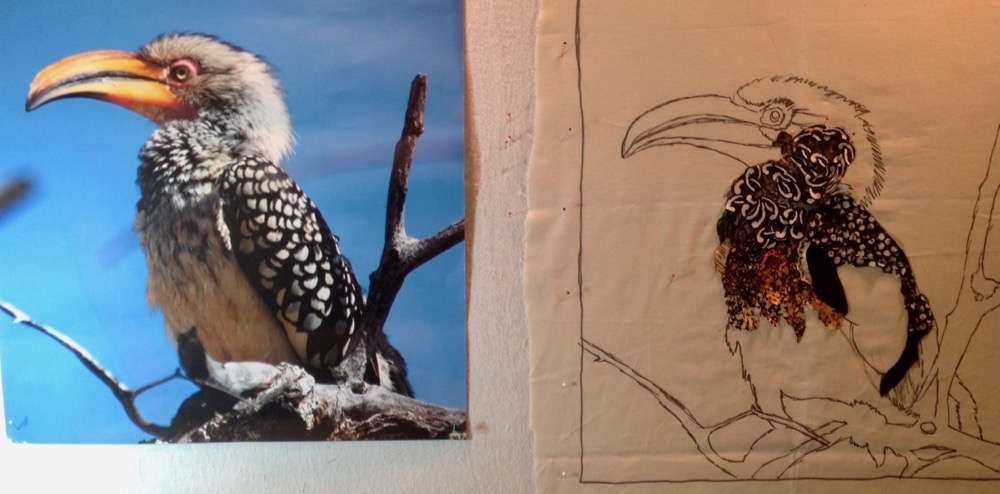
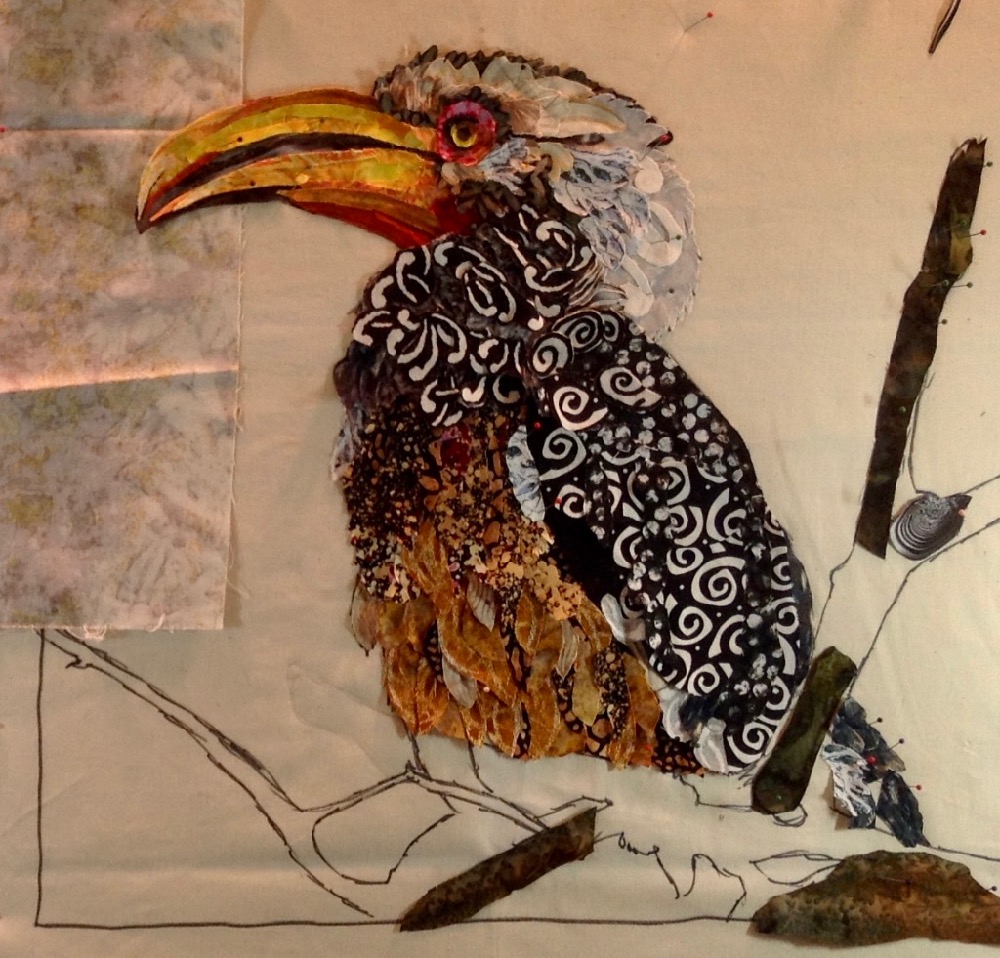
Linda Baar has been in a couple of my classes as well. But in her case, it’s her second collage that’s now finished, a yellow-billed hornbill. Linda lived in Africa for awhile and it seems so exotic to me to see birds like this on a local outing. When I asked Linda about choosing this image, she wrote:
While my husband and I were living in Botswana, Africa for 4 1/2 years, we had the privilege of going on many game drives at various safari camps. We would frequently see yellow-billed hornbills, better known as Zazu to Lion King fans. I was always amazed at how they could fly with such a large beak. I photographed this particular bird sitting on a tree branch on one of our bush outings.
When choosing fabric for images, I think it’s interesting to find prints that suggest a visual texture—such as the high-contrast black and white feathers of this hornbill—rather than painstakingly creating each feather. For Linda’s bird, the large graphic black and white spirals, achieved a similar look to the pattern on the wing feathers.
I remember talking to Linda about different background possibilities. Nothing was clicking, so finally I asked her to tell me about her time in Botswana. She excitedly told me about a type of cotton print specific to that area, and that she had brought some back with her. The next day, Linda brought pieces in to show me, and they were gorgeous, and perfect for her African bird.
The background is made from shwe-shwe which is a 100% cotton fabric manufactured in South Africa. Local ladies wear garments made from this very colorful fabric. Thanks to Susan for suggesting I use this fabric to complete the story of my life in Southern Africa.
Empty Spools Seminars at Asilomar, Pacific Grove, CA: March 2018
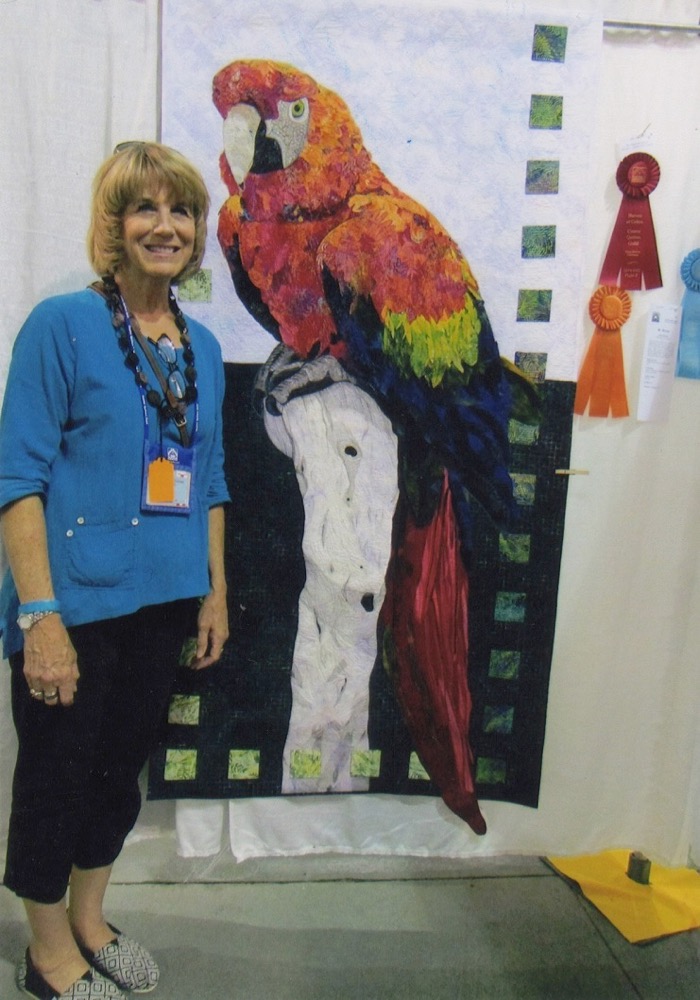
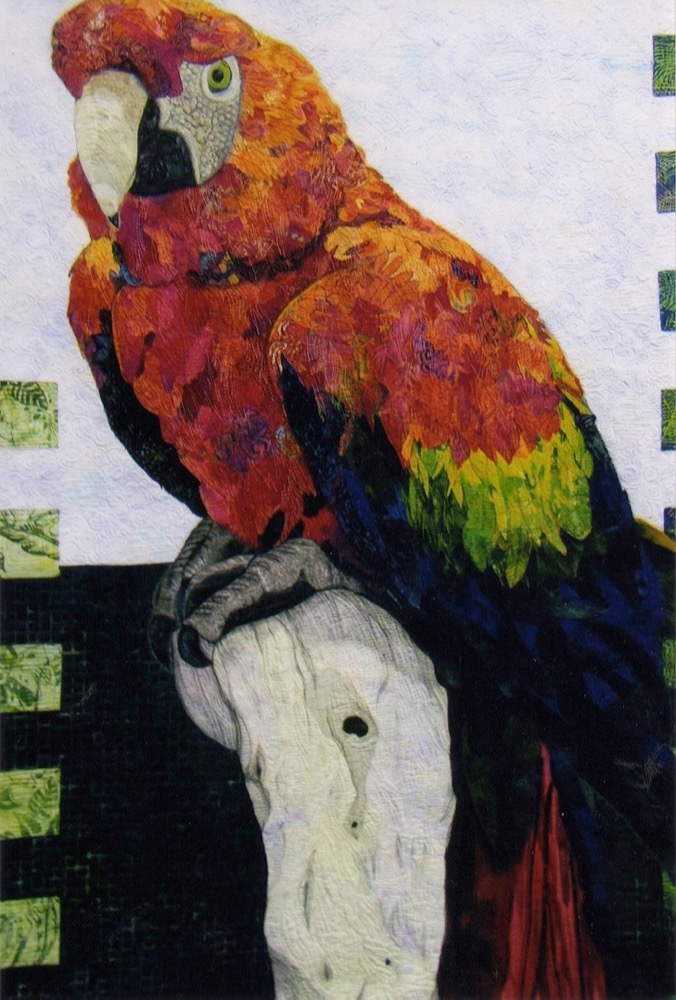
Finishing this post of Avian quilts in a “big” way is this big beauty by Linda Estrada. One of the many nice things about teaching at Empty Spools Seminars on the Monterey Peninsula in California, is the nice big classroom I’ve been lucky to get for a few years now. I almost always encourage students to go big on their designs—more room to play with fabric, after all.
But the class Linda was in stood out with just how many people had taken my advice. So much so, that on the last day of class, I got photos of them with their big papers patterns in one photo, followed by their big images in progress. You can see Linda and her macaw, along with her classmates and their big projects in the class link above.
Linda was an easy student for me, with a nice sense of color and value, making great progress on this big bird in the five days of class.
Just a couple weeks ago, as I was putting together these two avian-themed posts, a letter arrived from Linda with the following two photos enclosed. “Mr. MaCaw” was finished. Perfect timing. Linda thanked me for the encouragement to “go big” and that she had many more fabric collages planned. Plus, I hear I’ll get to see this fellow in person at Empty Spools 2019.
Judging by all those ribbons hanging off to the side, I’m not the only one thinking he’s a beauty. With all the attention to background I’ve been pointing out, I like how Linda let his tail fade into the background and then extend beyond the border. Very nice treatment that brings him right into the foreground—almost like he’s ready to hop onto Linda’s shoulder. She may regret going big if that happens!










These birds art quilts are amazing. It has given me inspiration for my next project.
I have made two bird quilts this year. They are fun, but can be challenging, especially if the birds are mostly white. It’s great to see these examples and see how they suggested feathers. See my blog, jerristroud.wordpress.com for the egret and gannet I made.
I would love to take a class but man o man, am I intimidated!
I am in love with the hummingbird, which holds a very sacred place in my heart because I always feel my husband’s spirit returning to me when the hummingbirds are in my yard. I am so glad she simplified the background, giving the bird all the attention and not having it hidden in the flowers. That’s always my challenge . . . Knowing when to simplify and when to let the fabric designs fly.
Since I was in the October 2017 Portland class with Brigette Schoen and Tish Atkinson, seeing their finished bird collages was an especially thrilling morning for me! This was my first fabric collage and I was deeply involved in creating Elizabeth, My Almost Perfect Cat, but I remember watching the auditioning and planning of the backgrounds on Tish’s lorikeet and Brigette’s hummingbird. This memory and what I learned was very helpful when it came time for me to decide on backgrounds–which can be as challenging as the main creature! Great post, and congratulations on these wonderful finished birds!