
It’s time to introduce a new series of posts that expand with further thoughts and information on popular fabric collage topics covered in earlier versions. Over time my experience as a fabric collage artist and teacher has given me new ideas and techniques in how I approach my fabric collage art—things I didn’t or couldn’t have anticipated when I first wrote about this fabric collage process.
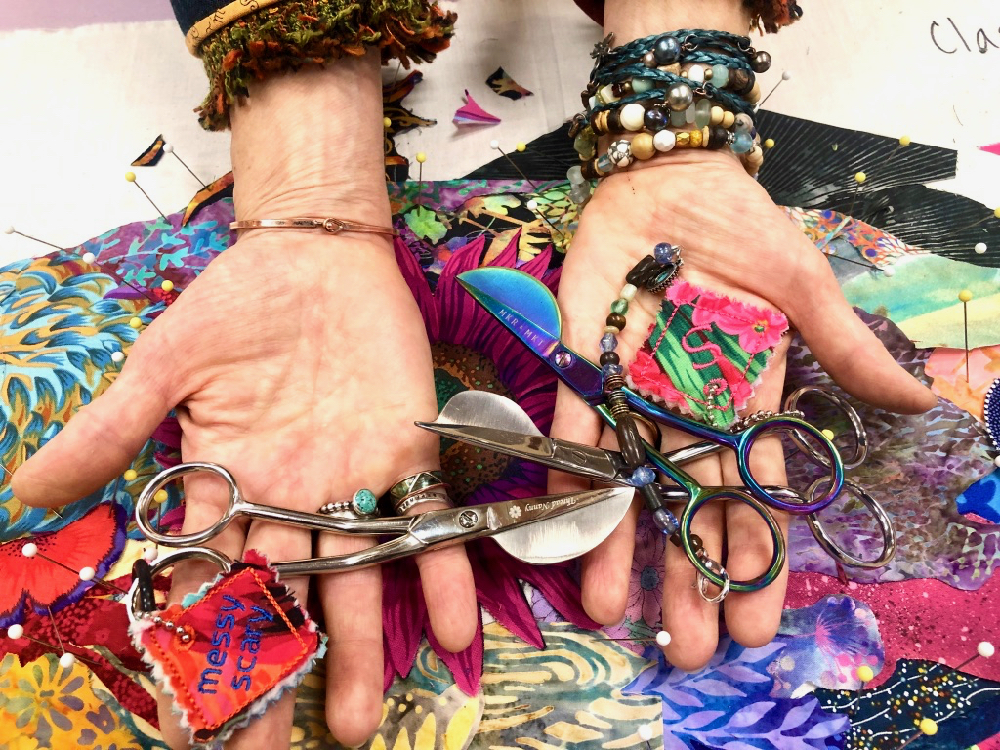
For example, I’ve always used appliqué scissors in my collage work, sometimes called duckbill scissors—or as I like to call them, pelican-bladed scissors. And ever since I started teaching (more than thirty years ago) I’ve been asked: Why?
Why do I use them and how do I use them? What do they do that regular scissors don’t? I tried to answer those questions in the original 2018 post, included below. But recently I’ve noticed (and it has been pointed out to me) that I also use these scissors in ways that might be unexpected. They are an extension of my hands, a prosthetic that for some things is even more efficient than my fingers.
Below, I use my scissors to poke, to prod, to lift and tuck. I use them as others might use a pair tweezers or a dental tool. The video demonstrates how I use my duckbills in ways they were never designed to be used.
In the original post, and new video above, I talk about and use my handy dandy trusty Gingher scissors. However, the links I had posted for someone to purchase them are “no longer available.” I did find some through distributers, but not from Gingher. So I decided to expand the field and find other duckbill scissor options to experiment with and write “further thoughts” about.
Two duckbills that had good online reviews were from Thread Nanny, and Maker and Market. When I re-read the many comments to my 2018 post, questions about left-handed duckbills came up and Havel’s was suggested. Even though I’m not a leftie, I added it to my ordered, to give it a try as well. The following is my initial experiences with all three brands.
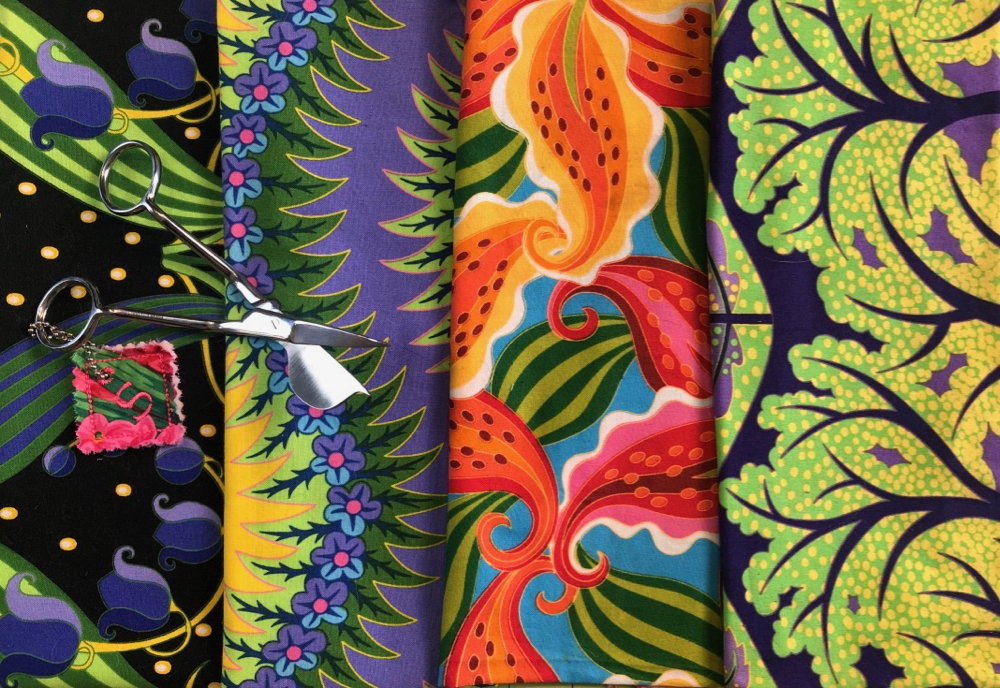
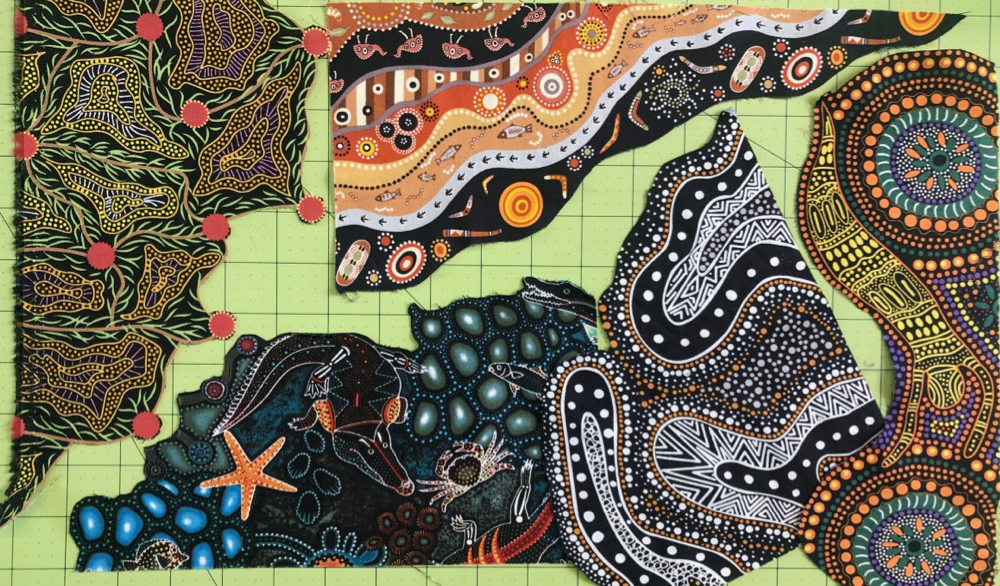
I needed to cut a palette of fabrics for my upcoming Thursday Night Follow-Along: Quilter’s Fantastical Trophy Fish anyway, so I took my first selection of sample fabrics and cut shapes using the Ginghers I’ve had for years as a base to judge the others (not pictured).
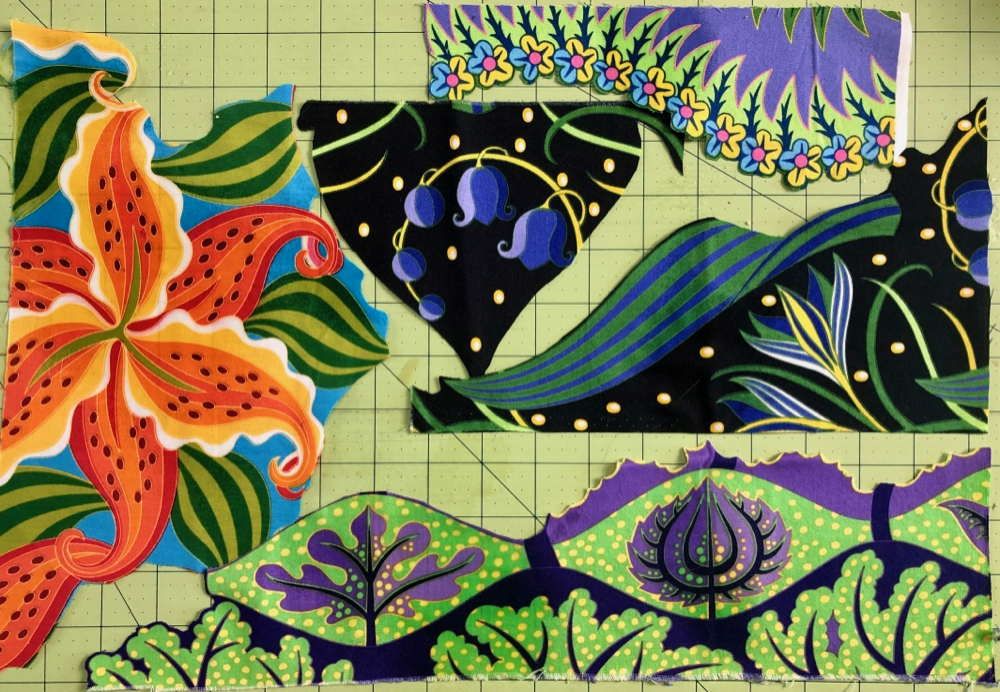
Then I picked up the Havel’s for lefties, below, and had a go at another pick of fabrics—a selection by artist, teacher, and fabric designer, Jane Sassaman.
The Havel’s (above) are even more unusual duckbills as they have a pointy nose, probably to snip into tighter corners (for appliqué use). Even though they are labeled left-handed, I can’t say I had trouble using them with my right hand. The lefties in my most recent class told me they had learned to cut with their right hands, so none of us could truly comment for those left-handed folks that have so much trouble finding scissors they can use. If you can speak from experience, let us know in the comments section at the end of this post.
Aside from that, I can say that these, and the other two new pairs as well, demonstrated to me how very much my old Ginghers need to be sharpened! I’ve used my current scissors for more than a decade, so no doubt sharpening is needed—I’ll let you know the results after I send them off—I’ve been told that sending them back to the company for sharpening is the way to go.
Below are the fabric palette cuts I made with the Havel’s. First thing I noticed that though the scissors are sharp, they are stiffer to open than what I was used to. With much use, I would certainly notice a strain in my hand. They have an adjustment screw, but it was too fine to be able to use my easy-to-find screwdriver, so I don’t know how much of a difference that would have made. Because of they’re left-handed I wouldn’t have normally purchased them, but in the samples you can see they cut fine. And if I can ever need that pointy tip, I’ll use them again.
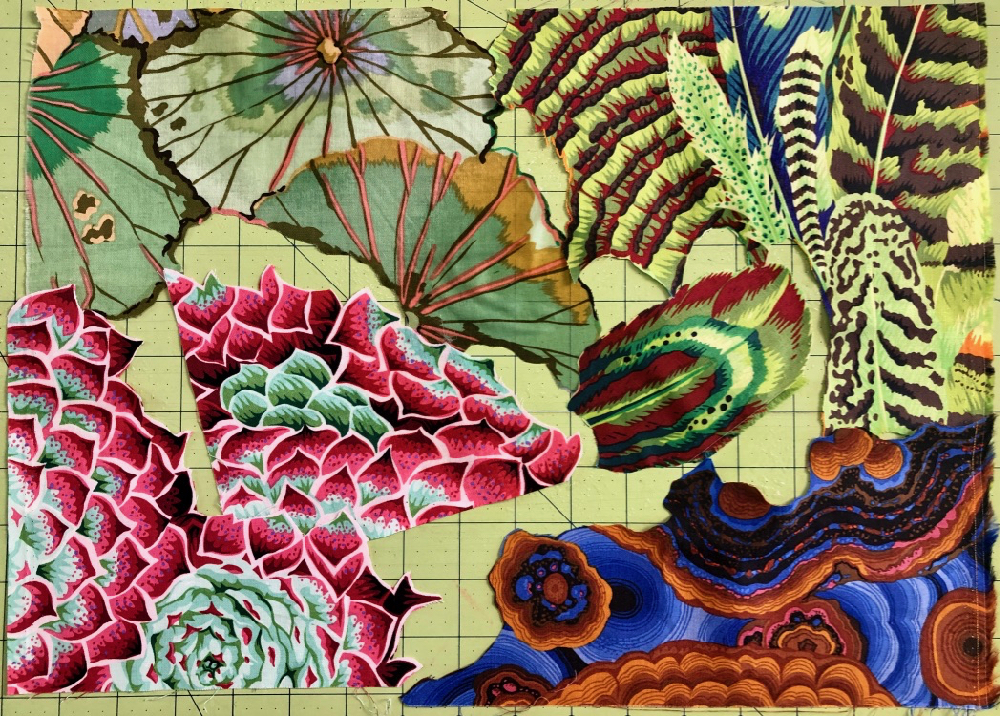
The second new pair of scissors I tried was by Thread Nanny, below—using them on a selection of fabrics by Kaffe Fassett.

The Thread Nanny scissors are angled slightly less than my Ginghers, and they tend to slip down my thumb and cause a strain because of that. But as I continued cutting the palette samples below, I consciously adjusted my hold and it relieved the ache. I also found these to be even sharper than the Havel’s and gave a slightly smoother cut.
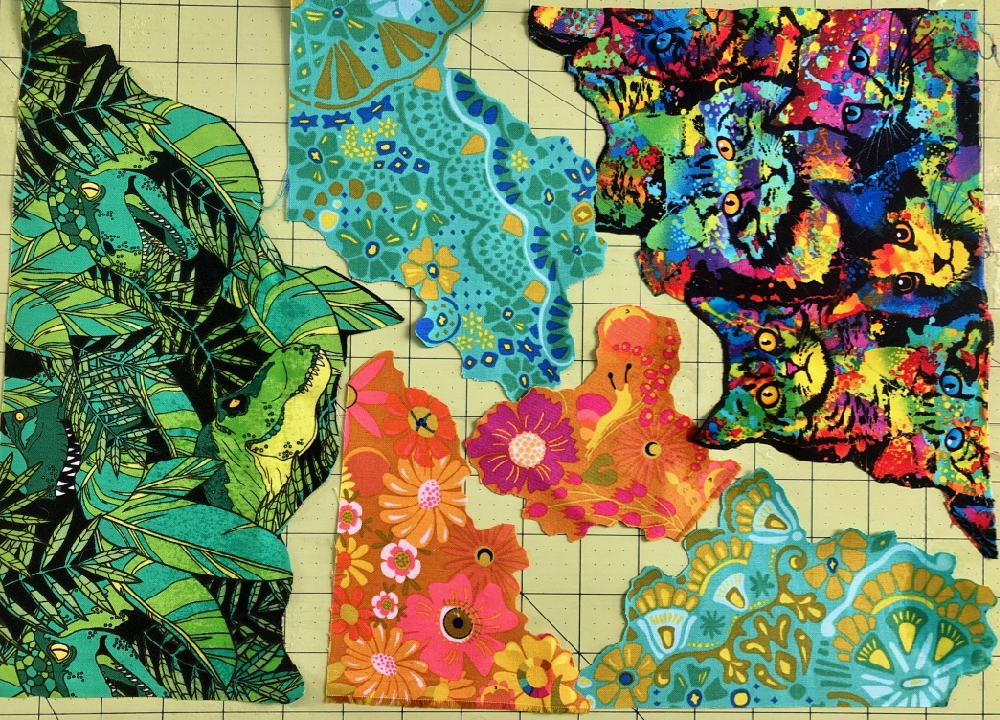
The third pair of scissors to be tested, below, is from Maker and Market—used on a variety of novelty designs, selected with future fish collages in mind.

Okay, I admit it, I ordered the “rainbow” version of these scissors, they seem to make using them just a little more fun. They felt a bit stiff to open, but not too bad. Of the three new makes, they fall most “naturally” over my thumb, so less hand strain. They are also the closest to the angle of my Ginghers, feeling familiar to handle and again, I noticed how nice and sharp they were. They also come with a closable holster to protect the blades.
I still had some fabrics to cut, so I decided to adjust the screws on both the Maker and Market and Thread Nanny scissors, and further test them on the Australian Aboriginal fabrics, below.

They were super easy to adjust and took out any and all stiffness in opening and closing. The more I traded off cutting with both pairs, the more automatic it became in holding them in a way that they didn’t slide down my thumb. I definitely could get used to using either pair.
And finally, I noticed the rubber grip inserts that came with the Maker and Market rainbow scissors (they do have other finishes available). You can just make out the black rings that are fit into the finger holes below. And that did it for me. They positioned my thumb and middle fingers perfectly for cutting, and away I went with the “soft fussy cut” I use for certain fabric designs, such as the cactus fabric I received from a Tucson class student recently (thanks Brenda!). I could also fit the inserts into the Thread Nanny finger holes, but the inserts are included only with the Maker and Market scissors.

So that’s it for now, folks! Hope this helps you in your fabric collage journeys—having good tools makes all the difference sometimes. I know that many of my students have their own favorite scissors, but if you have these duckbills or want to try them out, keep reading my original Running with Pelicans: Scissors for Fabric Collage post below, to explore the ways I’ve learned to use them. All of three of these scissors are linked in my Fabric Collage Toolkit.
Original Post: Running with Pelicans: Scissors for Fabric Collage
First Posted January 20, 2018
See original post here to read more comments.
One of the most basic skills in fabric collage is cutting. Using scissors is a skill so taken for granted that it’s something we let pre-schoolers do. But there’s a pretty big gap between cutting construction paper snowflakes and fabric collage. It takes practice and hopefully a few hints will help as well.
Recently I’ve begun to pay more attention to how I cut because I’ve become more familiar how other people cut. Some don’t cut in the optimal way for fabric collage. They cut as they have learned to do in traditional quilting. It makes perfect sense, but I need to help my students relearn how to cut for fabric collage.
The first morning of my classes, as I’m talking about how to get started, I demonstrate cutting out shapes from fabric. When I take out my favorite detail scissors, someone often says, I have those scissors but I’ve never known how to use them. Someone else says, I have those scissors but I’ve never used them that way. In a more recent class, someone said, You could do a whole blog post on just how you use those scissors.
So here we are.
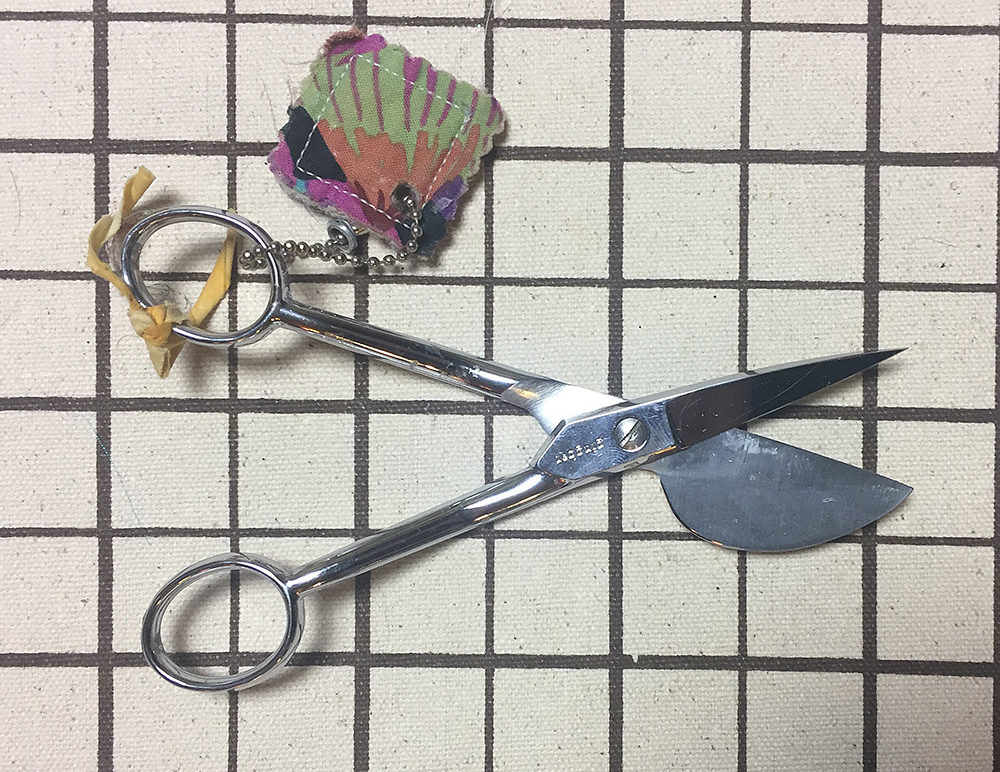
Let’s start with the equipment. Full-size shears are perfect for some things, those tiny little snips are good for others, but for fussy cutting around fabric prints, I use Gingher 6-inch knife-edge appliqué scissors (pictured above). Sometimes they’re referred to as “duck-billed,” though I usually call them “pelican-bladed” (I mean, really, doesn’t it look more like a pelican?). These are my personal favorite scissors and have used them since forever.
There are many other types of lovely scissors out there. If you have a personal favorite, use them. But if you’ve ever wondered about how to use those funny-shaped duck pelican scissors, this blog post is for you.
It will be most helpful if I show how I use these uniquely shaped scissors, thus the videos below. I’ve broken down cutting into three processes:
- Cutting shapes out of printed fabrics
- Trimming to the line of your drawn design
- Cutting a glued collage subject away from its foundation
1. Cutting to Prints in Fabric
These scissors allow me to cut very close around the edges of prints I find in fabrics—and using the contours I find in those prints is integral in how I construct my fabric collages.
Cutting out hand-sized chunks of fabric with a rough “fussy-cut” is how I get students started with the collage process, this first video shows a finer fussy cut, but either way it demonstrates how I use my pelican scissors to cut around fabric prints.
2. Cutting to Your Design
These appliqué scissors allow me to cut tight against flat surfaces. Since I draw my subject matter onto a foundation fabric and proceed to fill in with small pieces of printed fabric, I often need to trim away some of those shapes when they extend over a drawn line. I find I can use the straight side of these scissors (the top of the beak, let’s say) as way to stabilize my hand as I cut against the surface of the foundation fabric.
3. Cutting Away Foundation
When the image you’re working on is completed to the point where the original drawing is filled in, it’s time to consider the background. One easy way to audition different background fabrics or ideas, is to cut the foundation fabric away from the collaged and glued image in order to place it on different possibilities.
Here, I flip the scissors over and use that strange pelican blade to lift and protect all the collaged shapes that make up the outer edges of my subject, while slashing away and freeing the foundation fabric underneath. Like magic.
One recent student referred to these odd pelican duck scissors as “the magic scissors.” I’ve found that just like when it comes to sewing machines, we all have our favorite tools. A pair of pelican scissors is a tool I’ve found helpful for fabric collage. Maybe they can be helpful for you too.
P.S.—These days many of my students read this blog and come to class with a basic knowledge of what I’ve already covered in blog posts, which leads them to offer suggestions for what I could add or elaborate on, such as how I use my pelican scissors. If there’s something else I’ve neglected to cover, or you’d like to see, be sure to comment below!
Thank you Susan for this tutorial. I purchased these scissors awhile ago only to find out that because I’m left handed I can’t use them the proper way. I have searched for left handed scissors to no avail. Do you have any tips for us left handed people?
I bought a left handed pair by mistake which I was able to gift to a left handed friend. So I know they are out there.
My thumb joints are large due to arthritis. I find it hard to get my thumb in and out of the handles. Any duck billed scissors that have larger thumb and finger handles?
What a great idea to expand our minds about using pelican scissors. I need to practice these new uses. Maybe someday you can add how you spin them around like a gunslinger in an old western movie. That was entertaining during the African fly on the wall, but maybe there’s a reason to do it.
I’m off to the store to purchase some “pelican” scissors! Thanks again, Susan, for years of helping me!
Pamela Holst