
I describe fabric collage as painting with fabric. That’s more than a helpful way of explaining it to newbies. It has been a way of thinking of working with fabric that has guided my development as an artist.
My mother was a seamstress and later took up quilting in the 1970s. I absorbed my love of fabric and the creativity of sewing from her. Living with fabric itself—you know, in closets, spread out on tables, shopping for fabric, touching it—has always been a part of my life.
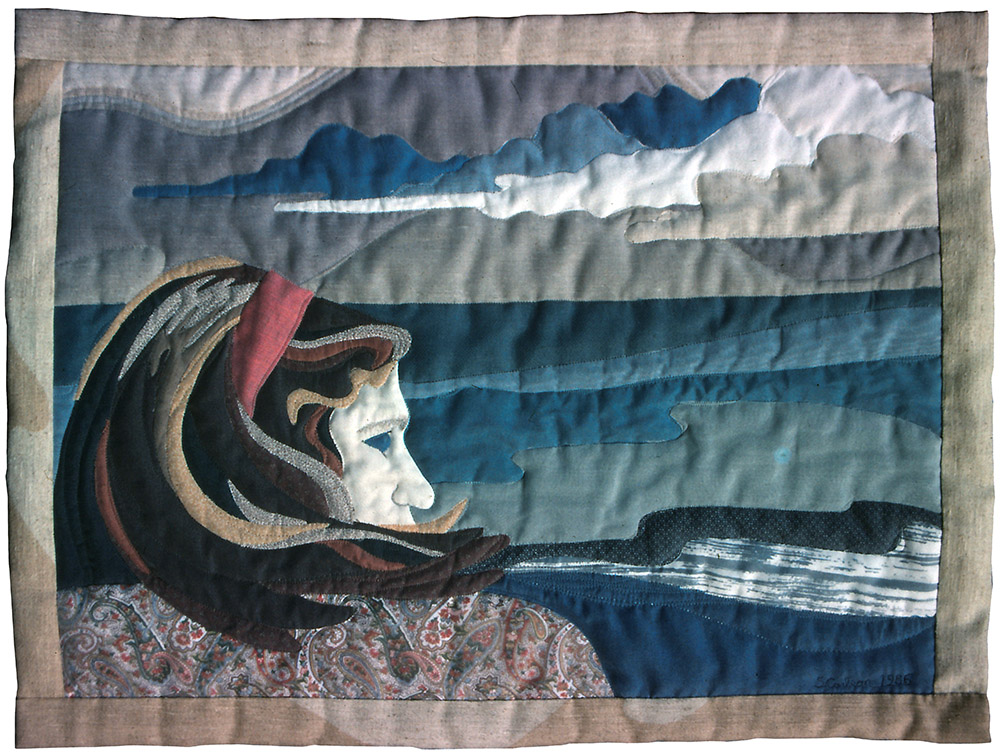
In college (1983), I started to use fabric as an artistic medium, though I didn’t see others using fabric in the same way I was thinking. So my technique developed as I went along—trying this, discarding that—until I came up with a way of working with fabric that responded to my inspiration—such as with a 1993 portrait quilt Elements, detail above.
Over the three decades I’ve been using and teaching fabric collage, my experiments have made the technique as immediate and as flexible as possible. Fabric will never be exactly like paint. Thank goodness! For those of us who love fabric, its attributes of texture, color, and pattern are what draw us to it.
It wasn’t a straight line from learning how to sew to fabric collage. However, it was the detours that let me know I needed to keep experimenting and trying out new ideas. Eventually I landed on a few ways of working with fabric that made the process of creating an image more immediate, less time-consuming (for me), while getting closer to the final painterly process I imagined.
No Templates/Freehand Cutting
In my early observations of quilting, it seemed like templates were needed to create an image in fabric. So I drew a design, cut out the individual shapes from paper, pinned the paper to fabric, and cut out the shapes again from fabric, attached them together to make the image (as in the quilt below). It worked, but I really just wanted to cut things out once. To be honest, it’s one of the “chores” of making clothing that always slowed me down—first cut out the pattern shapes, pin onto the yardage, cut them out again. That’s how you guarantee a good fit, but I was looking for spontaneity in fabric collage, and later, serendipity.
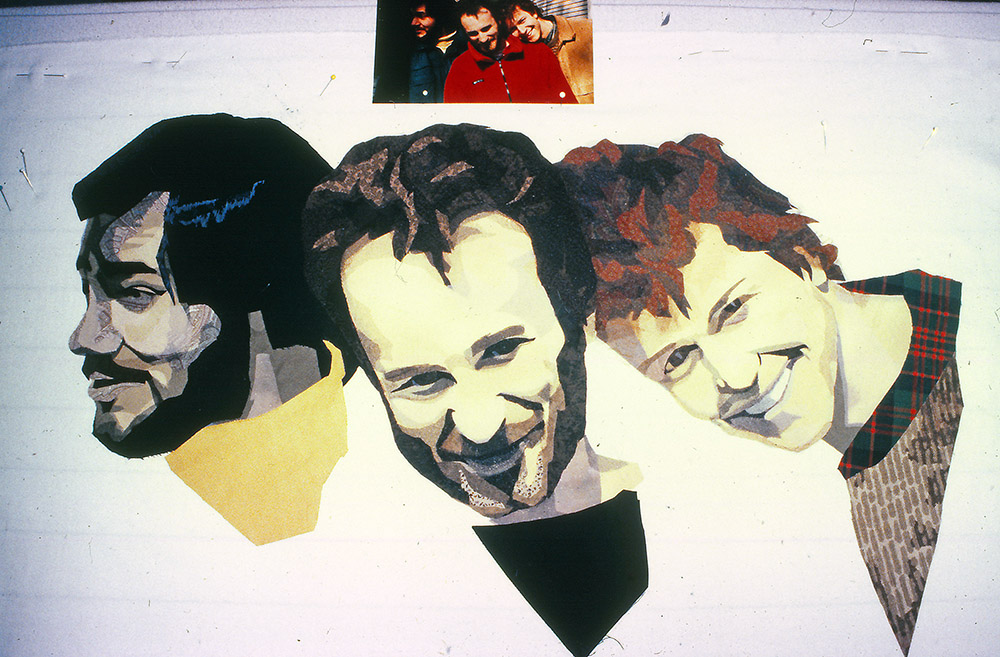
So ditching templates was one of the first things I did. Rather than using a drawing or photo to create a template, I pinned the photo nearby and started cutting and arranging fabric shapes directly onto a foundation fabric (see quilt below for an early example of this no-templates approach).
This had the unintended but wonderful effect of allowing me to use multiple pieces of fabric to create a shape. If one piece of fabric needs a touch more—to make it bigger, give it a highlight or shadow, blend to a different color, and so on—I just added another piece of fabric. Like adding another dab of paint. Ultimately, it’s this building of colors and values that gives a subject the illusion of form.
Eliminating the templates let my creativity bloom. I could try one piece of fabric, try more, compare them, layer them, keep or discard, move on to the next area of my image.
Anyone who has taken my classes, knows my insistence of “no templates.” However, anyone who is familiar with my first book Freestyle Quilts (2000), will ask about the included fish designs and template instructions. Well, let’s just say that I was younger and less experienced in teaching then. I thought that in order to present my fabric collage technique I had to approach it in a way that most quilters would be familiar with. Since that book was in print for 12 years, it definitely touched a fabric collage chord and introduced many to fabric collage—and it’ll always be my “first.”
But by my second book Serendipity Quilts (2010), I was older and a little wiser. I decided to re-introduce the collage process from a different beginning point, one closer to how I work, by first transferring a drawn design onto the foundation fabric. Then using the drawn lines as guides to fill the shapes with smaller cuts of fabric. (As with my “Samuelsaurus Rex” below, which is made up of fabric scraps.)


Glue
Why glue? When I began free-hand cutting fabric into smaller shapes, I needed a way to hold them in place. Pins certainly work temporarily as I audition fabrics and placement, but at a certain point they get in the way and even obscure progress. I used spray glue in the beginning, a hold-out from art school projects, but the fumes from the propellent were bothersome on many levels.
At last I tried Aleene’s Original Tacky Glue, a white craft glue, and I’ve used that ever since. It’s non-toxic and easy to “roll” off my fingers as I anchor my fabric pieces onto the foundation fabric. It is water soluble—so we’re talking NO washing of quilts—fine by me as I’m creating artwork for the walls anyway. And over the past 20 years, my collaged art quilts have held up, and together, just fine with this glue. Though I did learn a one-time lesson about copious amounts of steam to iron a well-glued yet not-yet-quilted collage. Best to avoid that. And don’t water-block your quilt either. Just sayin’.
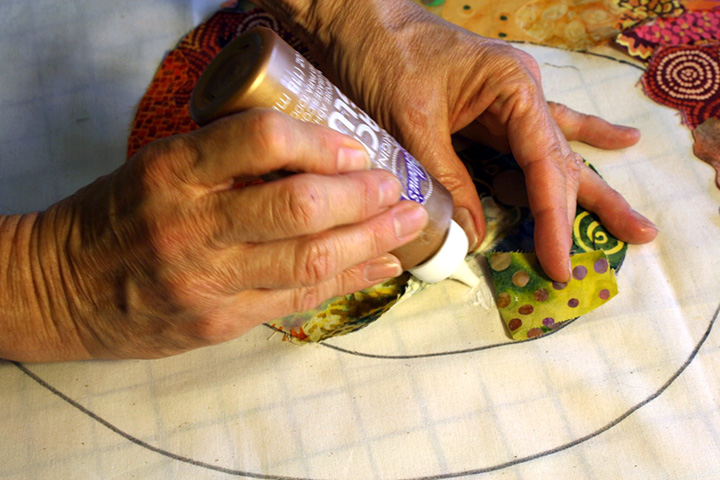
But most important for my way of working is the immediacy of using glue. It’s a relatively quick way to progress with the image—a dab or smear near the center of the fabric piece, press it down and, bam, it’s tacked in place and pins can be removed. You can see how the collage looks immediately. If sometime down the road I change my mind, and I certainly reserve the right to do so, I can “rip” up the piece of fabric—or simply cover it up with an alternative.
Patterned Fabric vs. Solids
I consider the 1990 portrait of my father-in-law Dain (detail below), to be my first “fabric collage” quilt. That and other early quilts, look completely different than what I create now. Of course they would, it’s been 30 years after all. Thirty years of playing with the technique, but even more so, 30 years of the evolution of fabrics for quilting. Remember the calico only days? I have a quilt or two that my mom made for me from the 1980’s and they will always be dear to me. But for fabric collage, it is sooooo much easier to work with the bolder, more colorful prints and varied choices we have today.
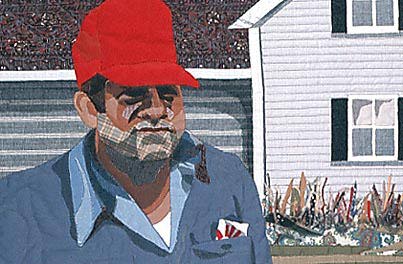
But fabrics with small designs and solid colors are where I started, ’cause that’s what I had, and they were safe. Safe for realistic portraits that is. Now, to create the form of a face or a body it’s necessary to blend from one value to another. From dark to light and back again. This is true whether your medium is paint or fabric or whatever. Paint comes in flat colors, so does fabric (like calicos and solids). It took me a couple years to learn is that it’s much harder to blend from one solid fabric to another than if there’s a pattern in the fabric that can “flow” from one shape to another.
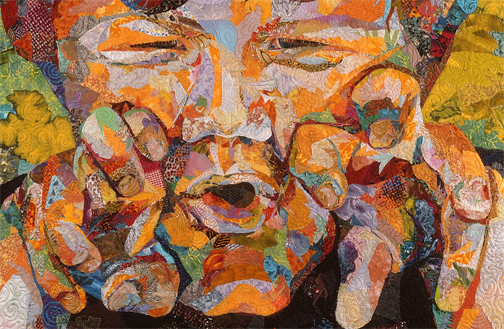
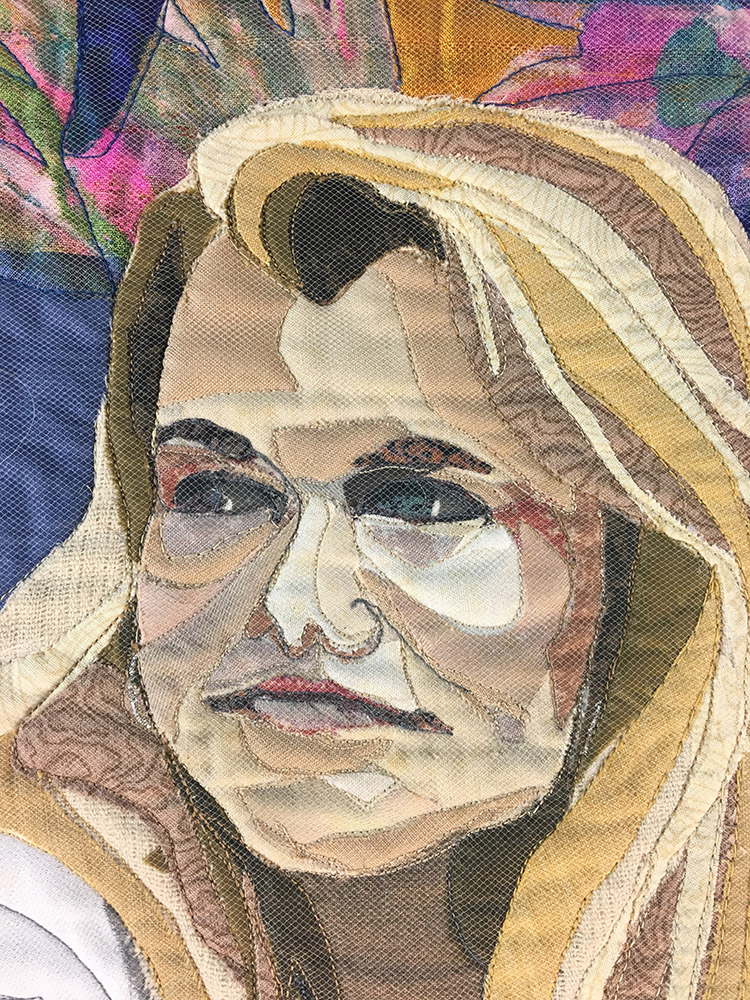
Two solid colored fabric placed side by side will create a sharp dividing edge between them (see above example). Patterned fabrics on the other hand, when cut using the given design as a guide, can be placed to bridge the dividing line between adjacent fabrics (see details of Monarch Maia below). Transitions between values and colors became smoother and I started to see the patterns and variety of colors within even a single piece of fabric as dabs to paint my collage.


Quilting
My approach to quilting has evolved over the years. Remember, I approached quilting from an experimental art-oriented direction. Anything I saw with free-motion quilting interested me right off and I jumped into it not really knowing what I was doing. But over 30 years, you definitely get the hang of it.
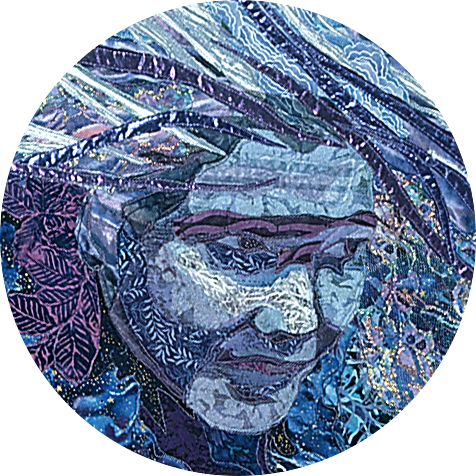
When I started doing this (raw-edged) fabric collage, I used a final top layer of netting over the entire collage to “capture” all the loose edges, and then stitched along every edge, changing thread colors to match, as you can see in the quilt detail below of California Dreams.
After a couple years, I graduated to not using netting as a top layer (see detail of Elements below)), but continued to free-motion stitch around all the glued raw edges—still changing thread color a lot and sometimes using the thread to create a final touch of detail—such as the whiskers on a cat or the ribs of a fish’s tail, or a fine shadow around a nose (above). This “tracing-around-the-shapes-with-stitching” lasted about ten years and ended with my first book.
Basically, I got better at gluing. Plus, my early quilts got old enough for me to see that even the ones with lighter stitching were holding up just fine. The glue that I applied to the exposed edges of the fabric shapes did exactly what it was supposed to—hold my collage together.
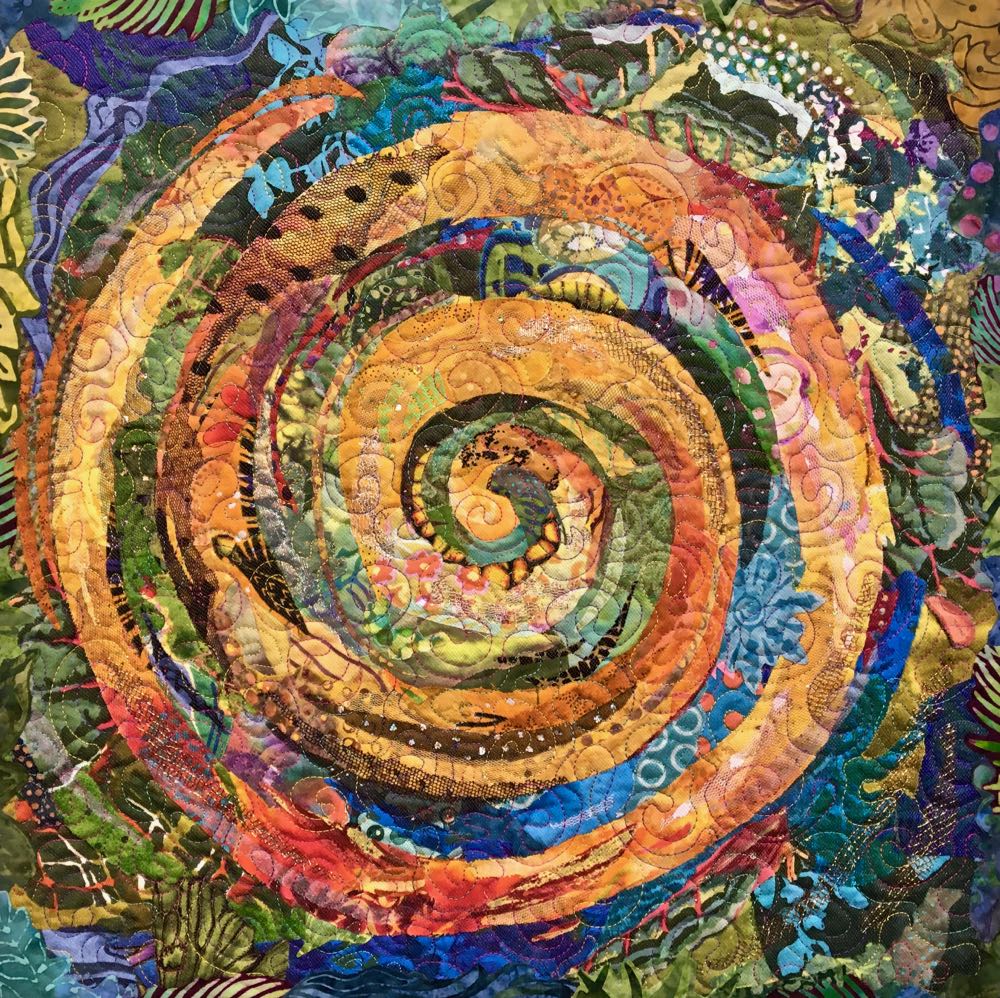
So I applied the idea of painting with fabric to my quilting as well, going for an overall texture—like you’d see looking closely at Impressionistic brushstrokes. I loosened up my quilting style with an overall spiral-like stipple pattern, without much regard for the edges of the fabric shapes or even the collaged design underneath. Thread changes are kept to a minimum and usually blend with the underlying fabrics. It’s what I demonstrate in my second book, and have used ever since, such as in the scrappy spiral below.
For me, quilting adds a final layer of texture to my “painted” fabric collage. It’s the final effect after letting the fabric itself, the color and value and pattern, do the talking.
I love reading about the evolution of your technique. Thanks for a great post.
This was a wonderful post and really shows how dynamic over time all aspects of the hands on processes of creating art are.
Really love this post explaining how your work has evolved…and good grief, 30+ years sure did pass by quickly! But if you DID want to wash your quilt at some point, do you consider that it is quilted down enough to handle a gentle hand wash if for some reason it was necessary?
Hi Amy! Nope, I wouldn’t wash any quilt I wouldn’t want to risk losing. Any water will dissolve the glue and any unstitched edges would lift up and the dry quilt would probably look “fuzzy” and frayed with visual texture I hadn’t intended. Also, the dissolved glue, if not rinsed out, would probably cause the frays to become stiff. Could be an interesting look if that’s what I was going for though! 😉 The only cleaning I recommend for these collage quilts is dusting (a very, very, slightly damp cloth should be okay), or light vacuuming (window screening placed between quilt and nozzle supports against the vacuum suction). —Susan
I thought this was a great read, Susan. Once I finish the quilt I have been working on for three years now, I am going to start working on the ideas in your book. I can hardly wait! Beautiful post thank you for sharing your journey with us! Much love to you and yours this New year.
I enjoyed reading about your journey. Thanks for working through these stages and making this technique available to us!
Thanks for the process overview ~ like the “old” as well as the “new”!
So interesting to actually learn your thought process as you were learning and discovering. Thank you for another very interesting article