Of course, the very best way to get a great picture of your quilt is to have it professionally photographed. But many of us don’t really need that. Still, it’s nice to have the best possible snapshot if for nothing more than being able to show it off on our Facebook pages or from the screen of our smartphones. (And for submitting images for the next installment of my “Finish Line” series. Hint, hint.)
My husband, Tom, takes photos of my quilts. He’s not a professional, but he has a good eye and his computer skills help to overcome some of his lack of skill and specialized equipment when taking photos. He can color-correct and sharpen photos to get the best result.
But what if you don’t have a Tom? (No, he’s not for rent.) Can you get a good shot with just what you have on hand?
I talked to my friend and pro photographer Joel Davidson for some hints. Joel has a beautiful website you may like to peruse: Joel Davidson Images.
Joel is the husband of Marilyn Davidson, a student of mine and talented art-quilt maker. Marilyn often uses Joel’s photos as inspiration for her quilts. I also used Joel’s photos in my marabou stork quilt, “Kaloli Moondance.” In an upcoming blog I’ll show off some images from their dual exhibit of Joel’s photos and Marilyn’s quilts.
The Camera in Your Pocket
Rather than using his professional equipment in his studio, for this demonstration Joel shows us how to get a good shot using only what we have on hand—or in our pocket.
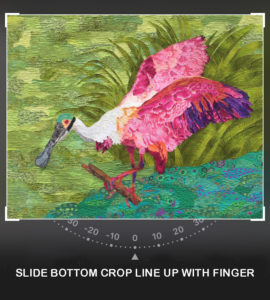
Using only an iPhone and natural light, the following sequence shows step-by-step how Joel achieved the image of Marilyn’s quilt of a roseate spoonbill (based on Joel’s photos). While he uses an iPhone for this demo, many other types of phones have similar features, so you should be able to adapt these instructions quite easily.
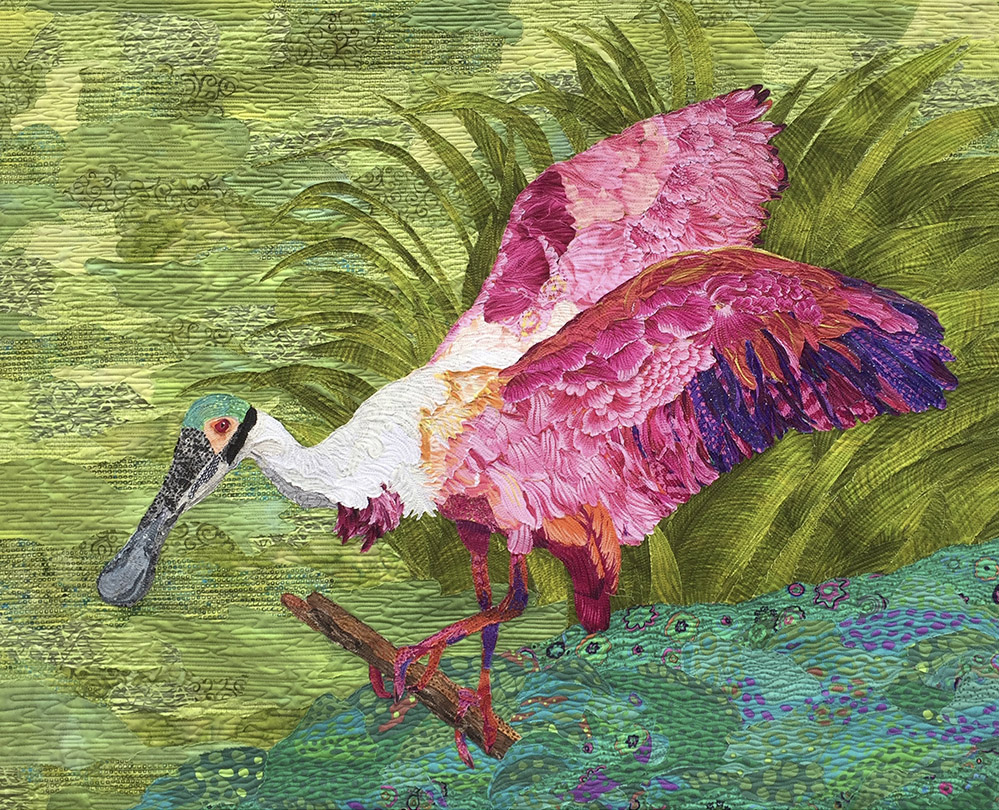
The photo above was taken by Joel using only his phone. I love that you can see the stitching. You can pick out the fabrics that are used. The colors are vibrant. The image is crisp, clear, and colorful. This photo really shows off Marilyn’s ability as a quilt artist and her skill at using fabric in fabric collage to its best advantage.
So here’s how he did it, in his words.
Joel Takes Us through the Process


“It is very important to photograph your quilt outside in “soft shade” or on a cloudy day. Bright sun will produce glare, hot spots and uneven lighting on your quilt.”
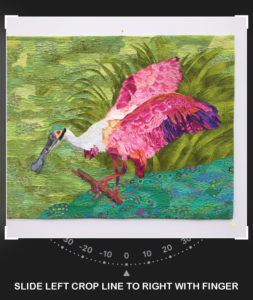
“Have a helper hold your quilt straight and parallel to your iPhone as shown below.”
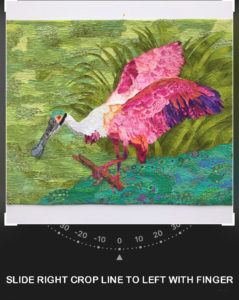
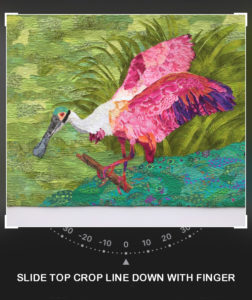
“The next three images are examples of incorrect positioning. Keep taking images until you have a straight square image.”


“Use the sliders as shown above to crop the quilt so you have a clean edge all around.”
“Now you should have a straight, square quilt image without any foam core or pins showing as seen below.”


Other Thoughts from Susan (and Tom)
In our experience, the color from our own smart phone cameras is pretty good. However, sometimes we feel the colors are a little dull, so Tom will add to the saturation of the image. Be careful not to go overboard with any of these digital manipulations. It’s easy to make your image look “Photoshopped,” by making the colors look unnatural.
Also, don’t be afraid to take lots of shots. You can always delete the extra ones later. I think that many of us are hesitant to snap the shutter because we grew up in the age of film, when you had either 24 or 36 shots per roll and developing photos wasn’t cheap. That’s the beauty of digital: just keep shooting until you get an image that’s bright, sharp, and square.
You’ve put a lot of work into making your quilts. You can take a little extra time and effort to capture great pictures of your quilts. Joel’s instructions will get you a long way toward having images worth bragging about.
Special thanks to Joel and Marilyn Davidson for their contributions to this blog post.


Great post! Very helpful!
Wow! Thanks for the thorough tutorial. It’s one thing to read how, but really helpful to see the buttons to “poke”! Very, very helpfulðŸ‘
Thank you for the great post
Awsome information thank you. Wonderful and useful post
Thanks again for sharing
This was very helpful. Thanks for sharing the information.
Wow, thank you for this!
The best blog ever! No more fear of photo’s. Thank you, thank you, thank you.
Another good way to pin a quilt to foam core is with hand needles. Use a thimble to push them in to the edge of the fabric. They won’t show at all.
Clever!
Thanks for all the great info. And the quilt is amazing too. ðŸ‘
Another wonderful post. I read every one with great anticipation!
Wow, this is such excellent information. All of our quilts are juried into quilt shows from photographs. This is going to be a huge help to many people. Thank you.
Thank you for sharing. This is going to be one of the most used info for making my quick shots so much better!
What a great post. Thanks so much for sharing such valuable info!!!
I cannot find the link to the rest of the post….?
Karen, today’s Throwback Thursday post links to the original post from January of 2017. I gave a few paragraphs of introduction, then you need to click on the box that follows, which will take you to the featured past post. Does that help?
Thanks, Susan! Found it!
Thanks! I haven’t tried adjusting my photos. You’ve given me the motivation to try and improve my photos.
These are great tips and I take lots of pictures with my iphone and get very good results, however when you photograph your quilts to submit for a competition, a show or a publication, do you use an iphone or an actual digital camera on a tripod with lights?
Thanks for this posting! These are great tips and I take pictures with my iphone with good results, however when you photograph your quilts to submit for a competition, a show or a publication, do you use an iphone or an actual digital camera on a tripod with lights?
For the best results, yes, a digital single lens reflex camera will give the best results to those who know how to use them and then color correct if necessary in Photoshop. But for most of us the cameras in our phones are so good. they’ll do the job well.
This is a great post! Thank you for sharing this again! Question, is it always advised to take a photo of one’s quilt outside vs indoors? And one requires another person to hold up the quilt? Thanks so much again!
Tracy
Always? Nothing is always. The advantage to doing it outdoors—on a cloudy or overcast day—is that the lighting should be more even. Unless you have professional quality lighting, diffuse sunlight is a better option. As for holding the quilt up, however works for you is of course fine. The post suggests that because it is often the easiest solution.
Does Joel’s blog still exist? I wasn’t able to find it. Thank you, Paula
Hi Paula! There was something wrong with the link, or maybe Joel no longer has a blog, but I updated to his website instead. Here’s the link: “https://www.joeldavidsonimages.com/” Thanks!
Thank you so much, Susan. I remember reading this post the first time around but it is still helpful.