
The way I create a fabric collage almost always involves using a line-drawing pattern of my subject. For my week-long classes, students create their own patterns. For my shorter classes, I often have participants choose a pre-drawn design from my website.
For my most recent Zoom Follow-Along Class (which at the time of this original posting was in-progress), Fascinating Bugs and Butterflies, I provided a special pattern of a cicada, seen above, showing three different enlargement sizes.
Regardless of how a pattern is generated, it will more than likely need to be enlarged. The simplest way to enlarge your image to take your printout or drawing to a copy shop or business big box store like Staples. They will enlarge it to any size your want (within reason—ask for the cheaper blueprint paper).
But sometimes it’s not convenient to visit a store like that—it’s not nearby or isn’t open when you can get there. Is it possible to enlarge your line drawing on your home printer? The answer (if you read the title of this post) is: Of course you can. If you have internet access, at least.
My husband and partner, Tom—in his book designing days—used to use his complex and expensive page layout software to enlarge patterns for me. But that’s not necessary anymore. There are many free ways to do the same thing on the internet and that’s what I suggest my students use.
One of the most popular websites is called blockposters.com. It is so straightforward to use that I won’t even take the time describing in detail how it’s done. Simply follow the instructions to upload your image, choose how big to make it, then download it to your computer for printing out and assembly (see below for more on that step).
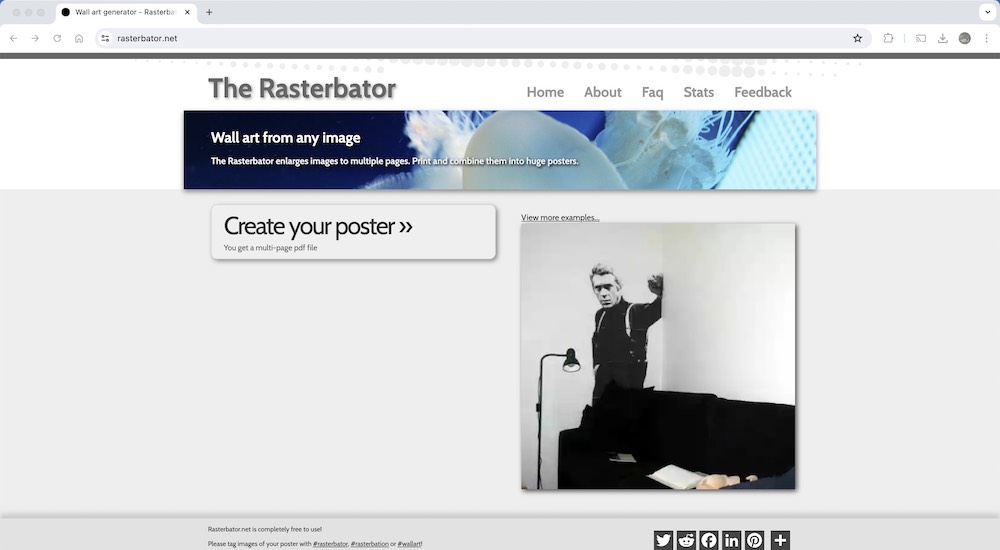
Another site Tom likes, despite its sophomoric name, is rasterbator.net. This is a free (and nearly ad-free) site that offers a few more options without being overwhelmingly complicated. Below Tom uses step-by-step screenshots to demonstrate using the site to enlarge a pattern.
But first, how much should you enlarge your pattern?
Calculating and Choosing an Enlargement Size
If you need to enlarge your pattern to a very specific size, I’ll point you to a video (below) where at about the five minute mark, I demonstrate using a proportion wheel to calculate the size.
You can also turn to the ever-present internet to calculate enlargement sizes for you. Here are a couple of websites that will do the work for you.
That said, neither rasterbator.net nor the free version of blockposters.com allows you to enlarge your image with such precision (the paid version of blockposters.com does allow it).
Instead, these websites simply ask how many pages wide you want your image to be. I find that to be a great rule of thumb anyway. If your image fits on a standard letter-size piece of paper (8.5 x 11 inches), to enlarge your image by 200 percent you simply make it two pages wide. Three hundred percent is three pages wide. And so forth.
The decision is yours to choose how big to make your pattern, but I wouldn’t suggest anything less than 2 pages wide. You’ll want room to play with your fabric, their colors and patterns. Three pages wide is good. Four pages wide is even better. The largest version of my cicada pattern you saw in the first photo, is enlarged to five pages wide.
Mea Culpa: PDFs vs. JPGs
So, an admission of guilt: when we created my website (ages ago it seems), websites like blockposters.com did not exist. We had no idea they would ever exist. The files we chose to provide patterns for sale are PDFs. Unfortunately, neither enlargement website mentioned here allows the use of PDFs. They require JPGs or PNGs.
Changing the website might take some time (for Tom to get to), so in the meantime, if you have a pattern of mine and need a JPG version of the image, simply email Tom (tom@tomallenbooks.com) and he will send you the JPG version. No worries.
Now, on to the example of how to enlarge your pattern.
Step by Step: Enlarging Image Using rastorbator.net
1. This is the home page of the website. Click on “Create your poster”.
2. At this point you have three ways to tell the website which file you want to enlarge. The easiest way is to simply “drag and drop” the file into the “Drag image file here” rectangle. You may also give it a URL or click “Choose file” to search your computer (don’t forget to click “Upload” if using this method).
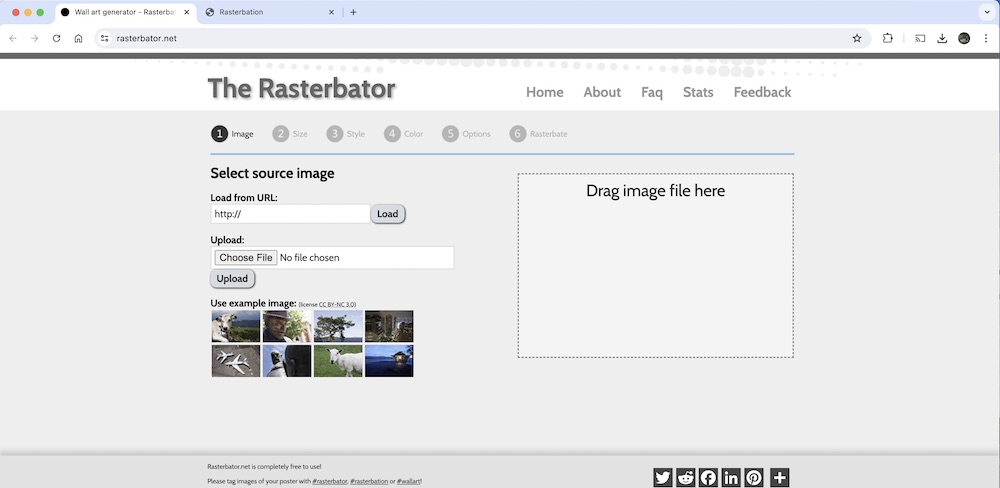
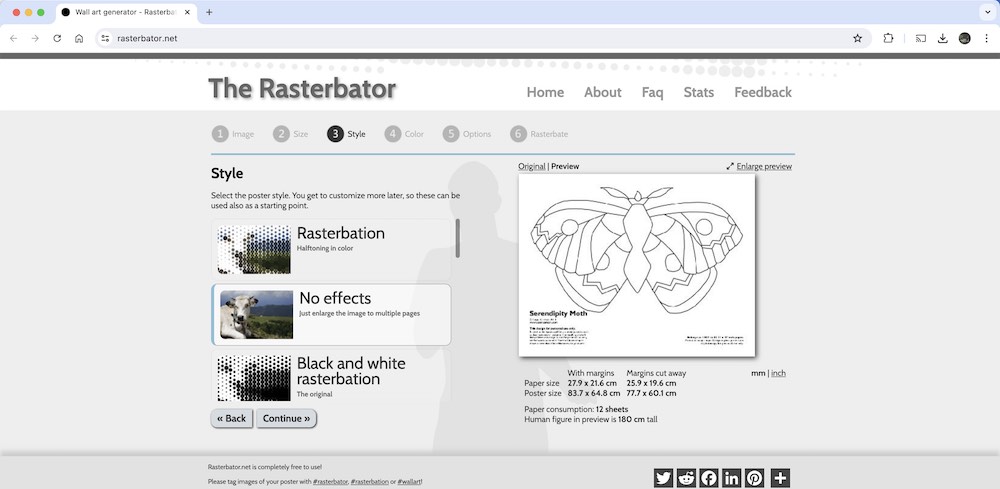
3. Once selected your image should show in the window. (For this example, I’ve chosen Serendipity Moth, one of my patterns.) At this point you need to select options for “Paper settings” and “Output size”.
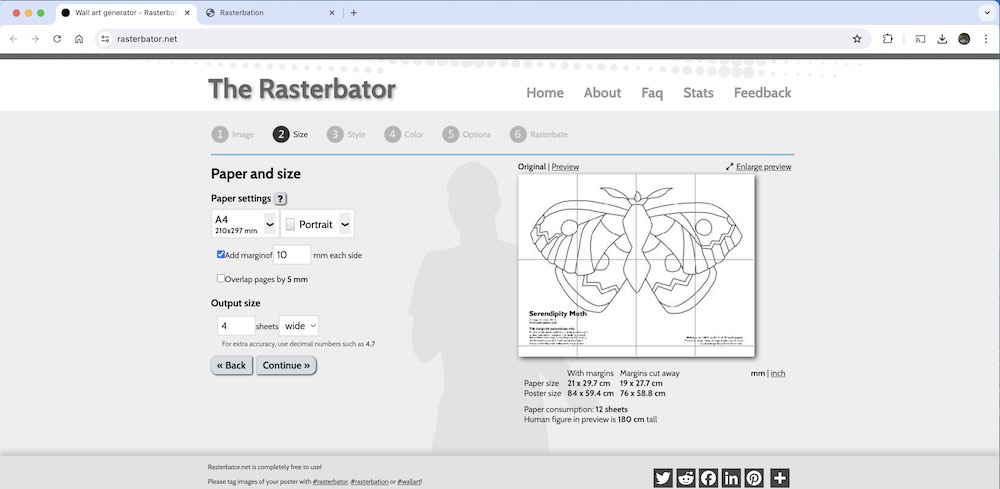
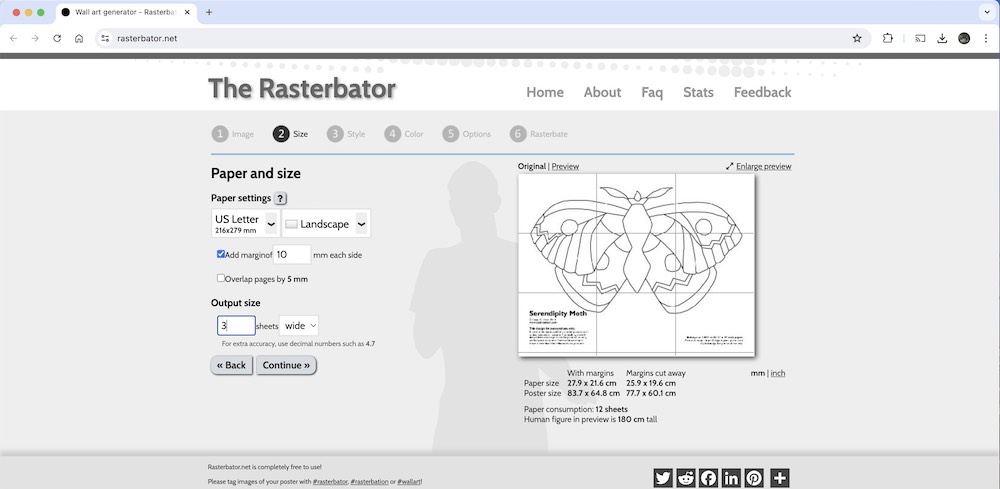
4. In this example, I have selected “US Letter” and “Landscape” as my paper settings. (I have chosen to leave the “Add margins” setting as is.) For Output size, I have chose “3” pages “wide”. This will enlarge my image between 250 and 300 percent, depending on how much of the page is covered by the image.
4. At the next page for the “Style” option, I have chose “No effects”. This is the best setting for a black and white line drawing.
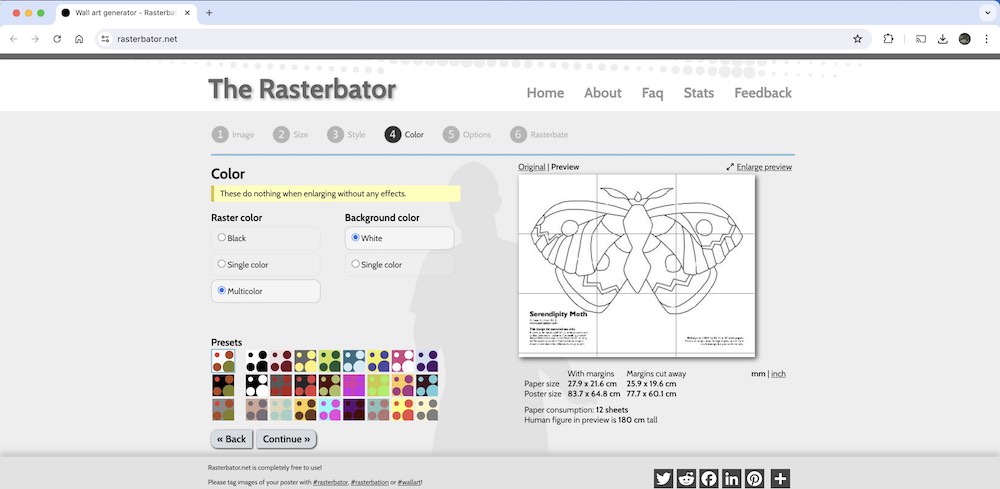
5. As it says here, since I have chose “No effects” for my Style the “Color” setting will have no effect.
6. Under “Options” I have chosen to leave them as set. I want to do a “Plain enlargement” with “Crop marks”. The button “Complete 12 page poster!” may indicate a different number of sheets depending on the size of your image and what other options you have chosen. (For this moth pattern example, three of the grid blocks were blank and we only chose to print out 9 of the sheets.)
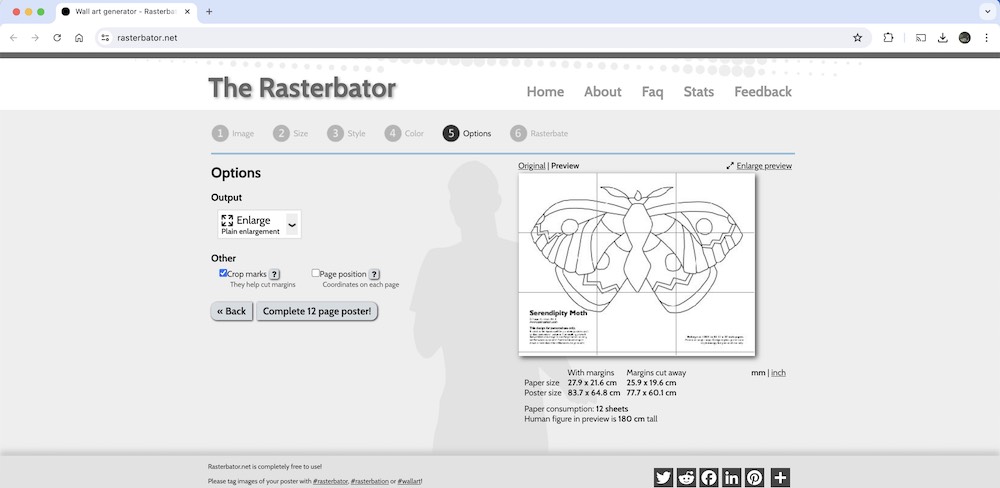
7. When I clicked “Complete 12 page poster!” the “Done!” page appears. At the same time, a new pop up window appears (see below). In the fine print is does say that the site is completely free to use. In the not-so-fine print, they do accept optional donations—your call.

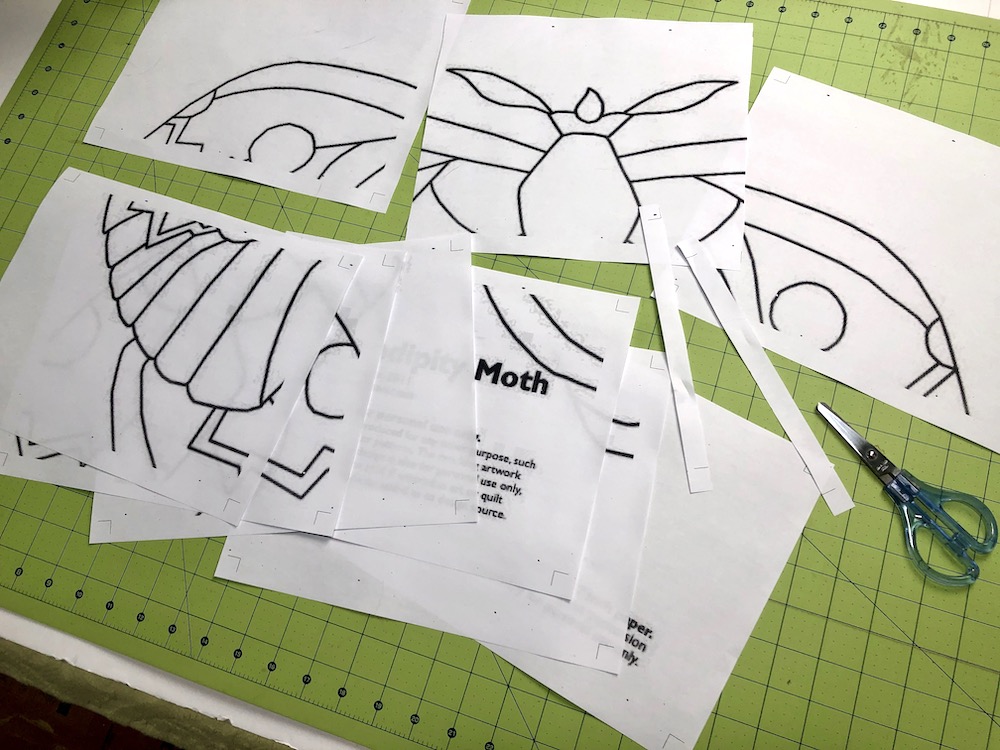
8. The new pop up window contains a preview PDF of your enlarged image. To print, use the icon in the upper right. You may find (as I did) that some sheets are blank and do not need to be printed.

Tiling Together the Enlarged Pattern
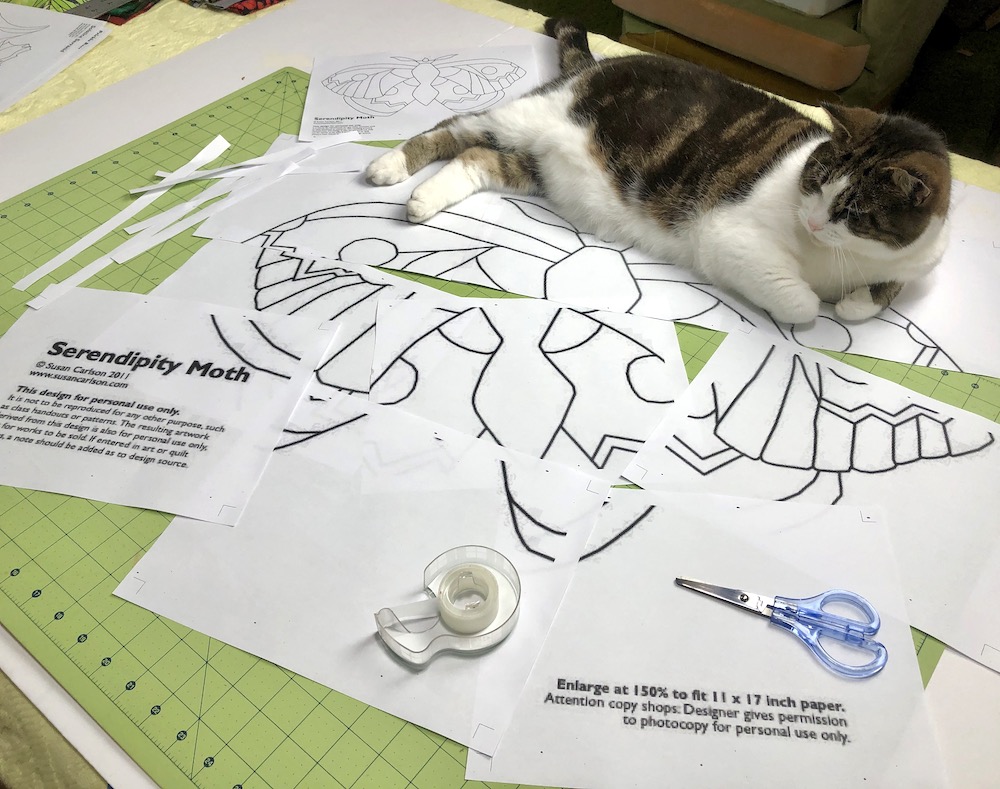
1. Each of the sheets of an enlargement have a white border all the way around. You only need to trim off the edge of one of the two sheets where the pattern butts together. The trimmed sheet overlaps the untrimmed one.
2. My assistant Djinni Cat graciously agreed (insisted actually) to assist in this process. The only tools needed for assembly are a pair of paper scissors and some transparent tape.
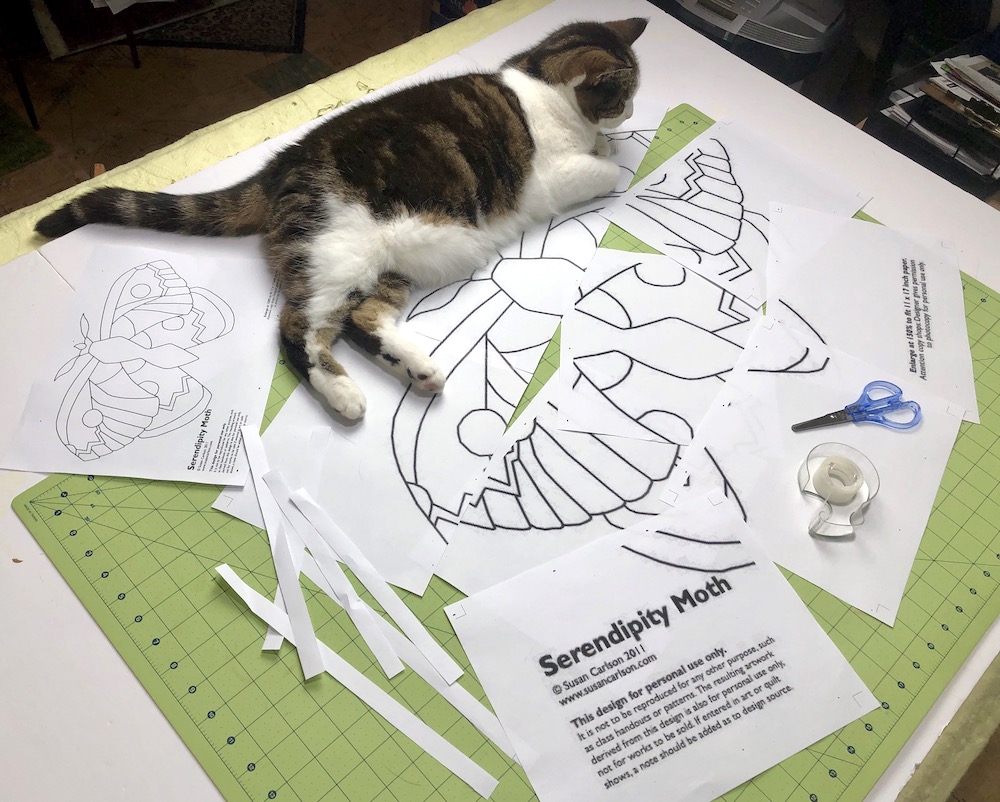
3. Once the pages are trimmed, start lining up the pattern and taping the sheets together.
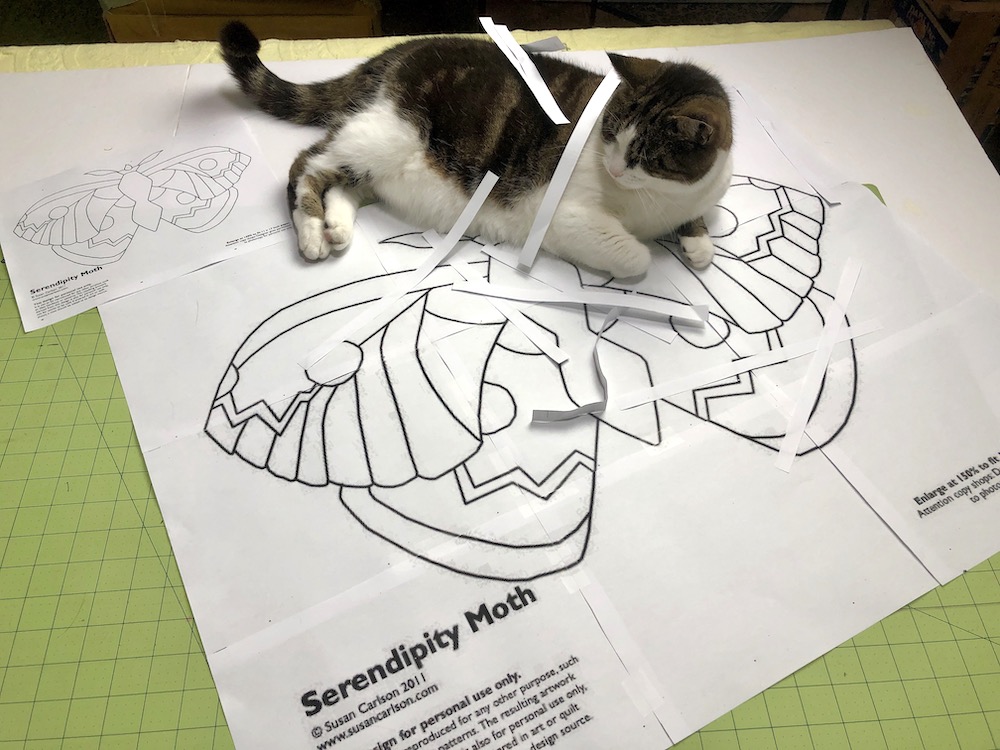
4. Here’s the assembled enlargement, helpfully still held in place by Djinni. For comparison, the one-page original is in the upper left of the photo.
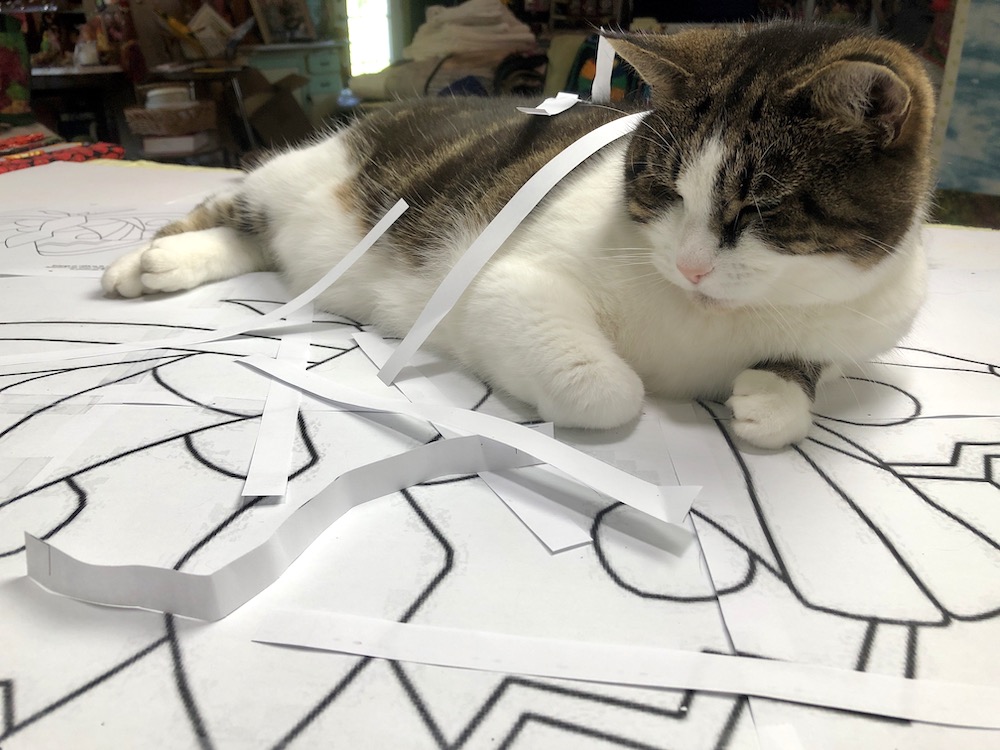
5. Added benefit of this enlargement method? Cat toys. Whether paper or fabric Djinni thinks scraps are fair game.
So helpful! Thank you!
The Rasterbator works but your step by steps made it so much easier. Thank you.
Used Blockposter.com without any issues!! Thanks for the jpeg Tom!