This week’s blog is guest-written by my husband, Tom Allen. You’ll understand why when you start to read it. — Susan.
What’s it like to take a class with Susan?
It’s clear to me, her husband, that Susan’s influence extends far beyond the classroom. Her books and her online presence, including this space, have introduced her method of fabric collage to quilters around the world. But as diligent as she’s tried to be in conveying her techniques and thought processes in these media, nothing substitutes for the experience of sitting in her class.
Being able to ask her questions, having her give feedback on your progress, benefitting from strategies she individualizes to the challenges you are facing with your particular project, coaching and encouraging you through difficult stages—these are all things that books and the internet can’t do (yet!).
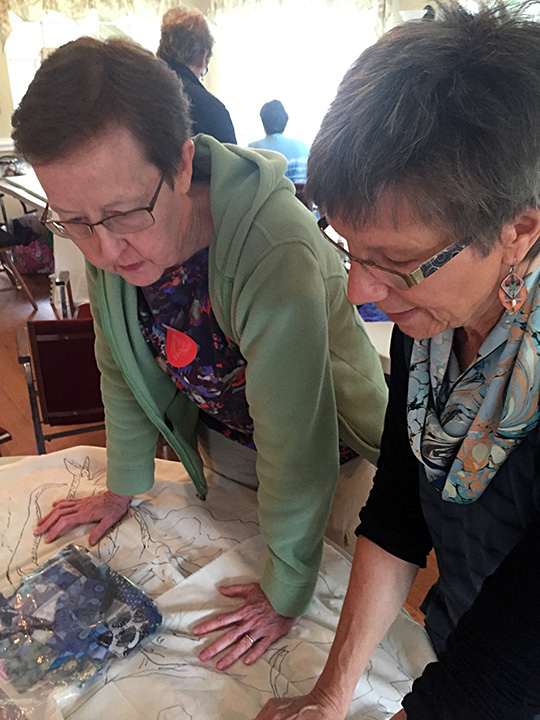
Last week, Susan hosted a retreat at the Harpswell Inn, here in our hometown in Maine. I chose a student to follow during the four days as I could easily visit the class and check in. I interviewed her, eavesdropped when Susan was giving her feedback, and took photos of her work in progress. In this way, I hope to share with you one student’s experience in class and take a small step toward answering that question: what’s it like to take a class with Susan?
Meet Jerri
Jerri Stroud is from St. Louis, Missouri. She’s an experienced quilter, having produced quilts for over thirty years in a number of styles and techniques. She’s a member of Thimble & Thread Quilt Guild in St. Louis. She’s taken classes from the likes of Hollis Chatelain and Diane Gaudynski at the National Quilt Museum. She has had quilts accepted into the Houston Quilt Festival and the American Quilter’s Society show in Paducah. She also has a blog.
Though she worked for over three decades as a reporter and editor for the Post Dispatch (following in the footsteps of her father), Jerri was an art student in college, primarily studying painting and printmaking.
“I tried to continue in art,” she said. “But once you have a child it’s too messy.”
She got into sewing and quilting as a substitute creative outlet. It also fed her hunger to make things. She sewed her first quilt for her sister, a baby quilt in 1983 or 1984. She made bed quilts to start. When her son was heading off for college, she told him she wanted to make a quilt for him. He asked her to make a fractal quilt, which they designed together.
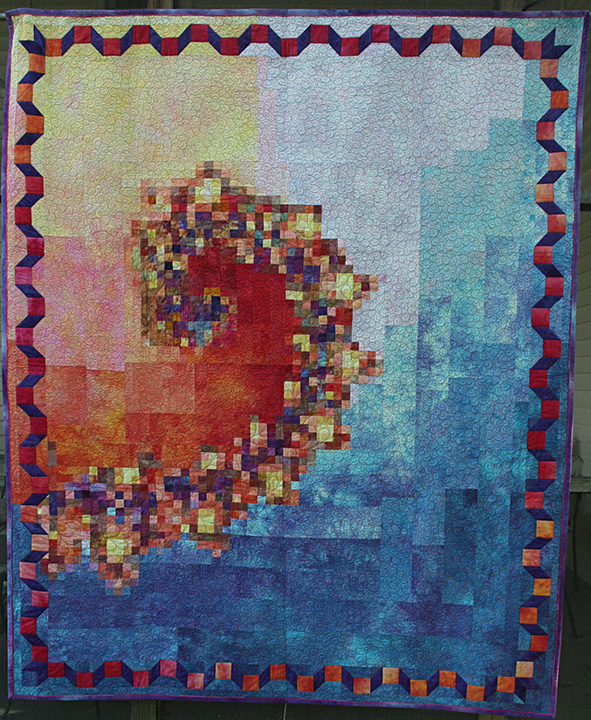
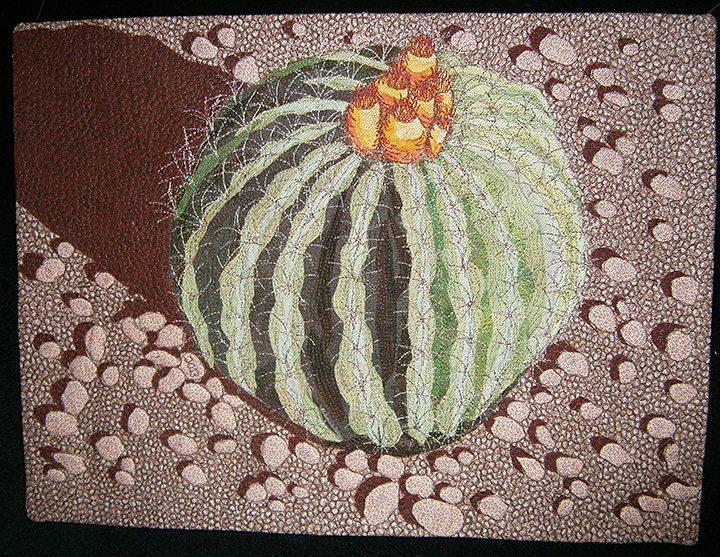
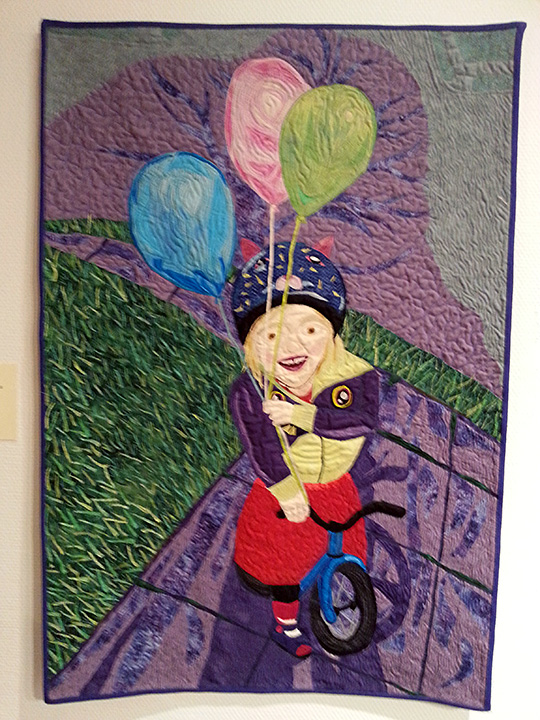
Gradually, Jerri migrated into creating art quilts. Three or four years ago she began making collage quilts, using Susan’s book Serendipity Quilts.
“I think the butterfly was the first one. Then I did the cactus series,” she said.
Then she chose a more challenging subject—her granddaughter, Emily—but she wasn’t satisfied with the result.
Day One
On the first morning, Susan gathered the students and had them introduce themselves to one another and summarize their goals for the class. Jerri’s goal was to break away from her realistic color palette, to be more loose and playful with color.
Susan then gave a demonstration of how to get started on their projects. This format continued through the four days. Each morning Susan gave a demonstration that advanced the students’ skills and addressed the stage at which they found themselves.
After her demo, Susan sent the students off to their work tables where she visited each to discuss their chosen projects. Jerri had brought pictures of three possible subjects: a lizard, a lion, and her granddaughter, Emily. She had already traced the lizard and Emily onto background fabric (as described in a previous blog).
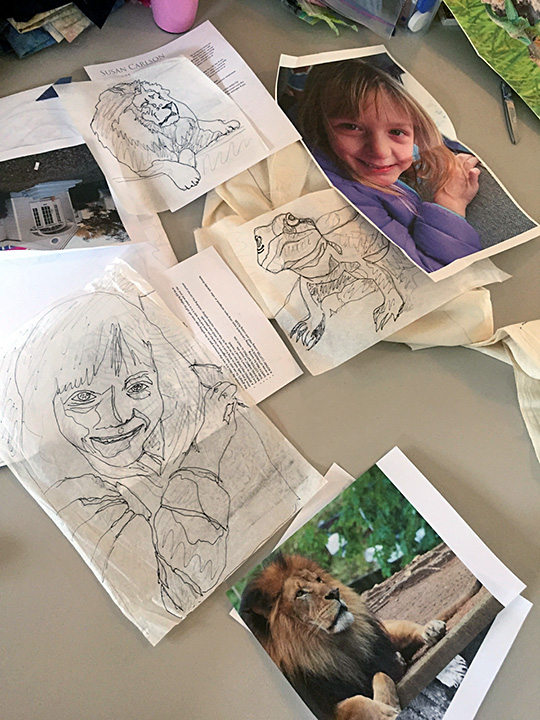
She and Susan briefly considered the other options, but they quickly focused on Emily.
“So you want to break out with color,” Susan said. “What were you thinking of for this color-wise?”
“I’m not sure, I thought of maybe doing her in blue. Because that’s her favorite color, or blues and greens.”
Jerri then brought up her main concern about doing a portrait of her granddaughter.
“There’s not an emotional attachment to [the lizard],” Jerri said. “I did [a fabric collage portrait of Emily] a few years ago that I’m not happy with at all, because the foreshortening is bad, there’s not enough detail in the body, so it looks sort of blocky. But I love this picture. It’s on my phone.”
“That’s the thing about doing kids,” Susan said. “There’s much more at stake. If the main idea is to work in color then maybe the lizard would be better. Where do you feel your heart is at?”
“I’m not wedded to either one,” Jerri said.
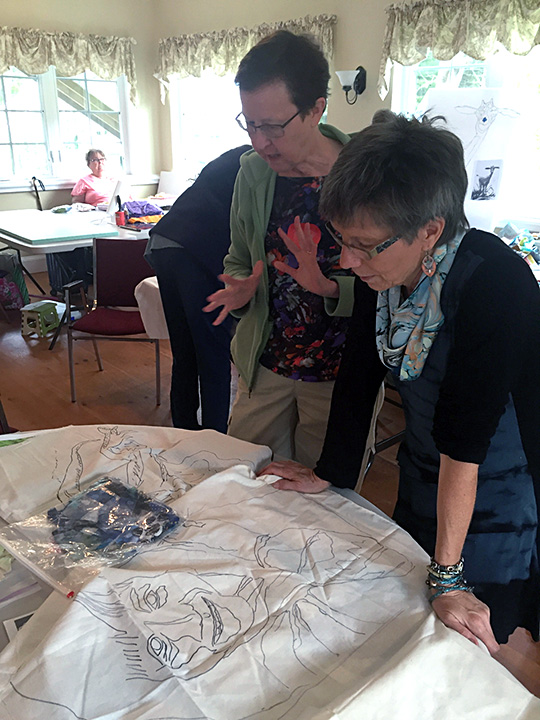
Susan then suggested that four days might be too short a time to attempt a portrait. Rushing, she said, was dangerous, as it’s critical to nail down the features such as eyes, nose, and mouth to ensure a good likeness. Susan examined the design of Emily that Jerri had traced onto her backing fabric. Perhaps, Susan suggested, she might do the lizard first then work on improving the design for Emily and then she could employ the skills she developed working on the lizard. The design of Emily didn’t seem detailed enough, especially around the nose.
“I can work on that. I have an art degree,” said Jerri.
Maybe it’s at that point that Susan realized, even if Jerri might not have, that Jerri had decided to do the quilt of Emily. Susan encouraged Jerri to add more detail to her design, especially around the important features.
“That will give you the information you need and you’ll be getting it set in your head. Then you can interpret it easier. You’re telling your brain what you want it to do. You’re familiar with drawing and painting. Do what’s familiar to you and then when you go to interpret it in fabric I think it will flow much easier.”
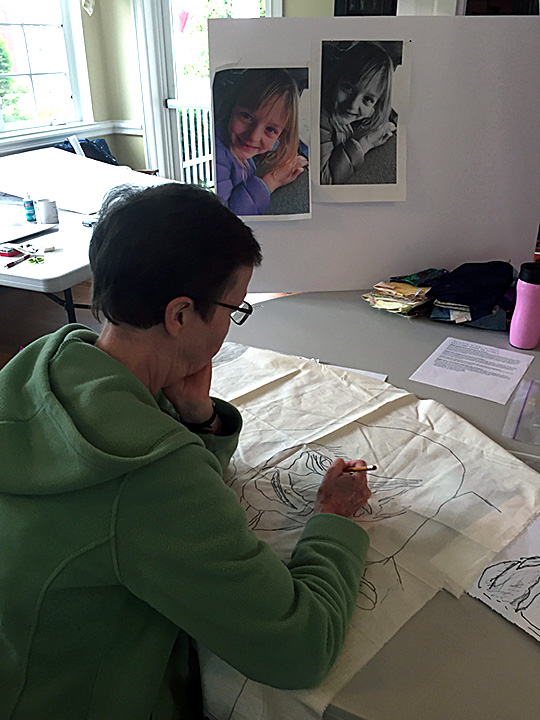
Day Two
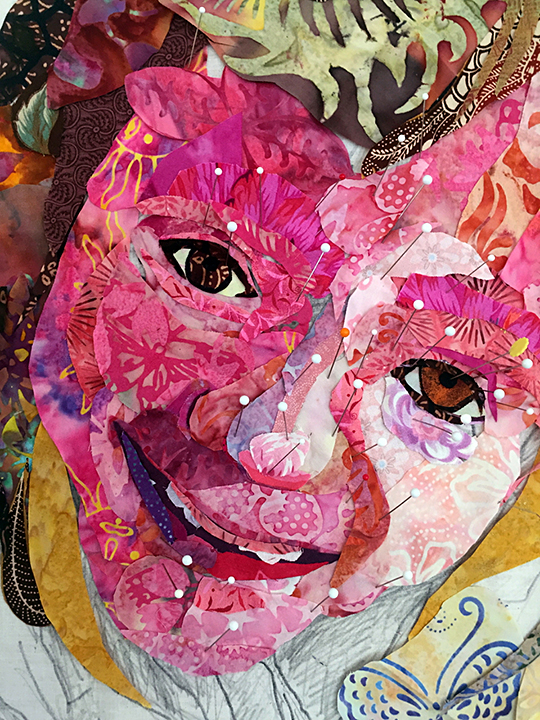
When I came to class midmorning the next day, Jerri had almost completely blocked in Emily’s face with vibrant pinks and purples. She had also started work on the hair.
“I’m surprised I got as far as I did yesterday, because I was a little frightened of it,” she said. “Because I was doing someone I know, and someone who is precious to me, I didn’t want to make her look like a clown or anything like that. So I was little worried about the likeness and just how it would look. Susan said when she saw the eyes, ‘You have to go for this, work on this.’ I figured while I was here in the class I might as well get some advice from the expert.”
Jerri was worried about the nose in particular.
“It’s such a soft picture. And a child’s face, they don’t have a lot of lines to define where the nose is. I’m still playing with that.”
She had consulted with Susan the previous afternoon.
“I had this sort of medium purple [for a shadow defining the left side of the nose] but she thought it ought to be darker. Same thing with the bottom of the nose. Now, I’m a little worried that the bottom of the nose looks like a clown nose, but haven’t glued that yet.”
On the whole, though, Jerri appeared confident. And seemed to be largely avoiding the “messy-scary” stage that many students encounter on day two.
“I’m pretty happy with it. I didn’t know what I was going to do with the hair. I’m certainly going to add some strands over it to indicate the featheriness of her hair. For the background I have no idea. ’Cause the background [in the photo] is nothing exciting so I can do what I want with that.”
Day Three
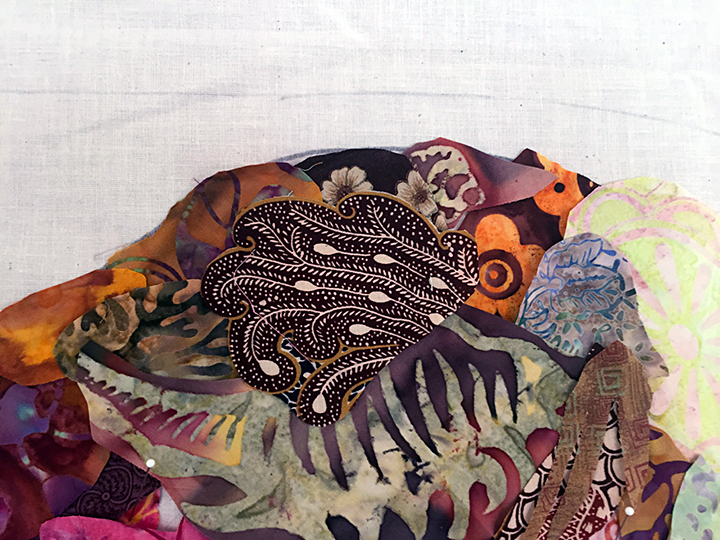
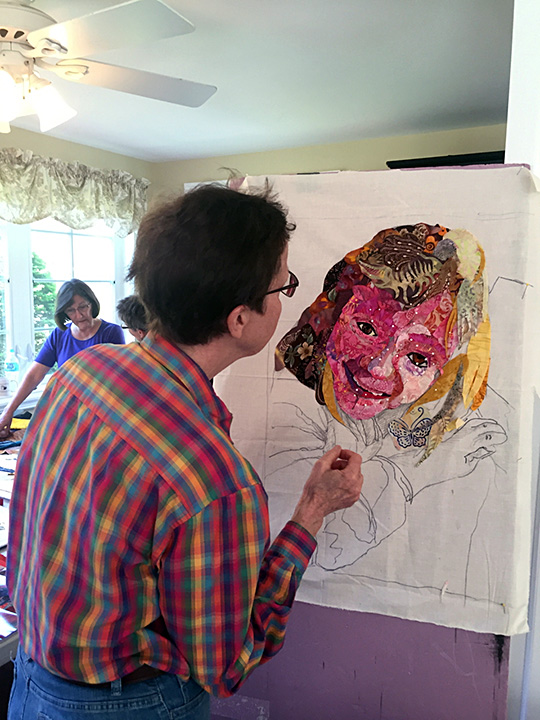
On the morning of day three, Jerri had blocked in the arm and jacket, and had also begun work on the hand. There was more detail everywhere else.
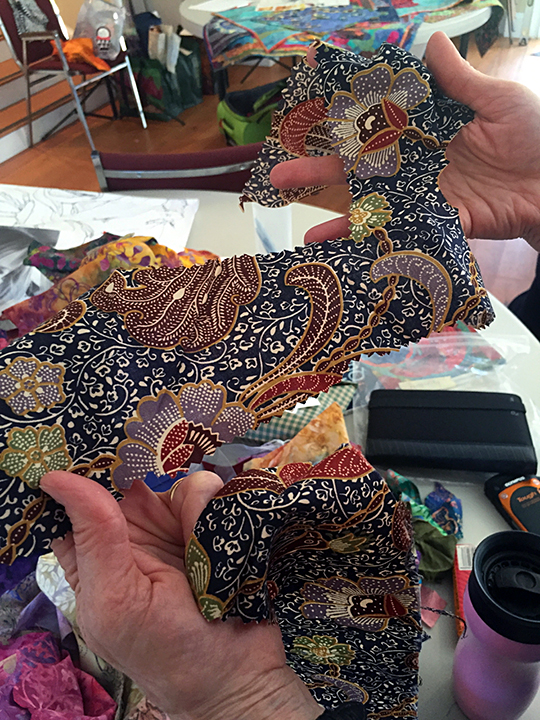
She added some cut-out flowers to the jacket, especially one large purple and turquoise blossom.
“I decided it’s an opportunity to use some of the patterns in the fabric. I don’t necessarily have to have the same jacket she has on. This flower is kind of bigger than it should be. So I’m not sure whether to leave that,” she said.
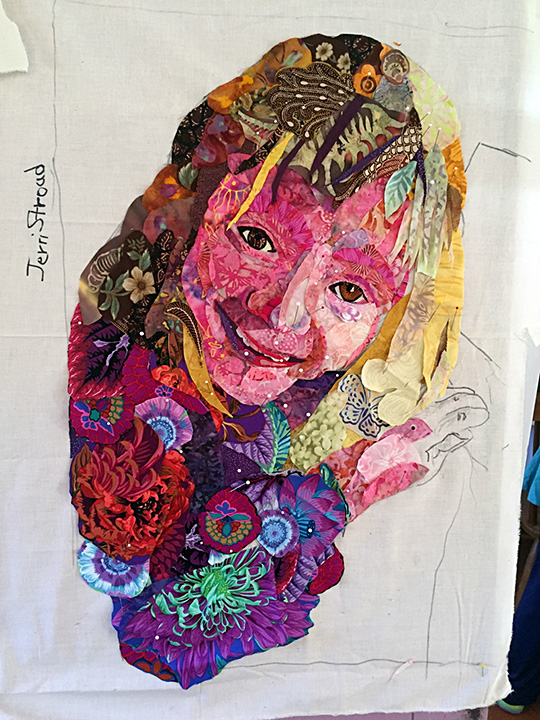
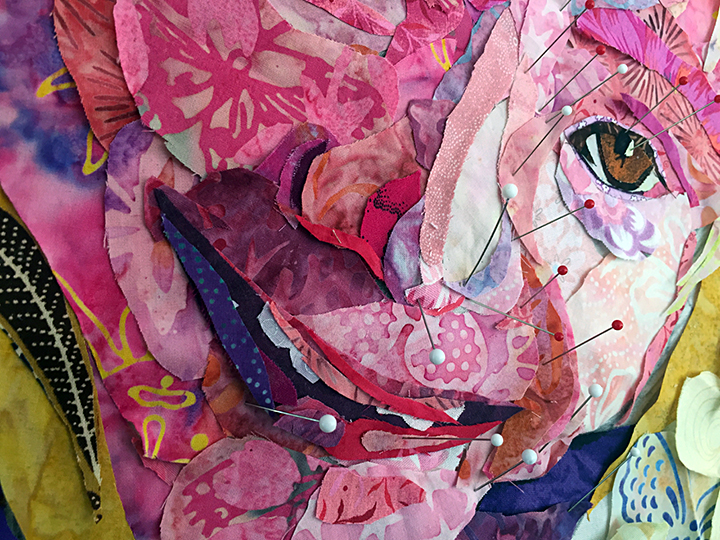
She was also working on the mouth.
“I’m pretty happy with the face. Maybe right in here is bothering me a little bit—the smile line. I haven’t glued that down. I could bring possible a little more shadow into here on left hand side.”
She had progressed so rapidly she was even talking about backgrounds, a stage many students don’t reach until after class. Susan was due to confer with her soon, so Jerri was looking forward to asking her about how to approach the background.
“I’m interested to hear what she says about background because this is so busy itself I don’t want the background to be real busy and detract from the face. You need a place for the eyes to rest.”
When Susan got around to her later that morning, Jerri had already begun to lay down strips of dark colored fabric given to her by a friend to frame the piece. She had bigger concerns, however.
“The problem areas are the hand and deciding what to do with the jacket. I decided to not to try to reproduce the jacket. But I could add some definition with darks,” Jerri said.
Susan zeroed in on the jacket. The values weren’t right. The arm blended in with the background because the tones were too close.
“It’s getting muddled in here,” Susan said. She quickly showed how she would begin to fix the problem by identifying the value of the pieces of fabric and shifting them into position.
Because Jerri seemed to be progressing so quickly, I suspect, Susan pulled fewer punches than she might with a student who was struggling.
Susan praised the hair: “The hair is pretty nice now, I like that.” But then moved on quickly to the hand.
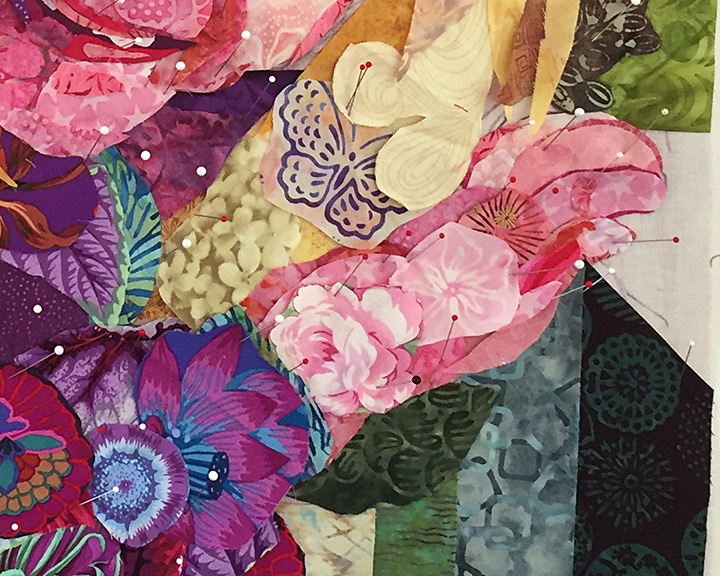
“The hand is tough. it’s curved and she’s kind of grabbing onto something, so you’re losing part of it,” she said.
“I could just cover it with lots of hair,” said Jerri, only half-joking.
“It’s always an option. I think you did pretty good with what you have. It’s not an ideal photo [of her hand].”
“Those fingers are too fat. This one needs to be put farther behind the other one, I think.”
“You kind of lost the flat of [the fingers]. I think you have to define the digits a little more. Where there’s curve and where they need to be more angular. If you emphasize the planes on them you might do better. I really try to emphasize the plane of the fingers, instead of trying to make them too curvy. You need to get the bones under it.”
Susan then asked how the nose, which had worried Jerri the previous days, was coming out. Susan said she liked the nose better, then suggested Jerri go a little stronger in the contrast between light and dark values.
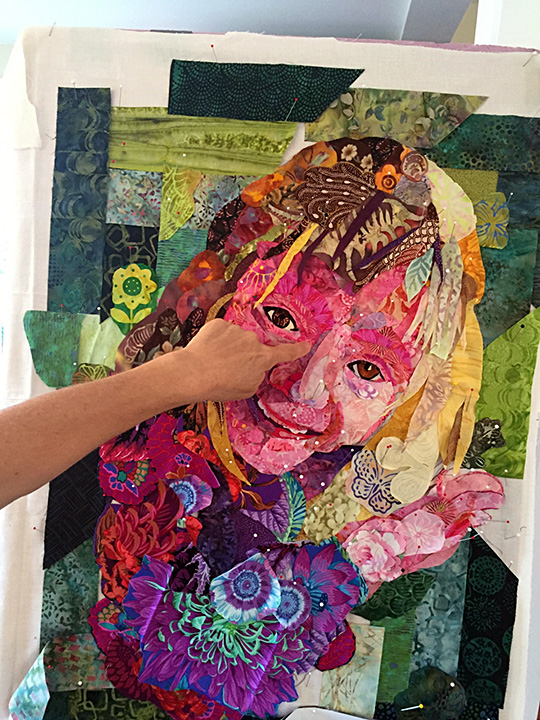
Then she encouraged Jerri: “This is really fine-tuning stuff. I’m telling you all this stuff beyond what most people are ready to hear.”
By later that afternoon, Jerri had begun to address the issues with the hand, and the background of her piece was progressing nicely. She was considering adding more flowers to break up the linear, blocky look of the scraps she was using. She used the values of those scraps to contrast the values of the portrait itself, notably, using a dark “pillar” of fabric for the hand to rest on.
“I didn’t think I would come this far this week. I do work fast. But I didn’t think I would get this far. I may just see if I can get some gluing done this evening. Then I may work on something else tomorrow. Because Emily loves bling, I may add some bling to it. I don’t want to overwhelm her but—I don’t know.”
Day Four
By the time I interviewed Jerri on the last day of class, she and Susan had already met for what would be the last time. Between them they had developed a final check list.
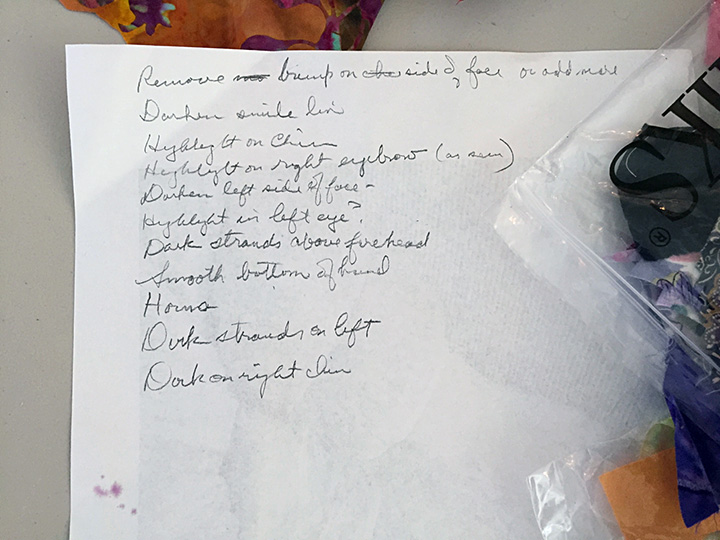
- Remove bump on side of face or add more
- Darken smile line
- Highlight on chin
- Highlight on right eyebrow
- Darken left side of face
- Highlight in left eye?
- Dark strands above forehead
- Smooth bottom of hand
- Horns
- Dark strands on left
- Dark on right chin
This is precisely the same kind of list that Susan makes as she’s finishing her quilts. I have contributed to those lists. At this point, when a quilter has worked on a piece for so long, it’s difficult to view the piece objectively. Literally, I believe, you can’t see straight. Your vision is impaired. You need a pair or more of fresh eyes to be honest (brutally honest if need be) about what needs fixing.
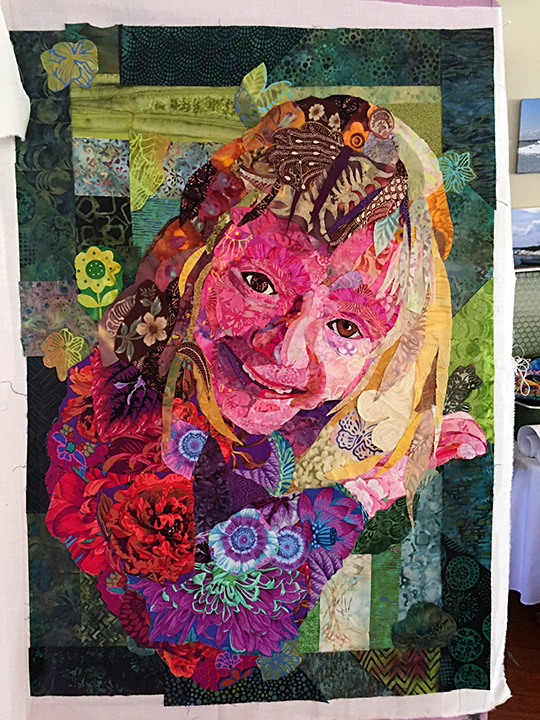
“The one major thing I’m doing is bringing her hair down more. She actually had fairly straight bangs at that point. So I’m working on that,” Jerri said.
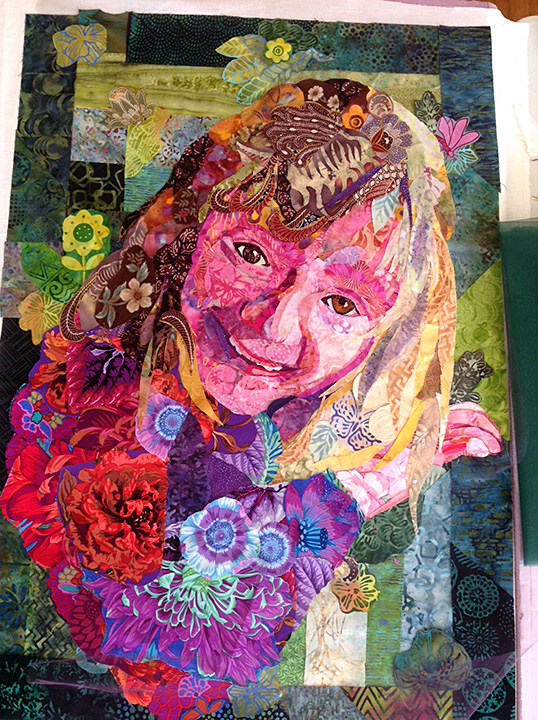
Some of Susan’s notes for Jerri can be grouped into feedback about value: something needs to be darkened or lightened or needs a shadow or highlight. Others refer to form: the hand, the chin. “Horns” refers to the flowers she added to the background. There was one pair that looked a little like horns sprouting from Emily’s head. You need fresh eyes to spot things like that.
Finishing
“I think I’m close to being done [piecing],” Jerri said. “I complete projects. I’m big on completion. I have some UFOs but they’re usually optional block things I won.”
Jerri planned to shadow quilt the piece. She would place netting or tulle over the whole piece before quilting. This would catch even the tiniest pieces of fabric.
“With the amount of quilting I do and the speed at which I quilt having something to hold it in place is really important.”
Susan also sent her home with guidance on another project she was having trouble with.
“I showed her something that I’m working on. I sort of got stuck. I think I was being too literal on the color. She made some suggestions about how I might approach it just looking at value and not looking at color at all. It’s a tree and I had bought all these browns and grays. I didn’t like the colors so I couldn’t get excited about it,” Jerri said.
Susan says that Jerri’s portrait of her granddaughter, Emily, isn’t representative of what most people accomplish in her class. When I started interviewing Jerri, I had little idea of her experience both as a quilter and artist. Susan faced the same issue. Susan confirmed that during her initial meeting with Jerri when they were discussing which subject to tackle, it was when Jerri said that she had an art background that Susan knew Jerri should do the portrait.
Jerri came with a goal.
“The first day, I really wanted to cut loose with color and be a little freer with color and not be so literal. I think that was a success,” she said.
She also mentioned that Susan hadn’t spent a lot of time with her. Susan says that may be because Jerri didn’t need as much attention: “I try to be equitable with time, but part of what I do is determine how much guidance students need based on their abilities. It didn’t take long to see she was getting it. I needed to ask her questions and make suggestions so she could come up with her own solutions.”
Jerri made more progress with less guidance than most. Still, there’s a big difference between the first portrait of Emily and this one. What did Jerri need more? A trained eye? Technical advice? Or simply someone to tell her to go for it? Whatever she needed, I’m pretty sure she got it in the four days she spent here in Harpswell.
UPDATE
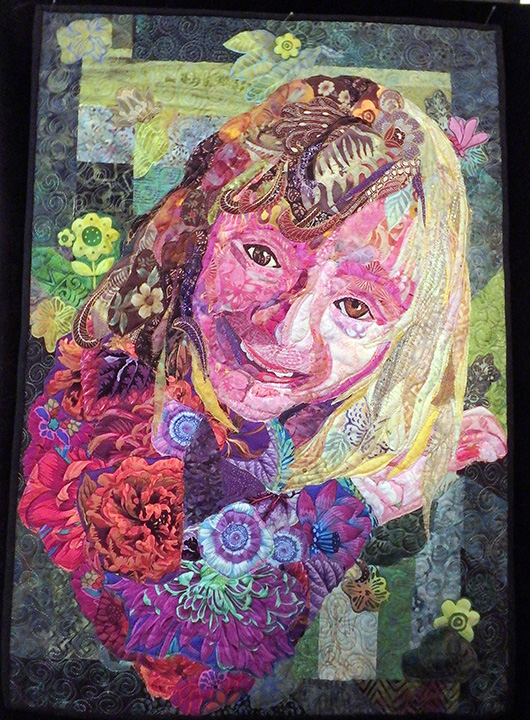
Jerri sent me a picture of the quilted and bound quilt. Very nice!
I have been reading your blog posts and following along for some time. Even though I haven’t commented before, I have found them very informative, interesting and helpful. Although I have done art quilts in the past, I have been currently working on more traditional quilts and concentrating on completing some large UFOs. I feel all this information I get from your blog posts is forming a body of information for when I feel free to try this collage method. Thanks for all the information.
You’re welcome!
Very, very interesting! Thank you.
Do you think in 2017 you will make it to st augustine fl again
Thank you for a wonderful four days, Susan. I learned so much and it was wonderful to see all the great work being done by other students. This blog was more than I bargained for!
Reblogged this on Pocketbook & Patches and commented:
When I signed up for Susan Carlson’s retreat, I got so much more than demonstrations of her skill. She encouraged me to tackle a challenging project, a portrait of our beloved granddaughter, Emily.
I’m afraid not. I’m booked full into 2018.
You were very gracious to allow us to interview you.
Great post. I know Jerri personally from our guild in St. Louis but I learned things about her I didn’t know such as her art background. I guess I just assumed she was a journalism major. I will be anxious to see the finished “Em.” I told her I was jealous that she got to take a class with you. It’s on my ever lengthening bucket list. I will be one of the students you have to spend a lot of time with though.
Wonderful! I hope she will share the finished quilted piece.
Amazing blog post that documents an incredible journey. It’s clear that Jerri Stroud was already an accomplished quilter, but what was so fascinating to me was how through the workshop, little Emily moved from very good to great. Very informational and very inspiring!
Thanks so much for giving us a detailed peak into the process. I hope one day I will be able to take your class Susan and learn from the Master!
What an awesome post. Your blog is one of the highlights of my day! Is it possible for you to share a final picture when Jerri is finished? It would be wonderful to see the completion of this project!!!
If you visit the blog online I have updated the blog to include the finished piece at the end.
This blog was great! I really enjoyed reading about the process, and looking at the photos of Jerri’s work as she went through the design and construction of her piece. Having just taken some classes from Susan, it was easy for me to understand when Jerri got stuck–because I was there a lot! Jerri has a bit of a ‘leg up’ on those of us who have not studied art, and her results were truly amazing and her finished piece just remarkable! The process that Susan has perfected give those of us with less art experience an amazing technique to make beautiful art quilts! Having taken a class with Susan, I so admire the way she can just look at a piece, add a couple of scraps and make the vision work! Thanks for this article–was a great perspective.
Thanks Suzanne
Just started following you, though I have always enjoyed your vision! Your husband is also an excellent writer, and totally captured the experience of making a collaged art quilt. I feel like I was there! Thank you so much and look forward to learning more and more.
I’m late coming to the party but am fascinated by every post I read. I’ve signed up for the new site and blog posts. (It’s Oct. 31, 2016 when I’m finding this June 26, 2016 post about attending a retreat–and I’m seriously looking into this possibility!) Thanks for all the information and pictures.
Martha