This post will be the last post… of 2024! Yikes! That went fast! Probably one of the most overstated comments of this time of year—but I have to admit it’s certainly true for me. This post may cover week three of my Fabric Collage Review, but it pertains to one of the most asked about techniques—gluing—why and how.
The six-week refresher (three weeks in 2024, three weeks in 2025) is an introduction to the basics of fabric collage—especially for all the newbies who started following my blog this year—but it’s also preparation for my upcoming live follow-along Zoom classes beginning in February (see below for info and registration).
Previously, we covered creating a palette for fabric collage and choosing fabric. Today we are ready to move on to gluing, which with practice—and the hints offered in this post—is an easily mastered skill. Over the next few weeks, we will continue to concentrate on preparatory steps related to a fabric collage project. So one way or another, if you subscribe to a four-week Follow-Along or not, you’ll be ready for a colorful and fabulous beginning to the New Year.
Before we meet again in a blog post, the New Year will have begun. May your transition be as you wish it to be—quiet or full of crazy dancing, surrounded by friends or reveling in solitude—may it be safe and “just right” for you. Looking forward to next year, and all its possibilities. See you then—Susan and Tom
* * * * * *
The Fantastical Fish Follow Along in February, will use a fish pattern (of your own design or one which you may choose free from my collection) with a 2025 focus on “blending”—one of my most asked about skills—the process of using the colors and prints in fabrics to merge one into another, often to create the illusion of form, with highlights and shadows.
The Bugs and Butterflies Follow Along (also your own design or based on my patterns) will focus on butterflies and how to approach the flowing and colorful shapes of their fascinating wings. Learn what to look for in your fabrics and how to work with their printed designs to create movement and form—letting the fabric do much of the work for you.
Use the links below to register for these four-week classes, held each Thursday night at 7:00 p.m. eastern time.
In the meantime, especially if you are new to fabric collage, it may be helpful to review the basics through this current series of posts covering the fabric collage technique before these classes begin. In following posts we’ll continue with the topics of: working in sequence, backgrounds, and sheers.
* * * * * *
February 6, 13, 20, 27, 2025 — 7 pm, Eastern Time
Fantastical Fabric Collage Fish Zoom Follow-Along
REGISTER HERE
Price: $78
* * * * * *
July 24, 31, August 7, 14, 2025 — 7 pm, Eastern Time
Fascinating Fabric Collage Bugs and Butterflies Zoom Follow-Along
REGISTER HERE
Price: $78
If you’ve ever considered giving yourself the gift of a 5-day week-long fabric collage class experience with me—and are not scared off by staying cozy in your home, not traveling anywhere, and keeping your fabric stash close by—do we have a special offer for you—a $100 discount (which gives you the opportunity to add more fabric to that stash!).
January 20-24, 2025
Susan Carlson 5-Day Live Online Class—All Levels, Animals Only
Price WAS: $995
NOW: $895
REGISTER HERE
Take advantage of this special offer only for January’s “Cozy” Live Online Fabric Collage Class
Further Susan Carlson Learning Resources: Susan Carlson Quilts website, patterns, blog (in general), YouTube videos, Spiral eWorkshop, Patreon, and our February Fantastical Fish and Summertime’s Fascinating Bugs and Butterfly Work-Alongs
Why Glue? Updated with Video
First published January 21, 2017
One of our plans, as we delved into video, was to re-visit and update some of my more popular, technique-oriented posts with short videos. It would also let me update the post itself with any further information that I may have forgotten to include the first time around, or that was inspired by the comments section for the post.
The question was: Which post should I choose first? Well, an obvious choice would be one of the most popular.
Since I first published “Why Glue?” in May 2016 it has racked up well over ten thousand views, making it one of my most popular posts ever. Turns out the simplest things are sometimes the most interesting and useful to learn.
And if you have any requests for other blogs to re-visit, or even new questions you’d like to have answered, please make note of them in the comments section below. Thanks.
How to Do It
Sometimes you just have to see something done in order to understand it. Lots of people who read the original “Why Glue?” blog post wondered how much glue to use, how to apply it, how thin to smear it, and so on. So, seems to me, this is a perfect opportunity to use video to clear matters up—drum roll, please.
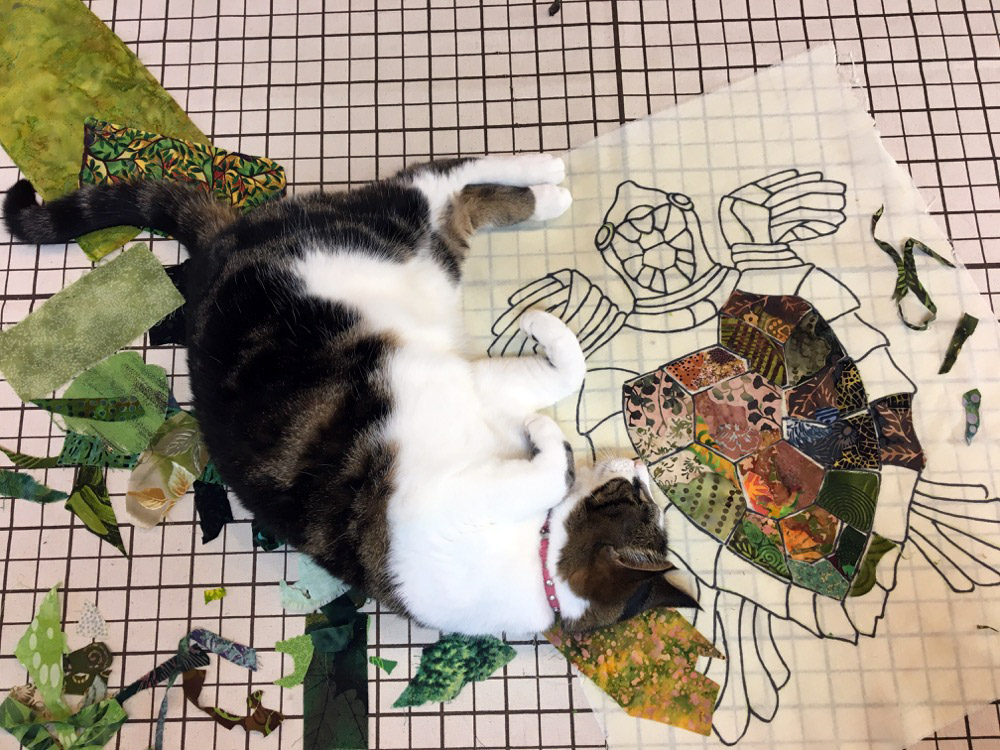
Reader Question: Hungry Bugs?
Now here’s a question from the comments section that I’ve never been asked. From Jeanne Marklin: “Have you any problems with bugs? That would be my concern—supposedly, they like the taste of dried glue.”
Well, I can honestly say that I’ve never had that problem. I do hang my quilts and I imagine it would be easier for bugs to settle in if the quilts were rolled or folded in storage. However, the question took me back to a college painting class where we pre-treated canvas with rabbit skin glue—a traditional priming technique of years past—and one of the associated problems is that bugs can be attracted to the canvas, because bugs like animal products.
Thinking of that, I had a momentary panic. Famously, glue used to be made of (and as I found out, some still is) butchered horses. Since I eat a vegan diet, the mere possibility that my beloved Aleene’s Original Formula Tacky Glue might be made from horse or rabbit parts sent me to Google the question.
As far as I could tell after following a few links, white craft glue today is made from petroleum products. I’m not sure if that’s completely reassuring either, but it seems to be free of animal parts.
So, in answer to Jeanne’s question, we’re probably safe from bugs eating our Tacky Glue collaged quilts.
At least that’s what I wrote before I Googled “Do insects eat plastic?” And guess what, there is a wax moth that does—in it’s larval form—but it seems to munch on Styrofoam, like insulation. It’s unlikely the thin smearing of glue that holds the fabric in place will ever be attractive to creepy crawlies. And after using the same glue for about 20 years, I’m going to say it’s pretty safe for the quilts.
Reader Question: Needle Trouble?
Maureen (no last name) asked: “Once you’ve made your sandwich, do you have any problems with the machine needle going through the glue when you quilt it??”
As opposed to the bug question, I get asked this a lot. They worry that the quilt will be too stiff for the needle. Aleene’s Tacky Glue states on the bottle that it dries flexible (and I’ve found that to be true). Also, only a very little glue is needed to hold down the fabric pieces until I get to the quilting stage. So don’t overdo it—use a “thin smearing”. (See the video for an example!)
Along the same lines, others have asked if the needle gets gunky, potentially messing up your machine.
I’ve come to the conclusion that that question is often prompted by the fact that “Tacky” is used in the name of the glue I use and recommend. I believe “tacky” refers to the relatively thick viscosity of the glue as it comes out of the bottle. It sits on top of the fabric (making it easier to smear) and doesn’t soak in like a thinner glue might—which could create a darkened spot where the glue has seeped through.
Again if you are stingy with how much you use, the glue sets up completely dry in a matter of minutes. It’s way far from being tacky (despite the name!) by the time you quilt.
Reader Question: Discoloring?
Some have also wondered about the potential for discoloration. Is white craft glue (aka polyvinyl acetate) acid free? A Google search answered that yes, it is, basically. The amount of acid is so negligible as to be a non-factor. The information I found was on other natural media, paper and wood—and I’m going to assume I can include fabric in that.
Aleene’s has an acid-free glue available these days (though not when I first started working this way). I haven’t tried it because I really like what I’ve been working with. Besides I figure I’ve been working with it so long, if a problem was going to arise it would have by now. The best proof is experience. I have quilts from the 1990s—over twenty years ago—that show no signs of discoloration. A hundred years from now? I just can’t say.

The Original Post (pretty much)
It’s so simple to describe my process of creating fabric collage quilts that most people get it right away.
- Free-hand cut fabric to shape.
- Glue fabric to foundation.
- Assemble top, batting, and backing, then quilt.
But wait…
Step 2 is glue fabric to foundation? Glue? Really?
Yes, really. I get asked about it at lot and the questions generally fall into one of three categories:
- Why adhesive at all?
- Why glue instead of a fusible?
- How do you do it?
Why Adhesive At All?
The primary reason for using glue is immediacy. Glue allows me to use fabric the way other artists use paint. Grab a piece of fabric, cut it, maybe recut it, pin it, glue it. Done.

My first collages were made of paper while I was in college. I used spray adhesive. I liked collage a lot, even developing a small “library” of images cut from old books and magazines. (Ah, the pre-internet days!)
So when I first decided to try glue as a tool in fabric collage, I used spray adhesive. The quilt of my husband and his two college roommates, “Surprise Me,” was made using spray adhesive. It was what I was familiar with and it worked fine.
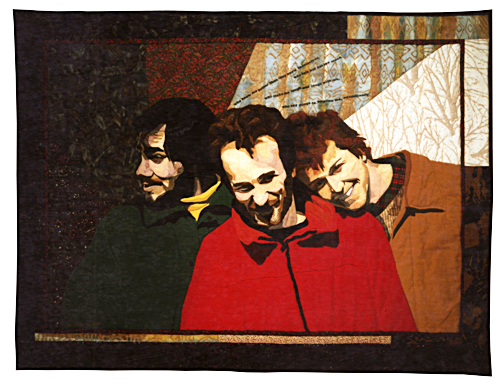
Except I didn’t like the potentially toxic fumes of spray adhesives. If I was going to be doing more pieces, I didn’t want to be breathing that stuff in. I figured that in the long-term it wasn’t the best idea.
Also, it was annoying to pick up each piece of fabric in order to spray the back of it. After spending the time and effort to get a piece cut to exactly the right shape and positioned in just the right spot, I wasn’t crazy about moving it again. (This is the same beef I have with glue sticks, which some students also consider using.)
So that led me to try plain-old, white, craft glue. It’s non-toxic both for breathing and for contact. I soon found that a tiny dab could be smeared on the center of each piece while it’s still pinned in place. Press it down and it’s attached. I had solved both problems.
There are lots of white craft glues out there. The first one I ever used was Aleene’s. I still use it today. Aleene’s has since come out with a whole line of different glues and other adhesive products, but I still use Aleene’s Original Tacky Glue.
I’m sure part of the reason I still use Aleene’s Original is just plain old habit. But it does have two properties I really like. First of all, the consistency seems just right, neither too runny nor too goopy. Second, if applied correctly (more on this later), it dries soft and pliable (more on this later, too).
Why Glue Instead of a Fusible?
Fusibles—iron-on mesh adhesives—have grown in popularity since I began making fabric collage quilts. Many of my colleagues use fusibles. Since fusibles are already in many of my students’ toolboxes, so to speak, they’re curious why I don’t use them.
Again, the biggest reason is immediacy. If while I’m piecing I want to have a dab of red, I rifle through all my reds (and all my fabrics that simply contain red). I have lots of options. But if I have to choose head of time (limiting my options before I even get started), prefuse the fabric, then grab and cut, that’s one step too many for me, for my immediate, serendipitous process.
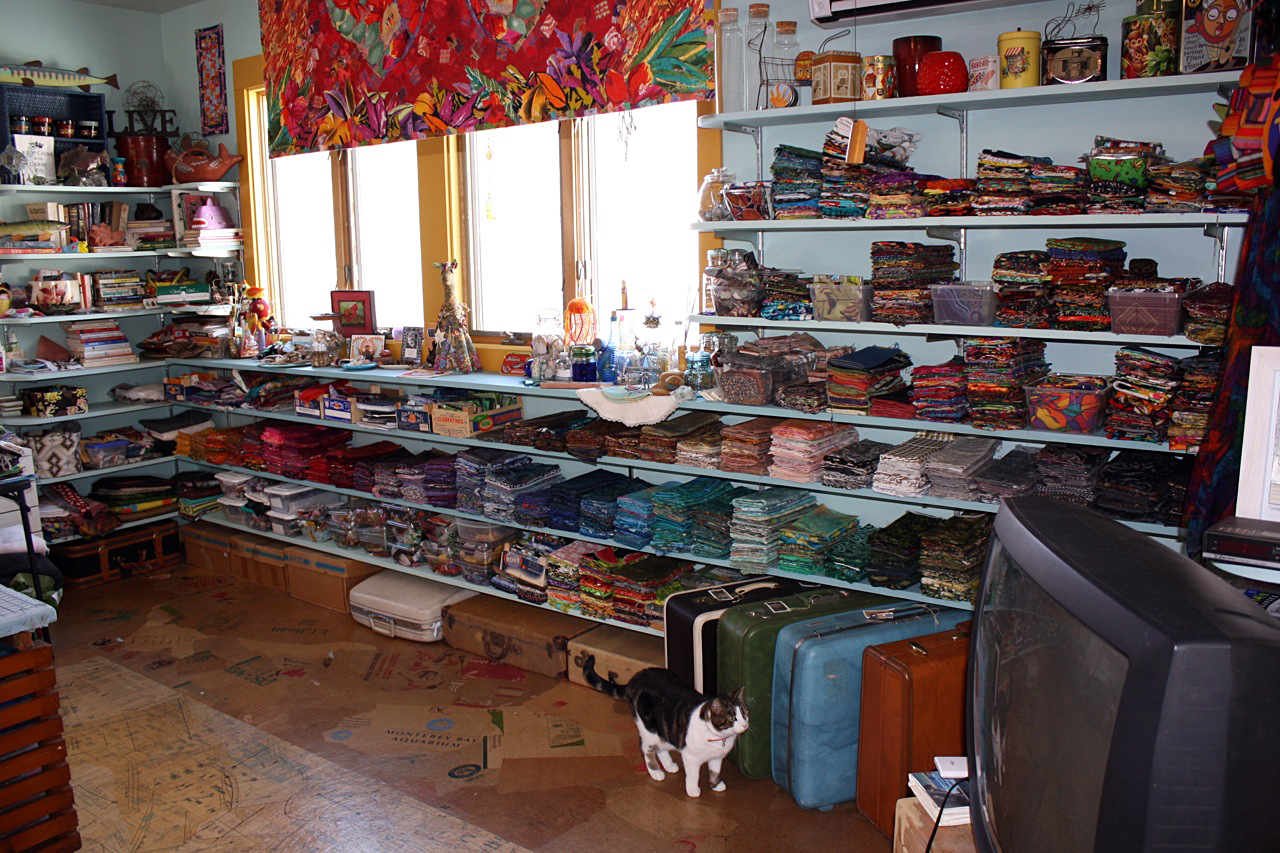
Besides, I own thousands of fabrics. Some chunks are folded neatly. Other bushels of scraps are stuffed into suitcases. If I were to make all of it available for use as fusible, I’d spend too much time applying the fusible web instead of actually creating.
And then there’s the question of which side to apply the fusible to? I sometimes use the back side of a piece because it has exactly the shade of color I’m looking for.
Other than immediacy, the other reason I don’t use fusibles is because of how stiff they feel. I apply multiple layers of fabric—four, five, six or more—especially in parts like eyes, mouths and other facial features. Imagine how stiff it would become with four, five, or six layers of fusible added.
When applied properly (more on this later, I promise), glue dries thin and flexible. My quilts still feel like quilts. Despite my untraditional construction and design, retaining that tactile flexibility of fabric is important to me.
Fusibles are great for many applications (no pun intended). My friend Laura Wasiloswki is a member of a group called the Chicago School of Fusing. They do wonderful work. Fusing suits their styles. And isn’t having different styles what it’s all about?
How Do You Do It?
Fabric collage—the way I do it anyway—goes through as many as five stages of permanence, giving me lots of chances to change, remove, cut, cover up, augment, and allow discovery.
- Placing cut pieces of fabric on a foundation.
- Pinning.
- Tacking with glue.
- Permanently gluing.
- Quilting.
When I first cut a piece of fabric, I lay it down on a foundation—muslin or other inexpensive backing fabric. Usually I have sketched my design onto the foundation. When I work on my extended drafting table, I’m working at an angle. Using the cohesion between the fabric and foundation, pieces stay put pretty well just by smoothing them down by hand. When I was working on my upright pinning wall on “Crocodylus Smylus,” I used white flannel as a foundation. That had even more “stickiness,” allowing me to still place fabrics temporarily without even pinning them in most cases.
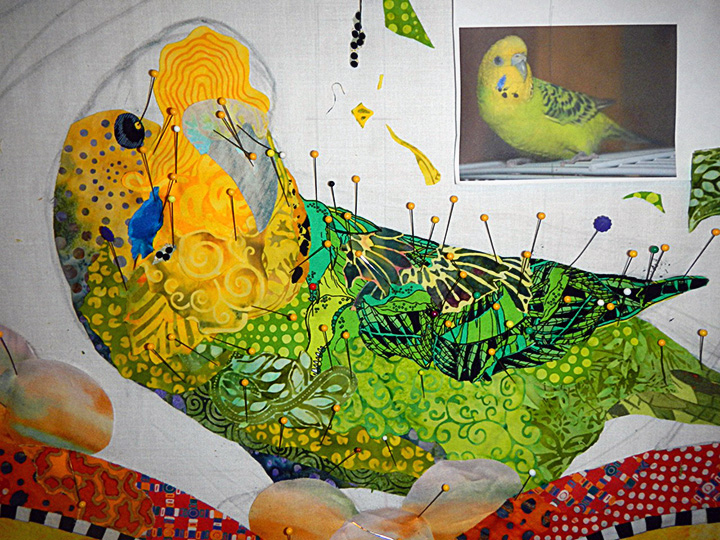
Laying down the fabric on the foundation is the first level of permanence. Next comes pinning. When I can’t put down another piece without risking moving the others, I start pinning. I have adapted my work table with a homosote board. For my pinning wall I used 2-inch thick styrofoam insulation panels. When the work is flowing I’ll sometimes place fabric until I run out of pins. That can mean hundreds of pieces of fabric.
I’ll then have to start gluing.
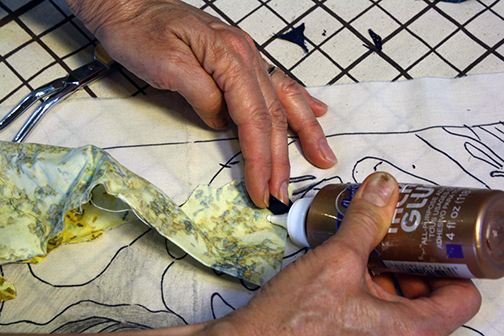
Aleene’s glue bottle has a nice tip. I simply lift an edge of the fabric and apply a small dab to the center of the piece of the fabric. Notice I said I apply glue to the center of the pieces. I leave the edges loose at this stage. I may want to come back and trim them down or slip another piece under the edge.
Once the dab is in place, I smear it flat. This prevents the glue from soaking through the fabric and creating spots. I use only a small amount of glue, just enough to tack it in place. This makes the piece stable, but still allows me to easily remove fabric if I decide I want to.


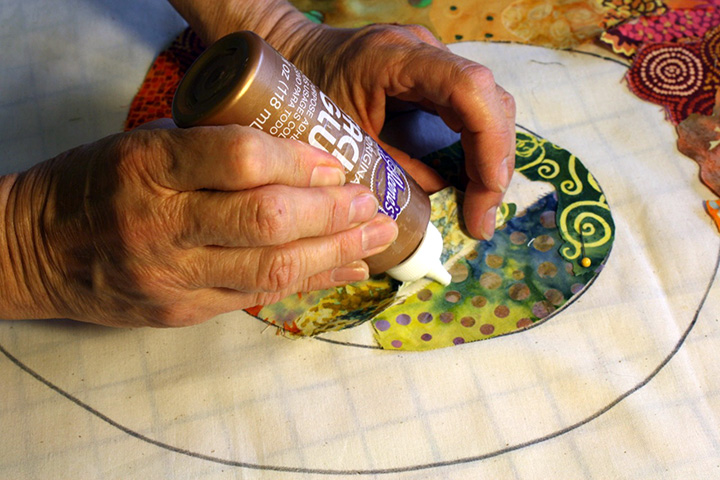
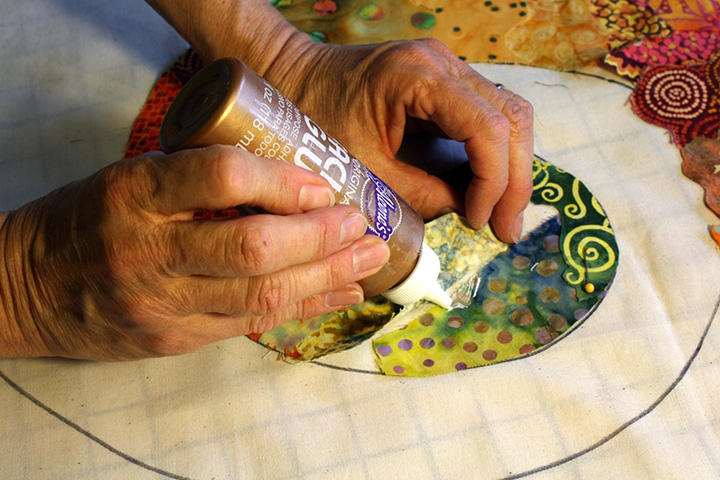
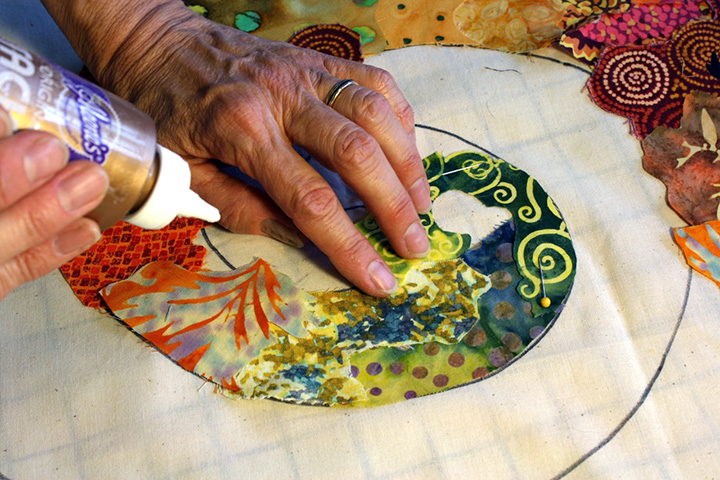
Once tacked in place, it will stay this way until piecing is complete. Before I begin quilting I have a decision to make. Occasionally, I will choose to place a fine netting or tulle over the entire piece. This is called shadow quilting. The netting holds down all the loose edges and prevents the quilting foot on my sewing machine from getting caught.
If I choose not to use tulle (which is most common), I now have to go back and glue down all those loose edges.
Yes, it is tedious. Thanks for asking.
“Dixie Dingo Dreaming” took me three days to glue all the edges.
When this stage arrived for “Crocodylus Smylus” (aka Stevie the Crocodile), I was pretty certain I would use shadow quilting just because the task of gluing seemed so daunting, but my husband, Tom, was against it. I said, “Fine. If you don’t want me to use tulle, you’ll have to help glue.” So he did.
It still took days.
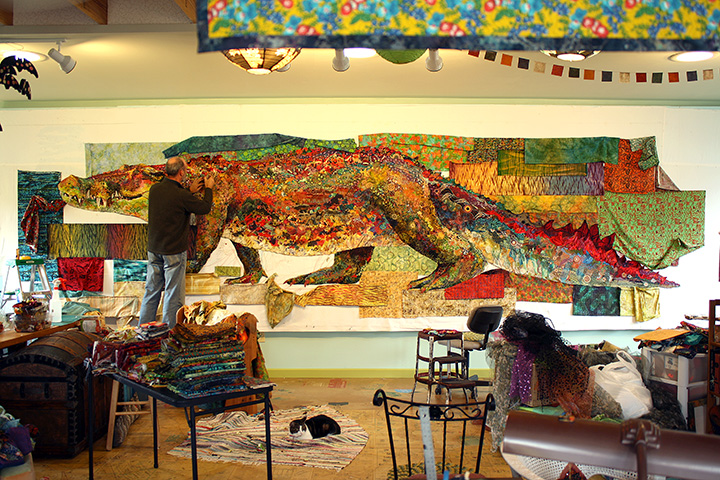
When it’s done, the fabric is permanently attached. It doesn’t move without some real work. Since Aleene’s is water-based, dampening the fabric with a spray bottle can sometimes loosen the glue enough to lift. Usually it’s easier to apply new fabric right over the old if a change is necessary. And, by the way, these collage quilts of mine are not washable. They are art for the wall, not to be subjected to the washing machine any more than a watercolor painting.
Catching all those edges is important to me also because of the way I approach free-motion quilting. I don’t catch every edge when I quilt. Instead I use an overall loopy, spiral, stipple pattern. I aim to hit each piece but not each edge. The glue also prevents fraying, acting a bit like Fray Check without potential discoloration and smell.

Final Thoughts on Glue
So that’s the why and the how of using glue for fabric collage. I didn’t arrive at this way of working overnight. It was more than 26 years ago now that I started gluing fabric. Back then, using adhesives in quilting raised many an eyebrow. For some, I suspect, the use of glue was viewed as “cheating.”
Well, in the last three decades, the rise in popularity of multi-media fiber art in general has stretched the definition of what makes a quilt. Quilting is a traditional art with a long and cherished history. The traditional methods of constructing quilts ought to be and are being maintained. But the popularity of art quilts has created an explosion of different techniques and styles. We’re doing things now that would have been unthinkable without experimenting with new ways of creating.
The humble glue bottle has helped me to be spontaneously creative. Of course there are other, possibly even easier ways of using fabric to create art. I see amazing fabric art in shows and on the internet all the time.
Will I ever set aside my glue bottle for a different way of doing things? Hmmm, not in the foreseeable future. But my work, and how I work, has evolved over time, so who knows? I think that staying open to new ideas and trying new paths are key to the creative process. Or I may cling to the way of working that I’ve grown accustomed to. It’s only human nature.


My “fat fingers” make smearing difficult at times. Often I put a small glue pool on a small cardboard square I recycled from packaging. Then I can easily dip my purple thang in the glue pool, and smear with that thang as well. Works for me. Dries quickly, so you only need a small pool of glue at a time. When done, good bye square.
Although I like using Alene’s Original Tacky glue, I find that the Alene’s glue bottle is very stiff and my hands arent’ strong enough to continuously squeeze glue out with considerable discomfort. Has anyone found some type of glue dispenser that makes this task easier? Or some other way to address this problem? I have tried putting some glue in a tiny glass bowl and using it from there, but it thickens up quickly and I am back to squeezing that bottle again. Thanks.
Hi Linda. I can see that could become a problem. A couple things I would try. First of make sure the hole you have made in the tip is big enough. Poking a hole with a needle is not big enough. Cut the tip off with a pair of scissors near the end and see if that helps. Cut it a little further down until the glue comes out more easily. Also, try storing your glue bottle tip side down (with the cap on when not using it. I put mine in a little glass so the glue is always ready to go. You also might try the Aleene’s glue bottle that is made to be stored tip down. Here’s an Amazon link to the product I’m talking about: https://amzn.to/4jcdu8I
Hope this helps.
Susan
Thank you so much for your suggestions Susan. I will try them.
Linda