
When is it done?
Sometimes it seems my students have barely started before they ask: When is my piece done?
For me the answer is easy: When I run out of time.
If it weren’t for deadlines—mostly for shows or competitions—I could keep working on a quilt almost forever, adding more detail, more texture, more color, more more more. As I’ve said before, there’s enough bland stuff in the world. I’m not going to add to it.
For me, more is always better.
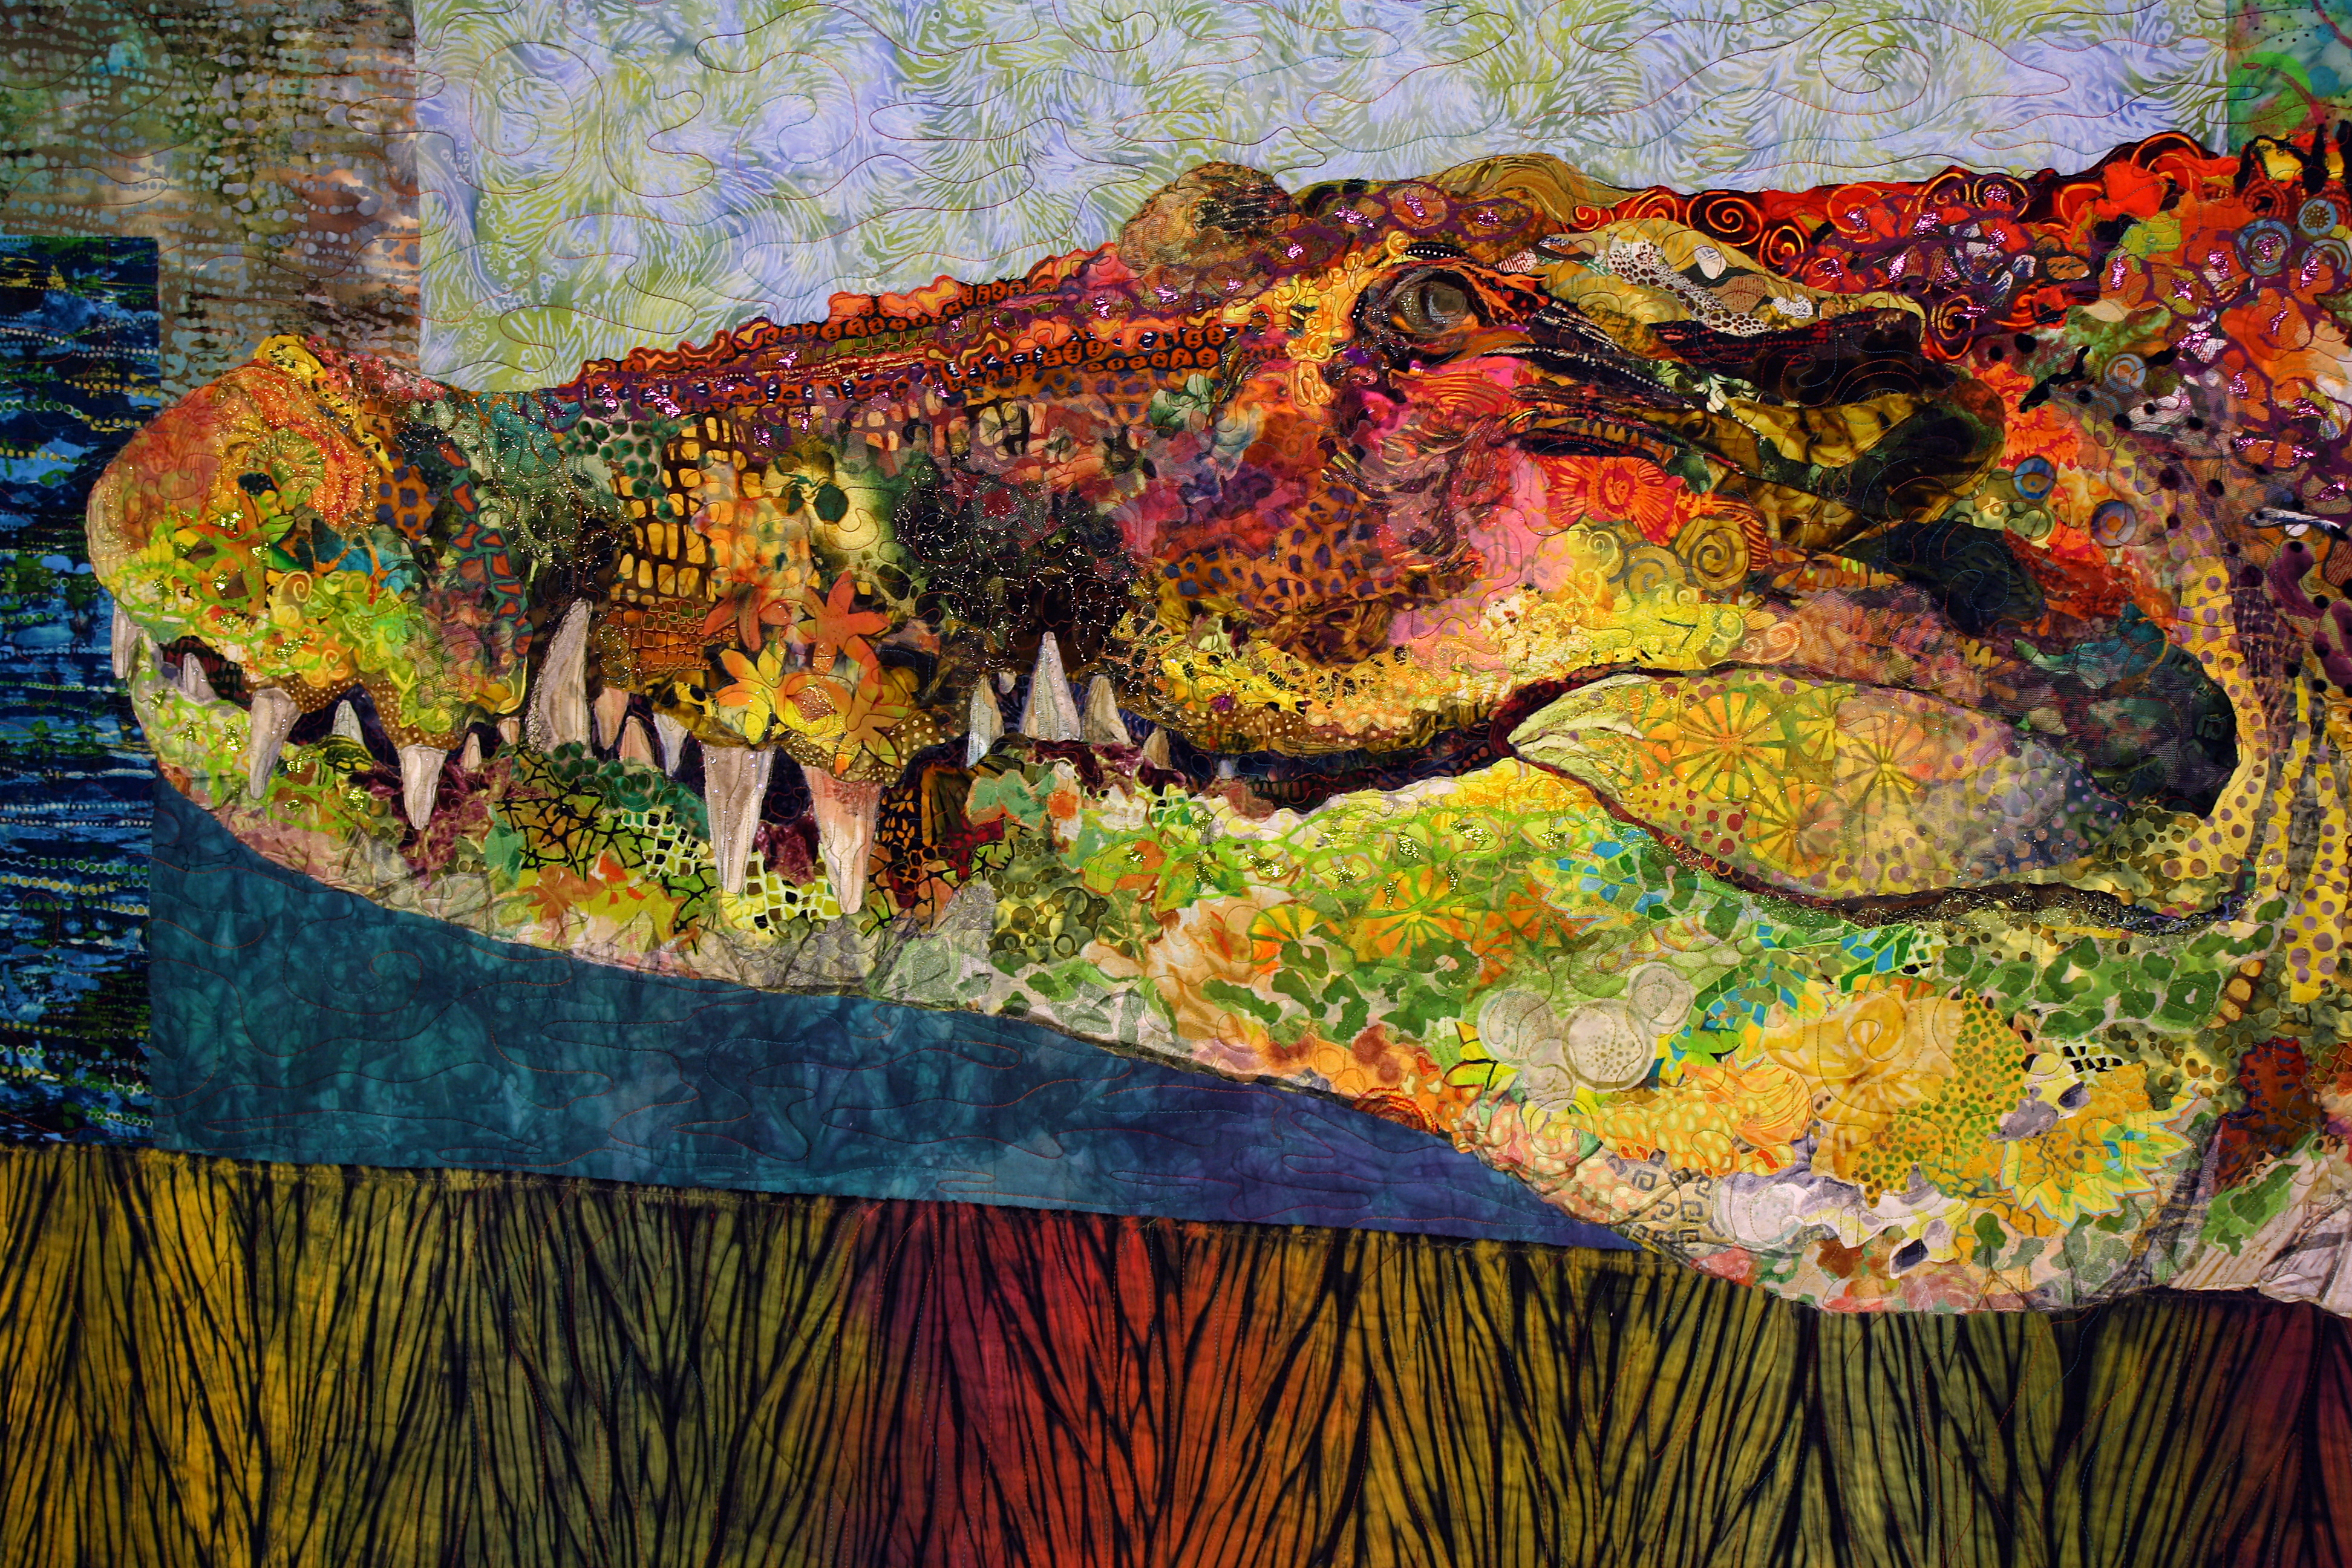
Maybe now is a good time for you to view a time-lapse of the creation of “Crocodylus Smylus,” or Stevie as I call her, in homage to the naturalist and TV personality Steve Irwin, the Crocodile Hunter. Clicking on the image below will take you to a YouTube video.
Have you finished yet? I’ll wait.
Neat, huh? Months of work condensed down to two and a half minutes. But misleading, too.
In what way? In that it makes it seem as if making Stevie was a smooth process from beginning to end, without any trouble spots along the way. Not true.
Take, for example, her legs.
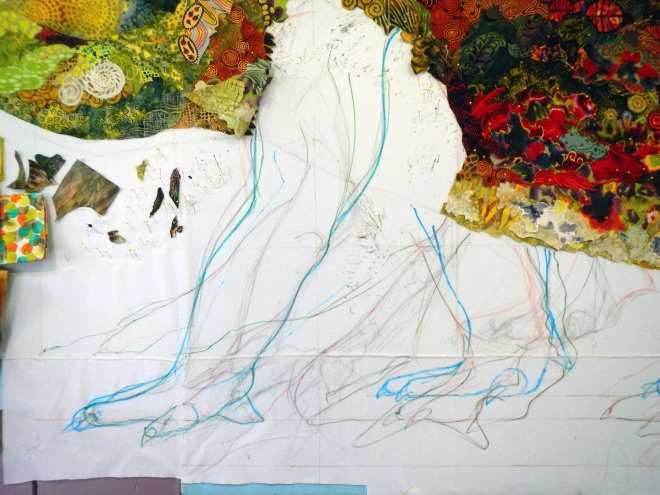
It took three tries to get her legs right. The first attempt is in pencil, the second in red, the third and successful try in blue. Twice I had to pull up fabric after the leg was mostly blocked in. Bits of glue and thread are visible in the photo.
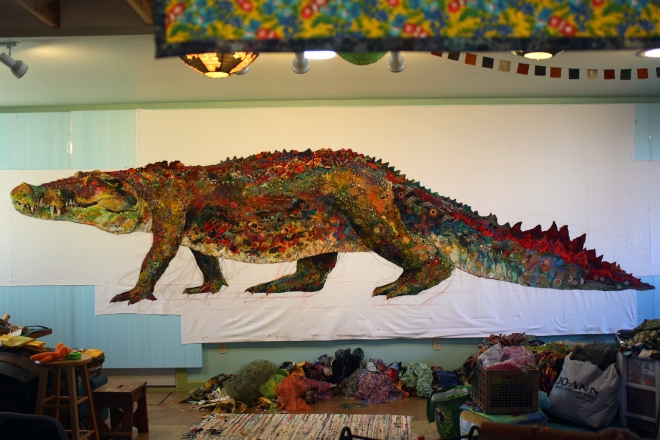
The tail was another trouble spot. I had it mostly blocked in when I decided it needed to be lowered so that it would drag along the ground. Check out the video again (at about 0:54) to see where the tail changes.
At last she was all blocked in and ready for a background, though I’d continue to tweak her right up until I took her off the wall to quilt.
The road to success is paved with the asphalt of failure, grasshopper.
Just Try It
Students often ask me what I think of this or that piece of fabric, whether this one would be better than that one.
I say, Try it. Just try it.
Part of what I find so freeing about the way I do fabric collage is that it’s so flexible. Just as when I changed Stevie’s legs (three times) and the tail, it’s easy enough to change something, so just try it.
Did you notice in the time-lapse all the piles of fabric on the floor underneath Stevie? Think I used all those fabrics? Hardly. But I did try them out. In fact, there’s a word for trying out fabrics for backgrounds: auditioning.
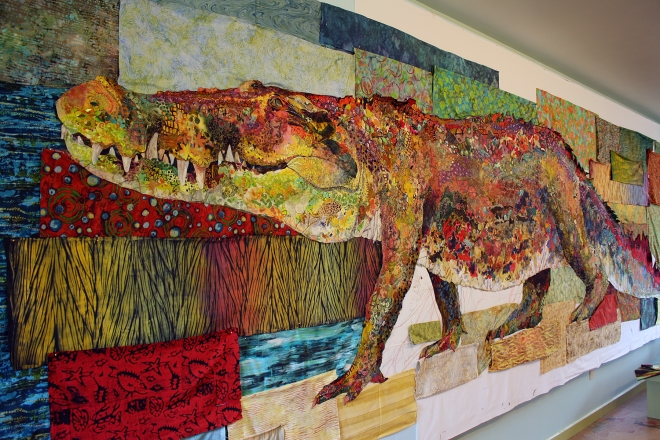
When gluing down pieces of fabric, I leave the outer edge loose so that I can slip background fabrics underneath. Just makes auditioning backgrounds that much easier.
When choosing a background the important thing to pay attention to is value. It’s usually best for the image to contrast with the background rather that blend in. An image will (and ought to) have varying values throughout. For example, Stevie’s back is quite dark, while her belly is light. Therefore, choosing one piece of fabric that contrasts with both back and belly would be nearly impossible, which is why I usually piece the background. (By the way, I use glue for the background, just like the main image.)
Another thing that makes backgrounds challenging is that they’re often abstract. It seems as though the choices are infinite. How do you narrow them down?
I had that problem with Stevie. At first it was a little scattered. I couldn’t figure out how to make it cohesive.
At this stage of a piece I often ask for advice, especially that of my husband Tom. He’s my biggest fan and a (sometimes brutally) honest critic. He knows it’s all about the quilt and that I want to make it as good as I can.
After hashing it out with him, I fell back on doing what I suggest my students do: consider the story you’re telling.
I imagined that Stevie was on the bank of a river. She’s emerging from the undergrowth and about to slip into the water. Once I had that framework, it became easier to make decisions: at her tail (mostly) greens and grassy patterns; below her (primarily) tans and browns; above and in front (largely) blue for sky and water and more greens for treetops.
Of course I didn’t follow this formula too literally. In the end, I mixed in some colors from each quadrant into the others to help balance the quilt.
Leap Before Your Look
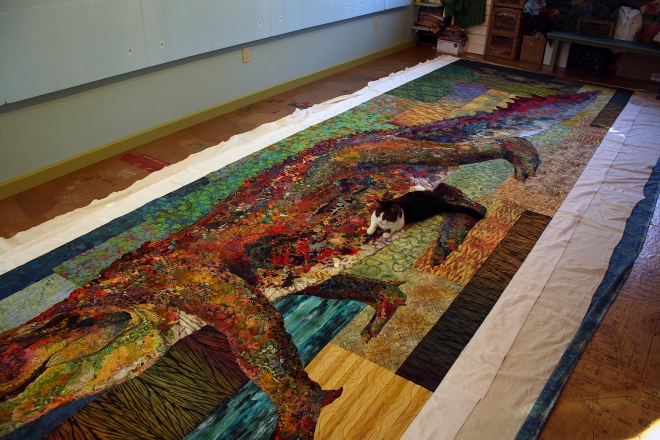
I have a confession: all while I was piecing Stevie, I didn’t know for sure how or even if I could quilt it. I knew it wasn’t going to fit under my Bernina home machine. Sure, I could probably squash it under the arm, but I wouldn’t be able to manipulate it.
As I came closer to completing the image, I think this issue bothered Tom more than me. I was too busy piecing and gluing. But it was there in the back of my mind.
I had a couple ideas: a friend had a room he used for sewing marine canvas—tops for boats and such. Or I could have sent it out to a professional long-arm quilter, but—call me selfish—I didn’t want to share her with anyone. I’ve always done my own quilting and I had become quite possessive of my crocodile at this point.
As the deadline loomed, and completion of the quilt drew closer, I at last let a friend take me to a visit a quilt shop that did quilting on a long-arm. After talking with the owner, she graciously agreed to let me rent time on her machine so that I could do it myself—she even tutored me. It was the perfect solution.
The point is, with every quilt, with every art project, there’s an element of the unknown. It’s a leap of faith. No matter how you plan, life will consistently provide obstacles. But if you trust yourself—and trust in the universe—solutions will present themselves.
Sometimes you have to leap before you look.

Continued in Part 3 of 3
I am a great admirer of your work Susan and it is wonderful to read your process on Stevie. I was so happy with your sentence “More is always better” because that’s exactly my way of working. I always say: “More is less” doesn’t work for me. So happy you mentioned it. Thank you for the beautiful video.
els mommers-saba
I’ve been wondering how you quilted Stevie…figured that you had to use a long arm, and your solution was perfect.
I’d never used a long-arm before. There was a significant learning curve, but it certainly seemed like the only solution. It was a nice gesture of the owner to let me use it myself.
I’ve loved the wonderful story and pictures of Stevie’s creation. Gorgeous work, absolutely luscious colors! You are an inspiration for tackling such a large project. Thanks for being a shining beacon.
I have trusted my eye for color placement but pondered what specifics are behind that intuition but now I feel better about trusting my eye. Now to convert to colors that are not necessarily realistic. There looks to be a lot of fun and courage in doing that.
Stevie is gorgeous and it’s wonderful to learn her “background story”. Your work is always inspiring.
Wow!! I am in awe of your work! I loved the time-lapse video. You and your husband were obviously having a lot of fun with it.